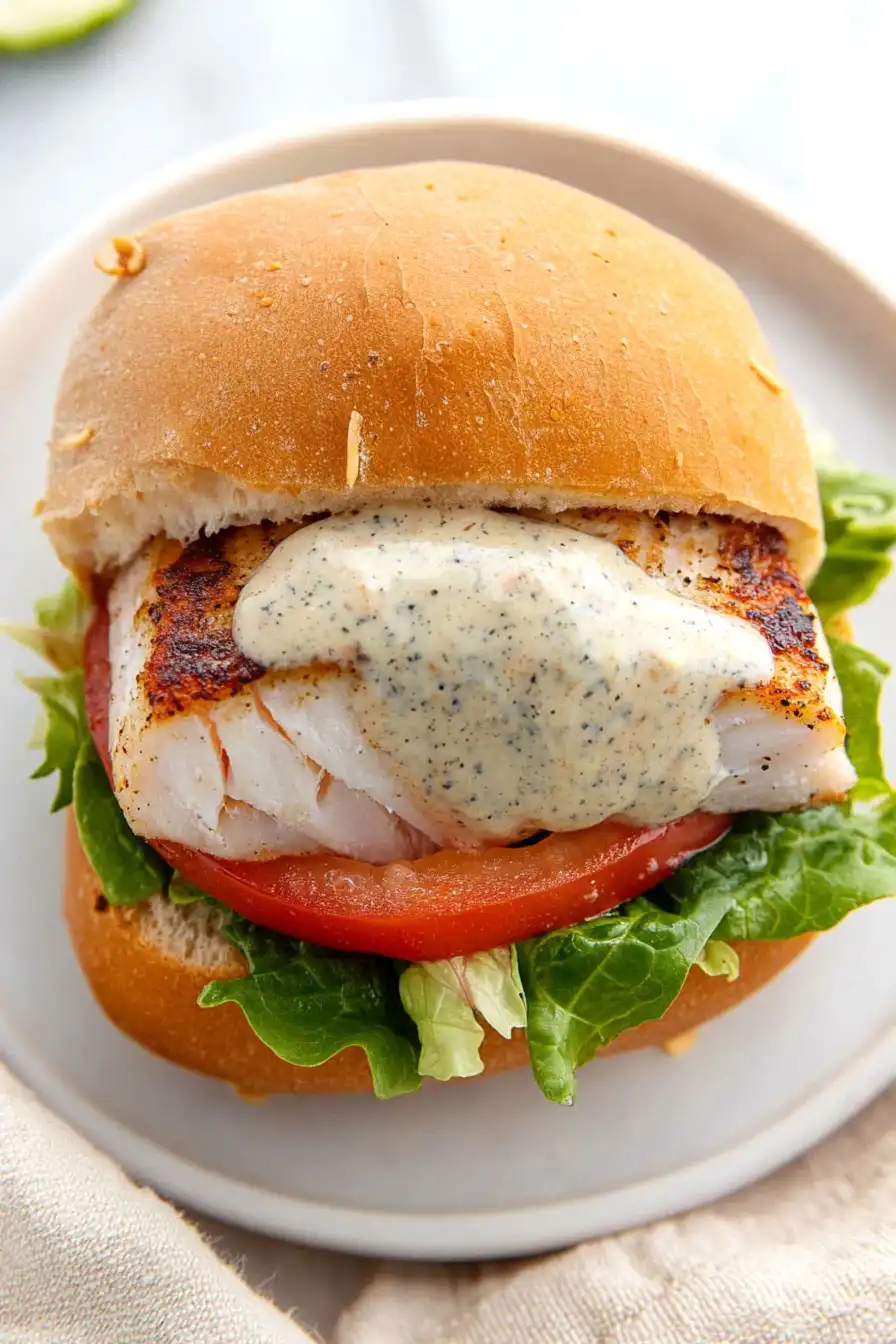
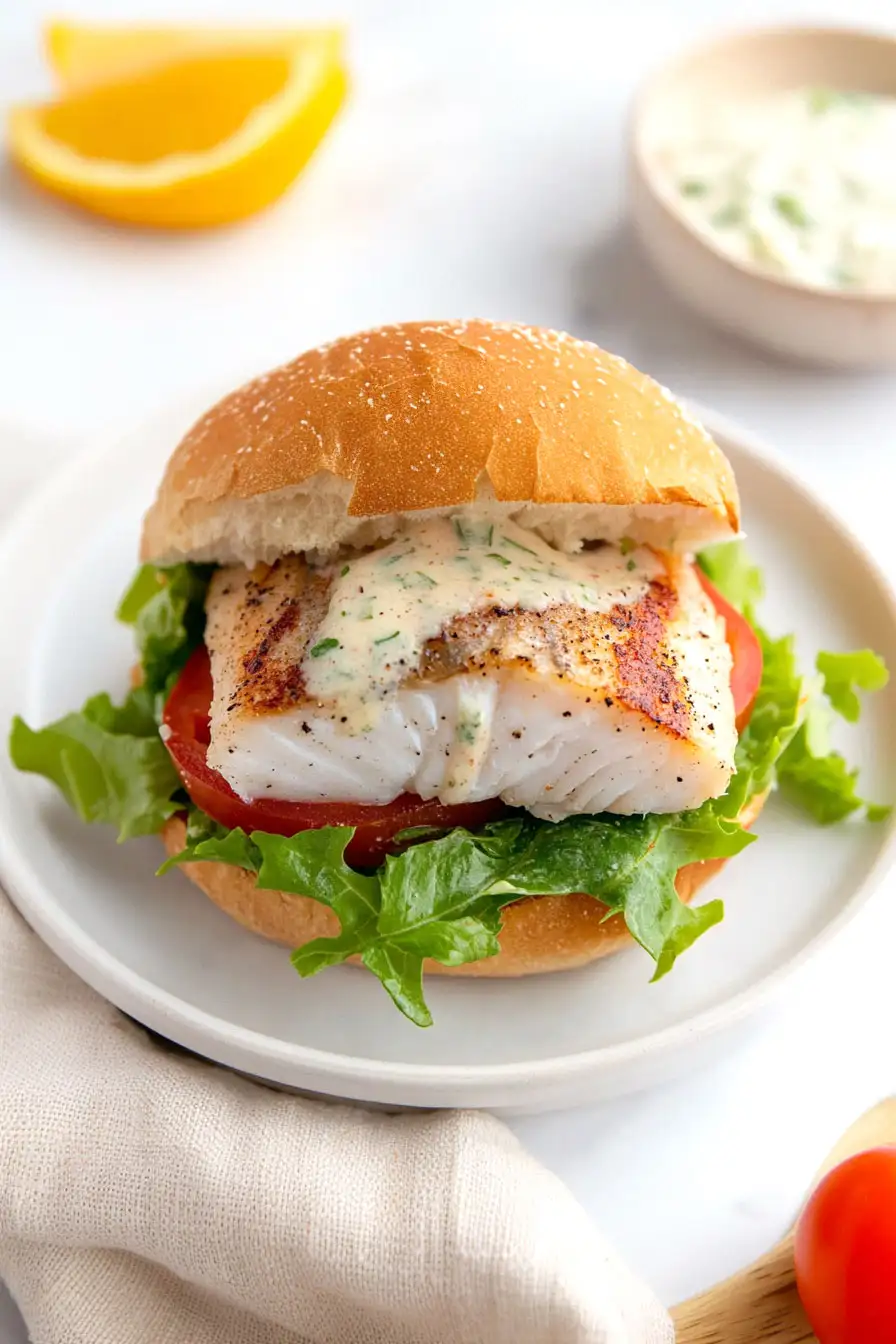
Let me tell you about one of my go-to sandwiches when I’m craving something that reminds me of beach vacations. There’s something about a mahi mahi sandwich that just hits different – maybe it’s the light, flaky fish or the way it picks up those nice grill marks. I started making these at home after realizing I was spending way too much at seafood restaurants.
Making fish sandwiches might seem tricky if you’ve never tried it before, but I promise this one’s pretty straightforward. The key is getting the fish cooked just right, and I’ll walk you through exactly how to do that. Plus, I’ll share my favorite toppings that make this sandwich extra special without getting too fancy or complicated.

Why You’ll Love This Mahi Mahi Sandwich
- Quick preparation – Ready in just 20-30 minutes, this sandwich is perfect for those busy weeknights when you want something tasty without spending hours in the kitchen.
- Healthy alternative – Made with lean mahi mahi and whole wheat buns, this sandwich offers a nutritious twist on traditional fish sandwiches while keeping all the flavor you love.
- Simple ingredients – You’ll only need a few basic ingredients that are easy to find at your local grocery store – perfect for last-minute meal planning.
- Customizable – Each family member can build their perfect sandwich by adding their favorite toppings, making it a crowd-pleasing option for everyone at the table.
What Kind of Mahi Mahi Should I Use?
Fresh mahi mahi is your best bet for this sandwich, but don’t worry if you can only find frozen – just make sure it’s properly thawed in the refrigerator overnight. Look for fillets that are firm and pale pink to beige in color, without any brown spots or strong fishy smell. For sandwiches, try to choose pieces that are roughly the same thickness (about 1-inch thick is perfect) so they’ll cook evenly and fit nicely on your bun. If you’re at the fish counter, ask for center-cut portions rather than tail pieces, since they’ll give you the most consistent shape and thickness for a sandwich.
Options for Substitutions
This fish sandwich is pretty adaptable and you’ve got several options for switching things up:
- Mahi mahi: If you can’t find mahi mahi, other firm white fish like cod, halibut, or grouper work great here. Just make sure the fillets are about the same thickness for even cooking.
- Tartar sauce: Not a fan of tartar sauce? Try remoulade, mayo mixed with sriracha, or even a light coating of plain mayo. You can also make quick tartar sauce by mixing mayo with chopped pickles and a splash of lemon juice.
- Whole wheat buns: Any burger bun works well – try brioche for something richer, or regular white buns. Even thick-sliced sourdough bread makes a good base.
- Lettuce: Feel free to swap in any crispy lettuce you have. Butter lettuce adds a nice tender crunch, or try arugula for a peppery kick.
- Canola/vegetable oil: Any neutral oil with a high smoke point works here – try grapeseed or avocado oil if you have them.
Watch Out for These Mistakes While Grilling
The biggest challenge when grilling mahi mahi is preventing it from sticking to the grates – always ensure your grill is properly preheated and the grates are well-oiled before placing the fish down. A common error is flipping the fish too early; wait until it naturally releases from the grill (about 4-5 minutes) which indicates it’s ready to turn. Another crucial mistake is overcooking the mahi mahi, which can make it tough and dry – cook just until the fish flakes easily with a fork and reaches an internal temperature of 145°F. For the best results, let the fish rest for 3-5 minutes before assembling your sandwich, and if you’re making these ahead for a crowd, keep the toppings separate until serving time to prevent soggy buns.
What to Serve With Mahi Mahi Sandwiches?
Since mahi mahi sandwiches bring those fresh, beachy vibes, they pair perfectly with light, summery sides that won’t weigh you down. A scoop of cold coleslaw adds a nice crunch and creamy texture that complements the fish really well. For something simple, a handful of kettle-cooked potato chips or sweet potato fries brings that satisfying salty crunch that makes any sandwich meal complete. If you’re feeling like something lighter, try a quick cucumber and tomato salad dressed with just a bit of lime juice and olive oil – it really brings out the fresh flavors of the fish.
Storage Instructions
Keep Fresh: If you have leftover cooked mahi mahi, place it in an airtight container and keep it in the fridge for up to 2 days. Store the fresh veggies and tartar sauce separately to keep everything crisp and prevent the bread from getting soggy. The buns are best kept at room temperature in their original packaging or a bread box.
Prep Ahead: You can mix up the tartar sauce a day or two before and keep it in the fridge. Slice your tomatoes and onions the morning of serving. For the best taste and texture, I recommend grilling the mahi mahi just before assembling your sandwiches.
Enjoy Later: To enjoy leftover mahi mahi, gently warm it in the microwave for about 30 seconds or until just heated through. Build your sandwich with fresh veggies and sauce right before eating. Trust me, these sandwiches taste best when assembled fresh!
| Preparation Time | 10-15 minutes |
| Cooking Time | 10-15 minutes |
| Total Time | 20-30 minutes |
| Level of Difficulty | Easy |
Estimated Nutrition
Estimated nutrition for the whole recipe (without optional ingredients):
- Calories: 1200-1400
- Protein: 90-100 g
- Fat: 70-80 g
- Carbohydrates: 80-90 g
Ingredients
- 1 tsp kosher salt
- 8 tbsp tartar sauce
- 1 large tomato (sliced)
- 8 lettuce leaves (I use green leaf lettuce)
- 1/2 tsp ground black pepper
- 1 to 1 1/2 lb mahi mahi fillets
- 4 whole wheat sandwich buns
- 1/2 thinly sliced red onion
- canola or vegetable oil (for grilling)
Step 1: Prepare the Mahi Mahi
Cut the mahi mahi into large 1/4 to 1/3 pound portions suitable for sandwiches.
Blot each fillet with paper towels to remove excess moisture.
Season both sides of the fish generously with kosher salt and black pepper.
Step 2: Preheat and Prepare the Grill
Preheat your grill to medium-high heat, approximately 450°-500°F.
Once hot, clean the grill grates thoroughly using a grill brush.
Fold a paper towel several times, drizzle it with 2 to 3 teaspoons of canola or vegetable oil, and use tongs to rub the oiled towel over the cleaned grill grates.
This will help prevent sticking.
Step 3: Grill the Mahi Mahi
Place the seasoned mahi mahi fillets on the grill and close the lid.
Allow them to cook for 3-4 minutes on one side.
Carefully flip the fish using a grilling spatula and continue to cook for an additional 2-4 minutes with the lid closed.
The cooking time will vary depending on the thickness of your fillets.
Step 4: Toast the Buns
During the last 1.5 to 2 minutes of cooking the fish, open the sandwich buns and place them cut side down on the grill.
Allow them to toast until grill marks appear, which should take about 1-2 minutes.
Step 5: Assemble the Sandwiches
Remove the grilled fish from the grill and transfer it to a cutting board or rimmed baking sheet.
On the bottom half of each toasted bun, place the grilled mahi mahi.
Complete your sandwich with your favorite toppings and condiments before adding the top half of the toasted bun.
Serve immediately for the best taste and texture.
