Finding a hearty, satisfying dinner that practically cooks itself can feel impossible on busy evenings. Between work, family responsibilities, and everything else on your plate, the last thing you want is to spend hours in the kitchen babysitting a meal, and it gets even trickier when you’re feeding a hungry crowd.
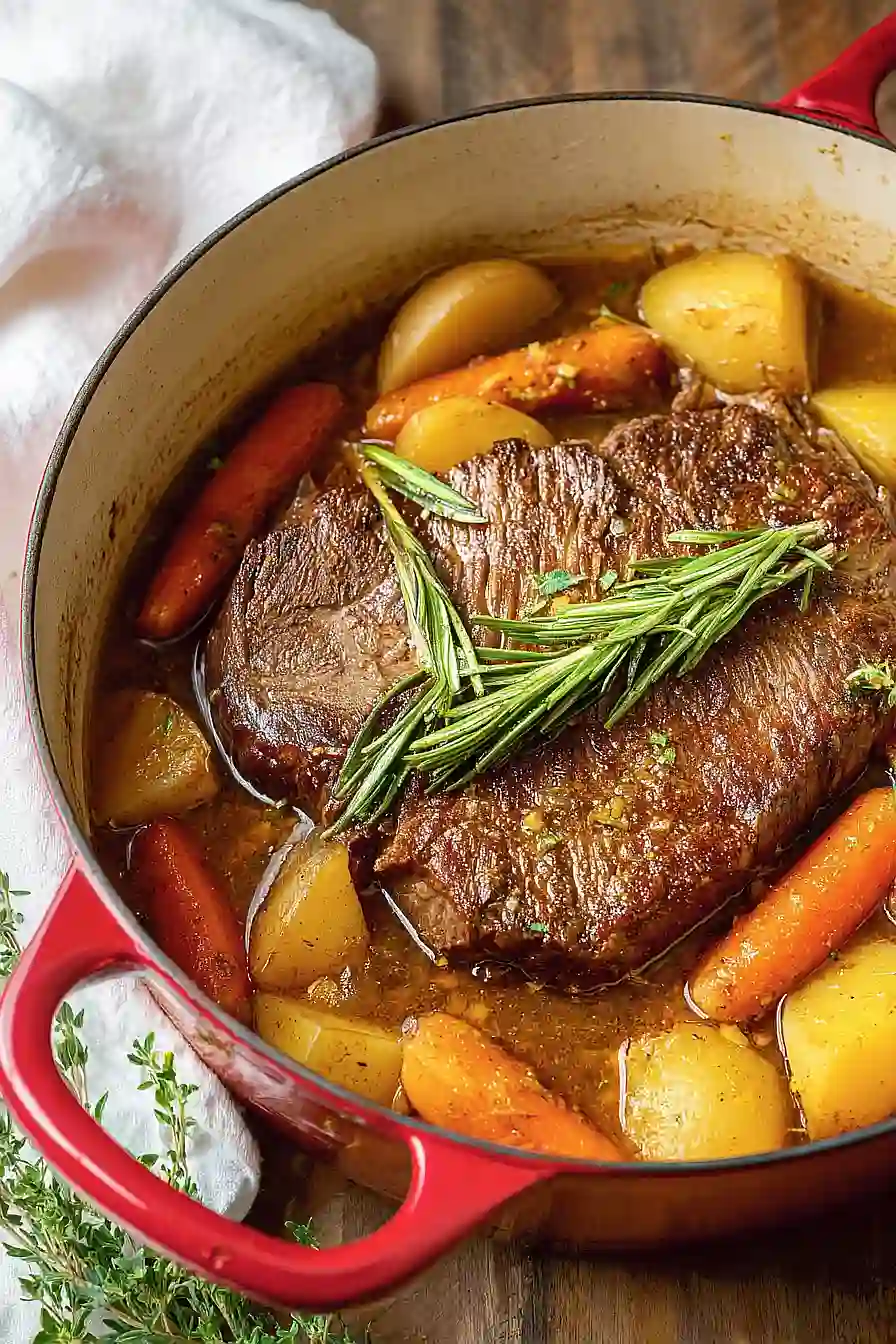
Thankfully, this oven baked pot roast solves all those problems: it’s comforting and filling, requires minimal hands-on time, and flexible enough to work with whatever vegetables you have sitting in your fridge.
Why You’ll Love This Pot Roast
- One-pot meal – Everything cooks together in the oven, which means less cleanup and all the flavors meld beautifully while you relax.
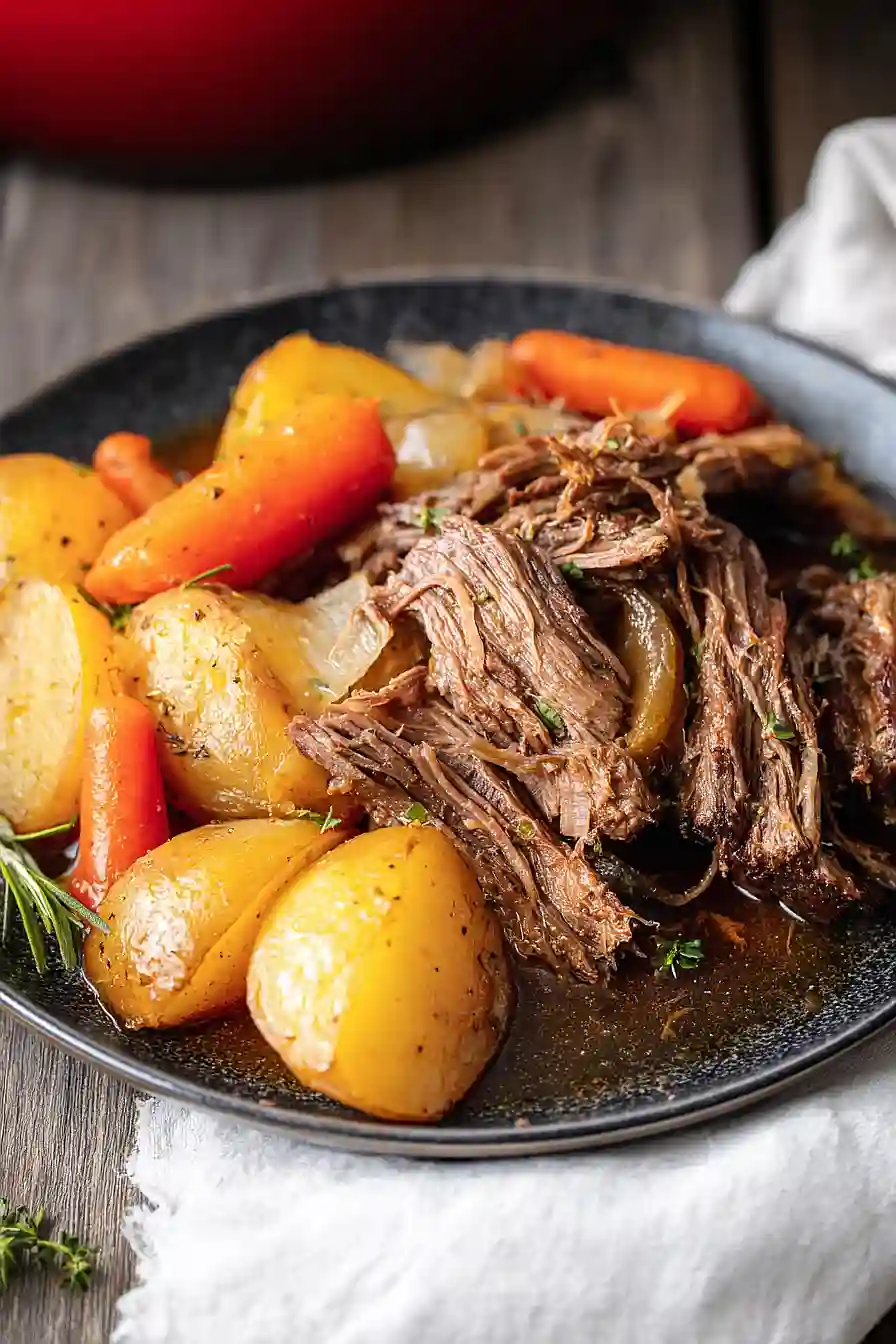
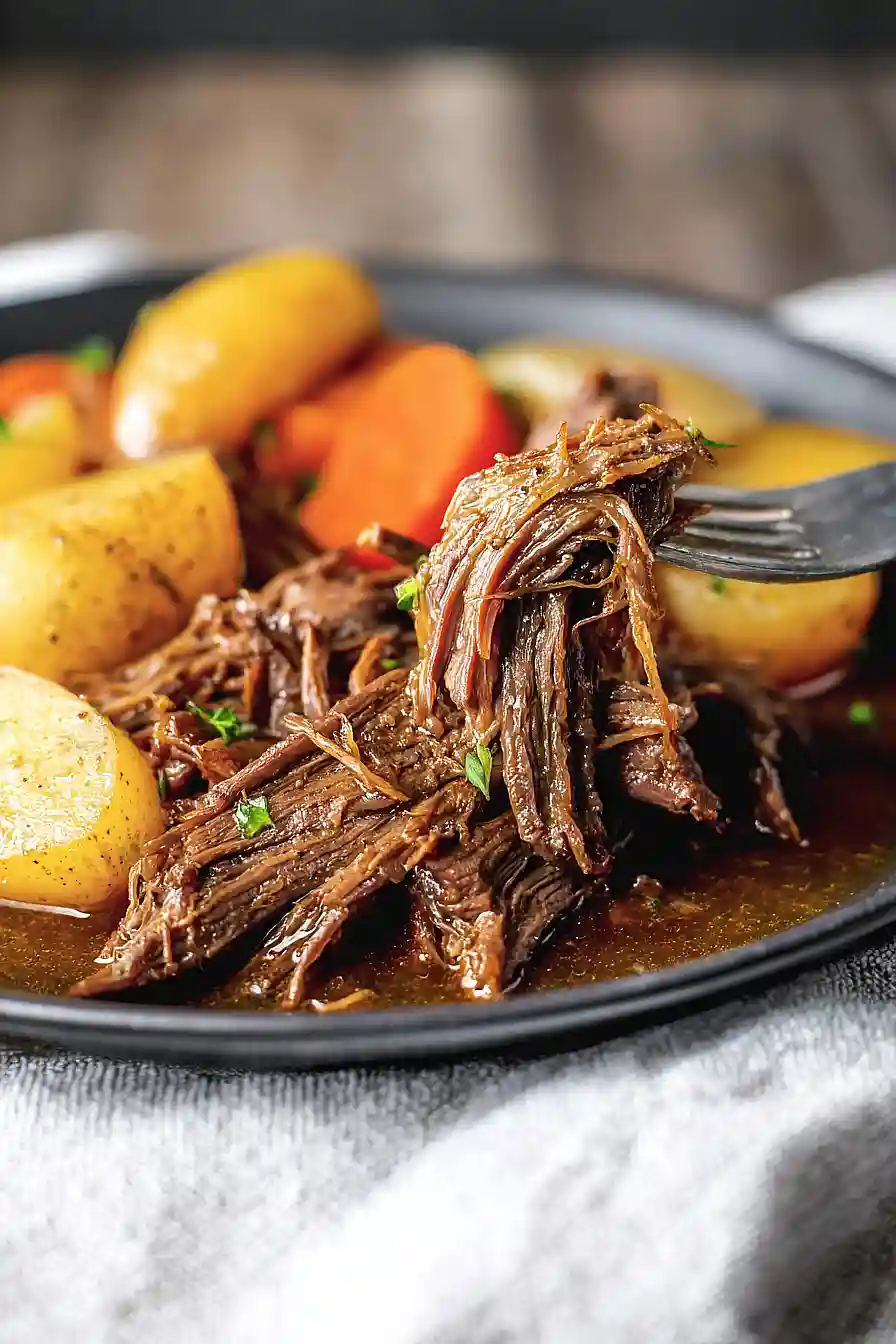
- Tender, fall-apart beef – The slow roasting method breaks down the chuck roast until it’s so tender you can cut it with a fork.
- Complete dinner in one dish – With potatoes, carrots, and beef all cooking together, you’ve got your protein and veggies covered without making separate side dishes.
- Perfect for meal prep – This pot roast makes great leftovers and actually tastes even better the next day, so you can enjoy it throughout the week.
- Impressive but easy – It looks and tastes like you spent hours in the kitchen, but the oven does most of the work for you.
What Kind of Beef Should I Use?
For pot roast, you’ll want to stick with tougher cuts of meat that have good marbling and connective tissue – that’s what makes them perfect for slow cooking. Chuck roast is the classic choice and usually the most affordable option at the grocery store, but you can also use brisket or bottom round if that’s what you have available. The key is to look for a piece that has some fat running through it, since that fat will break down during the long cooking process and keep your meat juicy and tender. If your roast comes tied with butcher’s twine, leave it on during cooking to help the meat hold its shape, and you can always remove it before slicing and serving.
Options for Substitutions
This pot roast recipe is forgiving and works well with a few simple swaps:
- Chuck roast: Chuck roast is really the best choice here since it has enough fat and connective tissue to stay tender during long cooking. If you must substitute, try a bottom round roast, but know it may turn out a bit drier.
- Avocado oil: Any high-heat oil works fine – try olive oil, vegetable oil, or even coconut oil if that’s what you have on hand.
- Yukon gold potatoes: Red potatoes or russet potatoes both work well. Russets will break down more and thicken the sauce, while red potatoes hold their shape better.
- Beef broth: You can use beef stock or even chicken broth in a pinch. For extra richness, try adding a splash of red wine along with the broth.
- Maple syrup: Honey or brown sugar can replace the maple syrup in equal amounts. This adds a touch of sweetness that balances the savory flavors.
- Apple cider vinegar: Red wine vinegar or white vinegar work just as well for that little bit of tang.
- Fresh herbs: If you don’t have fresh rosemary and oregano, use 1 teaspoon each of dried herbs instead. Add them at the beginning of cooking.
Watch Out for These Mistakes While Cooking
The biggest mistake when making pot roast is cranking up the oven temperature to speed things up, but low and slow is the only way to break down the tough connective tissue in chuck roast – keep your oven at 325°F or lower for tender, fall-apart meat.
Skipping the searing step is another common error that costs you flavor, so make sure to brown all sides of the roast in hot oil before adding it to the pot, creating that rich, caramelized crust.
To avoid dry, stringy meat, check for doneness around the 2.5-hour mark by testing if the roast pulls apart easily with a fork, and remember that a 3-pound roast typically needs 3-3.5 hours total.
One more tip: cut your potatoes and carrots into similar-sized chunks so everything cooks evenly, and if your vegetables are getting too soft before the meat is done, you can always add them halfway through cooking instead.
What to Serve With Pot Roast?
Since this pot roast already comes with potatoes and carrots built right in, you really just need a few simple sides to round out the meal. A crusty dinner roll or some buttery biscuits are perfect for soaking up all that rich gravy at the bottom of the pot. I love adding a simple side salad with a tangy vinaigrette to cut through the richness of the beef, or you could go with some roasted green beans or steamed broccoli for a pop of color on the plate. If you’re feeding a crowd and want to stretch the meal further, consider serving it over egg noodles or mashed potatoes (in addition to the potatoes in the pot) for an extra hearty dinner.
Storage Instructions
Store: Leftover pot roast is honestly one of my favorite things to have in the fridge! Store it in an airtight container with all the juices and veggies for up to 4 days. The meat actually gets more tender and flavorful as it sits in those delicious juices.
Freeze: This pot roast freezes really well for those busy weeknight dinners. Let it cool completely, then portion it out with the vegetables and gravy into freezer-safe containers or bags. It’ll keep for up to 3 months, and you’ll thank yourself later for having a homemade meal ready to go.
Reheat: Warm it up gently in a covered pot on the stove over medium-low heat, stirring occasionally until heated through. You can also reheat individual portions in the microwave. If the gravy seems too thick, just add a splash of beef broth to loosen it up.
| Preparation Time | 15-20 minutes |
| Cooking Time | 180-240 minutes |
| Total Time | 195-260 minutes |
| Level of Difficulty | Medium |
Estimated Nutrition
Estimated nutrition for the whole recipe (without optional ingredients):
- Calories: 2600-2900
- Protein: 170-190 g
- Fat: 140-160 g
- Carbohydrates: 140-170 g
Ingredients
For the spice mix:
- 1 tbsp garlic powder (I use McCormick)
- 1 tbsp onion powder
- 0.75 tsp black pepper (freshly ground preferred)
- 2 tsp salt
- 2 tsp paprika (for color and mild smoky flavor)
For the roast and vegetables:
- 1.25 lb Yukon gold potatoes (cut into 1.5-inch chunks, skin on)
- 1 yellow onion (quartered into large chunks)
- 4 large carrots (cut into 2-inch pieces)
- 1 sprig oregano (fresh preferred)
- 3 lb beef chuck (I use Prime grade for better marbling)
- 3.5 tbsp avocado oil (or any neutral oil like canola)
- 1 sprig rosemary (fresh, about 3-4 inches long)
- 1 bay leaf
For the braising liquid:
- 1 tbsp maple syrup (balances the acidity)
- 2.25 cups beef broth
- 2 tsp apple cider vinegar (adds depth to the sauce)
Step 1: Prepare Ingredients and Season the Beef
- 4 large carrots
- 1.25 lb Yukon gold potatoes
- 1 yellow onion
- 3 lb beef chuck
- 2 tsp paprika
- 0.75 tsp black pepper
- 1 tbsp onion powder
- 2 tsp salt
- 1 tbsp garlic powder
Cut the carrots into 2-inch pieces, potatoes into 1.5-inch chunks (leaving skin on for texture), and quarter the yellow onion into large chunks.
Pat the beef chuck dry with paper towels—this is crucial for getting a good sear.
In a small bowl, combine paprika, black pepper, onion powder, salt, and garlic powder.
Generously rub this spice mixture all over the beef, making sure to coat all sides evenly.
Let it sit for a few minutes while you preheat the oven to 300°F.
Step 2: Sear the Beef and Build Flavor
- 3.5 tbsp avocado oil
- spiced beef from Step 1
Heat 3.5 tablespoons of avocado oil in a large Dutch oven or heavy pot over medium-high heat until it shimmers.
Once hot, carefully place the seasoned beef in the pot and sear for 2-3 minutes per side, resisting the urge to move it around—you want a deep brown crust to develop for maximum flavor.
Transfer the seared beef to a plate and set aside.
I like to let that flavorful oil and browned bits stay in the pot; they’re going to build an incredible foundation for the braising liquid.
Step 3: Sauté Vegetables and Build the Braise Base
- 1 yellow onion from Step 1
- 4 large carrots from Step 1
- 1.25 lb potatoes from Step 1
- seared beef from Step 2
In the same pot with the oil and browned bits, add the quartered onions and cook for 3-4 minutes, stirring occasionally, until they start to soften and pick up some color.
Add the carrots and potatoes from Step 1, stirring to coat them in the flavorful oil.
Cook for another 2 minutes to warm through.
Return the seared beef to the pot, nestling it among the vegetables.
Step 4: Create the Braising Liquid and Start Cooking
- 2.25 cups beef broth
- 2 tsp apple cider vinegar
- 1 tbsp maple syrup
- 1 sprig rosemary
- 1 sprig oregano
- 1 bay leaf
In a measuring cup or small bowl, whisk together 2.25 cups beef broth, 2 teaspoons apple cider vinegar, and 1 tablespoon maple syrup—the vinegar adds subtle depth while the maple syrup balances it out for a perfectly rounded sauce.
Pour this mixture over the beef and vegetables in the pot.
Tear the leaves from the fresh rosemary and oregano sprigs and scatter them over the top along with the bay leaf.
Cover the pot with a lid and carefully transfer it to the preheated 300°F oven.
Step 5: Low and Slow Braise Until Tender
Braise in the oven at 300°F for 3 to 4 hours, depending on the size and cut of your beef.
The meat is done when it’s fork-tender and shreds easily—there should be minimal resistance when you poke it with a fork.
The vegetables should also be very tender and have absorbed the rich braising liquid flavors.
Step 6: Rest, Cut, and Serve
- braised beef and vegetables from Step 5
Remove the pot from the oven and let it rest for 5-10 minutes before serving.
This resting period helps the meat retain its moisture.
Carefully transfer the beef to a cutting board and cut it into serving-sized pieces.
Return the meat to the pot with the vegetables and braising liquid, or arrange the pieces on a platter with the vegetables around them and pour the pan juices over everything.
Serve hot and enjoy the rich, tender results of low-temperature braising.
