Finding a cookie recipe that’s both simple to make and guaranteed to bring smiles is harder than it sounds. Between measuring multiple ingredients, chilling dough for hours, and worrying about whether they’ll spread too much in the oven, baking cookies can feel like more work than it’s worth, especially when you just want something sweet to share with family or bring to a party.
Thankfully, these sugar cookies with Hershey Kisses solve all those problems: they come together quickly with basic pantry ingredients, require no chilling time, and that chocolate kiss pressed into the center makes them look like you spent way more effort than you actually did.
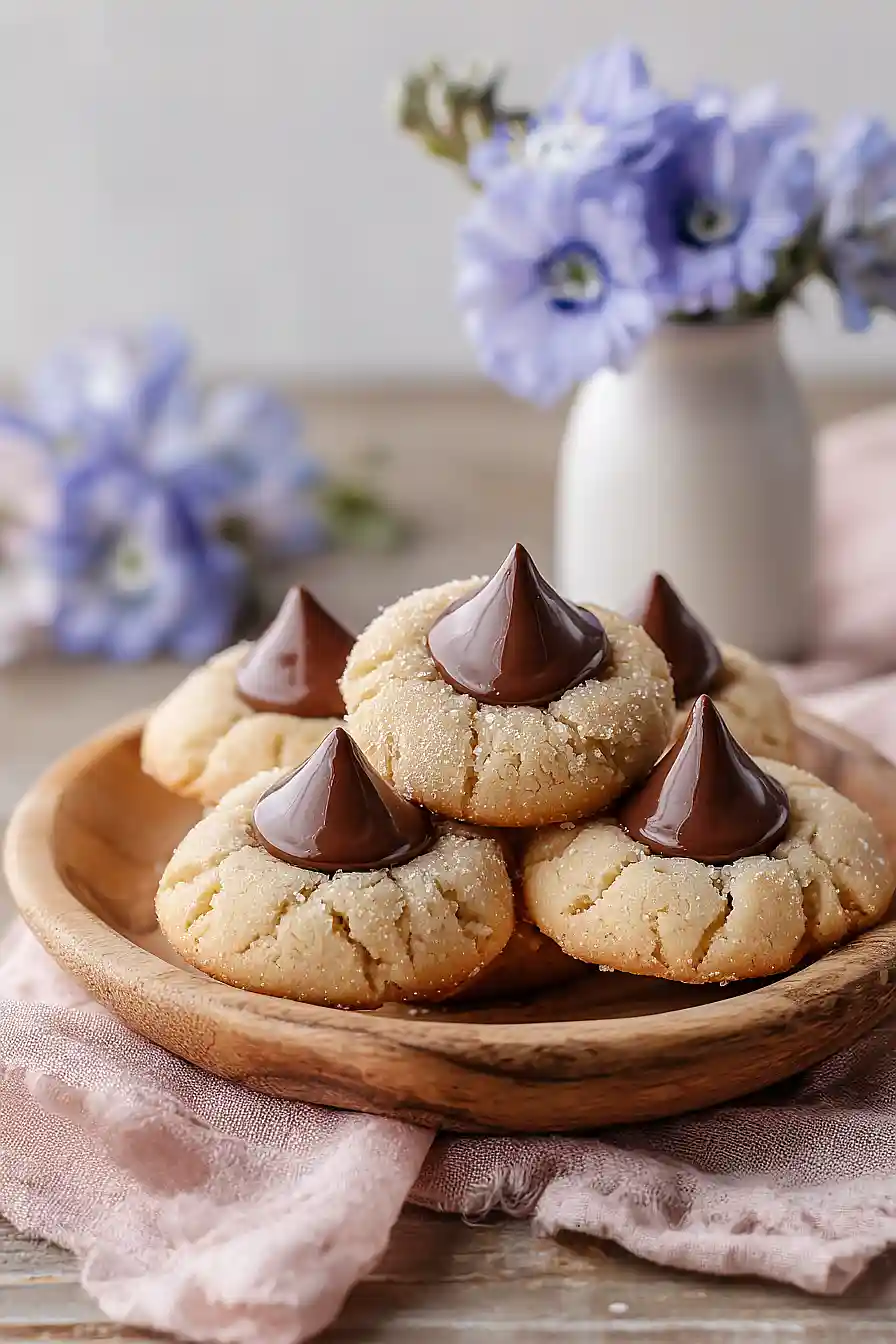
Why You’ll Love These Sugar Cookies with Hershey Kisses
- Quick and easy – These cookies come together in under 30 minutes, making them perfect for last-minute baking or when you need a sweet treat fast.
- Simple ingredients – You probably already have everything you need in your pantry, plus a bag of Hershey’s Kisses.
- Fun to make with kids – Rolling the dough in sugar and pressing the chocolate kisses on top is an activity the whole family can enjoy together.
- Classic crowd-pleaser – The combination of soft, buttery sugar cookies with chocolate kisses is a timeless favorite that everyone loves at parties, bake sales, or holiday gatherings.
What Kind of Hershey’s Kisses Should I Use?
The classic milk chocolate Hershey’s Kisses are the traditional choice for these cookies, and they’re what most people picture when they think of this recipe. That said, you can totally switch things up with different flavors like dark chocolate, caramel-filled, or even the seasonal varieties that pop up around the holidays. Just make sure you unwrap all your Kisses before you start baking – trust me, you don’t want to be frantically peeling foil while your cookies are cooling. Whatever flavor you choose, the key is pressing them into the cookies while they’re still warm from the oven so they stick properly and create that signature look.

Options for Substitutions
These cookies are pretty straightforward, but here are some swaps you can make if needed:
- Unsalted butter: If you only have salted butter, go ahead and use it – just skip the 1/4 teaspoon of salt in the recipe to avoid over-salting your cookies.
- Hershey’s Kisses: Get creative with the chocolate! Try using Rolo candies, peanut butter cups, caramel-filled Kisses, or even mini Reese’s pieces. Just press them in while the cookies are still warm from the oven.
- Vanilla extract: Almond extract works great if you want a different flavor profile – just use half the amount since it’s stronger. You can also try peppermint extract during the holidays.
- All-purpose flour: For a gluten-free version, use a 1:1 gluten-free baking flour blend. The texture might be slightly different, but they’ll still taste great.
- Granulated sugar for rolling: Switch things up by rolling the dough balls in colored sugar, cinnamon sugar, or even crushed candy canes for a festive twist.
Watch Out for These Mistakes While Baking
The biggest mistake with these cookies is pressing the Hershey’s Kisses in too early or too late – wait until the cookies come out of the oven and press them in immediately while they’re still hot, so the chocolate softens slightly but doesn’t completely melt.
Skipping the chilling step for your dough can lead to flat, spread-out cookies, so if your dough feels too soft after mixing, pop it in the fridge for 15-20 minutes before rolling into balls.
Another common error is not rolling the dough balls in enough sugar before baking, which gives these cookies their signature sparkly appearance and sweet crunch, so don’t be shy with that sugar coating.
Finally, make sure your butter is truly softened to room temperature (not melted) – it should leave a slight indent when you press it, which ensures your cookies have the right texture and don’t spread too thin in the oven.
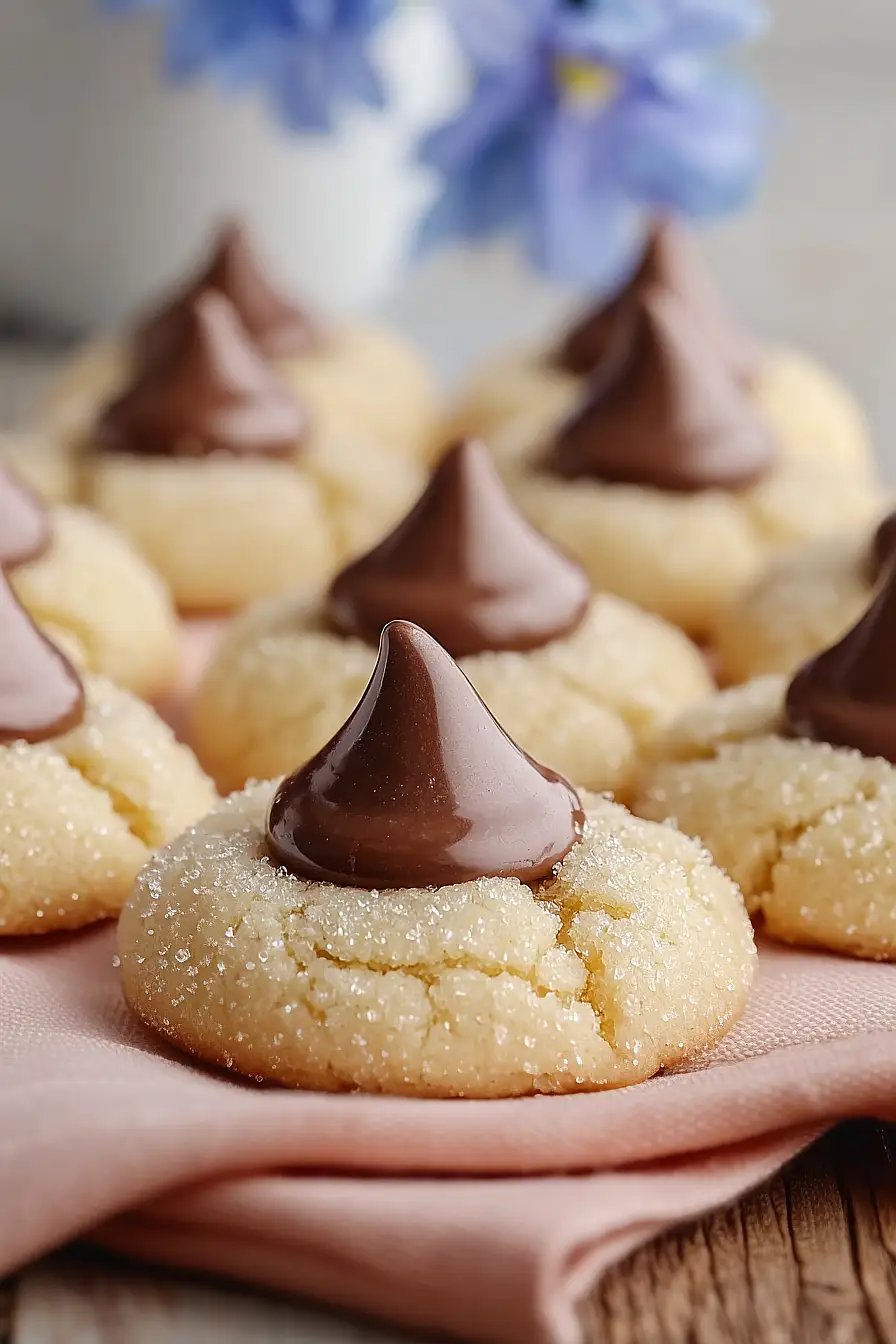
What to Serve With Sugar Cookies with Hershey Kisses?
These cookies are perfect for serving at holiday parties, cookie exchanges, or just keeping around the house for when you need something sweet with your afternoon coffee or tea. I love setting them out on a platter with other classic cookies like chocolate chip or snickerdoodles to give people options. They’re also great alongside a glass of cold milk for dunking, or you can pair them with hot chocolate for a cozy winter treat. If you’re making them for a party, consider serving them with some fresh fruit like strawberries or grapes to balance out the sweetness.
Storage Instructions
Store: Keep your Hershey Kiss cookies in an airtight container at room temperature for up to 5 days. Layer them between sheets of parchment paper so the chocolate kisses don’t stick together or get smooshed.
Freeze: These cookies freeze really well for up to 3 months. Just make sure they’re completely cool before freezing, and store them in a freezer-safe container with parchment between the layers. When you’re ready to eat them, let them thaw at room temperature for about 30 minutes.
Make Ahead: You can prepare the cookie dough ahead of time and refrigerate it for up to 3 days before baking. Just wrap it tightly in plastic wrap and let it sit at room temperature for about 15 minutes before rolling and baking so it’s easier to work with.
| Preparation Time | 15-20 minutes |
| Cooking Time | 8-10 minutes |
| Total Time | 23-30 minutes |
| Level of Difficulty | Easy |
Estimated Nutrition
Estimated nutrition for the whole recipe (without optional ingredients):
- Calories: 2500-2700
- Protein: 25-30 g
- Fat: 110-120 g
- Carbohydrates: 360-390 g
Ingredients
For the dough:
- 1/2 cup unsalted butter (softened to room temperature)
- 1.75 cups all-purpose flour (I use King Arthur all-purpose)
- 1/4 tsp baking soda
- 1/2 cup sugar
- 1 tsp vanilla extract (pure vanilla for best flavor)
- 1 egg (room temperature)
- 1/4 tsp salt
- 1/4 tsp baking powder
For assembly:
- 32 Hershey’s Kisses (pressed into warm cookies immediately after baking)
- 1/2 cup sugar for rolling
Step 1: Prepare Your Mise en Place and Preheat
- 1/2 cup sugar
- Baking sheets and parchment paper
Start by preheating your oven to 350°F and preparing your baking sheets with parchment paper or silicone mats.
While the oven heats, measure out all your ingredients and place them near your mixing station—this ensures you won’t scramble mid-recipe.
Make sure your butter and egg are at room temperature, as this helps them incorporate smoothly and creates a lighter, fluffier dough.
Pour the 1/2 cup of sugar for rolling into a small shallow bowl and set it aside.
Step 2: Combine Dry Ingredients
- 1.75 cups all-purpose flour
- 1/4 tsp baking soda
- 1/4 tsp baking powder
- 1/4 tsp salt
In a medium bowl, whisk together the flour, baking soda, baking powder, and salt.
Whisking is important here because it aerates the flour and distributes the leavening agents evenly throughout, which helps your cookies rise consistently.
Set this dry mixture aside—you’ll add it to the wet ingredients in the next step.
Step 3: Cream Butter and Sugar
- 1/2 cup unsalted butter
- 1/2 cup sugar
In a large mixing bowl, beat the softened butter and 1/2 cup sugar together for 2-3 minutes until the mixture is pale, fluffy, and noticeably lighter in color.
This creaming process incorporates air into the dough, which creates tender cookies with a better texture.
Stop occasionally to scrape down the sides of the bowl to ensure even mixing.
Step 4: Incorporate Wet Ingredients
- 1 egg
- 1 tsp vanilla extract
Add the room-temperature egg and vanilla extract to your creamed butter and sugar mixture.
Beat on medium speed for about 1 minute until the egg is fully incorporated and the mixture looks smooth and well-combined.
I find that room-temperature eggs emulsify better with the butter, creating a smoother, creamier base than cold eggs would.
Scrape down the bowl to catch any bits of unmixed butter on the sides.
Step 5: Combine Wet and Dry Ingredients
- dry ingredient mixture from Step 2
- wet ingredient mixture from Step 4
Add the dry ingredient mixture from Step 2 to the wet mixture from Step 4.
Mix on low speed just until the dry ingredients disappear and the dough comes together—this should take only 30-45 seconds.
Overmixing develops gluten, which makes cookies tough instead of tender, so stop mixing as soon as you no longer see streaks of flour.
The dough should be soft and slightly sticky but still manageable.
Step 6: Shape and Sugar-Coat Cookies
- dough from Step 5
- sugar for rolling from Step 1
- prepared baking sheets
Scoop 1 tablespoon of dough at a time and gently roll it between your palms into a ball.
Immediately roll each ball in the sugar for rolling from Step 1, coating it on all sides, then place it on your prepared baking sheet about 2 inches apart.
I like to roll the dough in sugar right away because it helps create that pretty sparkly exterior and a nice crispy-chewy texture.
Space them well because they’ll spread slightly during baking.
Step 7: Bake and Top with Kisses
- 32 Hershey’s Kisses
Bake the cookies for 8 minutes at 350°F—they should look set but still slightly soft in the centers and barely golden at the edges.
Remove the baking sheet from the oven and immediately press one Hershey’s Kiss into the center of each warm cookie, pressing gently until it sinks slightly into the dough.
The residual heat will soften the chocolate just enough to create that perfect melded appearance.
Let the cookies cool on the baking sheet for 2-3 minutes, then transfer them to a wire rack to cool completely.

Buttery Sugar Cookies with Hershey Kisses
Ingredients
For the dough:
- 1/2 cup unsalted butter (softened to room temperature)
- 1.75 cups all-purpose flour (I use King Arthur all-purpose)
- 1/4 tsp baking soda
- 1/2 cup sugar
- 1 tsp vanilla extract (pure vanilla for best flavor)
- 1 egg (room temperature)
- 1/4 tsp salt
- 1/4 tsp baking powder
For assembly:
- 32 Hershey's Kisses (pressed into warm cookies immediately after baking)
- 1/2 cup sugar for rolling
Instructions
- Start by preheating your oven to 350°F and preparing your baking sheets with parchment paper or silicone mats. While the oven heats, measure out all your ingredients and place them near your mixing station—this ensures you won't scramble mid-recipe. Make sure your butter and egg are at room temperature, as this helps them incorporate smoothly and creates a lighter, fluffier dough. Pour the 1/2 cup of sugar for rolling into a small shallow bowl and set it aside.
- In a medium bowl, whisk together the flour, baking soda, baking powder, and salt. Whisking is important here because it aerates the flour and distributes the leavening agents evenly throughout, which helps your cookies rise consistently. Set this dry mixture aside—you'll add it to the wet ingredients in the next step.
- In a large mixing bowl, beat the softened butter and 1/2 cup sugar together for 2-3 minutes until the mixture is pale, fluffy, and noticeably lighter in color. This creaming process incorporates air into the dough, which creates tender cookies with a better texture. Stop occasionally to scrape down the sides of the bowl to ensure even mixing.
- Add the room-temperature egg and vanilla extract to your creamed butter and sugar mixture. Beat on medium speed for about 1 minute until the egg is fully incorporated and the mixture looks smooth and well-combined. I find that room-temperature eggs emulsify better with the butter, creating a smoother, creamier base than cold eggs would. Scrape down the bowl to catch any bits of unmixed butter on the sides.
- Add the dry ingredient mixture from Step 2 to the wet mixture from Step 4. Mix on low speed just until the dry ingredients disappear and the dough comes together—this should take only 30-45 seconds. Overmixing develops gluten, which makes cookies tough instead of tender, so stop mixing as soon as you no longer see streaks of flour. The dough should be soft and slightly sticky but still manageable.
- Scoop 1 tablespoon of dough at a time and gently roll it between your palms into a ball. Immediately roll each ball in the sugar for rolling from Step 1, coating it on all sides, then place it on your prepared baking sheet about 2 inches apart. I like to roll the dough in sugar right away because it helps create that pretty sparkly exterior and a nice crispy-chewy texture. Space them well because they'll spread slightly during baking.
- Bake the cookies for 8 minutes at 350°F—they should look set but still slightly soft in the centers and barely golden at the edges. Remove the baking sheet from the oven and immediately press one Hershey's Kiss into the center of each warm cookie, pressing gently until it sinks slightly into the dough. The residual heat will soften the chocolate just enough to create that perfect melded appearance. Let the cookies cool on the baking sheet for 2-3 minutes, then transfer them to a wire rack to cool completely.