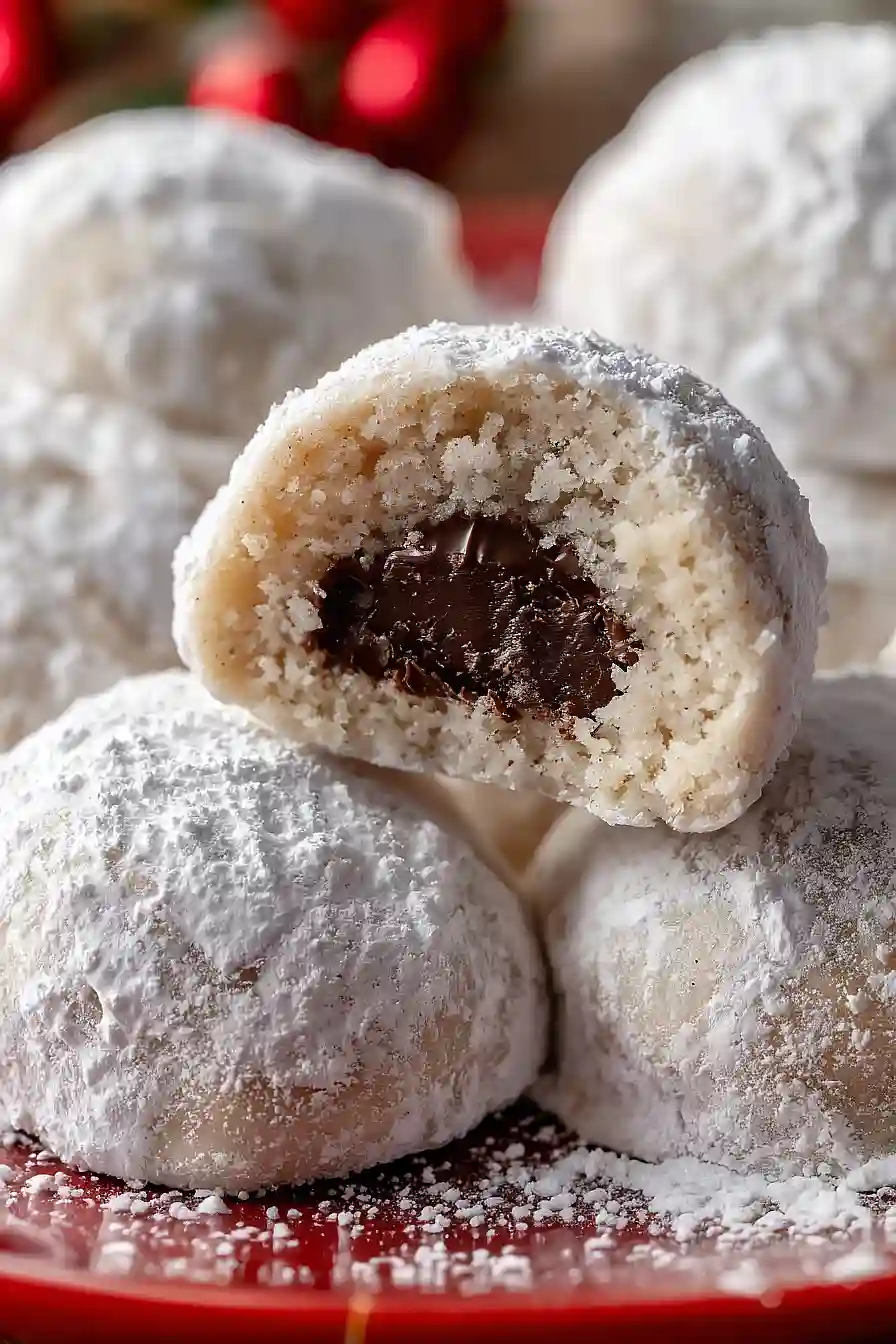
I grew up thinking Russian Tea Cakes were perfect just the way they were—those little snowball cookies rolled in powdered sugar that show up at every Christmas cookie exchange. Then one year, I had the idea to press a chocolate Kiss into the center while they were still warm, and honestly, I haven’t made them the plain way since.
The chocolate melts just a little bit into the buttery, pecan-filled cookie, and when you dust more powdered sugar over the top, it looks like someone tucked a little present inside each one. My kids call them “surprise cookies” because of the chocolate hiding in the middle. They’re not fancy or complicated—just regular Russian Tea Cakes with a simple twist that makes them even better.

Why You’ll Love These Russian Tea Cakes
- Quick and easy – These cookies come together in under 40 minutes, making them perfect for last-minute holiday gatherings or when you need a sweet treat fast.
- Simple ingredients – You probably have most of these pantry staples on hand already, so no special shopping trip required.
- Chocolate surprise inside – The Hershey’s Kiss hidden in the center adds a fun twist to the classic recipe and makes each bite extra special.
- Melt-in-your-mouth texture – The buttery, crumbly cookies dusted with powdered sugar are so tender they practically dissolve on your tongue.
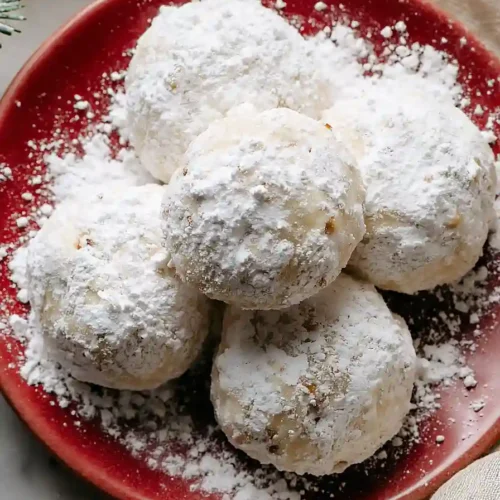
- Perfect for gifting – These cookies look fancy and festive, making them ideal for cookie exchanges, holiday parties, or packaging up as homemade gifts.
What Kind of Chocolate Should I Use?
For Russian tea cakes, you’ll want to use Hershey’s Kisses, which come in both milk chocolate and dark chocolate varieties. The choice between milk and dark really comes down to your personal preference – milk chocolate gives you a sweeter, creamier flavor while dark chocolate adds a richer, slightly less sweet taste that pairs nicely with the buttery cookie. You can even mix it up and use both types if you’re making a batch for a crowd with different tastes. Just make sure to unwrap all your Kisses before you start baking so they’re ready to press into the warm cookies right when they come out of the oven.

Options for Substitutions
These cookies are pretty forgiving when it comes to swaps, so here are some options if you need them:
- Pecans: Walnuts are a great substitute for pecans and give you that same nutty flavor and texture. You can also use almonds or hazelnuts, just make sure to chop them finely so they blend well into the dough.
- Butter: For the best flavor and texture, stick with real butter here – it’s what gives these cookies their melt-in-your-mouth quality. Margarine won’t give you the same results.
- Hershey’s Kisses: Any chocolate kiss will work here. Try caramel-filled kisses, peppermint, or even peanut butter cups for a fun twist. You could also use chocolate chips if that’s what you have on hand.
- Vanilla: If you’re out of vanilla extract, try almond extract instead – just use half the amount since it’s stronger. You could also add a bit of maple extract for a different flavor profile.
- Confectioner’s sugar: Don’t substitute the confectioner’s sugar with granulated sugar – the powdery texture is what creates that signature snowy coating on these cookies.
Watch Out for These Mistakes While Baking
The biggest mistake when making Russian tea cakes is using melted butter instead of softened butter, which will cause your cookies to spread too much and lose their signature round shape – make sure your butter is at room temperature and still holds its form.
Another common error is skipping the chilling step after shaping the dough around the chocolate kisses, as warm dough tends to crack and fall apart during baking, so pop them in the fridge for 15-20 minutes before they go in the oven.
Rolling the cookies in powdered sugar while they’re still piping hot will cause the sugar to melt and disappear, so let them cool for about 5 minutes first, then roll them once, let them cool completely, and roll them again for that thick, snowy coating.
Finally, be careful not to overbake these cookies – they should barely have any color on the bottom and look slightly underdone when you pull them out, as they’ll continue cooking on the baking sheet and become perfectly tender.
What to Serve With Russian Tea Cakes?
These buttery cookies are perfect alongside a hot cup of coffee or tea – the name says it all! I love setting out a platter of Russian tea cakes at holiday gatherings or cookie exchanges because they look fancy but are actually pretty simple to make. They pair beautifully with other holiday cookies like snickerdoodles or gingerbread, creating a nice variety on your dessert table. For a cozy afternoon treat, serve them with hot cocoa or a chai latte, and the chocolate kiss center makes them feel extra special without any extra work.
Storage Instructions
Store: These cookies stay fresh in an airtight container at room temperature for about a week. Just layer them with parchment paper between each layer so they don’t stick together. The powdered sugar coating might settle a bit over time, so you can always give them a quick roll in fresh powdered sugar before serving if needed.
Freeze: Russian tea cakes freeze really well for up to 3 months. I like to freeze them before adding the chocolate kisses, then press the kisses in after thawing. Store them in a freezer-safe container with parchment paper between layers to keep them from sticking.
Thaw: Just leave the cookies out at room temperature for about 30 minutes before serving. They taste amazing straight from the freezer too if you like a firmer texture! Once thawed, you can dust them with a bit more powdered sugar to freshen them up.
| Preparation Time | 10-20 minutes |
| Cooking Time | 14-17 minutes |
| Total Time | 24-37 minutes |
| Level of Difficulty | Easy |
Estimated Nutrition
Estimated nutrition for the whole recipe (without optional ingredients):
- Calories: 3250-3450
- Protein: 30-36 g
- Fat: 210-225 g
- Carbohydrates: 350-370 g
Ingredients
For the dough:
- 3/4 cup confectioner’s sugar
- 1 tsp vanilla (pure vanilla extract)
- 3/4 cup pecans (finely chopped)
- 2 cups all-purpose flour (I use King Arthur all-purpose flour)
- 1/4 tsp salt
- 24 Hershey’s Kisses (one per cookie)
- 1 cup butter (softened to room temperature)
For coating:
- 1/2 cup confectioner’s sugar (for dusting)
Step 1: Prepare Your Mise en Place and Preheat
- Parchment paper
- 3/4 cup pecans
Start by preheating your oven to 350 degrees Fahrenheit and lining a baking sheet with parchment paper.
While the oven heats, finely chop your pecans if you haven’t already—this prep work takes just a few minutes and ensures everything is ready when you need it.
Set out your butter to ensure it’s fully softened to room temperature, as this will make mixing much easier and create a more uniform dough.
Step 2: Mix the Cookie Dough
- 1 cup butter
- 3/4 cup confectioner’s sugar
- 1 tsp vanilla
- 2 cups all-purpose flour
- 1/4 tsp salt
- 3/4 cup pecans
In a large mixing bowl, cream together the softened butter and 3/4 cup confectioner’s sugar until the mixture is light and fluffy, about 2-3 minutes.
This creaming process incorporates air into the dough, which helps create a tender, delicate cookie.
Add the vanilla extract and mix until combined.
In a separate bowl, whisk together the flour and salt, then add this dry mixture to the butter mixture along with the chopped pecans.
Mix gently until just combined—you want a soft, uniform dough without overworking it.
I find that letting the dough rest for just a minute after mixing helps it hold together better when shaping.
Step 3: Shape Cookies Around Chocolate Kisses
- Cookie dough from Step 2
- 24 Hershey’s Kisses
Working with one chocolate Kiss at a time, take approximately 1 tablespoon of dough from Step 2 and gently wrap it around each Hershey’s Kiss, encasing it completely and forming a smooth ball.
The key here is to work quickly so the dough doesn’t warm up too much, and to ensure the chocolate is fully covered so it doesn’t leak out during baking.
Place each shaped cookie on your prepared baking sheet, spacing them about 1 inch apart since they’ll spread slightly during baking.
Step 4: Bake Until Golden
Place the cookie sheet in your preheated 350-degree oven and bake for 14 to 17 minutes, until the cookies are very lightly golden around the edges but still look slightly underdone on top.
This is important—these cookies continue to cook slightly after removal from the oven and will set up as they cool.
Don’t overbake or they’ll become hard and dry.
They should look just set but still soft to the touch when you remove them.
Step 5: First Sugar Coat While Warm
- Baked cookies from Step 4
- 1/2 cup confectioner’s sugar
Remove the cookies from the oven and let them cool for just 1-2 minutes on the baking sheet.
While they’re still warm, place the 1/2 cup of confectioner’s sugar for dusting in a shallow bowl and gently roll or dip each warm cookie in the sugar, coating it generously on all sides.
The warmth helps the sugar stick better.
I like to work quickly here and do this while they’re still warm from the oven—it really makes a difference in how the coating adheres.
Step 6: Final Sugar Coat After Cooling
- Sugar-coated cookies from Step 5
- Additional confectioner’s sugar for second coating
Transfer the warm, sugar-coated cookies to a wire cooling rack and let them cool completely, about 30 minutes.
Once fully cooled, dust them again with the remaining confectioner’s sugar, rolling or dipping each cookie to create that signature double-coated, snowy appearance.
This second coating gives you the beautiful presentation these cookies are known for and ensures a generous, luxurious sugar shell.
Pecan Russian Tea Cakes with Chocolate
Ingredients
For the dough:
- 3/4 cup confectioner's sugar
- 1 tsp vanilla (pure vanilla extract)
- 3/4 cup pecans (finely chopped)
- 2 cups all-purpose flour (I use King Arthur all-purpose flour)
- 1/4 tsp salt
- 24 Hershey's Kisses (one per cookie)
- 1 cup butter (softened to room temperature)
For coating:
- 1/2 cup confectioner's sugar (for dusting)
Instructions
- Start by preheating your oven to 350 degrees Fahrenheit and lining a baking sheet with parchment paper. While the oven heats, finely chop your pecans if you haven't already—this prep work takes just a few minutes and ensures everything is ready when you need it. Set out your butter to ensure it's fully softened to room temperature, as this will make mixing much easier and create a more uniform dough.
- In a large mixing bowl, cream together the softened butter and 3/4 cup confectioner's sugar until the mixture is light and fluffy, about 2-3 minutes. This creaming process incorporates air into the dough, which helps create a tender, delicate cookie. Add the vanilla extract and mix until combined. In a separate bowl, whisk together the flour and salt, then add this dry mixture to the butter mixture along with the chopped pecans. Mix gently until just combined—you want a soft, uniform dough without overworking it. I find that letting the dough rest for just a minute after mixing helps it hold together better when shaping.
- Working with one chocolate Kiss at a time, take approximately 1 tablespoon of dough from Step 2 and gently wrap it around each Hershey's Kiss, encasing it completely and forming a smooth ball. The key here is to work quickly so the dough doesn't warm up too much, and to ensure the chocolate is fully covered so it doesn't leak out during baking. Place each shaped cookie on your prepared baking sheet, spacing them about 1 inch apart since they'll spread slightly during baking.
- Place the cookie sheet in your preheated 350-degree oven and bake for 14 to 17 minutes, until the cookies are very lightly golden around the edges but still look slightly underdone on top. This is important—these cookies continue to cook slightly after removal from the oven and will set up as they cool. Don't overbake or they'll become hard and dry. They should look just set but still soft to the touch when you remove them.
- Remove the cookies from the oven and let them cool for just 1-2 minutes on the baking sheet. While they're still warm, place the 1/2 cup of confectioner's sugar for dusting in a shallow bowl and gently roll or dip each warm cookie in the sugar, coating it generously on all sides. The warmth helps the sugar stick better. I like to work quickly here and do this while they're still warm from the oven—it really makes a difference in how the coating adheres.
- Transfer the warm, sugar-coated cookies to a wire cooling rack and let them cool completely, about 30 minutes. Once fully cooled, dust them again with the remaining confectioner's sugar, rolling or dipping each cookie to create that signature double-coated, snowy appearance. This second coating gives you the beautiful presentation these cookies are known for and ensures a generous, luxurious sugar shell.
