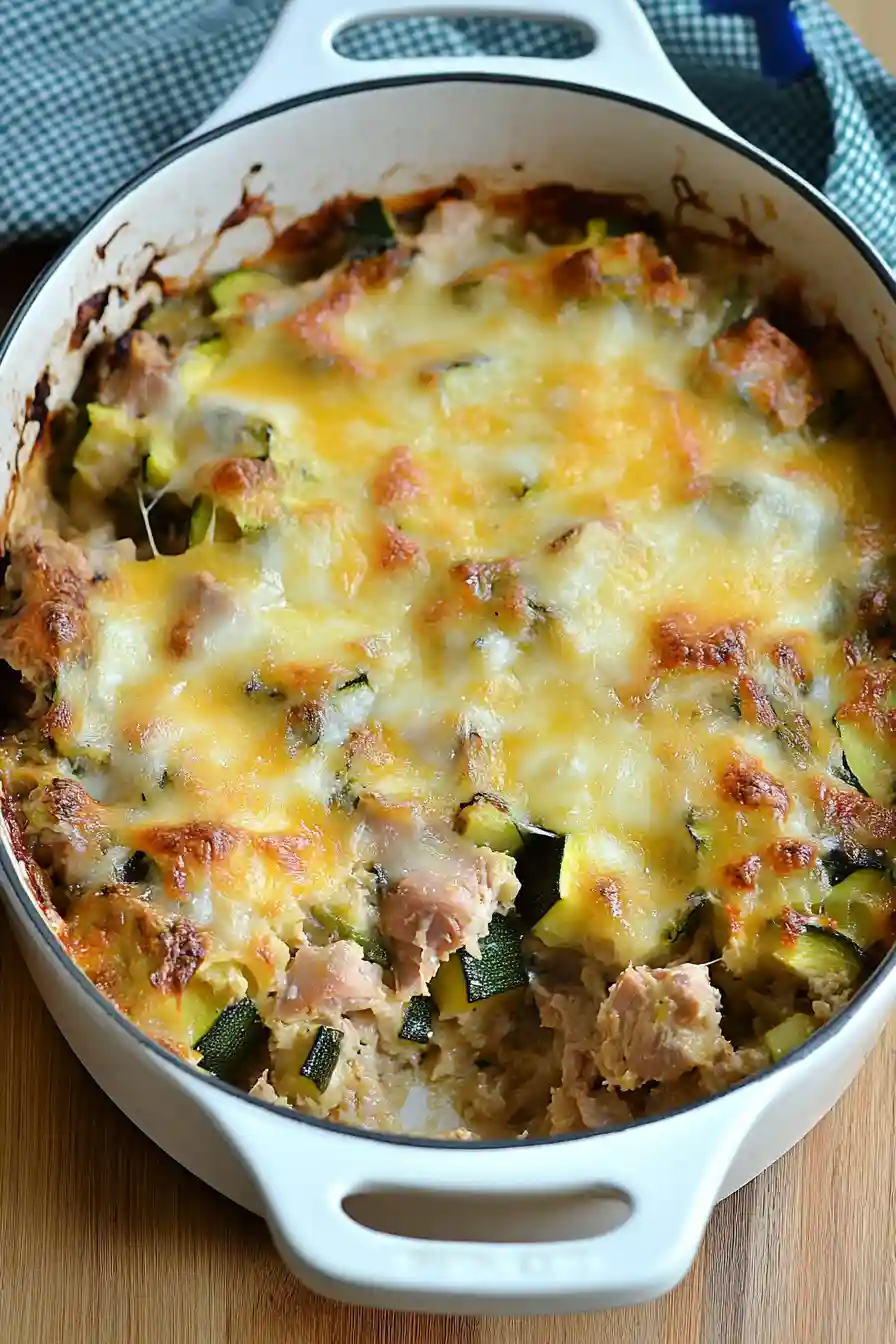
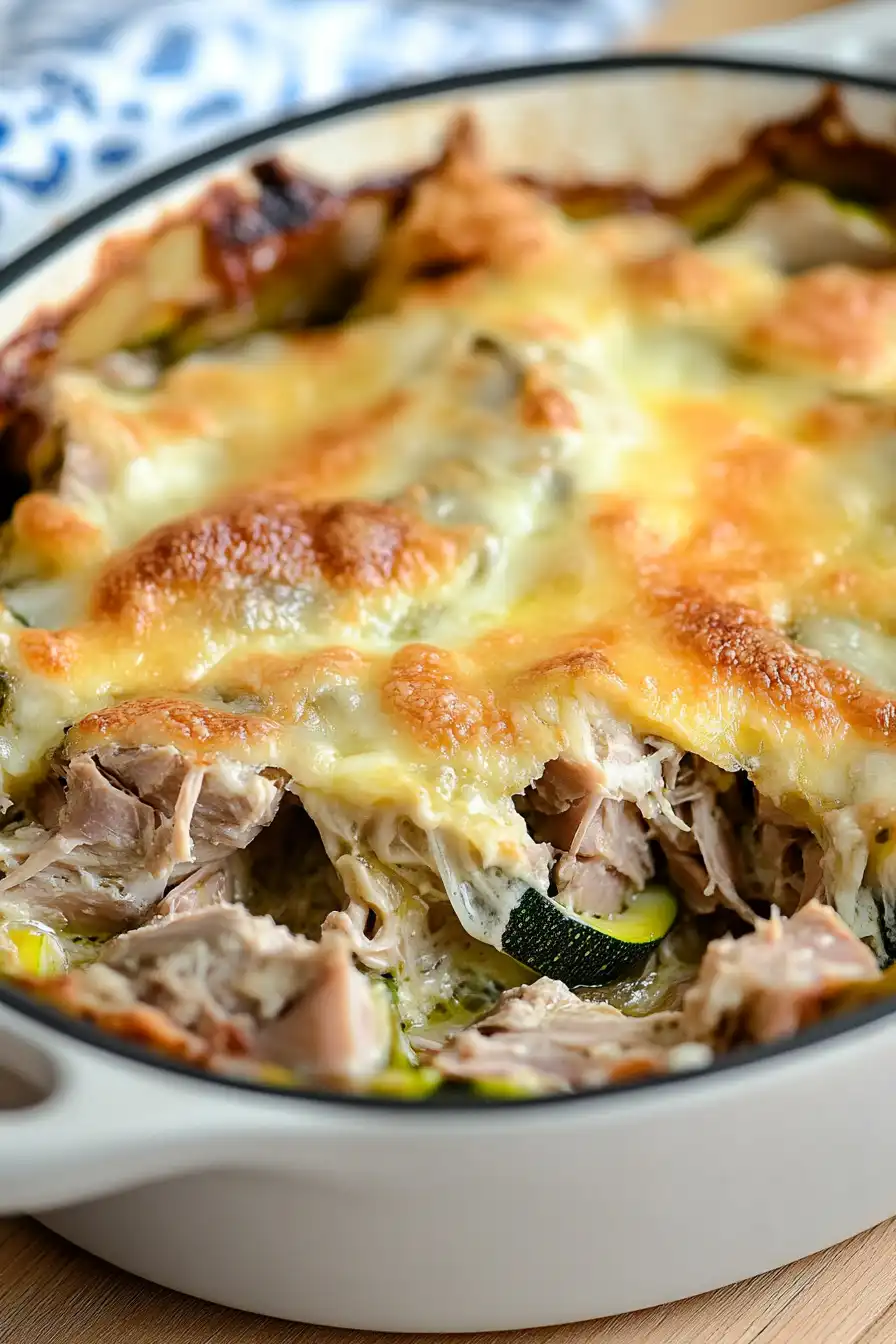
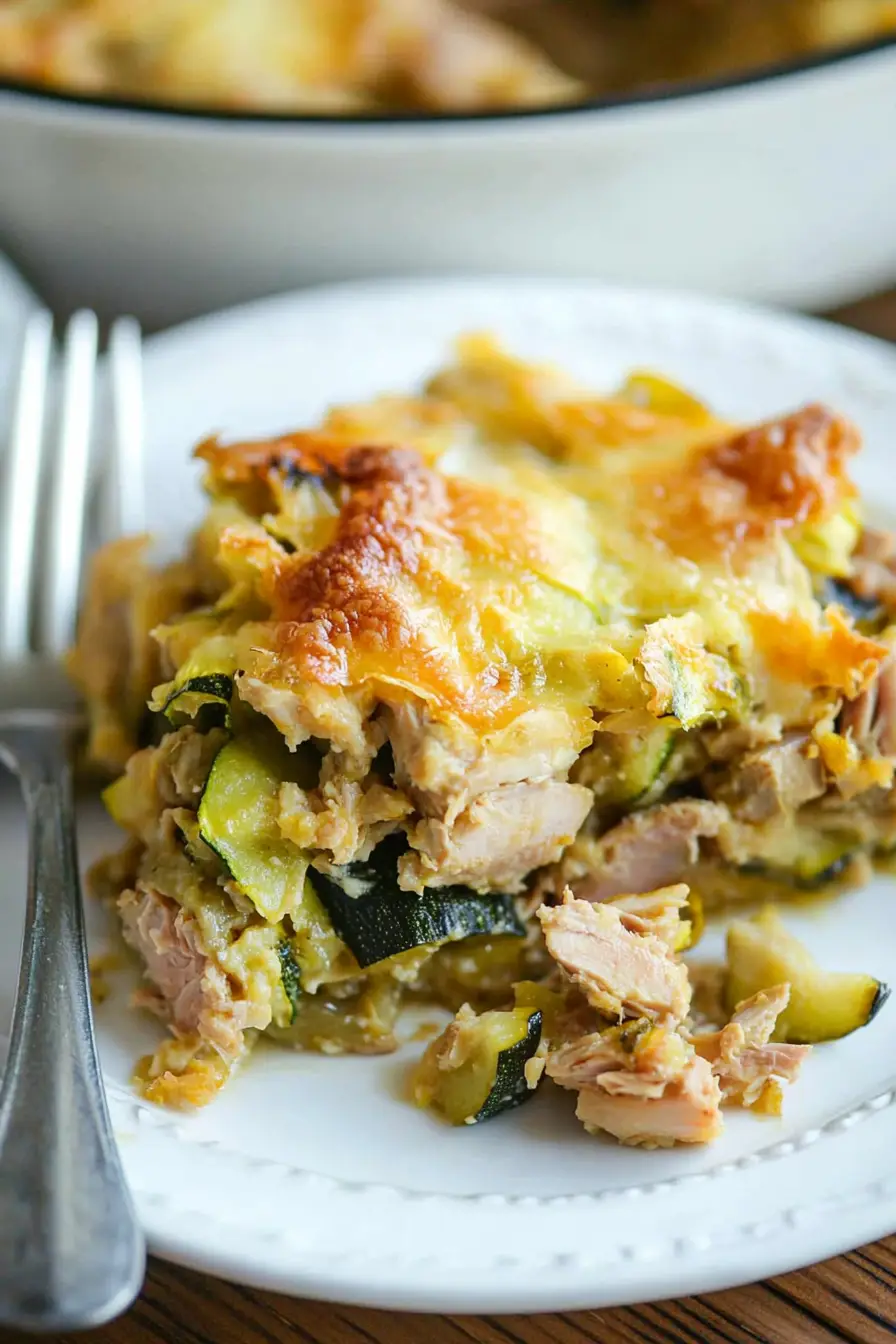
Here’s my go-to tuna zucchini casserole recipe, combining tender chunks of tuna, fresh zucchini, and a creamy sauce, all topped with a layer of crispy breadcrumbs.
This casserole has become my family’s favorite weeknight dinner option. I often make an extra batch to have for lunch the next day. And you know what? It actually tastes even better reheated!
Why You’ll Love This Tuna Zucchini Casserole
- Low-carb and protein-rich – This casserole swaps traditional pasta for zucchini, making it perfect for anyone watching their carbs while getting plenty of protein from the tuna.
- Budget-friendly ingredients – Using pantry staples like canned tuna and seasonal zucchini makes this an affordable dinner option that doesn’t sacrifice on flavor.
- Make-ahead friendly – You can prep this casserole in advance and reheat it when needed, making it perfect for busy weeknight meals or meal prep.
- Customizable recipe – The flexibility to choose your favorite cheese and swap between zucchini or summer squash lets you make this recipe your own.
Which Kind of Tuna Should I Use?
For this casserole, oil-packed tuna is the way to go since it stays more moist and flavorful than water-packed varieties. You can use either yellowfin (also called ahi) or albacore tuna – both work great, though albacore tends to be milder in flavor while yellowfin has a slightly more pronounced taste. If you’re shopping at the store, look for tuna that’s packed in olive oil rather than vegetable oil for the best flavor. While water-packed tuna can work in a pinch, you might want to add an extra drizzle of olive oil to make up for the missing moisture and richness that oil-packed tuna would normally provide.
Options for Substitutions
This casserole is pretty adaptable and you can make several swaps based on what you have in your kitchen:
- Zucchini: You can easily swap zucchini with yellow summer squash, or even use a mix of both. If you’re not a fan of either, try using sliced eggplant (just salt and drain it first) or yellow crookneck squash.
- Scallions: No scallions? Use 1 medium regular onion, finely chopped, or about 1/2 cup of chopped leeks. Just cook them a bit longer until they’re soft.
- Fresh thyme: If you don’t have fresh thyme, use 1/2 teaspoon dried thyme instead. You could also try dried herbs de Provence or Italian seasoning.
- Tuna: While tuna is key to this recipe, you can use water-packed tuna if that’s what you have – just add an extra tablespoon of olive oil to the mix. Canned salmon would also work well here.
- Cheese: The recipe is super flexible with cheese options – any good melting cheese will work. Mozzarella, provolone, or even a mix of different cheese odds and ends from your fridge would be fine.
Watch Out for These Mistakes While Cooking
The biggest challenge when making tuna zucchini casserole is dealing with excess moisture – failing to properly salt and drain your zucchini will result in a watery dish that won’t hold together. To prevent this, make sure to salt your sliced zucchini and let it sit for at least 30 minutes, then pat it thoroughly dry with paper towels before assembling the casserole. Another common mistake is using water-packed tuna without draining it well; oil-packed tuna not only adds better flavor but also helps avoid extra liquid in your casserole. When it comes to the cheese, don’t be tempted to pile on extra amounts thinking it will make the dish better – too much cheese can make the casserole greasy and heavy instead of creamy and balanced. For the best texture, let the casserole rest for 5-10 minutes after baking, allowing the cheese to set slightly and making it easier to serve clean portions.
What to Serve With Tuna Zucchini Casserole?
This cozy casserole pairs wonderfully with a simple green salad dressed in a light vinaigrette – the fresh, crisp lettuce provides a nice contrast to the warm, cheesy dish. For a heartier meal, serve it alongside some crusty French bread or garlic bread to soak up any extra juices. If you’re feeding a bigger crowd, steamed rice or quinoa makes a great base, and roasted cherry tomatoes add a nice pop of color and flavor to round out the plate. Keep in mind that since this casserole already has protein and veggies, you don’t need anything too complicated on the side!
Storage Instructions
Keep Fresh: This tuna zucchini casserole stays good in the fridge for up to 3-4 days when kept in an airtight container. The flavors actually get better after a day as everything melds together nicely. Just keep in mind that the zucchini might release a bit more liquid as it sits.
Freeze: While you can freeze this casserole, the zucchini might become a bit watery when thawed. If you decide to freeze it, wrap it well in foil and place in a freezer-safe container for up to 2 months. It’s best to thaw it overnight in the fridge before reheating.
Warm Up: To warm up leftovers, pop them in the oven at 350°F (175°C) for about 15-20 minutes, or until heated through. You can also use the microwave for quick reheating – just cover with a paper towel to catch any moisture. If it seems a bit watery after reheating, you can drain off any excess liquid.
| Preparation Time | 75-120 minutes |
| Cooking Time | 25-30 minutes |
| Total Time | 100-150 minutes |
| Level of Difficulty | Medium |
Estimated Nutrition
Estimated nutrition for the whole recipe (without optional ingredients):
- Calories: 1000-1200
- Protein: 80-90 g
- Fat: 60-70 g
- Carbohydrates: 40-50 g
Ingredients
For the zucchini:
- 2.5 tsp sea salt (or kosher salt, for drawing out moisture)
- olive oil (for greasing the baking dish)
- 1.5 lb zucchini (small, about 4-5 zucchini for best texture)
For the aromatics:
- 2 cups sliced scallions (use both white and green parts)
- 1.5 tsp fresh thyme (finely chopped, for best flavor)
- black pepper to taste (freshly ground preferred)
- 1/2 tsp salt
- 1 tbsp extra-virgin olive oil
- 1/4 tsp red pepper flakes
For the casserole assembly:
- 1.5 cups shredded cheese (such as Monterey Jack or cheddar)
- 2 cans tuna (5 oz each, drained well)
Step 1: Prep and Salt the Zucchini
Start by trimming the ends off the zucchini.
If the zucchini are small, slice them lengthwise.
For larger zucchini, cut them into batons about 3/4 inch (2cm) thick.
Place the zucchini pieces in a colander and toss them with 2 teaspoons of salt.
Allow them to drain for 1 to 2 hours, shaking and turning occasionally to encourage the excess water to drain off.
Step 2: Cook the Aromatics
Heat some olive oil in a skillet over medium heat.
Add the scallions, thyme, freshly ground pepper, chili flakes, and 1/2 teaspoon of salt.
Cook while stirring frequently until the scallions become wilted and soft, approximately 3 minutes.
Once done, remove the skillet from heat and set aside to cool slightly.
Step 3: Roast the Zucchini
Preheat your oven to 450ºF (230ºC).
Blot the drained zucchini dry using a paper towel and then toss them with a bit of olive oil on a baking sheet.
You may line the sheet with parchment paper to simplify cleanup and prevent sticking.
Spread the zucchini in an even layer, placing them cut side down, and roast in the oven just until tender, about 15 minutes.
Avoid overcooking to preserve their texture.
Step 4: Assemble the Casserole
Once roasted, remove the zucchini from the oven and arrange them in a single layer in a shallow baking dish or gratin dish so they fit snugly.
Scatter the cooked scallions evenly over the zucchini.
Drain the tuna, flake it over the scallions, and then sprinkle cheese uniformly over the top of the dish.
Step 5: Bake and Serve
Bake in the oven until the cheese is melted, lightly browned, and the casserole is fully heated, about 10 to 15 minutes.
Serve the dish warm, enjoying the delightful blend of flavors and textures.
