I’ve always loved finding new ways to make meatless versions of classic foods. The other day, my kids were asking for chicken nuggets, and I remembered how much they enjoy chickpeas in other dishes. That’s when it hit me – why not turn these protein-packed legumes into something fun and familiar?
These vegan chickpea nuggets have become a regular at our dinner table, and even my meat-loving husband reaches for seconds. They’re crispy on the outside, tender on the inside, and best of all, they’re so simple to make. I usually prep a big batch on Sunday afternoons while I’m getting ready for the week ahead.
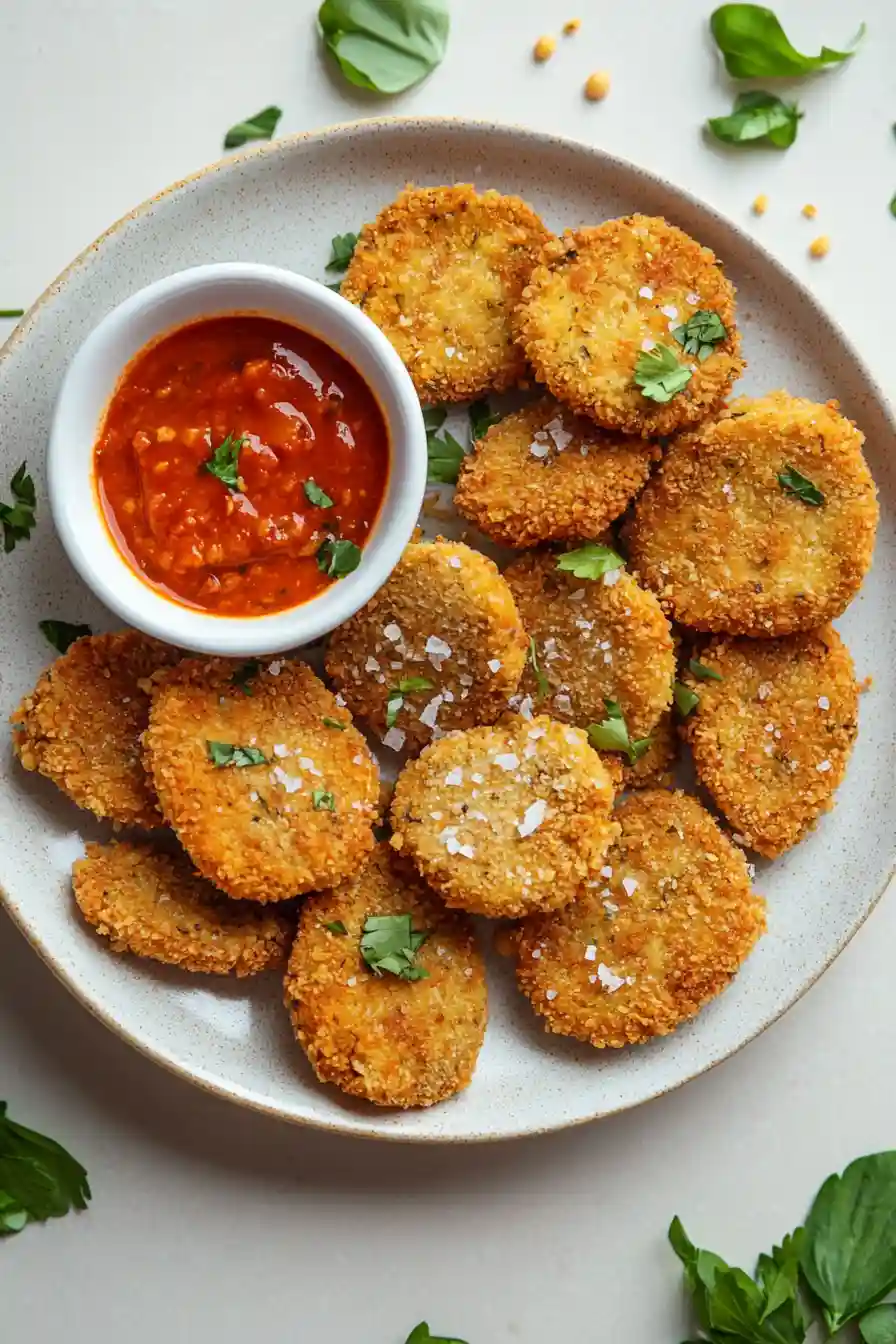
Whether you’re trying to eat more plant-based meals or just looking for a kid-friendly dinner option, these nuggets might be exactly what you need. Plus, they’re perfect for dipping – and we all know that’s half the fun!
Why You’ll Love These Chickpea Nuggets
- Plant-based protein – These nuggets are packed with protein from chickpeas and oats, making them a perfect meat-free alternative that will keep you satisfied.
- Kid-friendly – The familiar nugget shape and crispy texture make these a hit with children who might be picky about trying new plant-based foods.
- Budget-friendly ingredients – Made with pantry staples like chickpeas, oats, and basic seasonings, these nuggets are much cheaper than store-bought vegan alternatives.
- Quick preparation – You can have these nuggets ready in under 40 minutes, perfect for those busy weeknight dinners when you need something fast but nutritious.
- Customizable seasoning – The basic spice blend is just a starting point – you can easily adjust the seasonings to match your family’s taste preferences.
Which Kind of Chickpeas Should I Use?
For chickpea nuggets, canned chickpeas are your best friend since they’re pre-cooked and ready to go.
While you can certainly cook dried chickpeas from scratch, canned ones save time and still give great results.
Any brand of canned chickpeas will work well here – just make sure to drain and rinse them thoroughly to remove the excess sodium.
If you notice any loose skins floating around while rinsing, it’s helpful to remove them since this will give you a smoother texture in your finished nuggets.
When choosing canned chickpeas, look for ones without added salt so you can better control the seasoning in your recipe.

Options for Substitutions
This plant-based nugget recipe is pretty adaptable! Here are some handy swaps you can try:
- Rolled oats: Quick oats work just as well as rolled oats. You can also use breadcrumbs (regular or gluten-free) for the coating, though you might need to adjust the amount to get the right consistency.
- Nutritional yeast: If you don’t have nutritional yeast, you can skip it – it adds a nice savory flavor but isn’t crucial to the recipe. You could add an extra pinch of garlic powder instead.
- Chickpeas: Chickpeas are pretty important here as they’re the main ingredient, but in a pinch, you can use white beans. Just note that the texture might be slightly different.
- Poultry seasoning: No poultry seasoning? Mix a pinch each of dried sage, thyme, and rosemary as a substitute. Or just use Italian seasoning for a different but tasty flavor.
- Spray oil: Any cooking oil will work – just brush it on lightly instead of spraying. You can even skip the oil if you’re using parchment paper, though the nuggets won’t be quite as crispy.
Watch Out for These Mistakes While Cooking
The biggest challenge when making vegan chickpea nuggets is getting the right texture – make sure to drain and thoroughly dry your chickpeas with a paper towel, as excess moisture will make your nuggets mushy instead of crispy.
A common mistake is not processing the oats finely enough – they should be ground into a flour-like consistency in your food processor before adding the chickpeas to ensure the nuggets hold together well.
To achieve that golden-brown exterior, don’t skip the oil spray before baking, but avoid over-spraying as this can make them greasy rather than crispy. For the best results, flip the nuggets halfway through baking and give them another light spray of oil – this ensures even cooking and maximum crispiness on both sides.
Remember to let them cool for 5 minutes after baking, as they’ll continue to firm up and become easier to handle.

What to Serve With Chickpea Nuggets?
These plant-based nuggets are perfect for dipping, so I always like to set out a few sauce options like vegan ranch, BBQ sauce, or classic ketchup.
For a complete meal, serve them with crispy baked french fries or sweet potato wedges – just like you would with regular nuggets!
A simple side salad or some steamed broccoli adds nice color and freshness to the plate, while keeping things light and healthy.
If you’re packing these for lunch, they’re great in a wrap with lettuce and tomato, or on top of a grain bowl with quinoa and roasted veggies.
Storage Instructions
Keep Fresh: These chickpea nuggets stay good in an airtight container in the fridge for up to 4 days. I like to place a paper towel in the container to absorb any excess moisture and keep them from getting soggy. They make great leftovers for quick lunches or snacks!
Freeze: Want to meal prep? These nuggets freeze really well! Let them cool completely, then place them in a freezer bag or container with parchment paper between layers. They’ll keep for up to 3 months in the freezer. It’s super convenient to grab a few whenever you need a quick meal.
Crisp Up: To get these nuggets nice and crispy again, pop them in the oven at 375°F for about 10 minutes, or use an air fryer for 5-7 minutes. If reheating from frozen, add a few extra minutes to the cooking time. They’ll get that nice crispy exterior back in no time!
| Preparation Time | 15-25 minutes |
| Cooking Time | 10-15 minutes |
| Total Time | 25-40 minutes |
| Level of Difficulty | Easy |
Estimated Nutrition
Estimated nutrition for the whole recipe (without optional ingredients):
- Calories: 600-700
- Protein: 20-25 g
- Fat: 10-15 g
- Carbohydrates: 100-110 g
Ingredients
For the oat flour mixture:
- 1 tsp red pepper powder
- 1 cup oat flakes
- 1 tsp onion seasoning
- 1/2 tsp salt
- 1/2 tbsp nutritional yeast (I use Bragg Nutritional Yeast)
- 1 tsp garlic seasoning
For the chickpea mixture:
- 1/4 tsp herb mix
- 1/2 tsp garlic mix
- 1 can chickpeas (drained and rinsed well)
- 1/4 tsp sea salt
For air frying:
- oil (avocado oil works great for air frying)
Step 1: Make the Oat Flour and Seasoning Mix
Begin by blending 1 cup of oats in a blender until they become a fine oat flour, similar to all-purpose flour.
This should take about 30 seconds to 1 minute.
In a separate bowl, mix the oat flour with 1 teaspoon of garlic powder, 1/2 tablespoon of nutritional yeast, 1/2 teaspoon of salt, 1 teaspoon of paprika, and 1 teaspoon of onion powder.
Stir well to combine and set aside.
Step 2: Prepare the Chickpea Mixture
Open a 15.5-ounce (439g) can of chickpeas and save the brine for later use.
Place the chickpeas into the blender.
Add 1/2 teaspoon of garlic powder, 1/4 teaspoon of salt, and 1/4 teaspoon of poultry seasoning to the blender.
Blend until the mixture is thick and smooth, similar to hummus, without any chickpea bits remaining.
Step 3: Shape and Coat the Nuggets
Transfer the blended chickpea mixture to a bowl.
Measure out about 15 to 20 grams (or one heaping tablespoon) of the chickpea mixture and shape it into a nugget.
Dip the shaped nugget into the reserved brine of the chickpeas to coat it.
Next, roll the coated nugget in the oat flour mixture to cover it completely.
For a double breading, return the nugget to the brine of the chickpeas and then back into the oat flour mixture again to ensure it is well coated.
Place the breaded nugget on a dish and repeat the process until all the mixture is used, aiming to make about 12 nuggets.
Step 4: Air Fry the Nuggets
Preheat your air fryer.
Generously spray one side of the nuggets with spray oil before placing them in the air fryer with the sprayed side facing down.
Spray the other side with oil once they are in the air fryer.
Air fry the nuggets until they are golden and crispy, following the specific baking instructions provided in the blog post.
Optionally, spray the nuggets with a final coat of oil after cooking if there are any white spots from the flour.
Step 5: Serve and Enjoy
Once the nuggets are crispy and golden, remove them from the air fryer.
Serve with ketchup, a sprinkle of salt, and any desired greenery like fresh herbs or salad on the side.
Enjoy your delicious vegan nuggets!

can we do it in the oven don’t have an air fryer. I assume you mean by the brine the liquid from the chick pea can?