I never thought I’d fall in love with pistachio cheesecake until my sister brought mini ones to our family potluck last summer. Growing up, pistachios were just those green nuts my mom kept in a glass jar on the counter, and cheesecake was always plain or topped with cherries.
But these little treats changed everything. They’re smaller than regular cheesecakes, which means you can eat one (or two!) without feeling guilty. Plus, the nutty flavor of pistachios adds something special that regular cheesecake just doesn’t have. After begging my sister for the recipe, I’ve made these so many times I could probably do it in my sleep.
Why You’ll Love These Mini Cheesecakes
- Make-ahead friendly – These little treats can be prepared up to 3 days in advance, making them perfect for parties or when you want to plan ahead.
- No-bake recipe – You don’t need to turn on your oven – just mix, chill, and enjoy. It’s perfect for warm summer days when you’re craving cheesecake but don’t want to heat up the kitchen.
- Perfectly portioned – Individual servings mean no messy cutting or serving, plus they’re great for portion control and look cute on any dessert table.
- Customizable flavor – The recipe works with various nut butters and spreads, so you can easily switch up the flavor to match your preferences or what you have in your pantry.
What Kind of Pistachio Paste Should I Use?
Pure pistachio paste is the star ingredient here, and you’ll want to look for one that contains just pistachios (or pistachios and a small amount of oil) in the ingredients list. You can find it at specialty food stores, Middle Eastern markets, or online retailers – just avoid pistachio “spreads” that contain added sugar or other fillers, as these will change the texture and flavor of your cheesecakes. If you can’t track down pistachio paste, you can make your own by processing shelled, unsalted pistachios in a food processor until they form a smooth, creamy paste. And as noted in the recipe, you can also swap in other nut butters like almond or hazelnut if pistachio paste isn’t available.
Options for Substitutions
This mini cheesecake recipe is pretty adaptable – here’s what you can swap out:
- Vanilla wafer cookies: Don’t have vanilla wafers? Graham crackers, digestive biscuits, or even gingersnaps make great alternatives for the crust. Just use the same amount by weight.
- Pistachio paste: Can’t find pistachio paste? The recipe already suggests alternatives like peanut butter, almond butter, or hazelnut spread. Each will give you a different but equally tasty flavor profile.
- Cream cheese: This is a must-have ingredient that shouldn’t be substituted as it’s the base of the cheesecake. Make sure it’s at room temperature for the best results.
- Heavy cream: While heavy cream is best for the right texture, you can use whipping cream instead. Just avoid using half-and-half or milk as they won’t whip up properly.
- Vanilla essence: Feel free to use vanilla extract, vanilla bean paste, or even scrape a vanilla pod. If using vanilla bean paste, use the same amount.
- Granulated sugar: You can swap this with caster sugar or even brown sugar (though this will change the color slightly). If using brown sugar, pack it when measuring.
Watch Out for These Mistakes While Baking
The biggest challenge when making mini cheesecakes is temperature control – make sure your cream cheese is truly at room temperature (leave it out for at least 2 hours) to avoid lumpy batter, and beat it until completely smooth before adding other ingredients. Another common mistake is overmixing the batter once you’ve added the heavy cream, which can lead to dense, heavy cheesecakes – instead, fold it in gently just until combined. When it comes to the crust, pressing it too firmly into the pan can make it tough and hard to eat, so use moderate pressure with your fingers or the back of a spoon. For perfect results, don’t skip the water bath (even for minis!) as it prevents cracking and helps them bake evenly, and always let them cool completely in the fridge for at least 4 hours before attempting to remove them from the pan.

What to Serve With Mini Pistachio Cheesecakes?
These little pistachio cheesecakes are perfect for serving with a hot beverage like Turkish coffee or a creamy chai tea latte that complements the nutty flavors. If you want to create a dessert board, try pairing them with fresh berries, particularly raspberries or strawberries, which offer a nice tart contrast to the rich, creamy cheesecakes. For an extra special touch, drizzle some honey or chocolate sauce on the plate, and add a scoop of vanilla bean ice cream on the side. These mini treats also go wonderfully with other small desserts like chocolate-covered strawberries or macarons for an elegant dessert platter.
Storage Instructions
Keep Fresh: These mini pistachio cheesecakes will stay fresh in an airtight container in the fridge for up to 5 days. I like to wait to add the whipped cream and chopped pistachio garnish until right before serving – this keeps everything looking picture-perfect!
Freeze: Want to plan ahead? These little treats freeze really well! Place them in a freezer-safe container (without the garnishes) and they’ll keep for up to 3 months. Just place a piece of parchment paper between layers if you need to stack them.
Thaw: When you’re ready to enjoy your frozen cheesecakes, move them to the fridge the night before to thaw slowly. This helps maintain that smooth, creamy texture we all love. Once thawed, add your fresh toppings and enjoy!
Make Ahead: These cheesecakes are perfect for making ahead! You can prepare them up to 2 days before your event – just keep them in the fridge and add the toppings right before serving. The flavors actually get even better after a day or two!
| Preparation Time | 30-45 minutes |
| Cooking Time | 0-5 minutes |
| Total Time | 480-510 minutes |
| Level of Difficulty | Medium |
Estimated Nutrition
Estimated nutrition for the whole recipe (without optional ingredients):
- Calories: 1800-2000
- Protein: 20-25 g
- Fat: 140-150 g
- Carbohydrates: 130-150 g
Ingredients
For the crust:
- 3 tbsp unsalted butter (melted and cooled)
- 1 1/2 cups vanilla wafer crumbs
- 1 pinch fine sea salt
For the filling:
- 1/4 tsp fine sea salt
- 1 cup heavy cream (cold, for whipping)
- 1/2 cup pistachio paste (for best color and flavor)
- 2 tbsp powdered sugar
- 8 oz cream cheese (softened, at room temperature)
- 1/4 cup granulated sugar
- 1 tsp vanilla essence
For the garnish (optional):
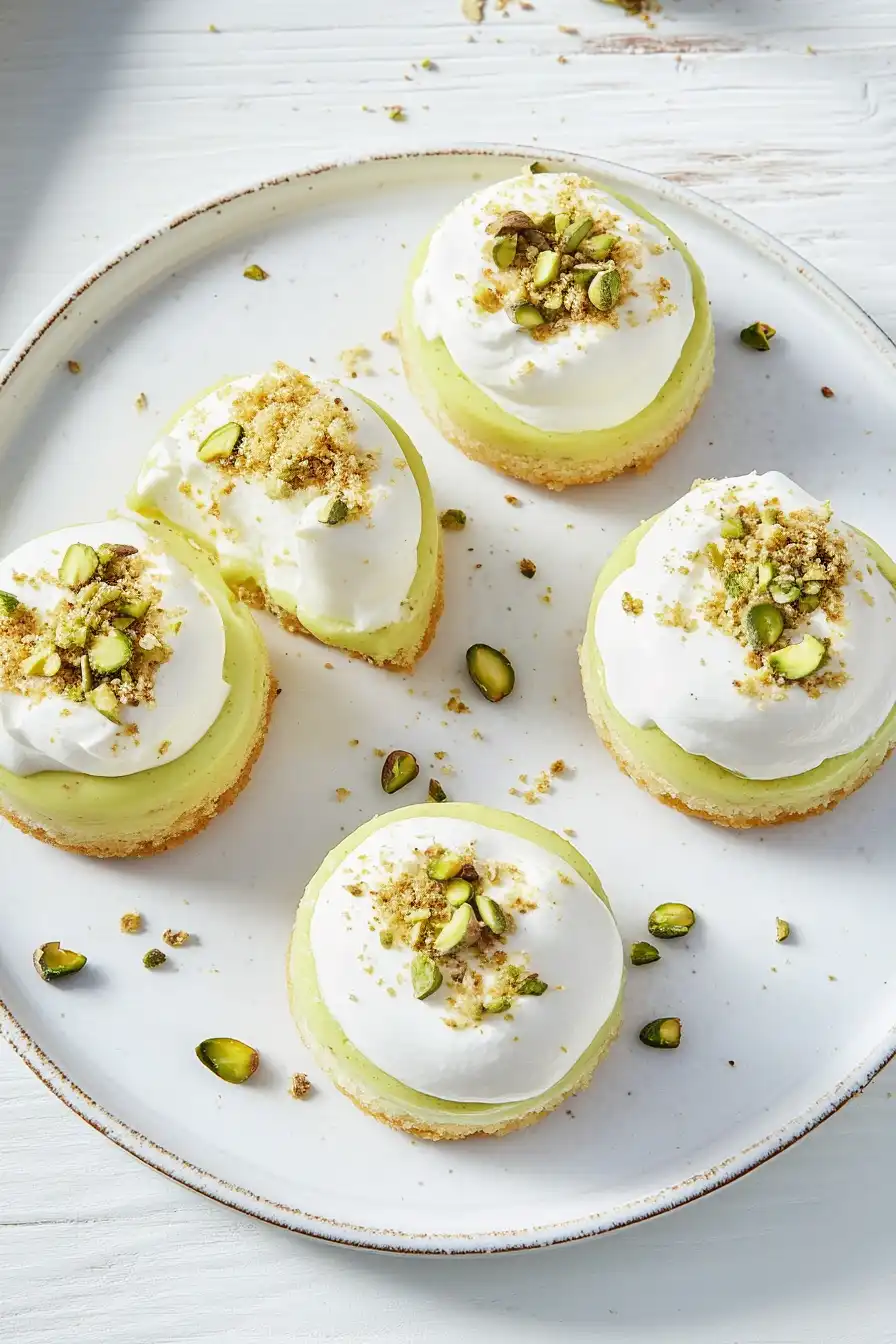
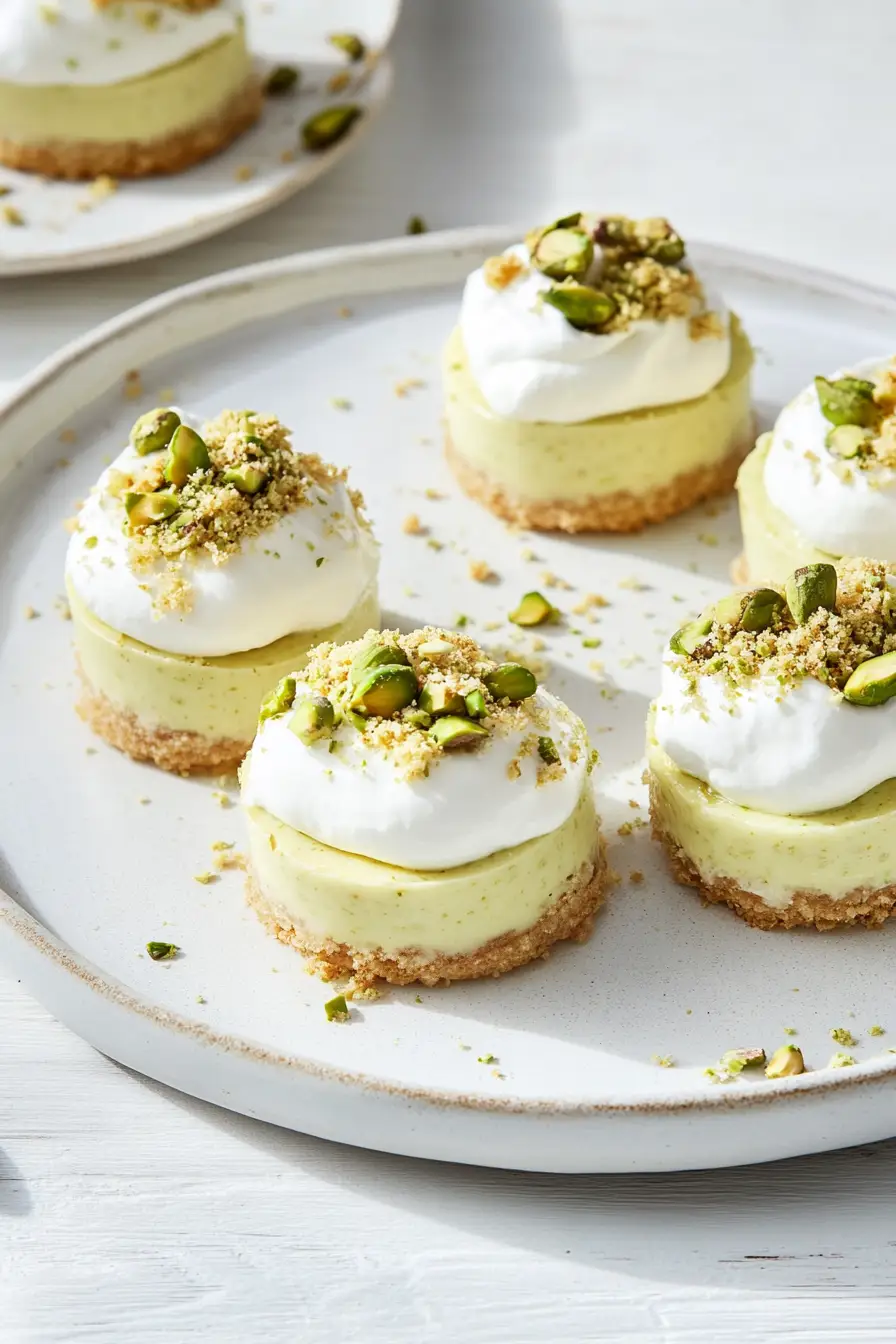
- chopped pistachios (for a nice finishing crunch)
- whipped cream
Step 1: Prepare the Cookie Crust
In a food processor, pulse the cookies until they turn into fine crumbs.
Alternatively, you can place the cookies in a large zip-top bag and crush them with a rolling pin by hand.
Add melted butter and a pinch of salt to the crumbs, then pulse again to combine everything evenly.
Step 2: Form and Freeze the Crusts
Lightly grease a 12-cup muffin pan with nonstick spray.
You can also line the pans with muffin liners for easier removal later.
Divide the cookie mixture evenly among the muffin cups.
Press the mixture firmly into the base and about halfway up the sides of each cup to form the crusts.
Freeze the crusts for at least 30 minutes or up to overnight to allow them to firm up.
Step 3: Make the Cheesecake Filling
In the bowl of a stand mixer fitted with the whip attachment, combine the cream cheese and pistachio paste.
Whip on medium speed for 2 minutes until well-mixed.
Add the granulated sugar and confectioners’ sugar and whip for another 2 minutes.
Incorporate the vanilla and salt by mixing briefly.
With the mixer running on medium speed, slowly add the cream, a little at a time, until fully incorporated.
Continue whipping for 2 to 3 more minutes, until the mixture is thick and creamy.
Step 4: Fill and Chill the Cheesecakes
Divide the creamy cheesecake mixture evenly among the prepared crust-lined muffin cups.
Spread the mixture into an even layer in each cup.
Refrigerate for at least 8 hours to allow the cheesecakes to set.
Use a small offset spatula or paring knife to gently loosen the edges of the chilled cheesecakes.
Carefully lift them out of the pan and transfer to a serving platter.
Keep the cheesecakes chilled until you’re ready to serve them, as they will soften at room temperature.
Step 5: Garnish and Serve
Before serving, top the cheesecakes with whipped cream and a sprinkle of pistachios, if desired.
Enjoy your delicious homemade pistachio cheesecakes!
