Growing up, I thought making a fancy cake roll meant hours in the kitchen and a counter covered in flour. My mom would only attempt them for special occasions, and even then, they sometimes cracked or came out looking a bit wonky.
That was before I discovered the magic of using cake mix for rolls. This red velvet version has become my go-to when I need something that looks like I spent all day baking, but actually only takes about an hour. And the best part? It’s almost impossible to mess up – even my teenage daughter got it right on her first try.
Why You’ll Love This Red Velvet Cake Roll
- Shortcut-friendly recipe – Starting with a cake mix makes this impressive dessert much easier than a from-scratch version, while still delivering that classic red velvet taste everyone loves.
- Make-ahead friendly – You can prepare this cake roll up to 2 days in advance and keep it refrigerated, making it perfect for holiday planning or special occasions.
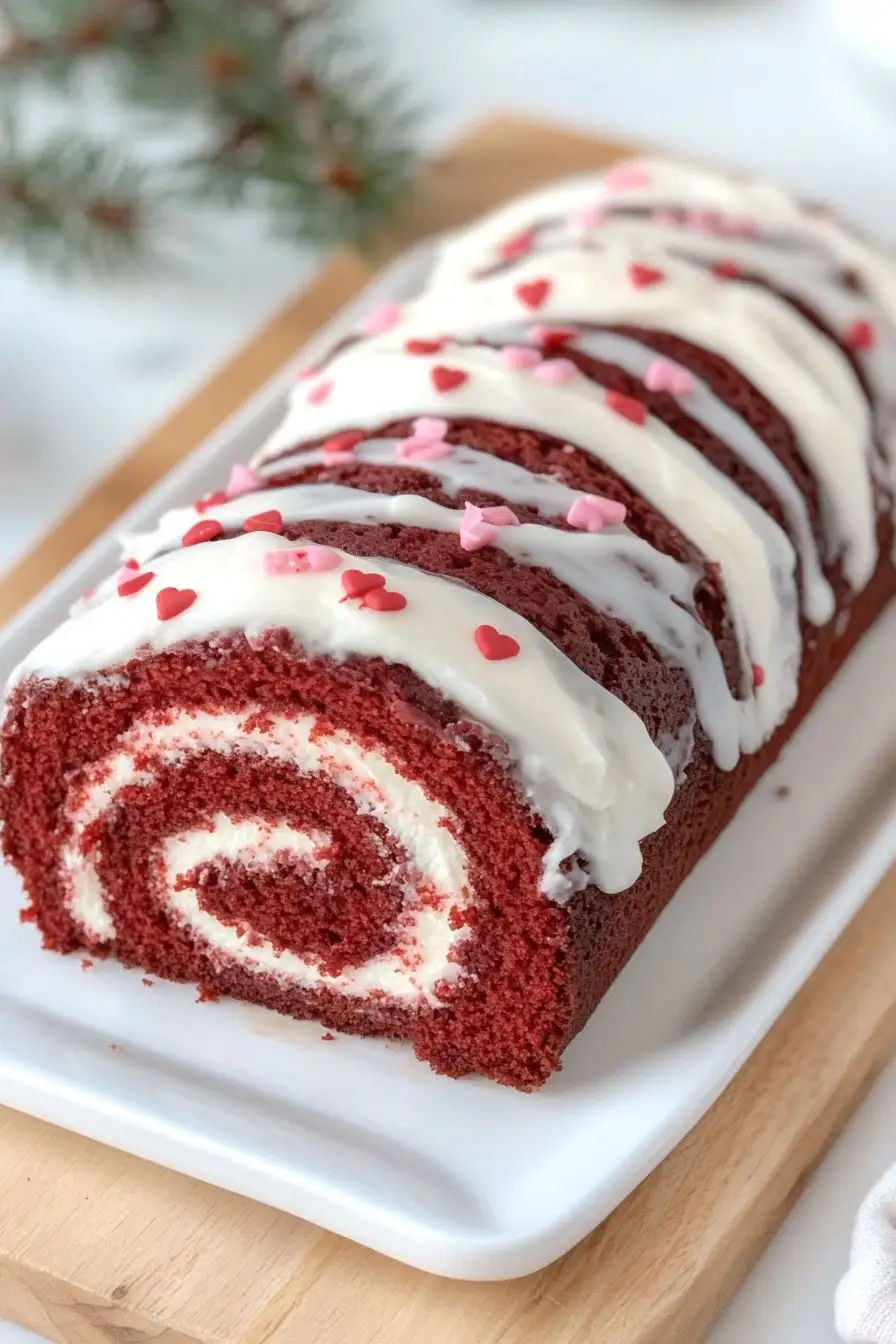
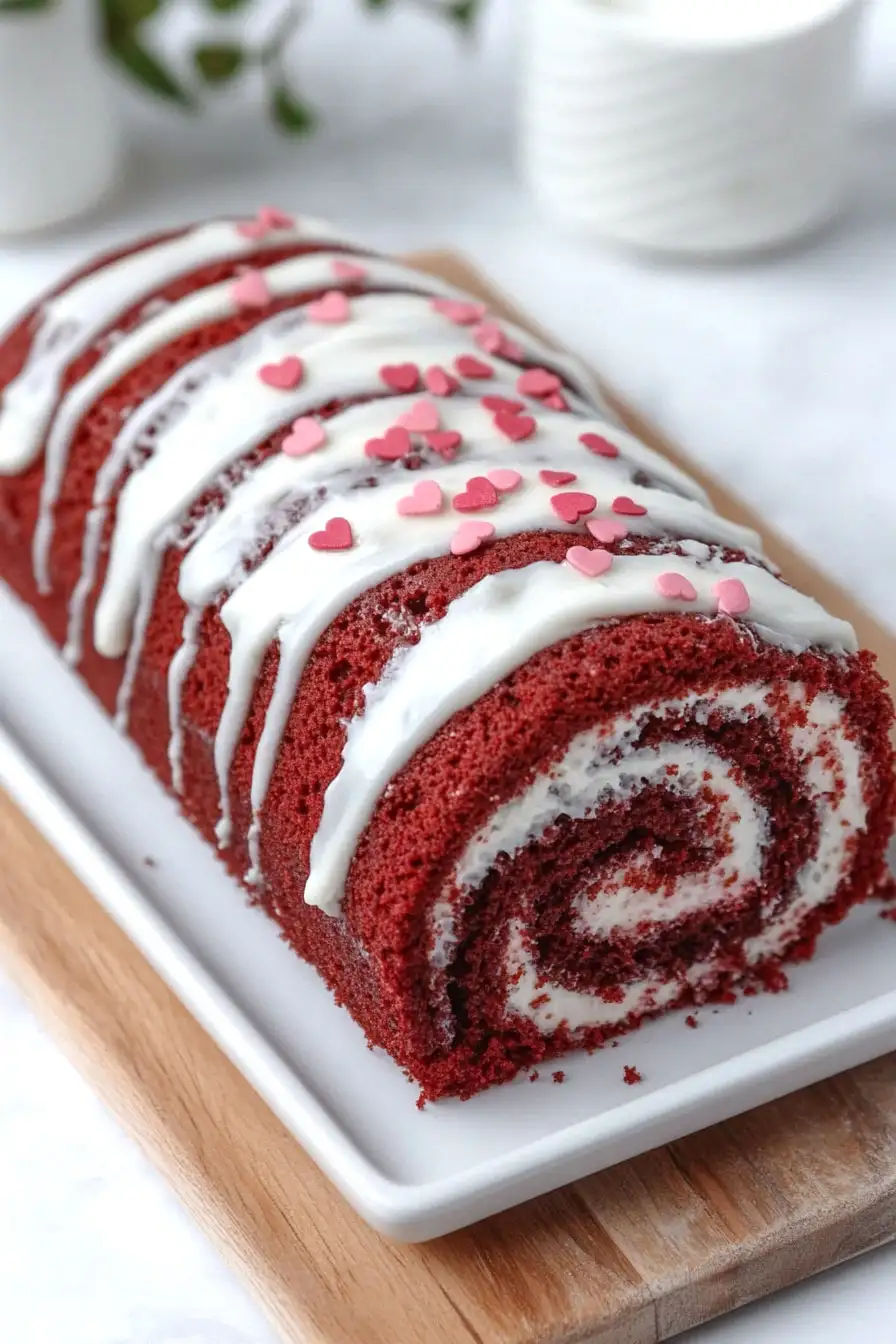
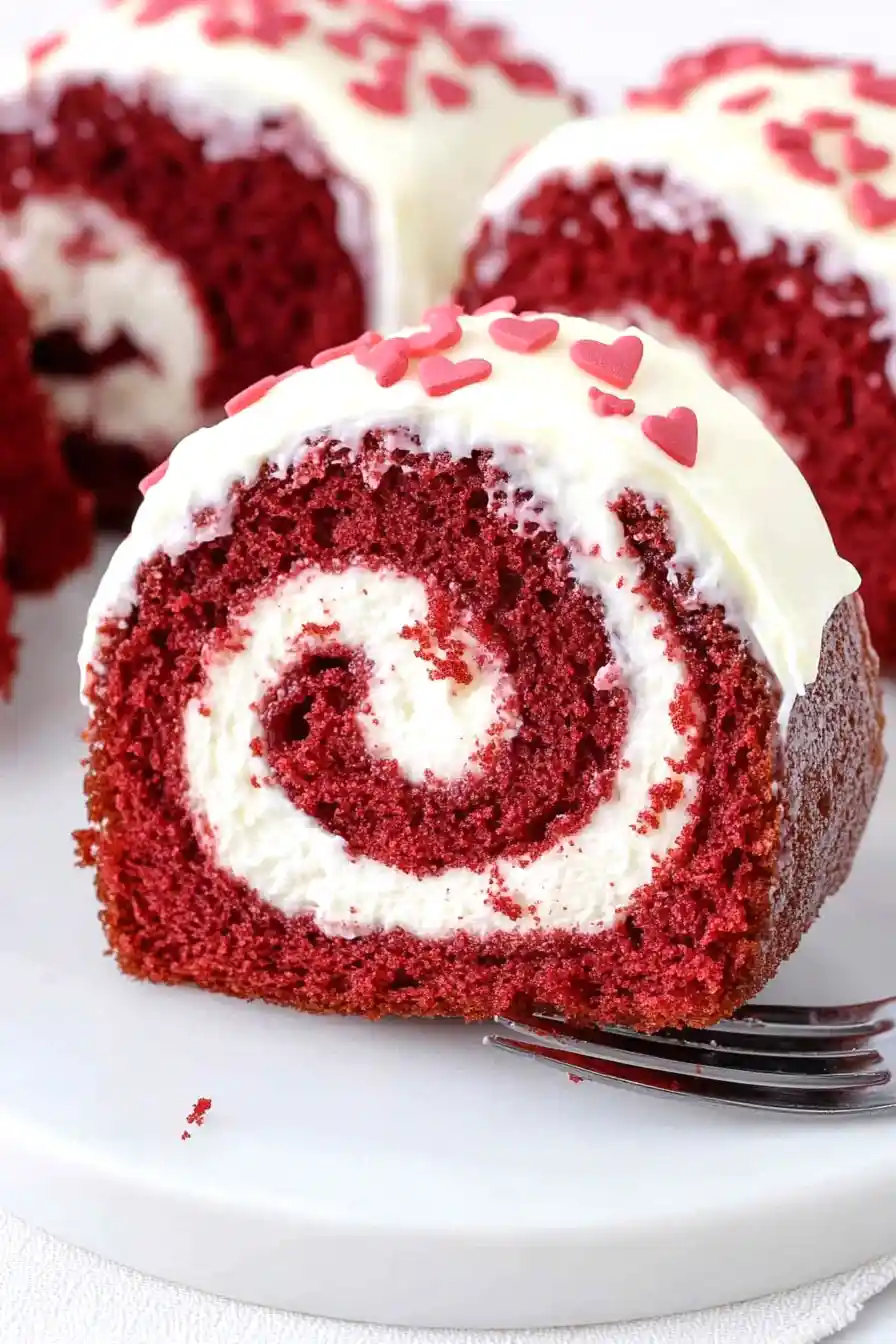
- Show-stopping presentation – The swirled cream filling and red velvet spiral create a beautiful dessert that looks like it came from a fancy bakery – but you made it yourself!
- Crowd-pleasing flavor – The combination of moist red velvet cake, creamy vanilla filling, and white chocolate drizzle makes this a dessert that disappears fast at any gathering.
What Kind of Red Velvet Cake Mix Should I Use?
When it comes to red velvet cake mix, most major brands like Betty Crocker, Duncan Hines, or Pillsbury will work well for this roll cake. While some bakers might prefer one brand over another, the key is to look for a mix that specifically says “red velvet” rather than trying to create the color and flavor from a white cake mix. If you’re watching artificial colors, several brands now offer naturally colored red velvet mixes that use beet powder instead of red food coloring. Just keep in mind that store-brand cake mixes sometimes contain less leavening, which could affect how well your cake rolls, so sticking with well-known brands might be your safest bet for this particular recipe.
Options for Substitutions
Need to make some swaps? Here are some helpful substitutions for this cake roll recipe:
- Red velvet cake mix: While red velvet gives this roll its classic look and taste, you can use other cake mix flavors like chocolate or vanilla. Just add 2-3 tablespoons of cocoa powder and red food coloring to regular cake mix for a similar effect.
- Heavy cream: For the filling, you can use half-and-half or whole milk instead of heavy cream, though you might need less to achieve the right consistency.
- White chocolate: Feel free to swap white chocolate with milk or dark chocolate for drizzling. You could also skip it entirely and just use extra sprinkles for decoration.
- Cooking oil: Any neutral-flavored oil works here – canola, vegetable, or even melted coconut oil are good options.
- Valentine’s sprinkles: Any sprinkles will work! Try rainbow jimmies, nonpareils, or even colored sugar for a different look. You can also leave them out if you prefer a simpler design.
- Butter: For the filling, you can use margarine, though the taste won’t be quite the same. Just make sure it’s well softened for the best texture.
Watch Out for These Mistakes While Baking
The biggest challenge when making a cake roll is preventing cracks, which often happen when the cake is either over-baked or rolled while too cool – check your cake at 12 minutes and remove it as soon as it springs back when lightly touched.
For a perfect spiral, you must roll the cake while it’s still warm (but not hot) in a clean kitchen towel dusted with powdered sugar, and let it cool completely in this rolled position before unrolling to add the filling.
Don’t skip the step of removing the cake from the pan immediately after baking and onto the powdered sugar-dusted towel, as letting it cool in the pan will make it stick and tear.
When spreading the filling, leave a 1/2-inch border around all edges to prevent overflow, and if your frosting seems too thick, gradually add heavy cream one tablespoon at a time until it reaches a spreadable consistency that won’t tear the cake.
What to Serve With Red Velvet Cake Roll?
This red velvet cake roll is perfect with a hot cup of coffee or tea, making it ideal for afternoon gatherings or dessert time. If you want to make it extra special, add a scoop of vanilla ice cream on the side – the cold, creamy ice cream pairs wonderfully with the rich cake roll. For a quick and easy drink pairing, cold milk is always a good choice, especially since it helps balance out the sweetness of the cream cheese filling. You could also serve it with some fresh berries on the side to add a bright, fresh element to the plate.
Storage Instructions
Keep Fresh: Once you’ve rolled up this beautiful cake, wrap it tightly in plastic wrap and keep it in the fridge. It’ll stay fresh and tasty for up to 5 days. The cream filling actually helps keep the cake nice and moist, which is a big plus!
Freeze: Want to plan ahead? You can freeze your cake roll for up to 2 months! Just wrap it well in plastic wrap, then add a layer of aluminum foil. When you’re ready to serve, let it thaw overnight in the fridge – it’s that simple.
Make Ahead: This cake roll is perfect for making a day before your special event. In fact, I think it tastes even better after the flavors have had time to mingle in the fridge overnight. Just add any extra sprinkles or white chocolate drizzle right before serving so they look fresh and pretty.
| Preparation Time | 30-45 minutes |
| Cooking Time | 14-16 minutes |
| Total Time | 2 hours 30 minutes – 2 hours 55 minutes |
| Level of Difficulty | Medium |
Estimated Nutrition
Estimated nutrition for the whole recipe (without optional ingredients):
- Calories: 4500-5000
- Protein: 40-50 g
- Fat: 220-240 g
- Carbohydrates: 600-650 g
Ingredients
For the cake:
- 1/2 cup water
- 1 box red velvet cake mix (I like Duncan Hines Signature Red Velvet)
- 1/4 cup cooking oil (a neutral oil like vegetable or canola works well)
- 6 eggs (large, at room temperature for better emulsion)
For the buttercream frosting:
- 3 to 4 tbsp heavy cream (adds richness and creaminess)
- 3 cups powdered sugar (sifted to prevent lumps)
- 1 cup softened butter (unsalted, at room temperature)
- 1 tsp vanilla extract (pure vanilla for best flavor)
- 3 tbsp valentine’s sprinkles
For the garnish:
- additional valentine’s sprinkles
- 2 oz white chocolate
Step 1: Prepare the Baking Equipment
Preheat your oven to 350°F (175°C).
Line a 10x15x1 inch baking sheet with parchment paper, then spray the paper with nonstick cooking spray to ensure easy removal.
Set the baking sheet aside.
Next, line one muffin tin with 5 paper liners and set it aside for the cupcake batter.
Step 2: Prepare the Cake Batter
Add the eggs to a mixer and beat them on high speed for 5-6 minutes.
This should create a bubbly and frothy mixture.
Incorporate the cake mix, water, and oil into the eggs.
Beat the mixture on low speed for 30 seconds and scrape down the sides of the bowl.
Then, switch to medium speed and beat for an additional minute until everything is well combined.
Step 3: Divide and Bake the Batter
Pour approximately 3-1/2 cups of the batter onto the prepared baking sheet and spread it evenly to ensure a uniform bake.
Use a 3-tablespoon portion scoop to transfer the remaining batter into the 5 cupcake liners.
Bake both the sheet cake and the cupcakes for 14-16 minutes, or until a toothpick inserted into the center comes out clean.
Once done, remove from the oven and set aside.
Allow the cupcakes to cool completely before frosting and enjoying them.
Step 4: Prepare the Cake Roll
Generously sprinkle powdered sugar onto a thin, clean towel.
After the cake sheet has cooled for about 10 minutes, remove it from the pan and place the cake onto the powdered sugar-covered towel, discarding the parchment paper.
Starting from a short end, roll both the towel and cake into a log shape.
Set the rolled cake aside to cool completely before frosting.
Step 5: Make the Buttercream Frosting
In a clean mixing bowl, beat the butter for 2 minutes until creamy.
Gradually add the powdered sugar and vanilla, beating slowly at first, then increasing to high speed for another 2 minutes.
Add enough cream to achieve a spreadable consistency.
Gently fold in sprinkles for added color and crunch.
Step 6: Assemble the Cake Roll and Final Touches
Carefully unroll the cooled cake.
Spread a generous layer of the prepared buttercream frosting on top.
Gently roll the cake back up and wrap it tightly with plastic wrap.
Refrigerate the roll for at least 2 hours or until you are ready to serve.
Before serving, unwrap the cake roll.
Melt chocolate according to package instructions, then drizzle it over the top of the roll.
Decorate with Valentine sprinkles and let it stand for about 10 minutes to allow the chocolate to harden.
Step 7: Serve and Store
Slice the cake roll into approximately 12 one-inch wide slices for serving.
Store any leftovers covered and in the refrigerator to maintain freshness.
