Growing up, dessert meant sugar-laden everything – especially when it came to pie. My mom’s cherry pie was basically a sugar bomb with fruit mixed in. Don’t get me wrong, it was good, but these days I try to watch my sugar intake a bit more carefully.
That’s why I started experimenting with sugar-free versions of my favorite desserts. It took some trial and error (and a few pies that tasted like cardboard), but I finally cracked the code on a cherry pie that’s naturally sweet without any added sugar. Trust me, if I served this at a family gathering without saying anything, nobody would guess it’s sugar-free.

Why You’ll Love This Cherry Pie
- Naturally sweetened – Using honey and coconut sugar instead of refined sugar means you can enjoy this classic dessert without the sugar crash afterward.
- Simple ingredients – With just a handful of basic ingredients and a ready-to-use crust, you don’t need any special items to make this pie.
- Perfect balance of flavors – The combination of tart cherries, natural sweeteners, and bright lemon creates a filling that’s not too sweet and not too sour.
- Make-ahead friendly – This pie can be prepared in advance and stored in the fridge, making it perfect for holiday planning or weekend baking.
What Kind of Cherries Should I Use?
For pie-making, you’ve got two main cherry options: sweet or tart (also called sour) cherries. Tart cherries like Montmorency are traditionally used in pies because their natural tartness creates the perfect balance when combined with sweeteners. Sweet cherries, such as Bing or Rainier, can also work well – just keep in mind they might make your pie a bit sweeter overall. If you’re using fresh cherries, look for firm, bright fruits without bruising or soft spots. Don’t worry if you can’t find fresh cherries though – frozen cherries work great in pies and are often picked at peak ripeness, plus they come pre-pitted which saves you lots of prep time.
Options for Substitutions
Looking to make some swaps in this sugar-free cherry pie? Here are some helpful substitutions:
- Cherries: Fresh cherries are great, but frozen cherries work just as well – just thaw and drain them first. You can even mix sweet and tart cherries for a nice balance of flavors.
- Honey: You can swap honey with maple syrup or agave nectar in equal amounts. Each will bring its own subtle flavor, but they’ll all work well in this pie.
- Coconut sugar: Any granulated sugar substitute like monk fruit sweetener or erythritol will work here. Just start with a bit less as some alternatives are sweeter than coconut sugar.
- Cornstarch: Arrowroot powder or tapioca starch can replace cornstarch – use the same amount. Just note that tapioca might give a slightly more glossy finish.
- Heavy cream: For brushing the crust, you can use beaten egg instead of heavy cream, or even milk. Each option will give you a nice golden brown top.
- Ready-to-use pie crust: While a ready-made crust is convenient, you can use any homemade pie crust recipe. For a gluten-free option, look for gluten-free pie crusts in your grocery store’s freezer section.
Watch Out for These Mistakes While Baking
The biggest challenge when making sugar-free cherry pie is dealing with excess liquid – cherries naturally release a lot of juice during baking, which can lead to a soggy bottom crust if not properly managed. To prevent a runny filling, make sure to thoroughly mix your cornstarch with the cherry mixture and let it sit for 10 minutes before filling the pie, allowing the cornstarch to properly bind with the juices. Another common mistake is underbaking the bottom crust – starting your pie on the lowest oven rack for the first 20 minutes helps ensure a crispy bottom, then move it to the center to finish baking. For the perfect golden-brown top crust, don’t skip the heavy cream brush, but be careful not to let it drip down the sides, as this can glue your crust to the pie plate – apply it gently with a pastry brush just on the top surface.
What to Serve With Cherry Pie?
A slice of cherry pie practically begs for a scoop of vanilla ice cream – even better if it’s still slightly warm so the ice cream starts to melt! If you’re sticking to sugar-free options, try it with some sugar-free vanilla ice cream or fresh whipped cream (you can sweeten it with your favorite sugar substitute). For a morning treat, serve your pie with a hot cup of coffee or tea, which helps balance out the natural sweetness of the cherries and honey. You might also like to add a dollop of Greek yogurt for a tangy contrast that works really well with the fruit.
Storage Instructions
Counter or Fridge: Your sugar-free cherry pie can hang out on the counter for about 2 days, covered with foil or plastic wrap. If you want it to last longer, pop it in the fridge where it’ll stay good for up to 5 days. Just cover it well to keep other food smells out!
Freeze: This pie freezes really well! Let it cool completely, then wrap it tightly in plastic wrap and aluminum foil. You can keep it frozen for up to 4 months. I like to freeze individual slices too – they’re perfect for when you need a quick dessert fix!
Enjoy Later: When you’re ready to dig into your frozen pie, let it thaw overnight in the fridge. Want it warm? Heat individual slices in the oven at 350°F for about 10-15 minutes. The crust will get nice and crispy again, and the filling will be just right.
| Preparation Time | 25-35 minutes |
| Cooking Time | 75-90 minutes |
| Total Time | 100-125 minutes |
| Level of Difficulty | Medium |
Estimated Nutrition
Estimated nutrition for the whole recipe (without optional ingredients):
- Calories: 2200-2500
- Protein: 20-25 g
- Fat: 100-120 g
- Carbohydrates: 350-400 g
Ingredients
For the pie crust and topping:
- 1 package double pie crust (Pillsbury is my favorite for convenience)
- heavy cream
For the filling:
- 3 cups pitted cherries (fresh or frozen, thawed)
- 3/4 cup honey (local honey for best flavor)
- 3 tbsp salted butter (cold and cut into small cubes)
- 1/4 cup coconut sugar
- 3 tbsp cornstarch
- 1 cup lemon juice (freshly squeezed for brighter taste)
Step 1: Prepare the Oven and Pie Plate
Preheat your oven to 400 degrees F (200 degrees C) and line a baking sheet with a baking liner to catch any juices that might bubble over.
This will help keep your oven clean and make cleanup a breeze.
Step 2: Prepare the Cherry Filling
Pit the cherries and place them in a bowl.
Add coconut sugar, lemon juice, and cornstarch to the cherries, stirring to coat them well.
Let the cherries soak for ten minutes to help extract excess juices.
After soaking, drain any excess juice and mix in the honey until the cherries are well-coated and no dry lumps of cornstarch remain.
Stir for about 3 to 4 minutes.
Step 3: Assemble the Bottom Pie Crust
Roll out half of the pastry to fit a 10-inch pie plate.
Place the rolled-out pastry into the pie plate, ensuring it’s pressed firmly into the edges.
Pour the prepared cherry filling into the pie shell and gently tap the pie plate against a surface to settle the filling.
Dot the top of the filling with small pieces of butter to add richness and flavor as it bakes.
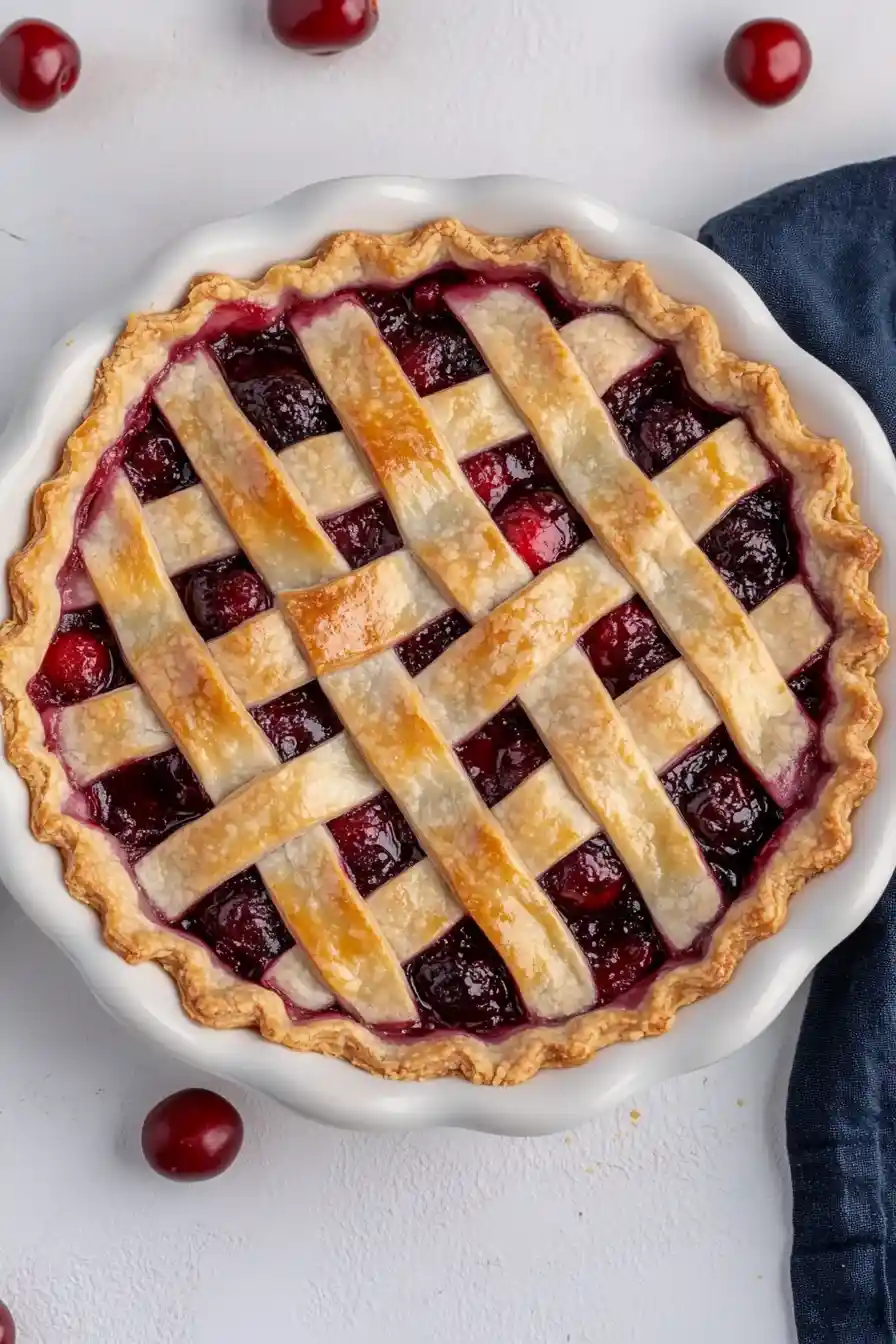
Step 4: Create the Lattice Top
Roll the remaining pastry dough into an 11-inch circle.
Using a paring knife or pastry wheel, cut the dough into 1-inch wide strips.
Lay 5 strips of pie crust across the top of the pie.
Weave the remaining pastry strips through these to form a lattice pattern.
Fold the ends of the lattice strips under the bottom crust edges and crimp the crust together to seal.
Step 5: Finish and Bake the Pie
Brush cream over the top of the lattice crust and sprinkle with 1 tablespoon of coconut sugar for a sweet, glossy finish.
Place the pie in the preheated oven and bake until the crust is browned and the filling is bubbling, about 1 hour and 15 minutes.
The aroma will fill your kitchen as the pie bakes to perfection.
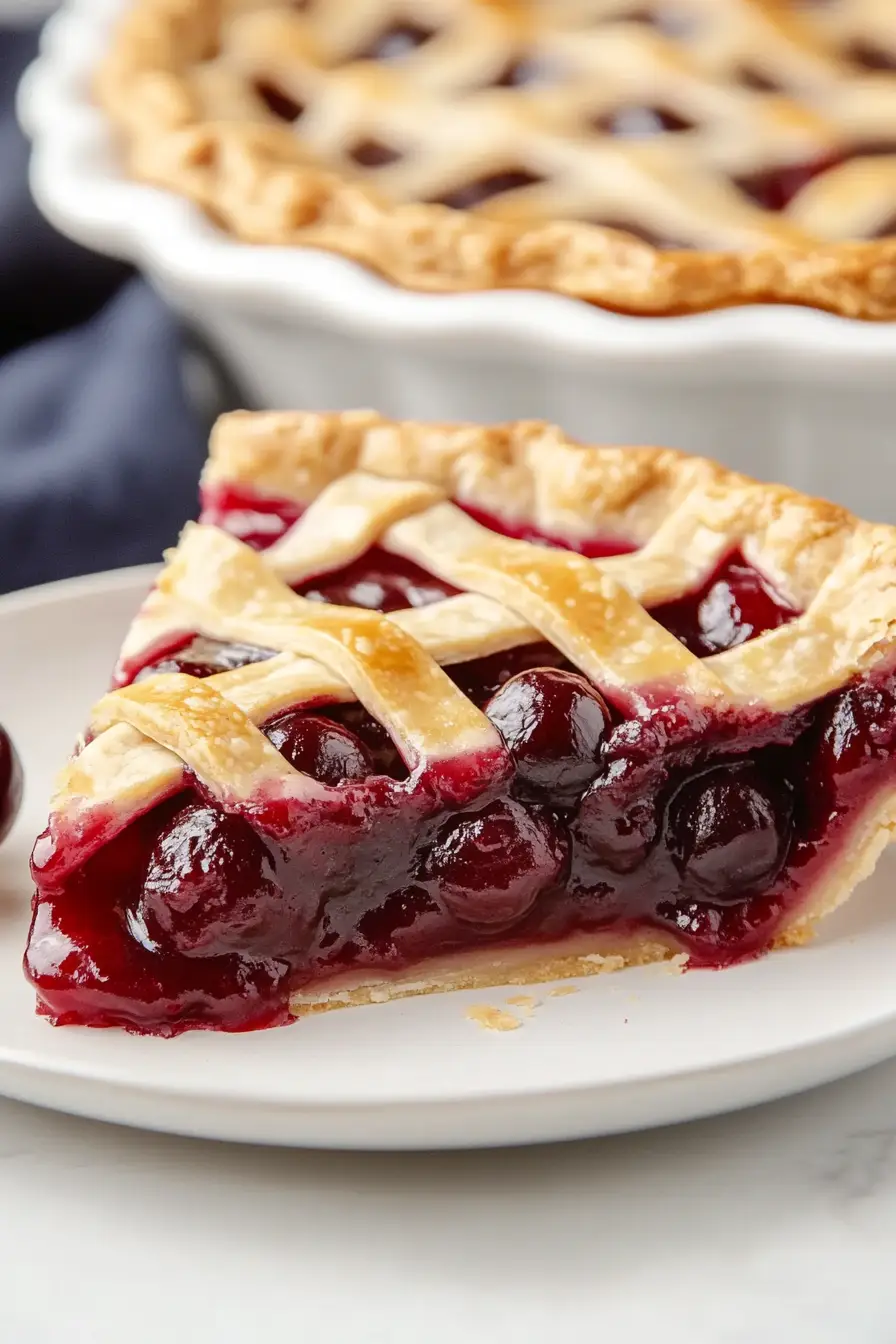
Step 6: Cool and Serve
Once baked, remove the pie from the oven and allow it to cool completely.
This step is crucial for the filling to set properly.
After it has cooled, slice the pie and serve with a dollop of homemade whip cream or a scoop of vanilla ice cream for a delightful treat.
