Looking to impress dinner guests without spending hours in the kitchen? Broiled oysters on the half shell might sound fancy, but they’re actually one of the easiest appetizers you can make. I know serving seafood at home can feel a bit intimidating at first – especially if you’re used to only enjoying oysters at restaurants.
These broiled oysters are a perfect solution: they’re quick to prepare, impossible to mess up, and bring that special restaurant-quality feel right to your dining room table. Plus, you can customize the toppings based on what you and your guests enjoy most.

Why You’ll Love These Broiled Oysters
- Quick preparation – These oysters go from prep to table in just 20 minutes, making them perfect for both casual gatherings and fancy dinner parties.
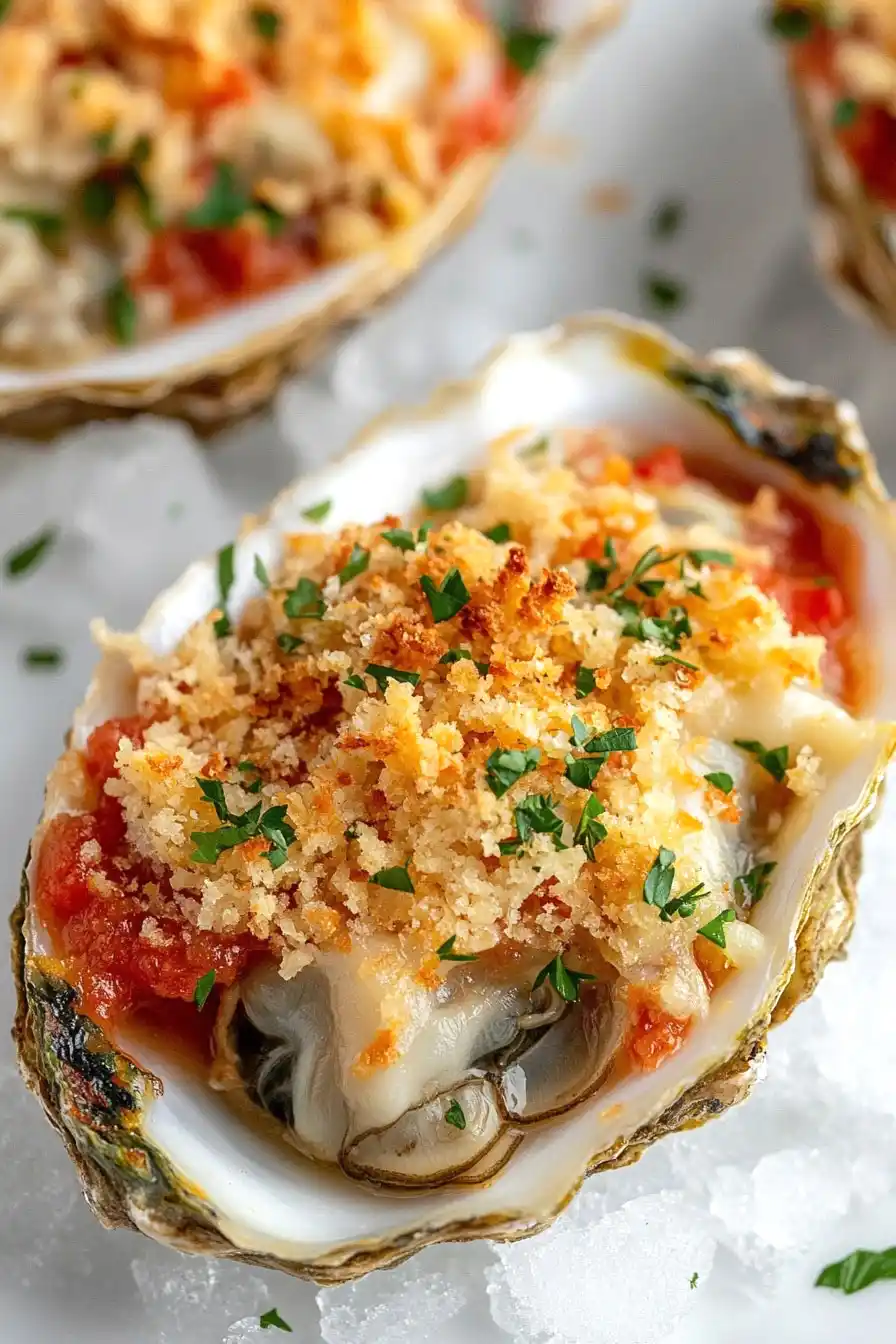
- Restaurant-quality results – The combination of creamy sauce, crunchy breadcrumbs, and fresh seafood creates a dish that tastes like it came from your favorite seafood spot.
- Simple ingredients – Most ingredients are pantry staples, and you’ll just need to grab fresh oysters and herbs from the store.
- Customizable heat level – You can easily adjust the amount of Cajun spices to make these oysters as mild or spicy as you prefer.
- Perfect appetizer – These oysters work great as a starter for 4-6 people, or can be doubled for a larger crowd.
What Kind of Oysters Should I Use?
For broiled oysters, you’ll want to look for medium to large-sized oysters that are fresh and still tightly closed – Gulf oysters or Blue Point oysters are great choices for this recipe. When you’re at the fish counter or market, the shells should be firmly closed or close when tapped, and they should feel heavy for their size, which means they’re full of that briny goodness. If you’re new to oysters, ask your fishmonger to shuck them for you, but if you’re doing it yourself, make sure to use a proper oyster knife and protective glove. Fresh oysters should smell like the ocean – clean and briney – and avoid any that have a strong fishy smell or open shells that don’t close when tapped.
Options for Substitutions
While some ingredients are essential, there are several ways you can adjust this recipe to work with what you have:
- Fresh oysters: These are the star of the show and can’t be substituted – fresh is best! Just make sure they’re properly shucked and still alive when you prepare them.
- Rock salt: If you don’t have rock salt, you can use regular coarse sea salt or even dried beans to create a bed for the oyster shells to sit on while cooking.
- Thick cream: Heavy cream works great, but you could also use half-and-half or even crème fraîche for a tangier taste.
- Panko breadcrumbs: Regular breadcrumbs work fine here – just toast them lightly in a dry pan first to get that extra crunch. You could even crush up some plain crackers as a last resort.
- Cajun spices: Out of Cajun seasoning? Mix together some paprika, cayenne, garlic powder, and dried oregano for a quick DIY version.
- Fresh parsley: Dried parsley works in a pinch (use 2 teaspoons), or try fresh cilantro for a different flavor profile.
- Green onions: Finely minced chives or regular onions can step in for green onions if needed.
Watch Out for These Mistakes While Broiling
The biggest challenge when broiling oysters is getting the timing right – overcooking will turn them rubbery and unpleasant, so keep a close eye and remove them as soon as the edges start to curl and the topping turns golden brown (usually 4-5 minutes). A common mistake is not properly nestling the oyster shells in rock salt before broiling, which can cause them to wobble and spill their precious juices – create a stable bed of salt on your baking sheet to keep them level. To avoid gritty oysters, carefully check for any remaining shell pieces after shucking, and make sure to position the oysters 4-6 inches from the broiler element to prevent the breadcrumb topping from burning before the oysters are properly heated through. For the best texture, mix your breadcrumb topping just before using – if prepared too far in advance, the melted butter can make the mixture clump and prevent even browning.
What to Serve With Broiled Oysters?
These rich and savory broiled oysters make a fantastic appetizer, but you can easily turn them into a complete meal with the right sides. A simple arugula salad dressed with lemon vinaigrette helps cut through the richness of the oysters, while providing a fresh contrast to their creamy topping. I love serving these alongside some crusty French bread or sourdough to soak up all the flavorful sauce that collects in the shells. For a true New Orleans-style experience, pair them with some cold craft beer or a crisp white wine like Chablis or Sancerre – the mineral notes in these wines really complement the briny oysters.
Storage Instructions
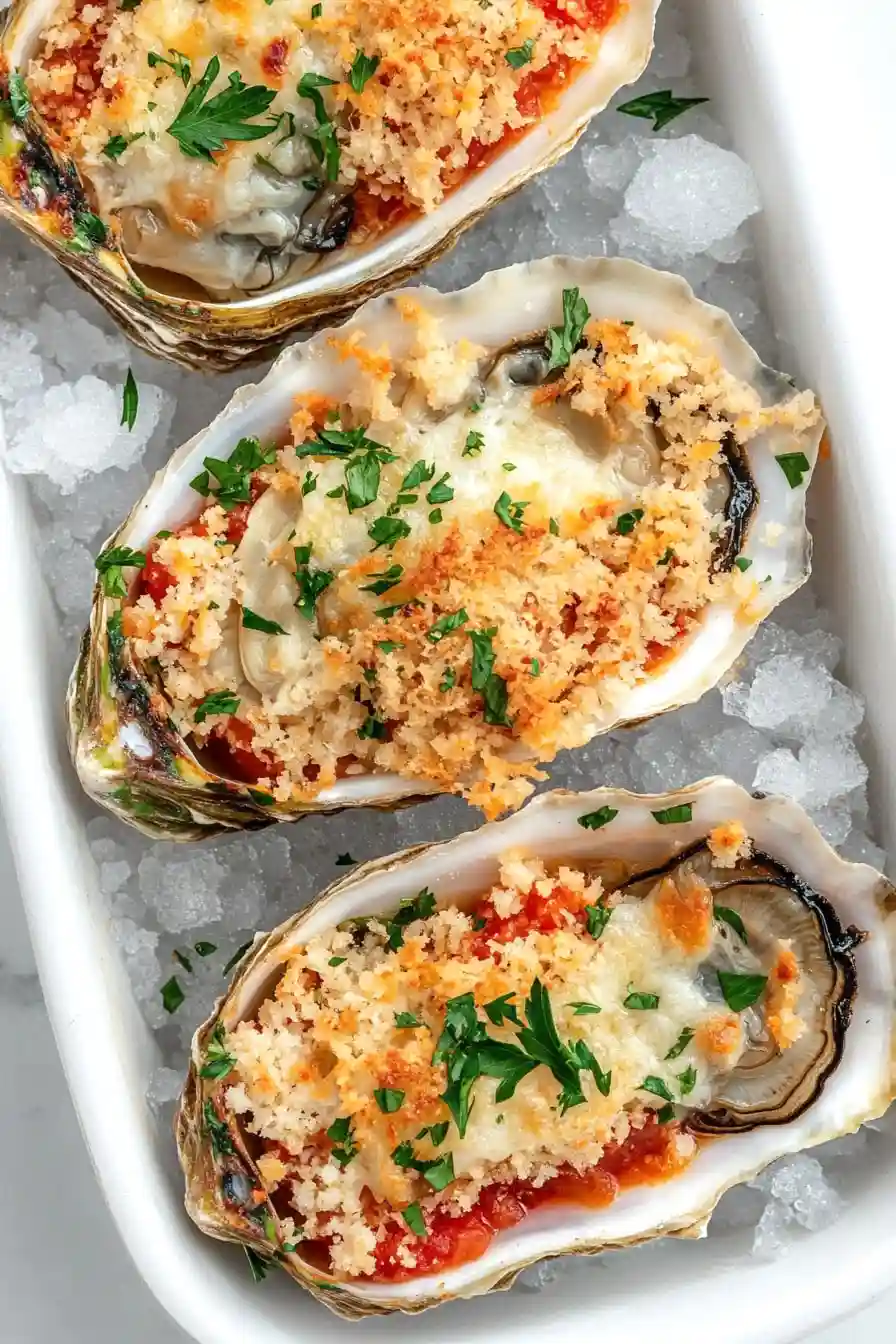
Serve: Broiled oysters are best enjoyed right away while they’re hot and the topping is crispy. For the best experience, serve them immediately after they come out from under the broiler, when the cheese is still melty and the breadcrumbs are golden brown.
Keep Fresh: If you have any leftover cooked oysters (though this rarely happens!), you can keep them in an airtight container in the fridge for up to 24 hours. Just know that the breadcrumb topping won’t stay as crispy, and the texture won’t be quite the same as when freshly made.
Prep Ahead: You can mix the topping ingredients (breadcrumbs, cheese, herbs, and butter) up to a day ahead and store it in the fridge. The cream and tomato sauce can also be combined ahead of time. Just keep the raw oysters fresh on ice until you’re ready to cook – they should be prepared and broiled just before serving.
| Preparation Time | 10-15 minutes |
| Cooking Time | 6-7 minutes |
| Total Time | 16-22 minutes |
| Level of Difficulty | Medium |
Estimated Nutrition
Estimated nutrition for the whole recipe (without optional ingredients):
- Calories: 500-600
- Protein: 25-30 g
- Fat: 35-40 g
- Carbohydrates: 30-35 g
Ingredients
- 12 fresh oysters, shucked and served on half shells
- Rock salt for baking
- 1/4 cup thick cream
- 2 tablespoons tomato puree
- 2 teaspoons cajun spices
- Salt and black pepper to preference
- 1/2 cup panko breadcrumbs
- 1/4 cup grated parmesan cheese
- 2 tablespoons finely chopped fresh parsley
- 2 tablespoons finely chopped green onions
- 1 tablespoon melted unsalted butter
Step 1: Preheat the Broiler and Prepare the Baking Sheet
Start by preheating your broiler to high.
Position the oven rack so it is 6 inches away from the broiler element.
This distance is crucial for proper and even cooking.
As the oven preheats, line a baking sheet with rock salt, which will help keep the shucked oysters stable while they cook.
Step 2: Arrange Oysters
Carefully arrange the shucked oysters on the prepared baking sheet.
Nestling them into the rock salt will ensure they stay upright and prevent any liquids from spilling out during broiling.
Step 3: Prepare the Sauce and Topping Mixtures
In a bowl, whisk together the heavy cream, tomato paste, and Cajun seasoning.
Season the sauce to taste with salt and black pepper.
In a separate bowl, combine the panko breadcrumbs, shredded Parmesan, minced parsley, minced scallions, and melted butter.
Season this topping mixture with salt and black pepper to taste as well.
Both mixtures should be well-combined and seasoned to your preference.
Step 4: Assemble the Oysters with Sauce and Topping
Spoon 1 to 2 teaspoons of the sauce mixture onto each oyster, making sure they are evenly coated.
Then, divide the panko topping mixture evenly among the oysters, pressing it gently onto each one to ensure it stays in place during cooking.
Step 5: Broil the Oysters
Place the baking sheet under the preheated broiler.
Broil the oysters for approximately 6 to 7 minutes, or until the topping is toasted and golden brown.
Keep a close eye on them to prevent burning, as broilers can vary in intensity.
Step 6: Serve and Enjoy
Once the oysters are done, carefully remove the baking sheet from the oven.
Allow them to cool slightly before serving.
These broiled oysters make a delicious and impressive appetizer or part of a seafood feast.