Making sushi at home might sound a bit scary at first, but I’ve discovered a budget-friendly trick that’s changed my weeknight dinner game. Instead of spending money on fancy sushi-grade fish, I use something most of us already have in our pantry – canned tuna!
I started making these tuna sushi rolls when I was trying to stretch my grocery budget without giving up my favorite Japanese takeout flavors. Now it’s become one of those reliable recipes I turn to when I want something that feels special but won’t break the bank. The best part? You don’t need any special equipment beyond a bamboo mat (though I’ve even made it work with a clean kitchen towel).
If you’re new to rolling sushi or just looking for an easy way to jazz up your canned tuna, this recipe is perfect. Trust me, once you get the hang of it, you’ll wonder why you didn’t try making sushi at home sooner.
Why You’ll Love These Tuna Sushi Rolls
- Budget-friendly sushi fix – Using canned tuna instead of raw fish makes this a wallet-friendly alternative to restaurant sushi, while still giving you those beloved sushi flavors.
- Quick preparation – You can have these rolls ready in just 20 minutes – perfect for when those sushi cravings hit but you don’t want to leave home.
- Pantry-friendly ingredients – Most ingredients are kitchen staples or have a long shelf life, making this an easy meal to pull together without a special grocery trip.
- Customizable recipe – You can adjust the spiciness, swap vegetables, or add different toppings to make these rolls exactly how you like them.
- Beginner-friendly – Since you’re working with cooked tuna, this is a perfect recipe for sushi-making beginners – no raw fish handling required!
What Kind of Canned Tuna Should I Use?
For sushi rolls, you’ll want to start with solid white albacore tuna rather than chunk light tuna since it has a milder flavor and firmer texture that works better in this recipe. While water-packed tuna is perfectly fine, oil-packed tuna can add extra richness to your rolls – just be sure to drain it well before using. I recommend sticking with well-known brands like Bumble Bee, Starkist, or Chicken of the Sea, as they tend to have consistent quality. If you’re concerned about sustainability, look for tuna cans with the MSC (Marine Stewardship Council) certification on the label.
Options for Substitutions
This budget-friendly sushi roll recipe is pretty adaptable! Here are some handy swaps you can try:
- Canned tuna: You can use canned salmon, cooked and flaked white fish, or even smoked tofu for a vegetarian version. Just make sure to drain well and flake into small pieces.
- Sriracha sauce: Not a fan of sriracha? Try regular hot sauce, gochujang (Korean chili paste), or simply leave it out if you don’t like heat.
- Tamari: Regular soy sauce works perfectly fine here. For gluten-free folks, coconut aminos make a good substitute.
- Nori sheets: These are pretty essential for sushi rolls, but if you’re in a pinch, you can make a bowl version without the nori – just layer all ingredients over the rice.
- Persian cucumber: Any cucumber will work – just remove the seeds if using regular cucumbers. You could also use julienned carrots or bell peppers for crunch.
- Avocado: If your avocado isn’t ripe, you can skip it or replace it with cream cheese for that creamy texture.
- Sushi rice: While sushi rice is ideal, you can use short-grain rice in a pinch. Just make sure to season it with rice vinegar, salt, and sugar as you would sushi rice.
Watch Out for These Mistakes While Making
The biggest challenge when making sushi rolls is working with sticky rice – to prevent it from clinging to your hands, keep a small bowl of water nearby and wet your fingers frequently while spreading the rice on the nori.
Rolling the sushi too loosely can cause it to fall apart when cutting, so make sure to apply gentle but firm pressure as you roll, using your bamboo mat to create a tight cylinder shape.
Using a dull knife is a common mistake that leads to messy, squished rolls – instead, use a very sharp knife and clean it with a damp cloth between each cut, and remember to let your roll rest for 2-3 minutes before cutting to help it hold its shape.
If your tuna mixture seems too wet, drain off any excess liquid before assembling the roll, as extra moisture can make the nori sheet soggy and harder to work with.
What to Serve With Tuna Sushi Rolls?
These budget-friendly tuna rolls are perfect for a light meal, and there are lots of tasty sides you can add to make it feel like a real sushi restaurant experience at home. A small bowl of miso soup makes a great starter and helps set the mood. For a fresh crunch, try a simple cucumber salad dressed with rice vinegar and a pinch of salt – it’s similar to the sunomono you’d get at a sushi spot. You can also put together a quick seaweed salad or serve some edamame sprinkled with sea salt for snacking while you roll your sushi. Keep things simple and authentic by serving green tea on the side!
Storage Instructions
Keep Fresh: These tuna rolls are best enjoyed right after making them, but if you need to save some for later, wrap them tightly in plastic wrap and pop them in the fridge. They’ll stay good for about 24 hours, though the rice might get a bit firmer.
Make Ahead: Want to prep ahead? You can mix the tuna filling and prep your veggies up to a day in advance – just keep them separate in airtight containers in the fridge. The sushi rice can also be made a few hours ahead, but remember to keep it covered at room temperature until you’re ready to roll.
Serve: Once you take the rolls out of the fridge, let them sit at room temperature for about 10 minutes before serving. This helps the rice soften up a bit. Remember to slice the rolls just before you’re ready to eat – this keeps them looking fresh and prevents the nori from getting chewy.
| Preparation Time | 10-15 minutes |
| Cooking Time | 0-5 minutes |
| Total Time | 10-20 minutes |
| Level of Difficulty | Medium |
Estimated Nutrition
Estimated nutrition for the whole recipe (without optional ingredients):
- Calories: 600-700
- Protein: 25-30 g
- Fat: 30-35 g
- Carbohydrates: 70-80 g
Ingredients
For the spicy tuna mixture:
- 1 tbsp sriracha sauce
- 1/2 tbsp mayonnaise (I prefer Hellmann’s mayonnaise for this)
- 1 tsp toasted sesame seeds
- 1/2 tsp toasted sesame oil
- 2 tbsp sliced scallions
- 1/2 tsp tamari
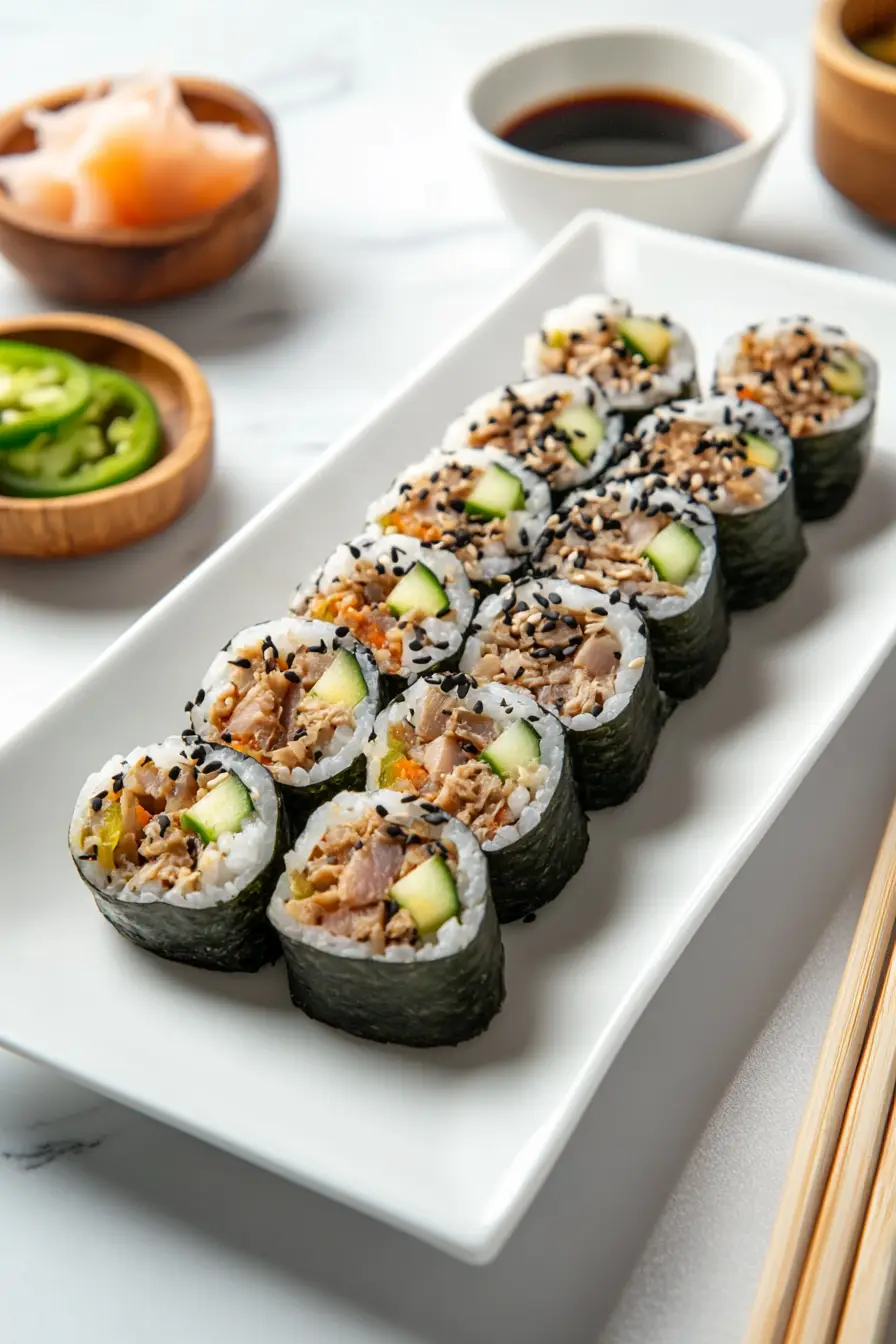
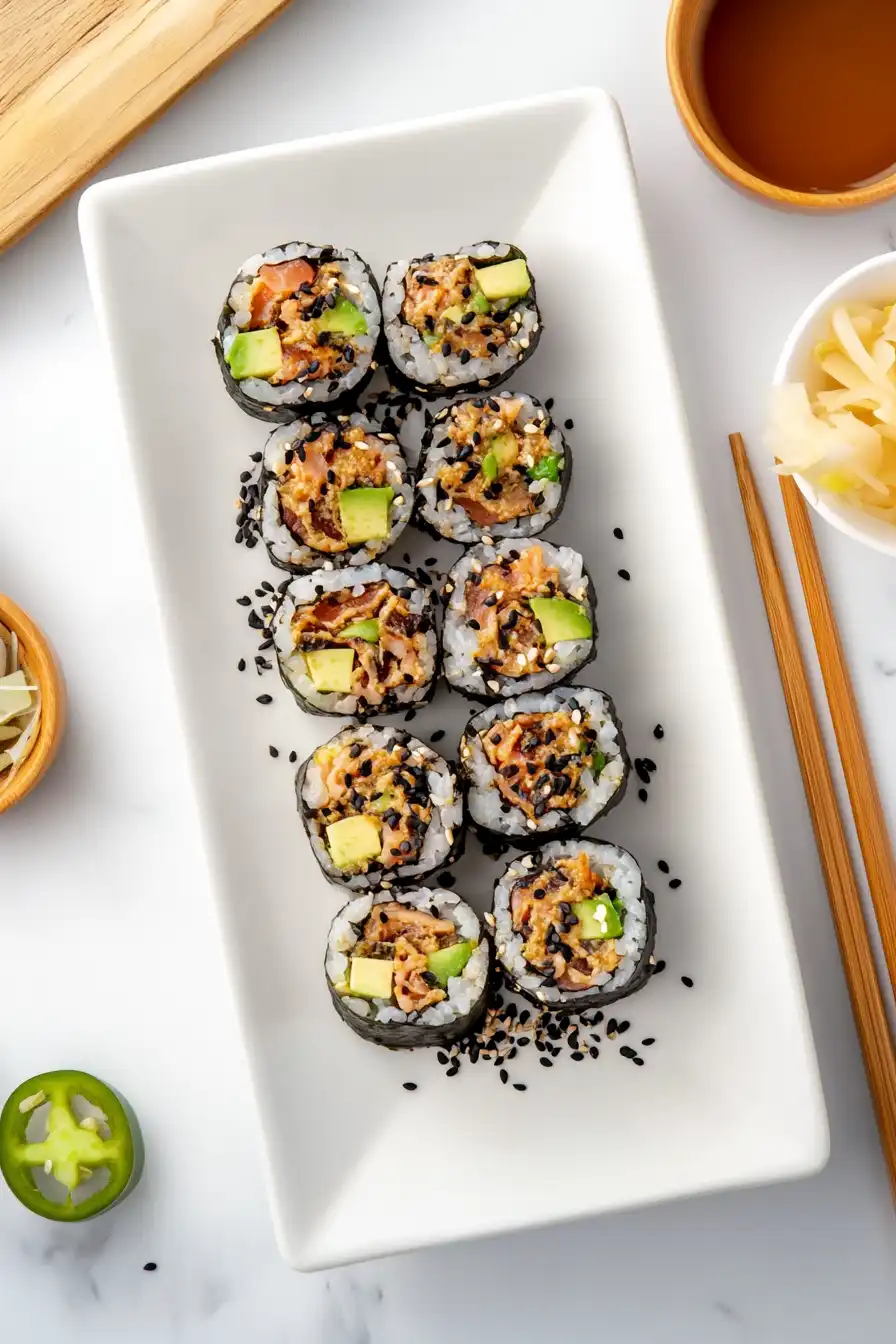
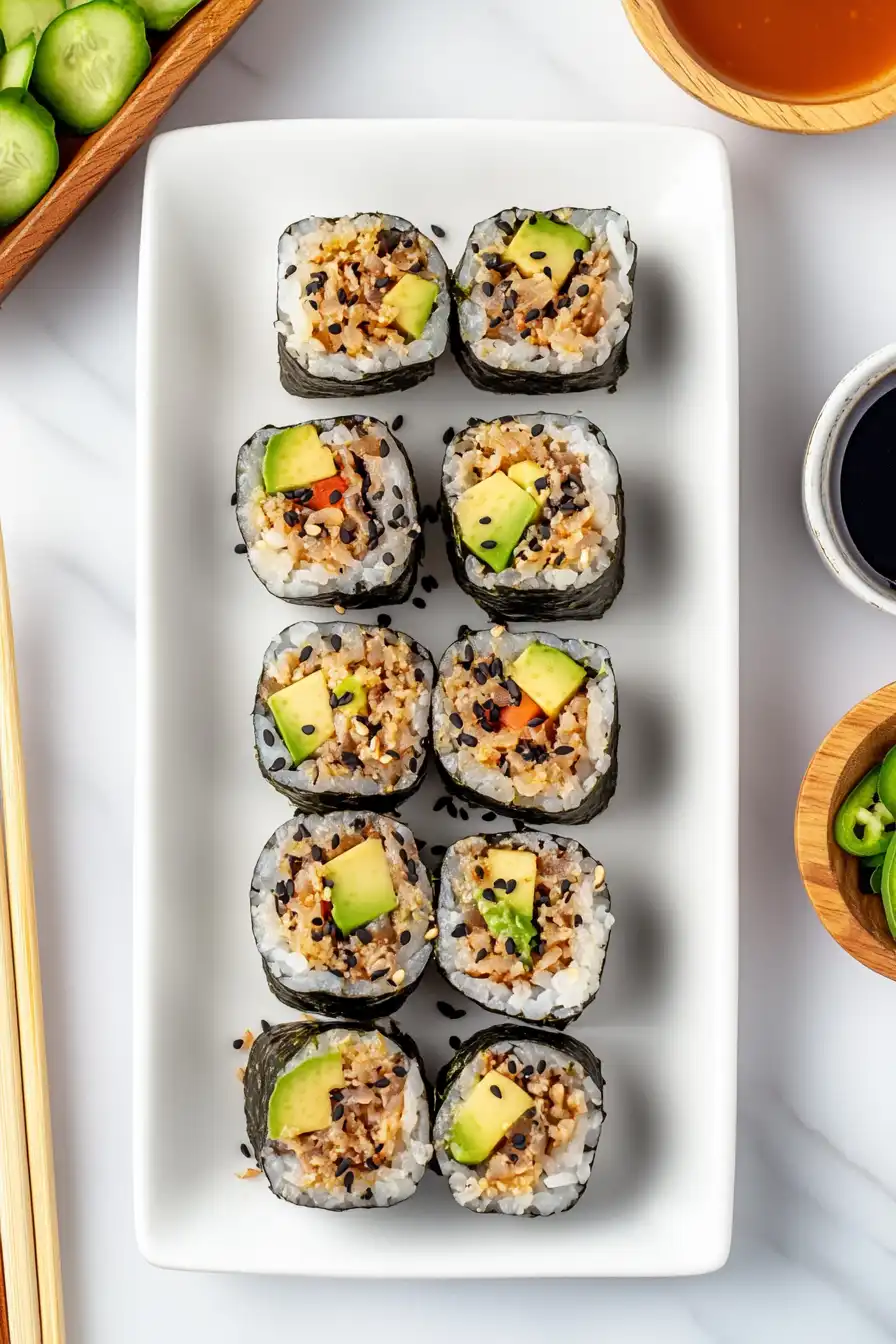
- 1 can tuna (5 oz), drained
For the sushi rolls:
- 2 sheets nori
- 1 1/2 cups prepared sushi rice
- 1/2 avocado (sliced thinly, about 1/4 inch thick)
- 1 Persian cucumber (cut into thin matchsticks)
Optional for serving:
- pickled ginger
- wasabi
- light soy sauce
Step 1: Prepare the Spicy Tuna Mixture
In a mixing bowl, combine canned tuna, sriracha hot sauce, mayonnaise, scallions, soy sauce, and toasted sesame oil.
Stir the ingredients together until very well combined, breaking down the tuna into a fine consistency conducive for rolling sushi.
Step 2: Set Up the Nori Sheet
Place a sheet of nori seaweed with the shiny side down on a bamboo rolling mat.
Position it so that the longer side is facing you.
This orientation will help in rolling the sushi tightly and uniformly.
Step 3: Spread the Sushi Rice
With a gentle hand, spread the thinnest layer of rice you can manage on the nori sheet.
Be sure to leave a border empty on all sides: a ½-inch border on each side and the edge closest to you, and a 1-inch border along the edge away from you.
This will aid in proper sealing of the roll.
Step 4: Add Fillings
Position your prepared fillings in a line about 1/3 of the way across from the edge closest to you — place sliced avocado, optional cucumber, and a stripe of the spicy tuna mixture.
Ensure the fillings are positioned evenly to distribute flavors throughout each piece.
Step 5: Roll the Sushi
Utilizing the bamboo rolling mat, gently roll the edge closest to you over the ingredients.
Continue rolling, using your hands to pull the roll tight with consistent pressure.
Tight rolling is key to keeping the sushi intact when slicing.
Step 6: Slice and Serve
Once the roll is complete, cut it in half first for evenness.
Then, cut each half into quarters to create uniform-sized sushi pieces.
Serve your fresh rolls immediately and enjoy the burst of flavors!
