Korean BBQ has become a regular weekend tradition at our house. There’s something so fun about gathering around the table, sharing plates of marinated meat and all those tasty side dishes. While I love going out for Korean BBQ, I’ve learned that making it at home isn’t as tricky as you might think.
That’s where this pork shoulder recipe comes in. It’s become my go-to when I’m craving those sweet and savory flavors but don’t want to leave the house. The marinade does most of the work while you’re busy with other things, and the meat turns out tender and flavorful every time. I usually prep it the night before, which makes dinner the next day a breeze.
Whether you’re new to Korean cooking or just looking for a reliable BBQ recipe, this one’s worth trying. My family asks for it at least twice a month, and the leftovers make amazing sandwiches – if there are any leftovers, that is!
Why You’ll Love This Korean BBQ Pork
- Make-ahead friendly – This slow-cooked pork is perfect for meal prep – cook it on the weekend and enjoy tender, flavorful meat all week long.
- Simple ingredients – The recipe uses everyday pantry staples and basic fresh ingredients you can find at any grocery store, no special trips to Asian markets needed.
- Set-it-and-forget-it cooking – While it takes time to cook, most of it is completely hands-off, letting you focus on other things while your kitchen fills with amazing aromas.
- Great for feeding crowds – This big batch of tender pork shoulder is perfect for family gatherings or when you’re hosting friends – it easily feeds 8-10 people.
- Sweet and savory flavor – The combination of brown sugar, soy sauce, and natural sweetness from apples creates a perfectly balanced taste that’s both kid and adult-friendly.
What Kind of Pork Shoulder Should I Use?
For Korean BBQ, you’ll want to look for a well-marbled boneless pork shoulder (also called pork butt or Boston butt) at your grocery store or butcher. Fresh pork shoulder typically comes with a fat cap on top – don’t trim this off completely since that fat helps keep the meat moist during cooking and adds flavor. When shopping, aim for meat that’s pinkish-red in color with white fat marbling throughout, and try to avoid any cuts that look very pale or have dark spots. If your store offers both bone-in and boneless options, either will work fine – just remember that boneless is easier to slice and serve, though you might need to ask your butcher to remove the bone for you.

Options for Substitutions
This Korean BBQ recipe is pretty adaptable – here are some helpful swaps if you need them:
- Pork shoulder: While pork shoulder gives the best results for this dish, you can use pork butt or pork belly. For a leaner option, try pork loin, but reduce cooking time by about 30% to prevent it from drying out.
- Chili garlic paste: No chili garlic paste? Mix 2 tablespoons of sriracha with 1 minced garlic clove, or use gochujang (Korean red pepper paste) for an authentic twist.
- Apples: The apples add natural sweetness, but you can use 1 ripe Asian pear or even 2 tablespoons of apple juice instead. Any sweet apple variety works well here.
- Brown sugar: Regular sugar plus 1 tablespoon of molasses works great. You could also use honey or maple syrup – just use about 1/3 cup since they’re sweeter than brown sugar.
- White rice: Any rice works here – brown rice, jasmine rice, or even cauliflower rice for a low-carb option. You could also serve it with noodles or in lettuce wraps.
- Soy sauce: For a gluten-free option, use tamari. Coconut aminos work too, but they’re sweeter, so reduce the brown sugar by 2 tablespoons.
Watch Out for These Mistakes While Cooking
The biggest mistake when cooking Korean BBQ pork shoulder is rushing the marination process – giving the meat at least 4-6 hours (or ideally overnight) allows the flavors to properly penetrate the meat and creates that signature Korean BBQ taste. When searing the pork, avoid overcrowding the pan as this will cause the meat to steam rather than develop that beautiful caramelized crust – work in batches if necessary, and make sure your pan is really hot before adding the meat. A common error is slicing the meat with the grain instead of against it, which can result in tough, chewy pieces – always cut against the grain in thin slices for the most tender result. For the best flavor development, let the cooked pork rest for 15-20 minutes before slicing, and don’t discard those flavorful juices – they make an excellent sauce when drizzled over the rice.
What to Serve With Korean BBQ Pork?
This flavorful Korean BBQ pork pairs perfectly with traditional Korean side dishes (banchan) and fresh vegetables. I like to serve it with kimchi, which adds a nice tangy crunch, and some quick pickled cucumbers or radishes for freshness. The meat is already rich and sweet, so adding some leafy greens like steamed bok choy or sautéed spinach helps balance out the meal. For a fun interactive dinner, set out some butter lettuce leaves and let everyone make their own lettuce wraps with the pork, rice, and toppings – don’t forget the sriracha or gochujang sauce if you want an extra kick of heat!
Storage Instructions
Keep Fresh: Got leftovers? Lucky you! Place your Korean BBQ pork in an airtight container and pop it in the fridge – it’ll stay good for up to 4 days. The flavors actually get even better as they meld together, making this perfect for meal prep.
Freeze: This pork freezes like a dream! Let it cool completely, then pack it in freezer-safe containers or bags, making sure to include some of that yummy sauce. It’ll keep well for up to 3 months. Pro tip: portion it out before freezing so you can thaw just what you need.
Reheat: To bring your pork back to life, warm it up slowly in a covered pan over medium-low heat, adding a splash of water if needed to keep it moist. For quick meals, the microwave works too – just heat in 30-second intervals, stirring in between. The rice should be made fresh for the best texture.
| Preparation Time | 15-20 minutes |
| Cooking Time | 420-480 minutes |
| Total Time | 435-500 minutes |
| Level of Difficulty | Medium |
Estimated Nutrition
Estimated nutrition for the whole recipe (without optional ingredients):
- Calories: 4000-4500
- Protein: 160-180 g
- Fat: 180-200 g
- Carbohydrates: 600-650 g
Ingredients
For the sauce:
- 12 garlic cloves
- 1/2 cup brown sugar
- 2 tbsp chili garlic paste (I use Huy Fong Sriracha Chili Garlic Sauce)
- 1 inch ginger (fresh, unpeeled)
- 2 unpeeled apples (such as Fuji or Gala for sweetness)
- 1/2 cup soy sauce
For the pork:
- 2 tbsp vegetable oil
- 1 tsp salt
- 4 lb boneless pork shoulder (pork butt, cut into 2-3 inch chunks)
For serving:
- 6 cups white rice
Step 1: Prepare the Sauce
In a medium bowl, combine soy sauce, brown sugar, and chili garlic sauce, mixing them well.
Stir in chopped apple, minced garlic, and grated gingerroot until all ingredients are well incorporated to form a flavorful sauce.
Step 2: Season and Sear the Pork
Rub the pork shoulder with oil to coat its surface, then sprinkle and rub in salt evenly.
Heat a 12-inch nonstick skillet over medium-high heat.
Once the skillet is hot, add the pork and cook for 2 to 3 minutes on each side, or until both sides are nicely browned.
This step will help seal in the juices.
Step 3: Slow Cook the Pork
Transfer the seared pork shoulder to a 5- to 6-quart slow cooker.
Pour the prepared sauce over the pork, evenly coating it.
Cover the slow cooker and cook on the Low heat setting for 7 to 8 hours, or until the pork becomes very tender.
Step 4: Strain the Sauce and Prep the Meat
Once the pork is cooked, transfer it carefully to a cutting board and let it stand until it is cool enough to handle.
Strain the cooking sauce through a fine strainer to remove any solids, then discard those solids.
Wipe out the slow cooker if necessary, and pour the strained sauce back into the cooker.
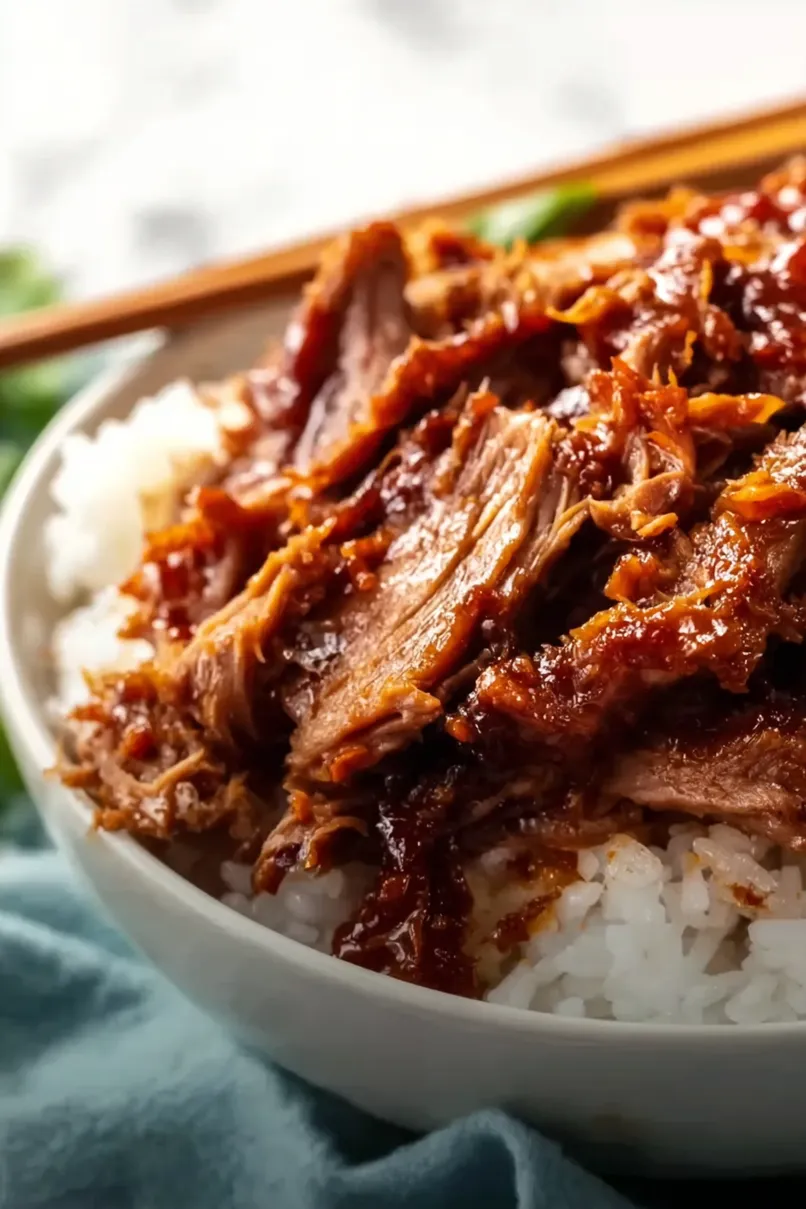
Step 5: Shred the Pork and Combine with Sauce
Shred the cooled pork using two forks or your hands, then return it to the slow cooker.
Stir the shredded pork well so that it is thoroughly coated with the rich sauce.
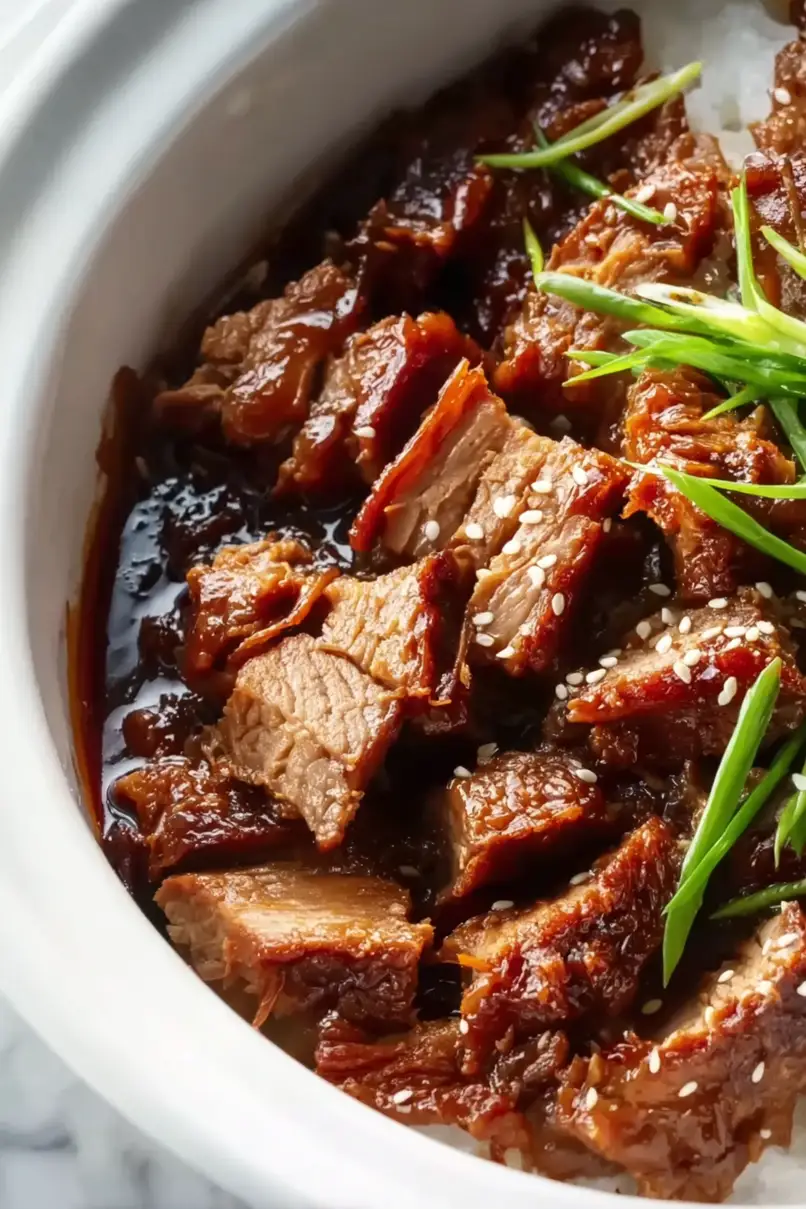
Step 6: Serve
Serve the flavorful shredded pork over a bed of rice, allowing the delicious sauce to soak into the rice for full enjoyment.
Enjoy your meal!

In your story part, which luckily I read, but most people don’t , you mention marinating. But nowhere in your steps do you mention this.
Hi Molly, I agree with the above commenter. Any chance you can discuss your marinade?