Making a homemade ice cream cake can seem like a daunting task when you’re staring down the freezer aisle at the store. After all, why bother with a DIY version when you can just grab one that’s ready to go? But here’s the thing – store-bought cakes never quite hit the spot like a homemade one, especially when you’re planning something special for a birthday party or family gathering.
That’s where this ice cream cake recipe comes in: it’s surprisingly easy to put together, can be made well ahead of time, and lets you mix and match your favorite ice cream flavors and toppings to create something that’s perfectly tailored to your taste.
Why You’ll Love This Ice Cream Cake
- Make-ahead friendly – You can prepare this cake days in advance and keep it frozen until your special event, making party planning so much easier.
- Customizable flavors – Mix and match any ice cream flavors you like – the possibilities are endless! Use your favorite combinations to create your perfect dessert.
- No baking required – This no-bake dessert keeps your kitchen cool and requires zero oven time – perfect for hot summer days or when you don’t feel like baking.
- Simple ingredients – With just store-bought ice cream, Oreos, and a few basic ingredients, you can create a show-stopping dessert that looks like it came from an ice cream shop.
- Kid-friendly preparation – Little ones can help layer the ice cream and add toppings, making this a fun family activity that everyone can participate in.
What Kind of Ice Cream Should I Use?
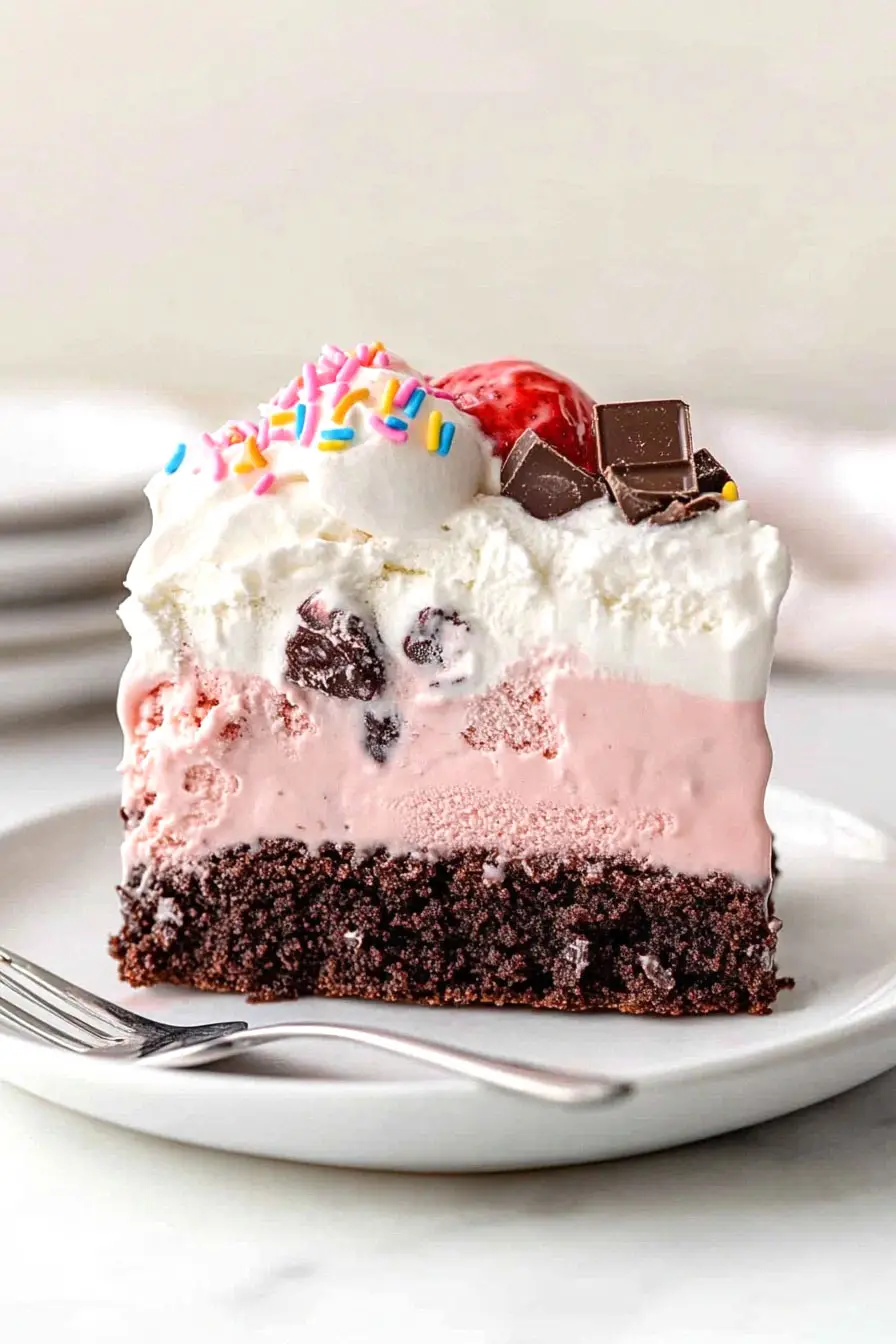
When it comes to making an ice cream cake, you’ve got tons of flexibility with your ice cream choices – any premium brand will work great, but make sure to avoid low-fat or budget varieties that might be too icy. The key is picking ice creams that have a creamy, smooth texture when softened, as this will make spreading the layers much easier. While this recipe suggests chocolate and strawberry, feel free to mix and match your favorite flavors – just try to choose ones that taste good together, like mint chip with chocolate, or coffee with vanilla. Just remember to let your ice cream soften at room temperature for about 15-20 minutes before spreading, but don’t let it melt completely or you’ll end up with ice crystals when it refreezes.
Options for Substitutions
This ice cream cake recipe is super adaptable and you can make several swaps to match your taste:
- Oreo cookies: You can swap Oreos with any sandwich cookies you like – try chocolate graham crackers, digestive biscuits, or even vanilla wafers. Just make sure to use the same amount by weight.
- Ice cream flavors: Feel free to mix and match any ice cream flavors you love! Vanilla, mint chip, coffee, or cookies and cream all work great. Just keep the total amount the same and make sure the ice cream is properly softened.
- Hot fudge: If you’re not a chocolate fan, try caramel sauce, strawberry sauce, or any other thick dessert sauce. Just avoid thin syrups as they might make the cake too icy.
- Heavy cream: For the whipped topping, you can use store-bought whipped cream or Cool Whip if you’re short on time. If using Cool Whip, skip the powdered sugar and vanilla since it’s already sweetened.
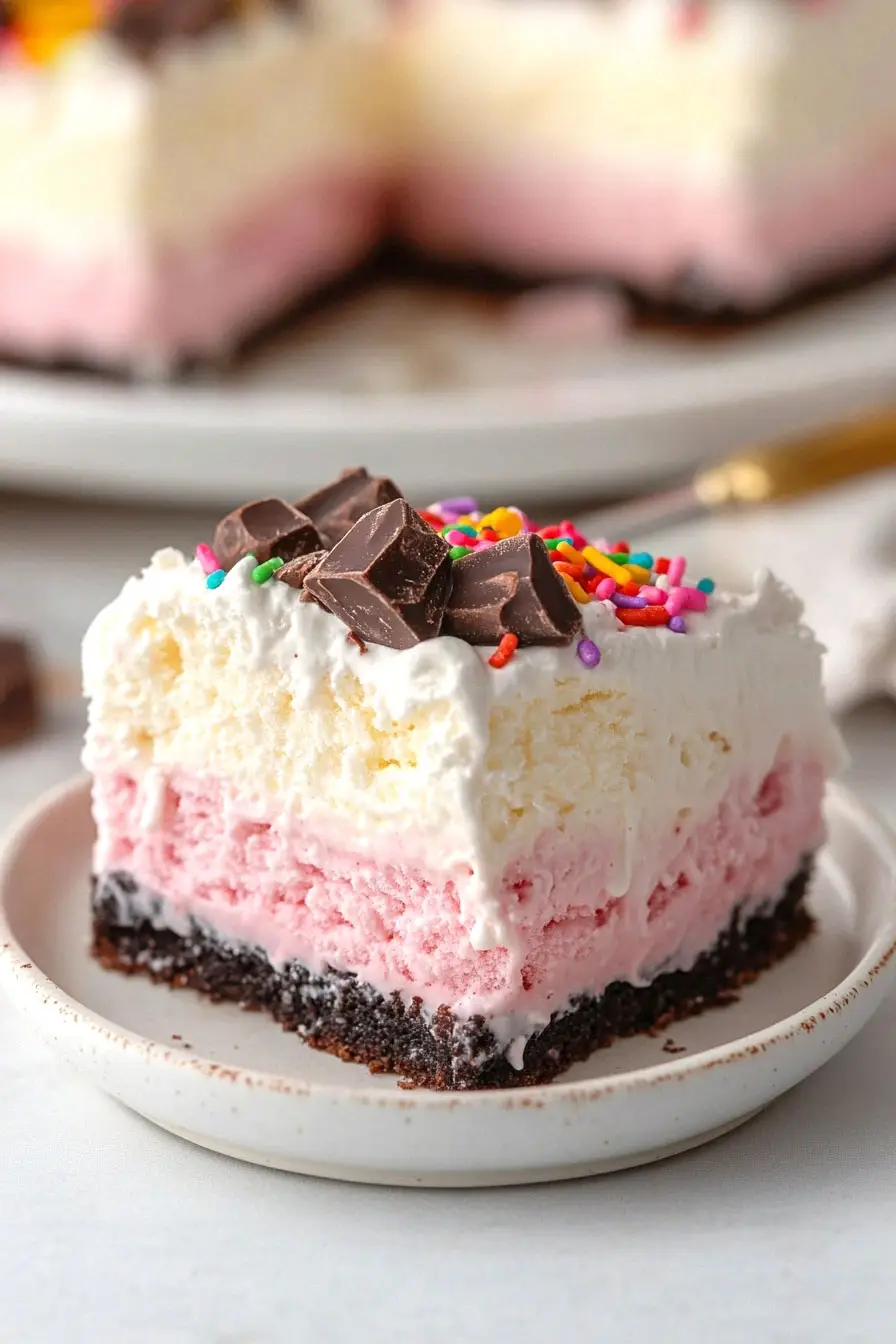
- Sprinkles: Get creative with toppings! Try crushed candy bars, chocolate chips, chopped nuts, or cookie crumbs instead of sprinkles.
- Butter: Salted butter works fine too – just keep in mind your crust will be slightly saltier. You can also use coconut oil for a different flavor.
Watch Out for These Mistakes While Making
The biggest challenge when making ice cream cake is timing – if your ice cream gets too soft, you’ll end up with a melted mess, but if it’s too hard, you won’t be able to spread it evenly. To get it just right, let your ice cream soften at room temperature for about 15-20 minutes, or until it’s spreadable but still cold.
Temperature control between layers is crucial – make sure each layer is completely frozen (at least 2 hours) before adding the next, and work quickly when spreading to prevent excessive melting. For the Oreo crust, avoid pressing too hard when forming the base, as an overly compressed crust will become rock-hard when frozen and difficult to cut through.
Keep your whipped cream ingredients (including the bowl and beaters) very cold before whipping, and don’t overwhip – stop when you see stiff peaks form, as continuing will give you a grainy texture. When it’s time to serve, let the cake sit at room temperature for 10-15 minutes to make cutting easier, and always use a knife dipped in hot water between slices for clean cuts.
What to Serve With Ice Cream Cake?
Ice cream cake is pretty amazing on its own, but there are some fun ways to make serving it even more special! Hot toppings like warm caramel sauce or extra hot fudge create an awesome temperature contrast with the cold cake – just drizzle them on right before serving. I love putting out a little toppings bar with chopped nuts, extra crushed Oreos, whipped cream, and different kinds of sprinkles so everyone can customize their slice. For drinks, a hot cup of coffee or homemade hot chocolate pairs really nicely with the cold, creamy cake, especially during birthday celebrations or special occasions.
Storage Instructions
Keep Frozen: Your ice cream cake needs to stay in the freezer to maintain its shape and texture. Place it in an airtight container or wrap it well with plastic wrap and aluminum foil. It’ll keep fresh for up to 1 week when stored properly. For the best texture, keep it towards the back of your freezer where the temperature is most consistent.
Make Ahead: This cake is perfect for making ahead! You can prepare it up to 3 days before your event. Just keep it covered in the freezer until about 10-15 minutes before serving time. The waiting time helps the ice cream soften slightly, making it easier to slice.
Serve: When you’re ready to serve, let the cake sit at room temperature for 10-15 minutes to soften slightly. This makes it easier to cut through the layers. If you have leftovers, pop them back in the freezer right away to prevent melting and ice crystal formation.
| Preparation Time | 30-45 minutes |
| Cooking Time | 0 minutes |
| Total Time | 12-48 hours |
| Level of Difficulty | Medium |
Estimated Nutrition
Estimated nutrition for the whole recipe (without optional ingredients):
- Calories: 4500-4800
- Protein: 40-50 g
- Fat: 250-280 g
- Carbohydrates: 550-600 g
Ingredients
For the crust:
- 2 tbsp unsalted butter (melted and cooled to room temperature)
- 10 Oreo cookies
For the ice cream layers:
- 1.5 L strawberry ice cream (softened for easy spreading)
- 1.5 L chocolate ice cream (softened for easy spreading)
- 1 cup hot fudge (I use Smucker’s hot fudge, split)
For the whipped cream topping:
- 2 cups heavy cream (chilled for best whipping results)
- 1/3 cup powdered sugar (sifted to prevent lumps)
- 1.5 tsp vanilla extract
Optional for topping:
- sprinkles (for decoration)
Step 1: Prepare the Oreo Crumb Mixture
In a food processor or blender, pulse 10 Oreos, including the cream filling, into a coarse crumb, leaving some larger chunks if you prefer.
You should have approximately 1 cup of crumbs.
Mix these crumbs with melted butter and set aside for use later in the recipe.
Step 2: Layer the Chocolate Ice Cream
Take the chocolate ice cream (or your chosen bottom-layer flavor) out of the freezer to soften for about 10 minutes.
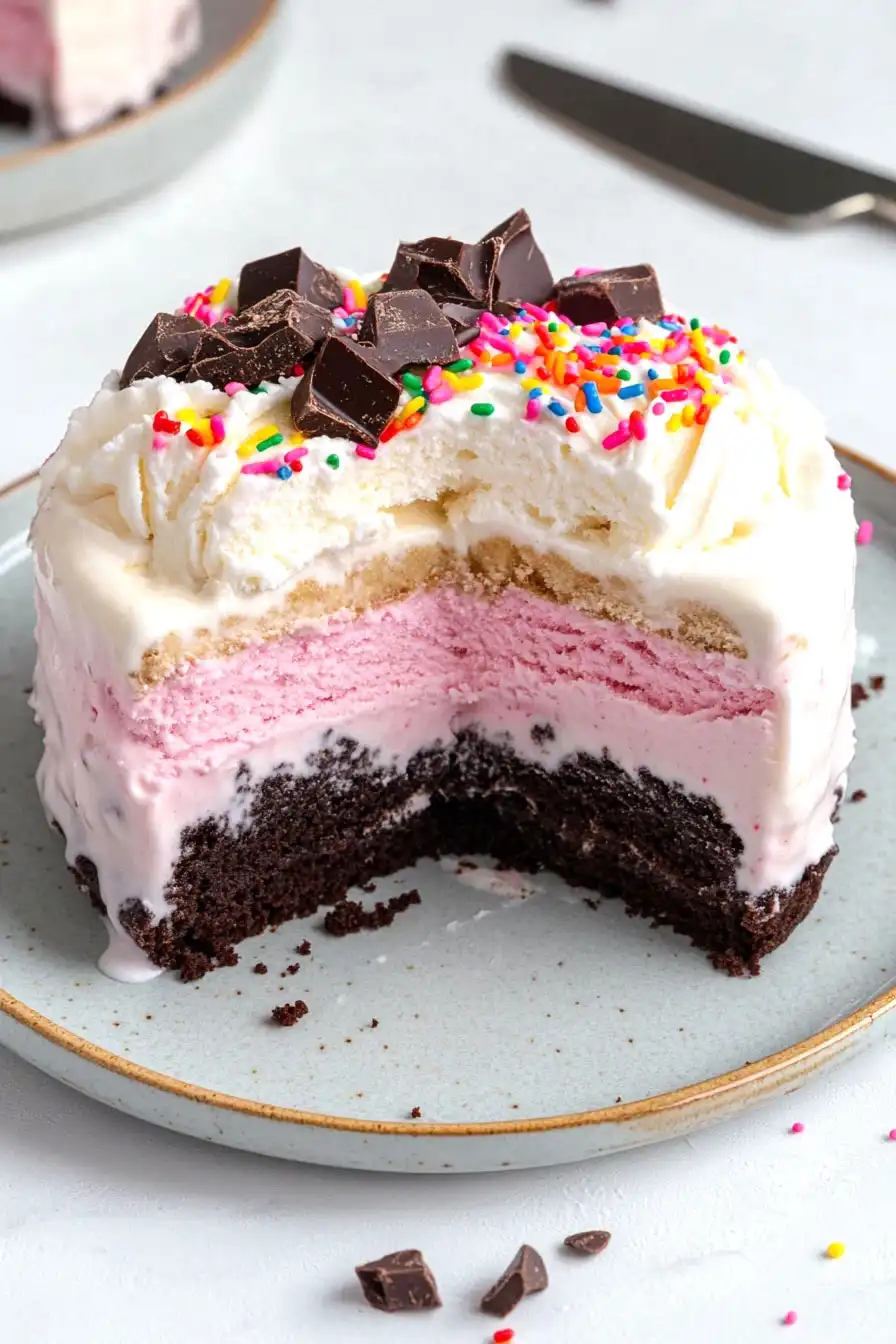
While the ice cream softens, line a 9×3-inch or 10×3-inch springform pan with plastic wrap, allowing some overhang on the sides for easy removal later.
Once softened, scoop the chocolate ice cream into the lined pan and use the back of a large spoon to spread it into an even layer.
Return the pan to the freezer for 30 minutes to firm up the layer.
Step 3: Add Hot Fudge and Oreo Layer
While the first ice cream layer is freezing, make your homemade hot fudge or warm up pre-made hot fudge sauce until it reaches a spreadable consistency.
Pour and evenly spread 1/2 cup of hot fudge over the first ice cream layer, then sprinkle the Oreo crumb mixture over the fudge.
Place the pan back in the freezer for another 30 minutes.
During this time, remove the strawberry ice cream (or desired top flavor) from the freezer to soften for 10 minutes.
Step 4: Add Strawberry Ice Cream
After the Oreo layer is set, drizzle the remaining 1/2 cup of hot fudge on top.
Working quickly, spoon and spread the softened strawberry ice cream over the Oreo and fudge layers to create an even top layer.
Cover the pan with plastic wrap or aluminum foil and freeze for at least 12 hours or up to 2 days to ensure the ice cream cake fully sets.
Step 5: Prepare and Apply Whipped Cream Topping
If you plan to transfer the ice cream cake to a different serving plate, place your desired cake plate, stand, or cutting board in the freezer for at least 30 minutes.
Use a handheld mixer or a stand mixer fitted with a whisk attachment to beat heavy cream, confectioners’ sugar, and vanilla on medium-high speed until stiff peaks form, which takes about 4 minutes.
Remove the frozen ice cream cake and the rim from the springform pan.
Carefully transfer or leave it on the bottom of the springform pan, or place it on the pre-chilled serving plate.
Working quickly, spread the prepared whipped cream over the top and sides of the ice cream cake.
Optionally, use a piping bag with Wilton 1M tip to create decorative borders and add sprinkles if desired.
Step 6: Serve the Ice Cream Cake
Slice and serve the cake immediately or re-freeze it for up to 1 hour before serving.
If frozen longer than an hour, the cake may become too hard to cut easily.
Use a very sharp knife, dipping it into a glass of hot water between slices for cleaner cuts.
Cover and store any leftovers in the freezer.
