Finding ways to enjoy fresh-tasting fruit desserts during the off-season can feel like a real puzzle. Between limited produce options at the grocery store and premium prices for fresh berries in winter, it’s tough to satisfy those fruity cravings without breaking the bank. And let’s be honest – sometimes you just need a warm, comforting dessert on a cold day.
That’s where this berry crisp with frozen berries comes to the rescue: it’s budget-friendly, super easy to throw together, and tastes just as good as if you’d made it with fresh berries from the farmers’ market. Plus, you can keep the ingredients on hand for whenever the dessert craving strikes.
Why You’ll Love This Berry Crisp
- Year-round dessert – Using frozen berries means you can make this cozy dessert any time of the year, not just during berry season.
- Simple ingredients – You probably have most of these pantry staples on hand already – just grab some frozen berries and you’re ready to bake.
- Easy preparation – Just mix, layer, and bake – no fancy techniques or special equipment needed. It’s nearly impossible to mess up!
- Perfect for sharing – This crisp serves a crowd and tastes great warm or at room temperature, making it ideal for potlucks, family gatherings, or holiday dessert tables.
- Budget-friendly – Frozen berries cost less than fresh ones and still give you that perfect sweet-tart berry flavor under the crispy oat topping.
What Kind of Frozen Berries Should I Use?
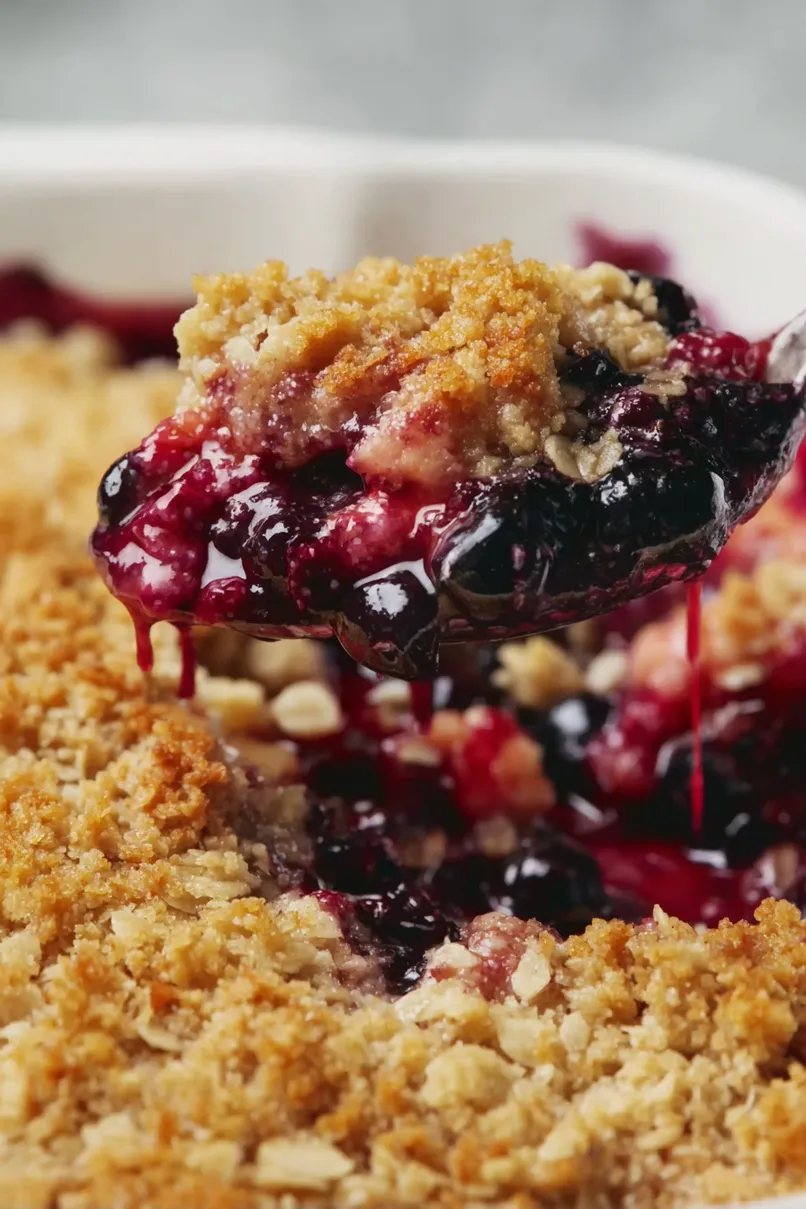
The beauty of making a berry crisp with frozen berries is that you can mix and match whatever varieties you have on hand. Raspberries, blackberries, and blueberries are classic choices that work really well together, but you can also throw in some strawberries or even dark sweet cherries if you’d like. Each type of berry brings something different to the table – raspberries break down and create a jammy texture, while blueberries hold their shape better and add nice bursts of flavor. When shopping for frozen berries, look for packages without ice crystals (a sign of freezer burn) and try to choose berries that were frozen individually rather than in big clumps, as these tend to be better quality.
Options for Substitutions
This berry crisp recipe is pretty flexible and you can make several easy swaps if needed:
- Rolled oats: Quick oats can work in a pinch, though the texture won’t be quite as nice. Just don’t use instant oats as they’ll become too mushy. You could also try using crushed graham crackers for 1/4 cup of the oats.
- Plain flour: Feel free to swap in whole wheat flour for a nuttier taste, or use gluten-free all-purpose flour for a gluten-free version. Almond flour works too, but only use it in the topping, not for mixing with the berries.
- Brown sugar: No brown sugar? Mix white sugar with a tablespoon of molasses. Or just use all white sugar – the crisp will still be sweet, just with slightly less caramel notes.
- Frozen berries: Fresh berries work perfectly here too. You can use any mix of berries you like, or even throw in some cherries or peaches. Just keep the total amount of fruit the same.
- Vanilla essence: Vanilla extract, vanilla bean paste, or even a splash of almond extract would work well. You can skip it if you don’t have any, though it does add nice flavor.
- Butter: You can use salted butter – just reduce the added salt in the recipe. Coconut oil can work too, but it will add a slight coconut flavor to your crisp.
Watch Out for These Mistakes While Baking
The biggest mistake when making berry crisp with frozen berries is not accounting for the extra moisture that frozen fruit releases – tossing your frozen berries with flour before baking helps absorb excess liquid and prevents a soupy dessert. Another common error is overworking the crisp topping – for the best texture, mix the dry ingredients first, then gently stir in the melted butter until you have coarse crumbs, as overmixing can lead to a dense, hard topping instead of a crispy one. Don’t skip the 10-minute rest after baking, as this allows the fruit juices to thicken and makes serving much easier. For the crunchiest topping, avoid pressing the mixture down too firmly on top of the berries – instead, loosely scatter it to allow for proper browning and that perfect crispy texture.
What to Serve With Berry Crisp?
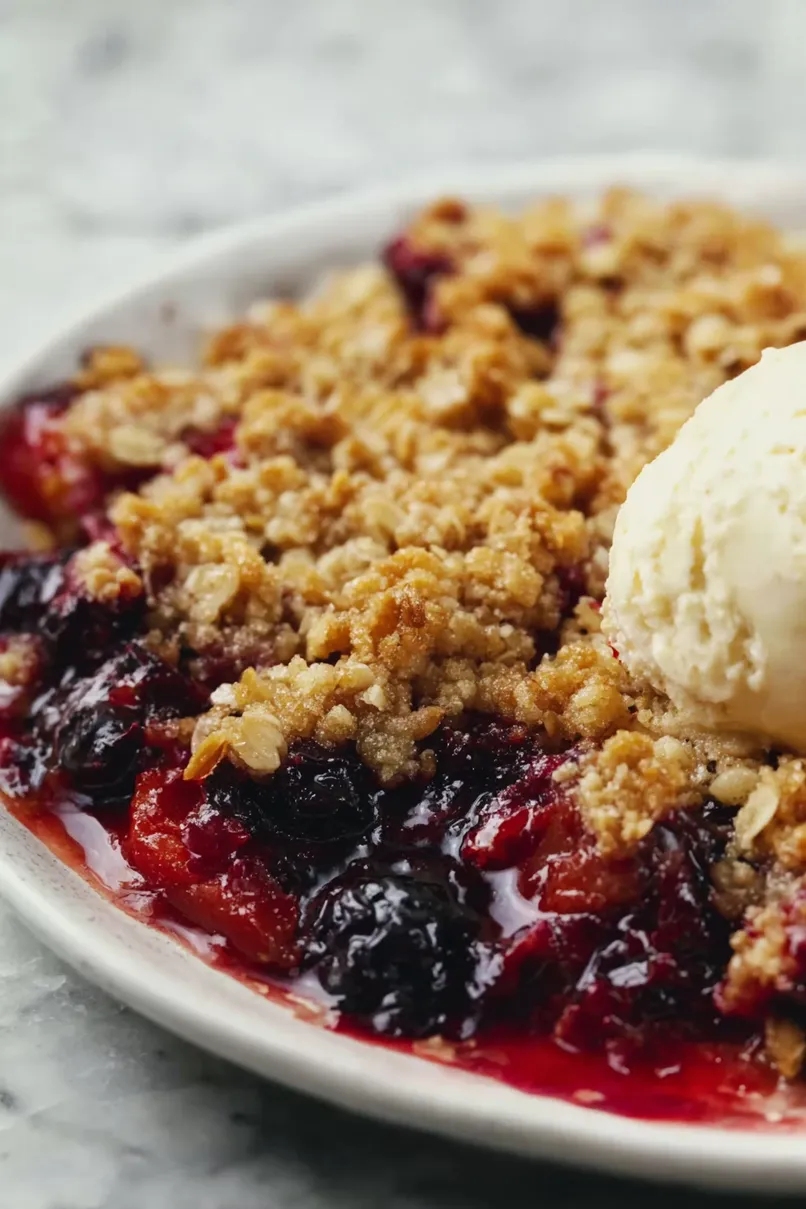
This warm, fruity dessert practically begs for a scoop of vanilla ice cream on top – the way it melts into all those sweet berries and crispy topping is just perfect! If you’re not in an ice cream mood, a dollop of freshly whipped cream or even Greek yogurt adds a nice creamy contrast to the crunchy oat topping. For a special breakfast or brunch serving, try it with a spoonful of mascarpone cheese or a splash of heavy cream poured over the top. On the beverage side, a cup of coffee or hot tea makes this dessert even cozier, especially when it’s served warm from the oven.
Storage Instructions
Keep Fresh: This berry crisp stays good in the fridge for about 4-5 days when covered well. The topping might lose some of its crunch over time, but it’s still super yummy! I like to keep it in an airtight container to keep any fridge smells out.
Freeze: You can freeze your berry crisp for up to 3 months! Just wrap it tightly in plastic wrap and aluminum foil, or pop it in a freezer-safe container. You can freeze it either baked or unbaked – both work great for when you want to plan ahead.
Warm Up: To enjoy your crisp warm, pop it in the oven at 350°F for about 15-20 minutes if it’s coming from the fridge, or 35-40 minutes if frozen. The topping will get nice and crispy again, and the berries will be perfectly warm. I love serving it with a scoop of vanilla ice cream!
| Preparation Time | 15-20 minutes |
| Cooking Time | 40-45 minutes |
| Total Time | 55-65 minutes |
| Level of Difficulty | Easy |
Estimated Nutrition
Estimated nutrition for the whole recipe (without optional ingredients):
- Calories: 2200-2400
- Protein: 30-35 g
- Fat: 100-110 g
- Carbohydrates: 350-370 g
Ingredients
For the topping:
- 1 tsp ground cinnamon
- 2/3 cup melted unsalted butter
- 1 pinch salt
- 1 cup all-purpose flour
- 1/4 cup granulated sugar
- 3/4 cup brown sugar (packed well)
- 1 cup rolled oats (certified gluten-free if needed)
For the filling:
- 1/4 cup all-purpose flour
- 1/4 cup granulated sugar
- 1/2 tsp lemon juice
- 4.5 cups frozen mixed berries (do not thaw)
- 1/4 tsp salt
- 1 tsp vanilla extract
Step 1: Preheat the Oven
Start by preheating your oven to 350 degrees Fahrenheit.
This will ensure that it’s ready to go once your berry crumble is assembled.
Step 2: Prepare the Topping
In a mixing bowl, combine oats, flour, sugar, brown sugar, cinnamon, and a pinch of salt.
Stir these dry ingredients together until well mixed.
Next, pour in the melted butter and stir until the mixture is fully incorporated and crumbly.
Set the topping mixture aside while you prepare the berry filling.
Step 3: Make the Berry Filling
In a separate bowl, add your frozen berries along with flour, sugar, salt, lemon juice, and vanilla extract.
Gently toss all these ingredients together until the berries are evenly coated.
This step helps to balance the sweetness and enhances the natural flavors of the berries.
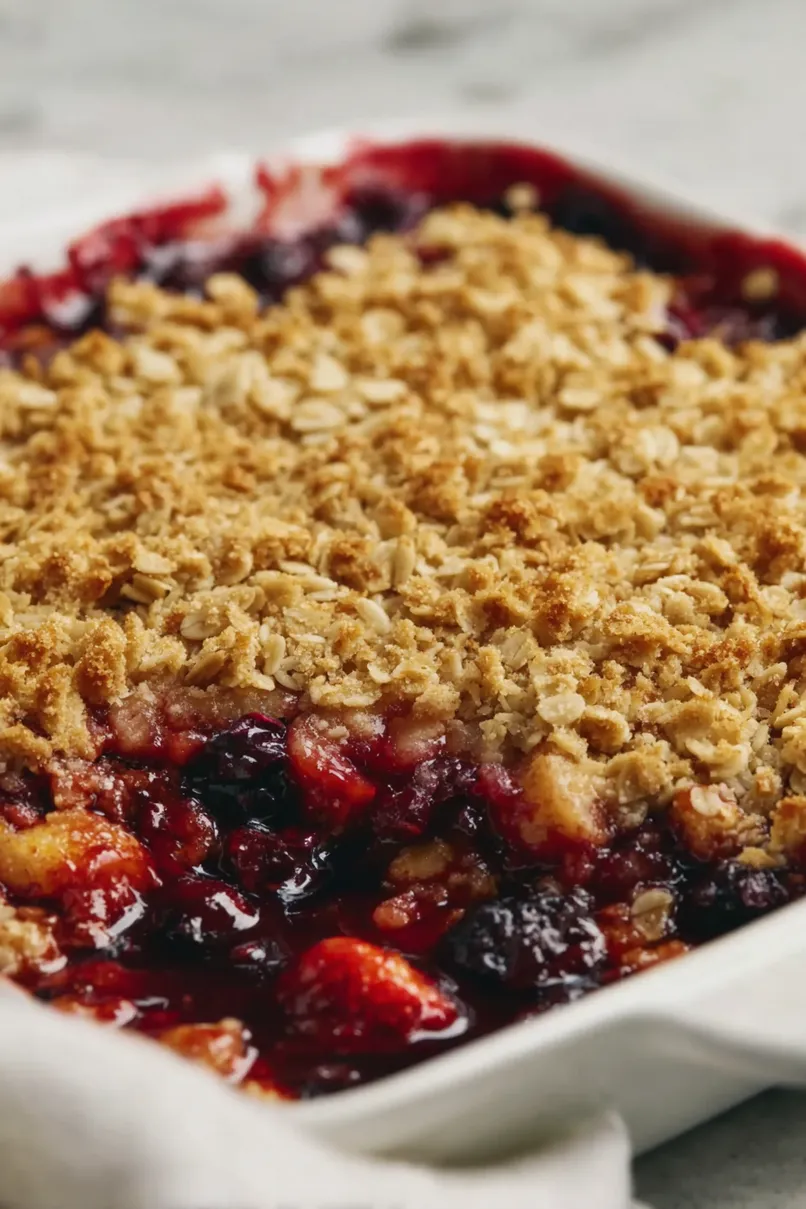
Step 4: Assemble the Berry Crumble
Transfer the mixed berry filling into an 8×8-inch casserole dish or a similar sized pie plate, spreading it out evenly.
Take your prepared topping, and using a spoon or your hands, “glob” it over the top of the berry mixture.
The topping will be softer due to the melted butter, but this is normal.
Step 5: Bake the Crumble
Place the assembled dish in the preheated oven and bake for 40-45 minutes.
You’ll know it’s done when the topping is golden brown and the berries are bubbly around the edges.
The warm, aromatic scent will fill your kitchen as it bakes!
Step 6: Cool and Serve
Once finished baking, remove the crumble from the oven and place it on a wire rack to cool for at least 7-10 minutes before serving.
This cooling period helps the juices to thicken slightly.
Serve the berry crumble warm, optionally with a scoop of vanilla ice cream for added indulgence.
Step 7: Store Leftovers
If you have any leftovers, cover them and store in the refrigerator for up to 5 days.
Enjoy reheated or cold, as desired.
You might also love trying an easy homemade apple crisp for another delicious dessert!
