If you ask me, homemade garlic bread sticks are one of life’s simple pleasures.
These warm, chewy bread sticks bring that classic Italian restaurant experience right to your kitchen table. Fresh garlic and herbs blend with melted butter to create that irresistible aroma that fills your whole house.
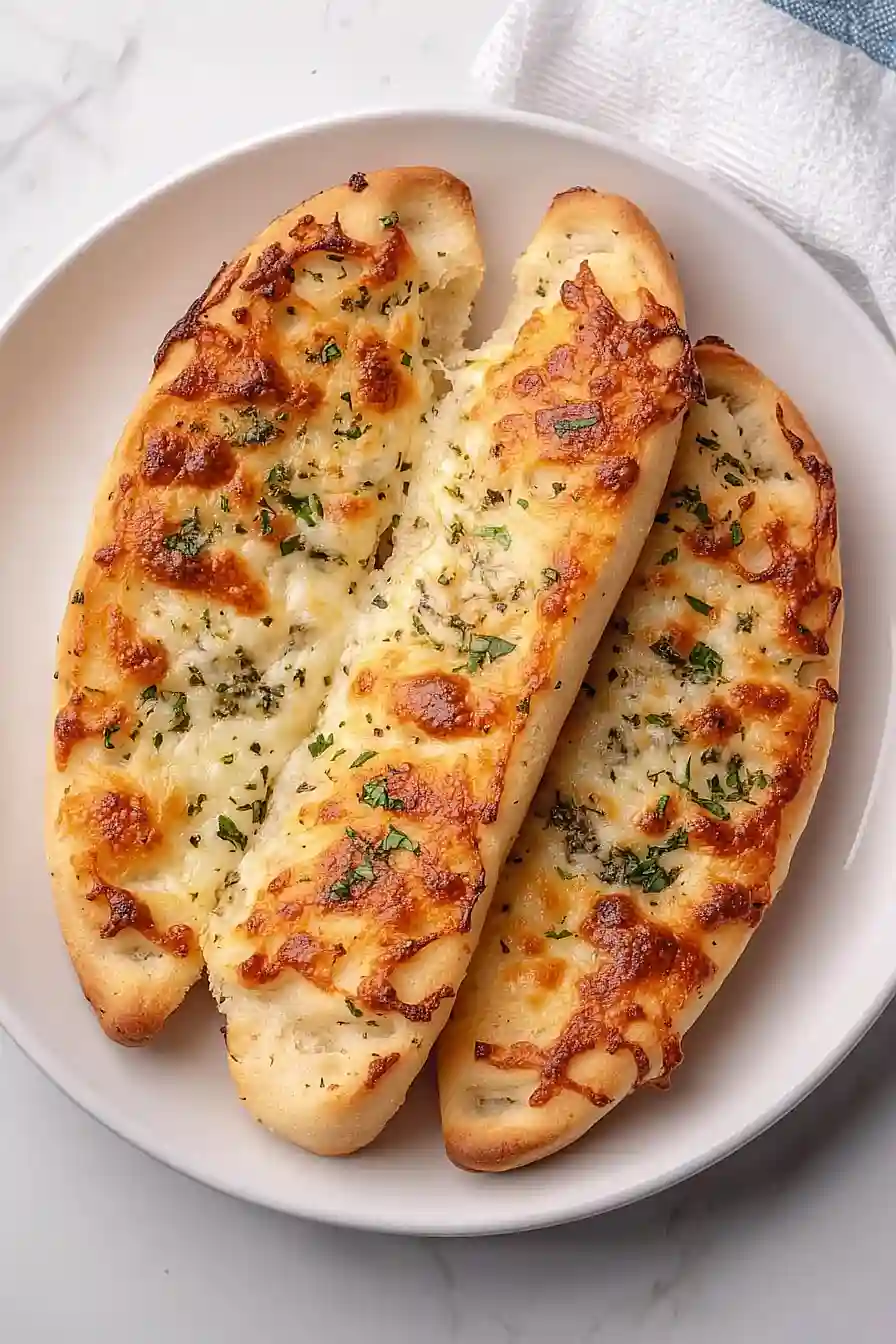
They’re brushed with a generous coating of garlic butter and baked until they’re just golden around the edges. A sprinkle of parsley and grated parmesan takes them from good to can’t-stop-eating-them good.
It’s the kind of side dish that makes any pasta night feel special, and let’s be honest – they rarely make it to leftover status in my house.
Why You’ll Love These Garlic Breadsticks
- Quick and easy – Ready in less than 30 minutes, these breadsticks are perfect for those busy weeknights when you need something tasty to go with dinner.
- Budget-friendly hack – Using hot dog buns instead of specialty bread saves money while still giving you that perfect garlic bread taste and texture.
- Simple ingredients – You only need 5 basic ingredients that you probably already have in your kitchen pantry.
- Kid-friendly recipe – These breadsticks are so simple to make that even kids can help prepare them, making it a fun family cooking activity.
What Kind of Hot Dog Buns Should I Use?
For this clever garlic bread hack, you’ll want to start with fresh, soft hot dog buns from your grocery store’s bakery section. Regular white hot dog buns work perfectly fine, but you could also use whole wheat or potato rolls if you prefer. The key is picking buns that aren’t squished or compressed, since they’ll need to lay flat when you split them for toasting. If your store carries split-top buns (the ones cut on the top instead of the side), those are actually ideal for this recipe since they tend to open up more evenly and give you a nice flat surface to work with. Just make sure whatever buns you choose are fresh – day-old buns can be a bit too dry and might toast up too quickly.

Options for Substitutions
This quick and easy recipe can work with several substitutions if you need to switch things up:
- Hot dog buns: No hot dog buns? No worries! You can use regular sandwich bread, French bread sliced lengthwise, or even hamburger buns. Just adjust the baking time slightly – thicker bread might need an extra minute or two.
- Margarine: Feel free to use butter instead of margarine – it actually gives a richer taste. Olive oil can work too, though the texture will be slightly different.
- Parmesan cheese: While Parmesan gives the best flavor, you can swap it with Romano cheese, Asiago, or even mozzarella. If using mozzarella, add it in the last few minutes of baking so it doesn’t burn.
- Garlic seasoning: If you don’t have garlic seasoning, mix ½ teaspoon garlic powder with ¼ teaspoon salt and a pinch of onion powder. Fresh minced garlic works great too – use about 2 cloves.
- Dried basil: Out of dried basil? Try dried oregano or Italian seasoning instead. Fresh basil works too – just double the amount since fresh herbs are less concentrated than dried.
Watch Out for These Mistakes While Baking
The biggest mistake when making garlic breadsticks is cranking up the oven temperature too high, which can quickly turn your breadsticks from golden to burnt in a matter of minutes – stick to a moderate 350°F and watch them closely. A common error is spreading cold margarine on the buns, which can tear the bread and create uneven coverage, so make sure your margarine is truly softened at room temperature for about 30 minutes before starting. To prevent dry, flavorless breadsticks, don’t skip the important step of mixing your seasonings thoroughly with the margarine before spreading, as this ensures every bite is packed with garlicky goodness. For extra-crispy results, place your breadsticks on the middle rack and leave a little space between each one to allow proper air circulation.

What to Serve With Garlic Bread Sticks?
These easy garlic bread sticks are perfect for dunking into your favorite Italian dishes! They’re great alongside a bowl of marinara-based pasta, like classic spaghetti and meatballs or fettuccine with meat sauce. For a lighter meal, pair them with a Caesar salad or a bowl of minestrone soup – the bread sticks are perfect for soaking up every last drop. If you’re serving these as a party snack, put out some warm marinara sauce or herb-seasoned olive oil for dipping, and watch them disappear in minutes.
Storage Instructions
Keep Fresh: Once your garlic bread sticks have cooled down, place them in a paper bag or wrap them in foil. They’ll stay good at room temperature for about 1-2 days. If you want them to last a bit longer, pop them in the fridge in an airtight container for up to 4 days.
Freeze: These bread sticks are perfect for freezing! Just wrap them tightly in foil, then place in a freezer bag. They’ll keep well for up to 3 months. It’s super handy to make a double batch and have some ready to go whenever you need them.
Warm Up: To get that fresh-baked taste back, wrap the bread sticks in foil and pop them in a 350°F oven for about 5-7 minutes. If they’re frozen, no need to thaw first – just add a few extra minutes to the heating time. You can also give them a quick zap in the microwave, though they might not be as crispy.
| Preparation Time | 10-15 minutes |
| Cooking Time | 8-12 minutes |
| Total Time | 18-27 minutes |
| Level of Difficulty | Easy |
Estimated Nutrition
Estimated nutrition for the whole recipe (without optional ingredients):
- Calories: 600-700
- Protein: 10-15 g
- Fat: 40-50 g
- Carbohydrates: 50-60 g
Ingredients
- 1 tsp crushed dried basil
- 2 tbsp softened margarine (room temperature, not melted)
- 2 tbsp shredded parmesan cheese
- 4 hot dog buns (preferably brioche for a richer flavor)
- 1 tsp garlic seasoning
Step 1: Preheat Oven and Prepare Baking Sheet
Begin by preheating your oven to 400 degrees F (200 degrees C).
While the oven is heating, line a rimmed baking sheet with parchment paper to prevent sticking and for easy cleanup.
Step 2: Prepare Parmesan Mixture
In a small bowl, stir together Parmesan cheese, garlic powder, and basil until well combined.
This mixture will serve as the flavorful topping for your buns.
Step 3: Prepare Hot Dog Buns
Place hot dog buns, with the cut-sides facing up, onto the prepared baking sheet.
This position will help the toppings adhere better to the buns.
Spread a layer of margarine over each cut side of the buns, ensuring they are evenly coated.
Step 4: Add Parmesan Topping
Sprinkle the prepared Parmesan mixture over the margarine-coated surfaces of the hot dog buns.
Be generous to ensure each bun is well-covered with the cheesy, garlicky goodness.
Step 5: Bake Until Golden
Transfer the baking sheet to the preheated oven and bake for about 10 minutes, or until the buns are golden brown and crispy.
Keep an eye on them to avoid over-baking.
Step 6: Serve
Once baked, remove the baking sheet from the oven.
Allow the buns to cool slightly before serving.
These Parmesan-topped hot dog buns make a delicious side or snack.
Enjoy!
