If you ask me, homemade scones are one of life’s simple pleasures.
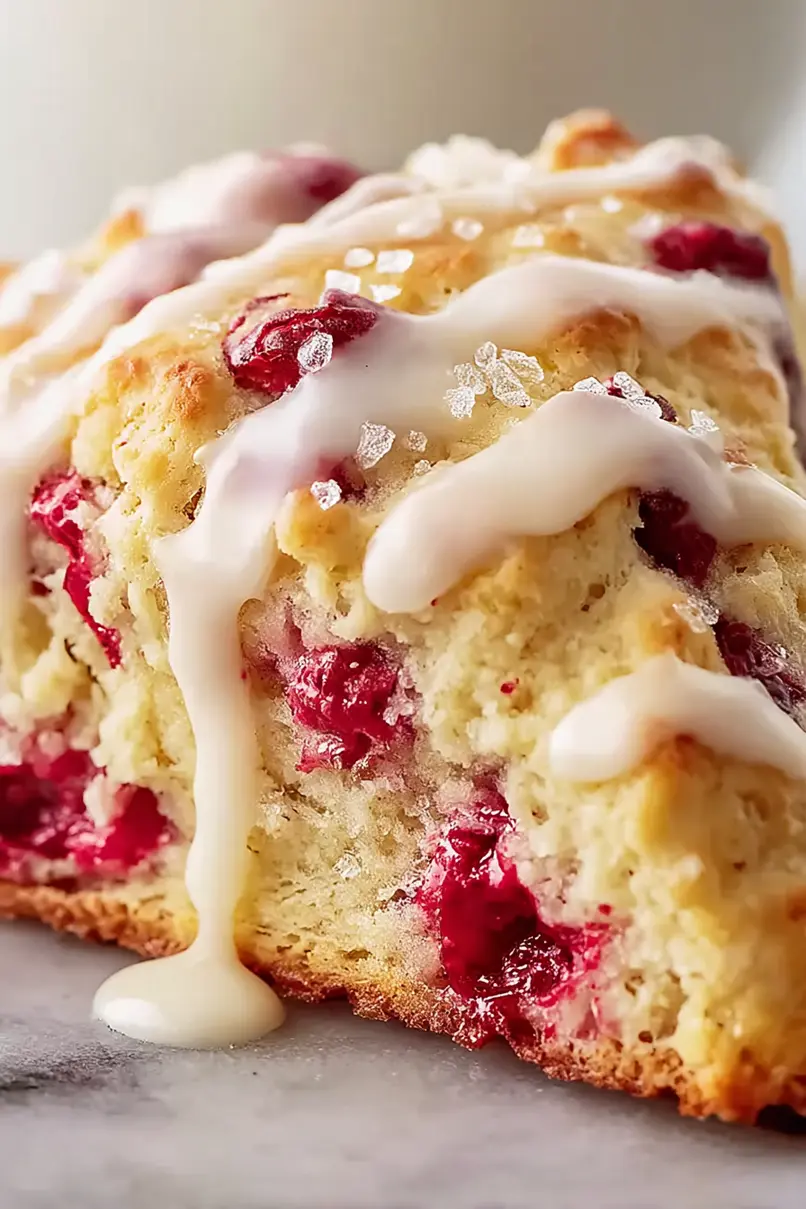
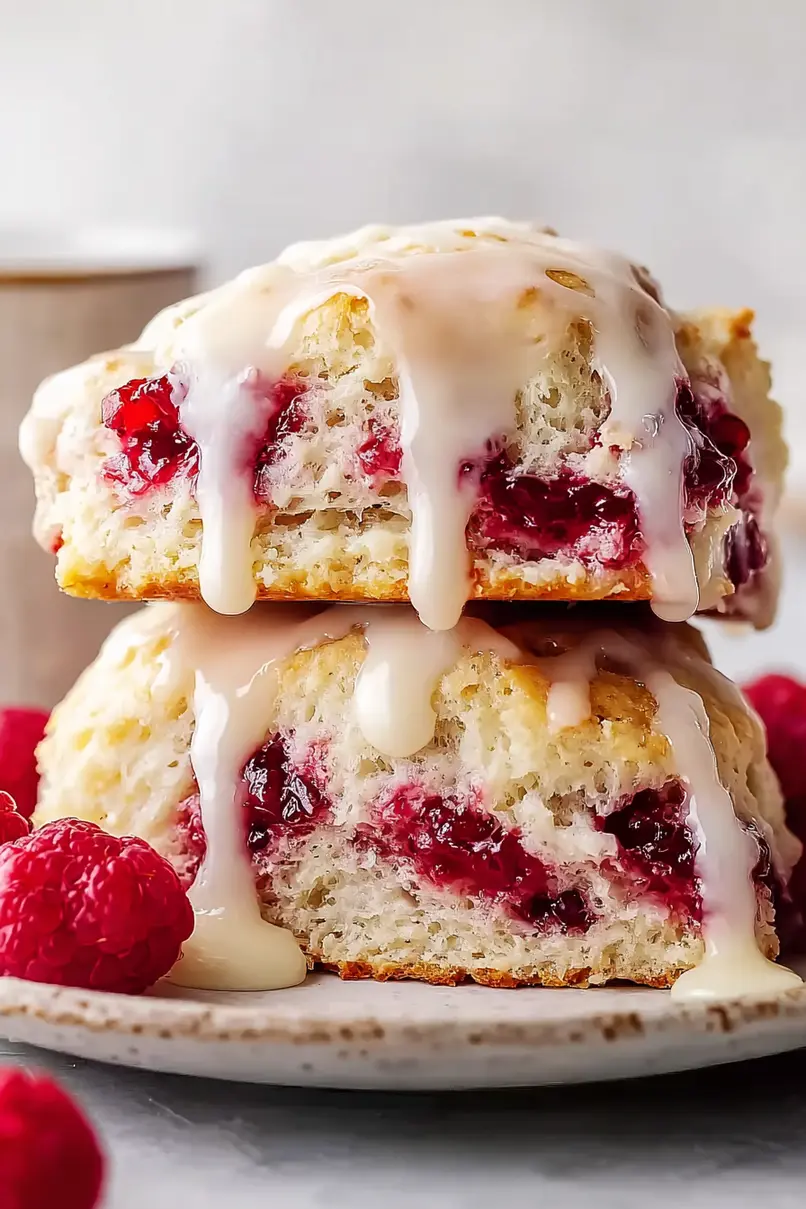
These raspberry scones are exactly what you want on a lazy weekend morning – tender, buttery treats dotted with sweet-tart berries. The outside gets just slightly crisp while the inside stays soft and fluffy.
They’re made with basic pantry ingredients, and fresh raspberries add little bursts of fruit in every bite. A light dusting of sugar on top gives them that classic bakery-style finish.
It’s the kind of breakfast treat that makes you want to slow down, pour another cup of coffee, and enjoy the morning.
Why You’ll Love These Raspberry Scones
- Bakery-style results – These scones turn out perfectly flaky and buttery, just like the ones from your favorite coffee shop, but at a fraction of the cost.
- Simple ingredients – You likely have most of these basic baking ingredients in your pantry already – just grab some fresh raspberries and you’re ready to go.
- Make-ahead friendly – The dough can be prepared and shaped ahead of time, then frozen for up to 3 months – perfect for unexpected guests or weekend brunch plans.
- Customizable recipe – While raspberries make these scones extra special, you can easily swap in other berries or add chocolate chips for a different twist.
- Quick breakfast option – From start to finish, you can have fresh, warm scones ready in under an hour – perfect for weekend mornings when you want something special but not complicated.
What Kind of Raspberries Should I Use?
Fresh raspberries are the top choice for these scones, but frozen ones can work in a pinch – just don’t thaw them first or you’ll end up with mushy scones. If you’re using fresh raspberries, look for berries that are bright red, plump, and firm to the touch, avoiding any that show signs of mold or mushiness. For the best results, try to use your raspberries within a day or two of purchase since they tend to spoil quickly. When preparing the scones, handle the raspberries gently when mixing them into the dough to keep them from breaking apart too much.
Options for Substitutions
These scones are pretty adaptable, and here’s what you can swap if needed:
- All-purpose flour: While all-purpose flour works best here, you can use pastry flour for a more tender scone. I wouldn’t recommend whole wheat flour as it’ll make them too dense.
- Whole milk: Feel free to use heavy cream for extra richness, or buttermilk for a slight tang. Plant-based milks work too – just make sure to use an unsweetened variety.
- Raspberries: Fresh or frozen raspberries both work great. You can also swap them with blackberries, blueberries, or chopped strawberries. If using frozen berries, don’t thaw them first – add them while still frozen.
- Butter: The cold butter is crucial for flaky scones, but you can use salted butter – just reduce the added salt to 1/2 teaspoon. Vegan butter can work too, but the texture might be slightly different.
- Coarse sugar topping: Regular granulated sugar works if you don’t have coarse sugar, or you can skip it altogether.
- Lemon juice: For the glaze, you can use milk instead of lemon juice, or try orange juice for a different flavor.
Watch Out for These Mistakes While Baking
The success of your scones largely depends on the temperature of your ingredients – using butter that’s too warm will result in flat, greasy scones instead of those coveted flaky layers, so keep your butter cold until the moment you’re ready to use it and pop it back in the fridge if your kitchen is warm. Working the dough too much is another common mistake that leads to tough, dense scones – mix just until the ingredients come together and resist the urge to knead the dough like bread. When adding the raspberries, handle the dough gently and don’t worry if they break apart a bit – this actually helps distribute their flavor throughout the scones. For the best texture, make sure your milk is cold too, and don’t skip chilling the shaped scones for 15-20 minutes before baking – this extra step helps them maintain their shape and rise better in the oven.
What to Serve With Raspberry Scones?
These sweet and fruity scones are perfect for breakfast or afternoon tea! A classic cup of hot English breakfast tea or Earl Grey makes the perfect warming companion to these buttery treats. If you’re hosting brunch, serve them alongside some scrambled eggs and crispy bacon for a more filling meal. For a lovely summer spread, pair them with fresh berries, whipped cream, and your favorite jam (raspberry or strawberry works especially well). You can also keep things simple with just a pat of good butter and a drizzle of honey.
Storage Instructions
Keep Fresh: These raspberry scones are best enjoyed the day they’re baked, but you can keep them in an airtight container at room temperature for up to 2 days. If you live in a humid climate, pop them in the fridge instead to prevent the glaze from getting too sticky.
Freeze: Want to prep these ahead? You can freeze unbaked scones for up to 3 months! Just place the shaped scones on a baking sheet, freeze until solid, then transfer to a freezer bag. When ready to bake, no need to thaw – just add a few extra minutes to the baking time. For baked scones, freeze them unglazed in an airtight container for up to 2 months.
Make Ahead: You can mix the dry ingredients and cut in the butter ahead of time – store this mixture in an airtight container in the fridge for up to 2 days. When you’re ready to bake, just add the wet ingredients and raspberries, shape, and pop them in the oven. The glaze can also be made a day ahead and stored in the fridge.
| Preparation Time | 20-30 minutes |
| Cooking Time | 20-30 minutes |
| Total Time | 40-60 minutes |
| Level of Difficulty | Medium |
Estimated Nutrition
Estimated nutrition for the whole recipe (without optional ingredients):
- Calories: 1800-2000
- Protein: 20-25 g
- Fat: 90-100 g
- Carbohydrates: 250-270 g
Ingredients
For the scones:
- 1/2 tsp pure vanilla extract
- 1 cup raspberries (fresh or frozen, do not thaw if frozen)
- 1/3 cup sugar
- 3/4 cup whole milk (cold for best results)
- 1 tbsp baking powder
- 1 tsp kosher salt
- 3 cups all-purpose flour (I always use King Arthur all-purpose flour)
- 12 tbsp cold unsalted butter (cut into 1/2-inch cubes)
For the topping:
- coarse sugar (for a sparkly finish)
For the icing:
- 1 cup powdered sugar (sifted to prevent lumps)
- 1 tbsp lemon juice (freshly squeezed for brighter flavor)
- 1/2 tsp pure vanilla extract
Step 1: Prepare Baking Materials
Preheat your oven to 375℉.
While it’s heating, line a large sheet pan with parchment paper to ensure easy cleanup and prevent sticking.
Set the prepared pan aside until you’re ready to use it.
Step 2: Mix Dry Ingredients and Incorporate Butter
In a large mixing bowl, whisk together the flour, sugar, baking powder, and salt until well combined.
Use a pastry blender to cut the butter into the dry ingredients until the mixture resembles a shaggy, sandy texture, with butter pieces about the size of large peas.
Step 3: Combine Wet Ingredients and Form Dough
Drizzle the milk and vanilla over the crumbly mixture.
Stir everything together using a spatula until mostly combined.
Once the crumbs start to hold together, use your hands to fold in the frozen berries.
Work swiftly but gently, kneading until the flour is fully incorporated and you have a cohesive mound of dough.
Step 4: Shape and Cut the Scones
Transfer the dough to a lightly-floured work surface.
Shape it into a flat, round disk about 1-1/2 inches thick; it’s okay if it’s slightly uneven.
Use a bench scraper or sharp knife to cut the dough into 6 equal wedges.
Step 5: Prepare and Bake the Scones
Place the scones onto the prepared sheet pan, spacing them apart to allow for expansion during baking.
Lightly brush the tops of the scones with milk and sprinkle them with sanding sugar for a sweet, crunchy finish.
Bake the scones for 20-30 minutes, or until they are golden brown, gently puffed, and cooked through.
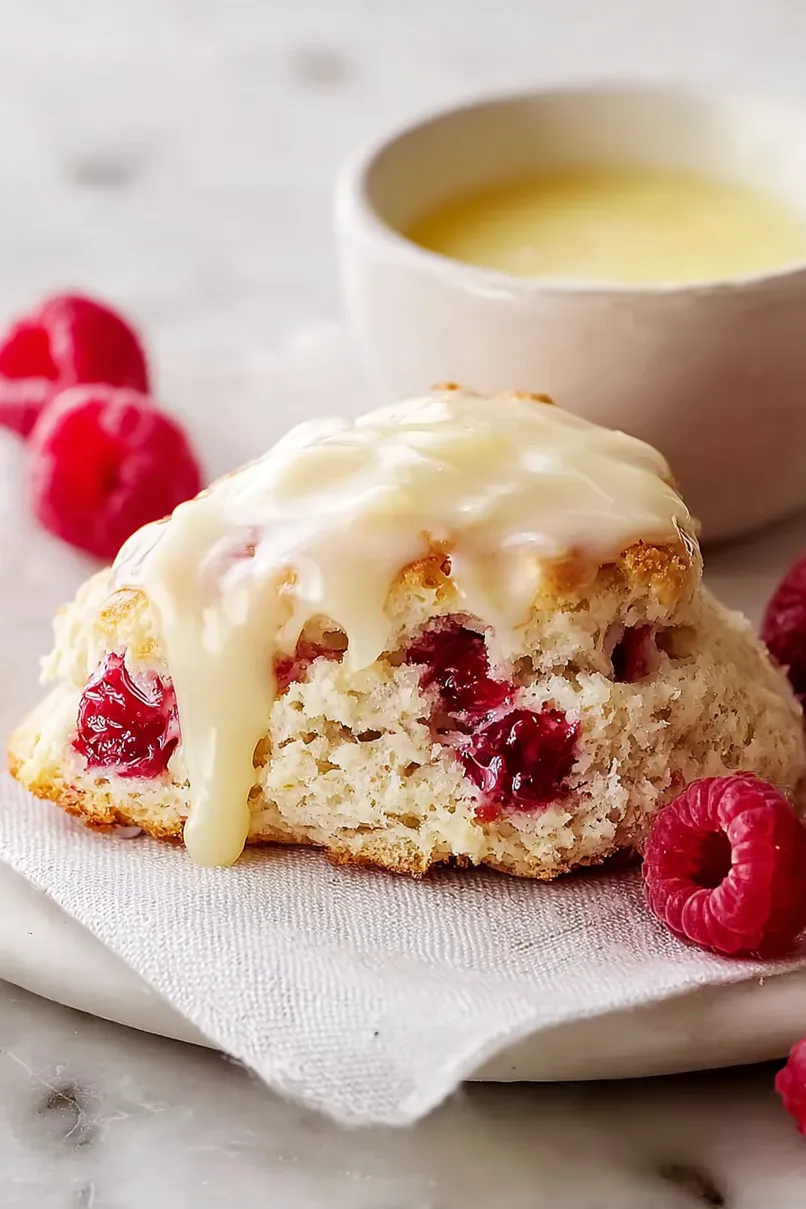
Step 6: Prepare Icing and Finish the Scones
In a small bowl, mix the powdered sugar and lemon juice until smooth.
Stir in the vanilla and, if necessary, add a splash or two of milk to reach your desired consistency.
While the scones are still warm, drizzle each one with the icing.
Allow them to set on a baking rack before indulging.
Enjoy your freshly baked scones!

So mad! Followed recipe exactly but missed step about chilling before baking because it was NOT printed in the steps! I went back to blog and there was the little hint about chilling prior to baking! Needless to say the scones spread while baking! NOT NICE!!! >:(