When I was growing up, my mom used to make this marble cake that looked like magic on a plate. Three flavors swirled together in one pan – vanilla, chocolate, and strawberry. It reminded me of those Neapolitan ice cream bars we’d get from the freezer section, but better because it was homemade.
Now I make this same cake for my own family, and it never fails to impress. The kids love trying to guess which flavor they’ll get in each bite. My husband always goes straight for the chocolate swirls. And I love that I can satisfy everyone’s cravings with just one cake instead of making three separate desserts.
The best part? It’s way easier than it looks. You make one basic batter, divide it into three bowls, and add different flavors to each. A few swirls with a knife, and you’ve got yourself a showstopper that tastes like childhood memories.
Why You’ll Love This Neapolitan Marble Cake
- Three flavors in one cake – You get the classic neapolitan combination of vanilla, chocolate, and strawberry all swirled together in one beautiful cake, so there’s something for everyone.
- Simple ingredients – This recipe uses basic baking staples like butter, sugar, flour, and eggs that you likely already have in your pantry.
- Perfect for special occasions – The marbled pattern and pretty pink swirls make this cake look impressive enough for birthdays, celebrations, or when you want to treat yourself to something special.
- Easy marble technique – Creating the marble effect is simpler than it looks – just divide your batter, add your flavors, and swirl them together for a professional-looking result.
What Kind of Butter Should I Use?
For this Neapolitan marble cake, you’ll want to use good quality unsalted butter that’s been softened to room temperature. The butter needs to be soft enough that you can easily press your finger into it, but not so warm that it’s melting or greasy. If you forgot to take your butter out ahead of time, you can cut it into small cubes to help it soften faster, or grate it using a box grater. Avoid using margarine or butter substitutes for this recipe, as real butter gives you the best flavor and texture for both the cake and the buttercream frosting. European-style butter with higher fat content will give you an even richer result, but regular supermarket butter works perfectly fine too.
Options for Substitutions
This marble cake is pretty forgiving when it comes to swaps, so here are some options if you’re missing ingredients:
- Vanilla bean paste: Regular vanilla extract works perfectly here – use 1 teaspoon. You can also try almond extract for a different flavor, but use only ½ teaspoon as it’s stronger.
- Self-raising flour: Mix 300g plain flour with 4½ teaspoons baking powder if you don’t have self-raising flour on hand. Make sure to sift them together well.
- Caster sugar: Regular granulated sugar works just fine, or you can pulse granulated sugar in a food processor for 30 seconds to make it finer.
- Pink food colouring: Skip the pink layer entirely for a classic chocolate-vanilla marble, or try other colors like yellow or green. Natural alternatives include a tiny bit of beetroot powder for pink.
- Icing sugar mixture: You can make your own by blending regular sugar in a food processor until powdery, or use regular icing sugar – just sift it first to avoid lumps.
- Butter: For the cake, you can substitute with equal amounts of vegetable oil or melted coconut oil (cooled slightly). For the frosting, stick with butter as it’s essential for the right texture.
Watch Out for These Mistakes While Baking
The biggest mistake when making marble cake is overmixing the batter once you add the flour, which can lead to a tough, dense cake instead of a light and fluffy one – mix just until the ingredients are combined.
Another common error is not having your eggs and butter at room temperature, as cold ingredients won’t cream properly and can cause the batter to curdle, so take them out of the fridge about an hour before baking.
When creating the marble effect, resist the urge to swirl too much – just a few gentle figure-eight motions with a knife will do, as too much mixing will muddy the colors and you’ll lose that beautiful marbled pattern.
For the frosting, make sure your butter is properly softened (not melted) and sift your cocoa powder to avoid lumps that can ruin the smooth texture.
What to Serve With Neapolitan Marble Cake?
This pretty marble cake is perfect on its own with a cup of coffee or tea, but you can easily dress it up for special occasions. A scoop of vanilla ice cream alongside a slice makes for a simple but satisfying dessert, especially if you want to play up those Neapolitan flavors. Fresh berries like strawberries or raspberries add a nice pop of color and a bit of tartness that balances out the sweet cake. For something extra indulgent, try serving it with a dollop of whipped cream or even a drizzle of chocolate sauce to highlight those beautiful swirled layers.
Storage Instructions
Keep Fresh: This marble cake stays moist and delicious when wrapped tightly in plastic wrap or stored in an airtight container at room temperature for up to 4 days. The buttercream frosting holds up really well, so you don’t need to worry about it getting messy or melting.
Refrigerate: If your kitchen is particularly warm or you want to keep the cake for longer, pop it in the fridge for up to a week. Just bring it back to room temperature for about 30 minutes before serving so the flavors really shine through and the texture is perfect.
Freeze: You can freeze slices of this cake wrapped individually in plastic wrap for up to 3 months. It’s great for portion control or when you want to save some for later! Thaw overnight in the fridge, then let it come to room temperature before enjoying.
| Preparation Time | 20-30 minutes |
| Cooking Time | 50-60 minutes |
| Total Time | 70-90 minutes |
| Level of Difficulty | Medium |
Estimated Nutrition
Estimated nutrition for the whole recipe (without optional ingredients):
- Calories: 4500-4800
- Protein: 38-45 g
- Fat: 270-300 g
- Carbohydrates: 500-540 g
Ingredients
For the marble cake:
- 2 tbsp unsweetened cocoa powder
- Pink food coloring (liquid)
- 1 cup superfine sugar
- 3 large eggs (room temperature for better emulsion)
- 1 tbsp milk
- 1 tsp vanilla bean paste (for a richer vanilla flavor)
- 1 cup plus 1 tbsp unsalted butter (softened and cut into small pieces)
- 2 cups self-raising flour (I use Gold Medal self-rising flour for consistent results)
- 1/2 cup milk
For the chocolate buttercream:
- 2 1/2 cups powdered sugar (sifted to prevent lumps)
- 1/4 cup unsweetened cocoa powder
- 3 tbsp whole milk
- 3/4 cup unsalted butter (softened for easy creaming)
Step 1: Preheat Oven and Prepare the Cake Pan
Preheat your oven to 180°C (350°F).
Grease a 20cm square cake pan and line both the base and sides with baking paper to ensure the cake releases easily after baking.
Step 2: Make the Cake Batter
- 1 cup plus 1 tbsp unsalted butter, softened and cut up (about 8.8 oz or 250g)
- 1 cup superfine sugar (about 7.8 oz or 220g)
- 1 tsp vanilla bean paste
- 3 large free range eggs, room temperature
- 2 cups self-raising flour (about 10.6 oz or 300g)
- 1/2 cup milk (about 4.2 fl oz or 125ml)
In a large mixing bowl, use an electric mixer to beat 1 cup plus 1 tablespoon of softened butter, superfine sugar, and vanilla bean paste until the mixture turns pale and creamy.
Add the eggs one at a time, beating well after each addition to fully incorporate.
Next, add the self-raising flour and 1/2 cup milk in alternating batches, gently stirring after each addition until just combined.
Be careful not to overmix; this keeps the cake light and tender.
I like to scrape down the sides of the bowl occasionally to make sure everything is evenly mixed.
Step 3: Divide and Tint the Batter
- 2 tbsp unsweetened cocoa powder (about 0.35 oz or 10g)
- 1 tbsp milk, extra (about 0.7 fl oz or 20.6g)
- pink food coloring, liquid
Evenly divide the cake batter into three portions.
To one portion, add 2 tablespoons of unsweetened cocoa powder and 1 tablespoon of extra milk, stirring until well combined to create a chocolate layer.
To another portion, add a few drops of pink liquid food coloring and mix until you achieve your desired shade.
The third portion will remain plain.
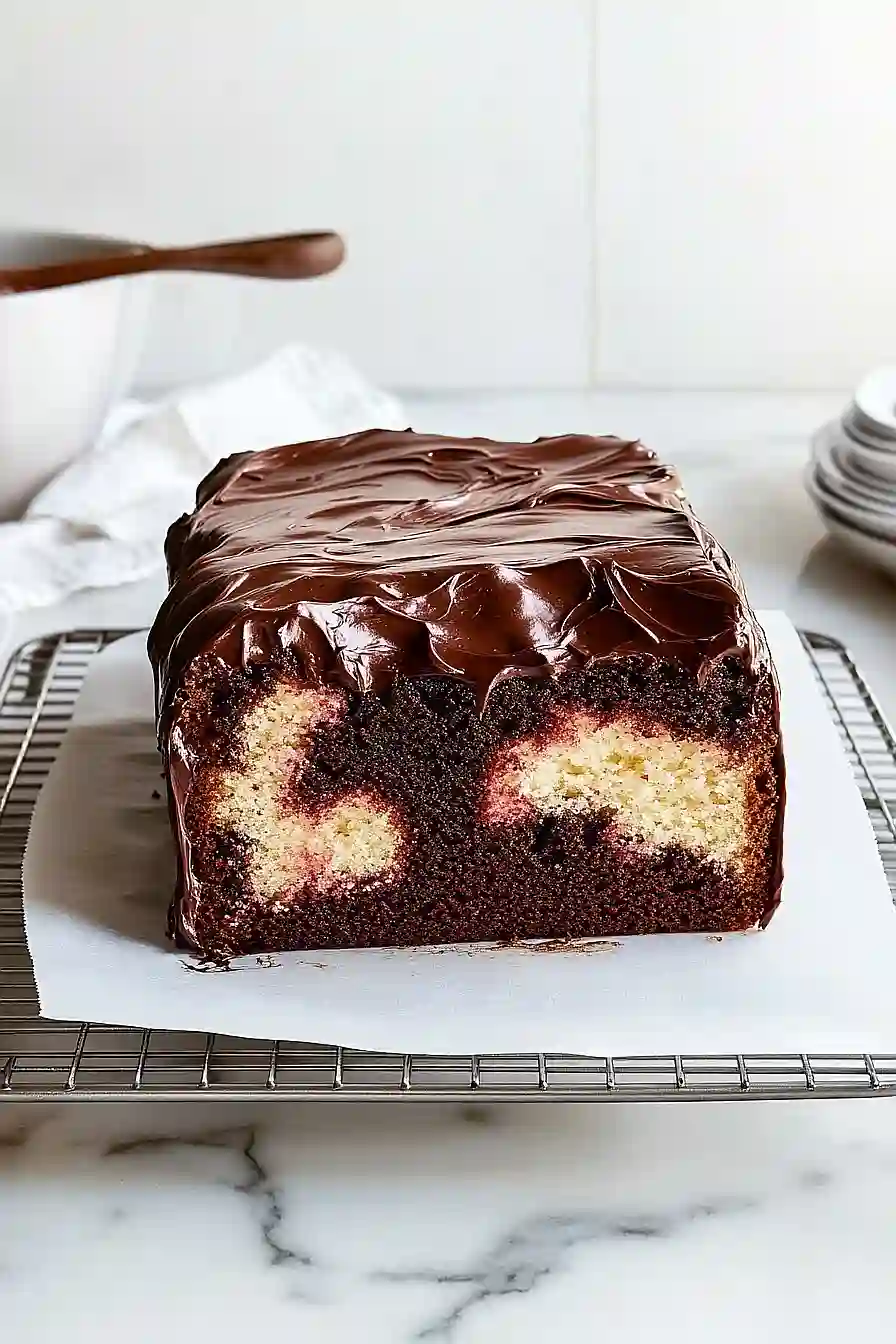
Step 4: Assemble and Marble the Cake
- chocolate batter (from Step 3)
- pink batter (from Step 3)
- plain batter (from Step 3)
Spoon the three batters, alternating spoonfuls, into the prepared cake pan.
Use a round-bladed knife to swirl the batters together gently, creating a marbled effect.
Smooth the surface with a spatula or the back of a spoon, taking care not to overmix the colors.
Step 5: Bake and Cool the Cake
Bake the marbled cake in the preheated oven for 50 minutes to 1 hour, or until a skewer inserted into the center comes out clean.
Allow the cake to cool in the pan for 5 minutes, then turn it out onto a wire rack to cool completely.
I like to cool my cakes on a wire rack to prevent the bottom from getting soggy.
Step 6: Prepare the Chocolate Buttercream
- 3/4 cup unsalted butter, softened (about 6 oz or 170g)
- 2 1/2 cups powdered sugar (about 11.3 oz or 320g)
- 1/4 cup unsweetened cocoa powder (about 0.7 oz or 20g)
- 3 tbsp whole milk (about 1.4 fl oz or 41.2g)
While the cake is cooling, make the chocolate buttercream.
In a clean bowl, use an electric mixer to beat 3/4 cup softened butter until very pale and fluffy.
Gradually add the powdered sugar in batches, beating well after each addition.
Add the remaining unsweetened cocoa powder and 3 tablespoons whole milk, then beat until everything is smooth and well combined.
For an extra silky finish, I sometimes beat the butter for a few extra minutes before adding the sugar.
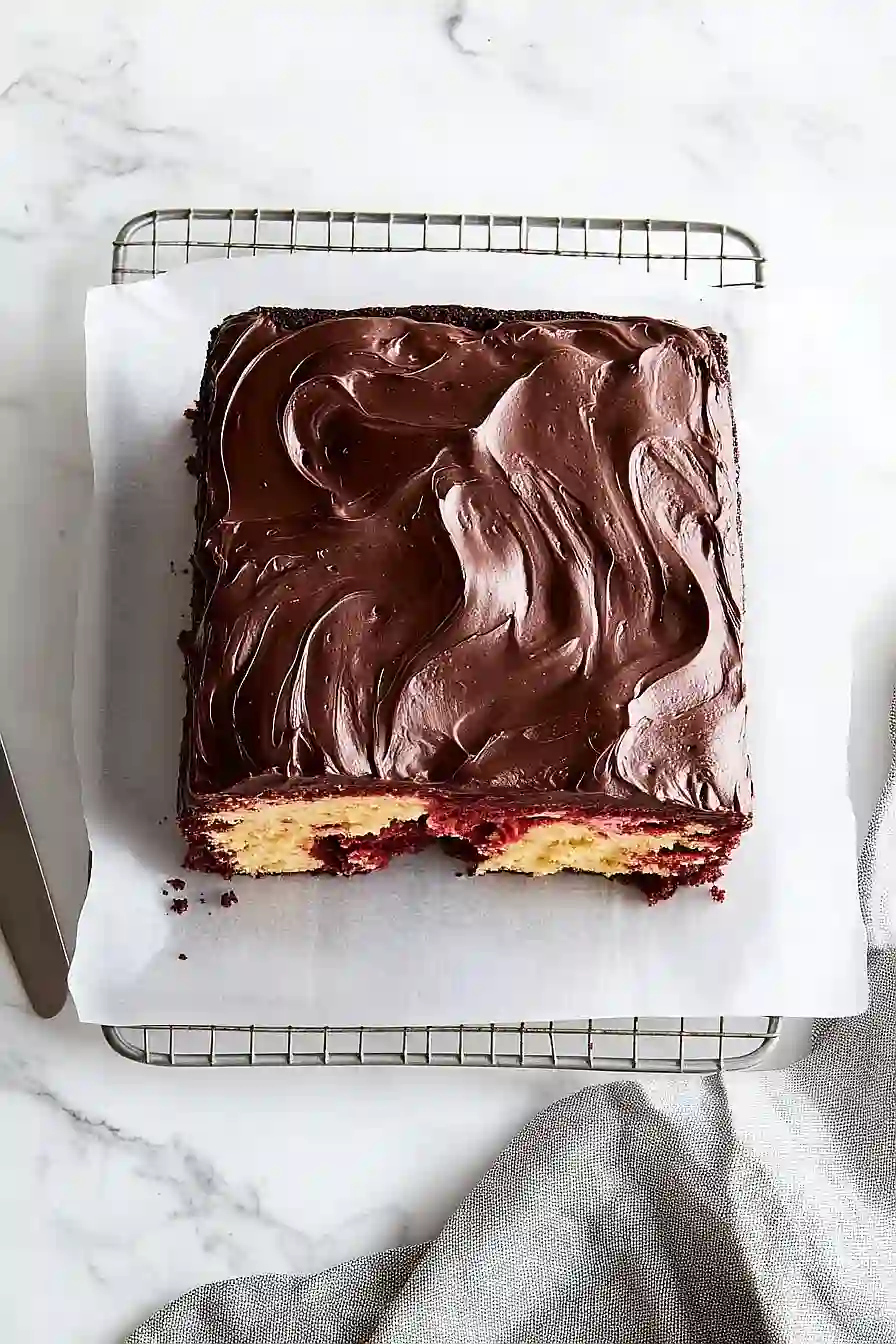
Step 7: Frost and Serve the Cake
- chocolate buttercream (from Step 6)
- cooled marbled cake (from Step 5)
Once the cake is completely cool, place it on a serving plate.
Spread the top evenly with the chocolate buttercream prepared in Step 6.
Slice and serve your delicious marbled cake.
