I have a confession to make. I’m that person who starts thinking about Halloween treats in September. My kids always roll their eyes when I mention pumpkin anything before October, but I can’t help myself. There’s something about that first hint of fall in the air that makes me want to start experimenting with pumpkin flavors.
That’s how these pumpkin cream cheese mints came to be. I was craving something creamy and sweet, but not too heavy. Something that would give me that fall flavor without being another slice of pie or batch of cookies. I wanted a treat that felt special but wouldn’t leave me feeling stuffed.
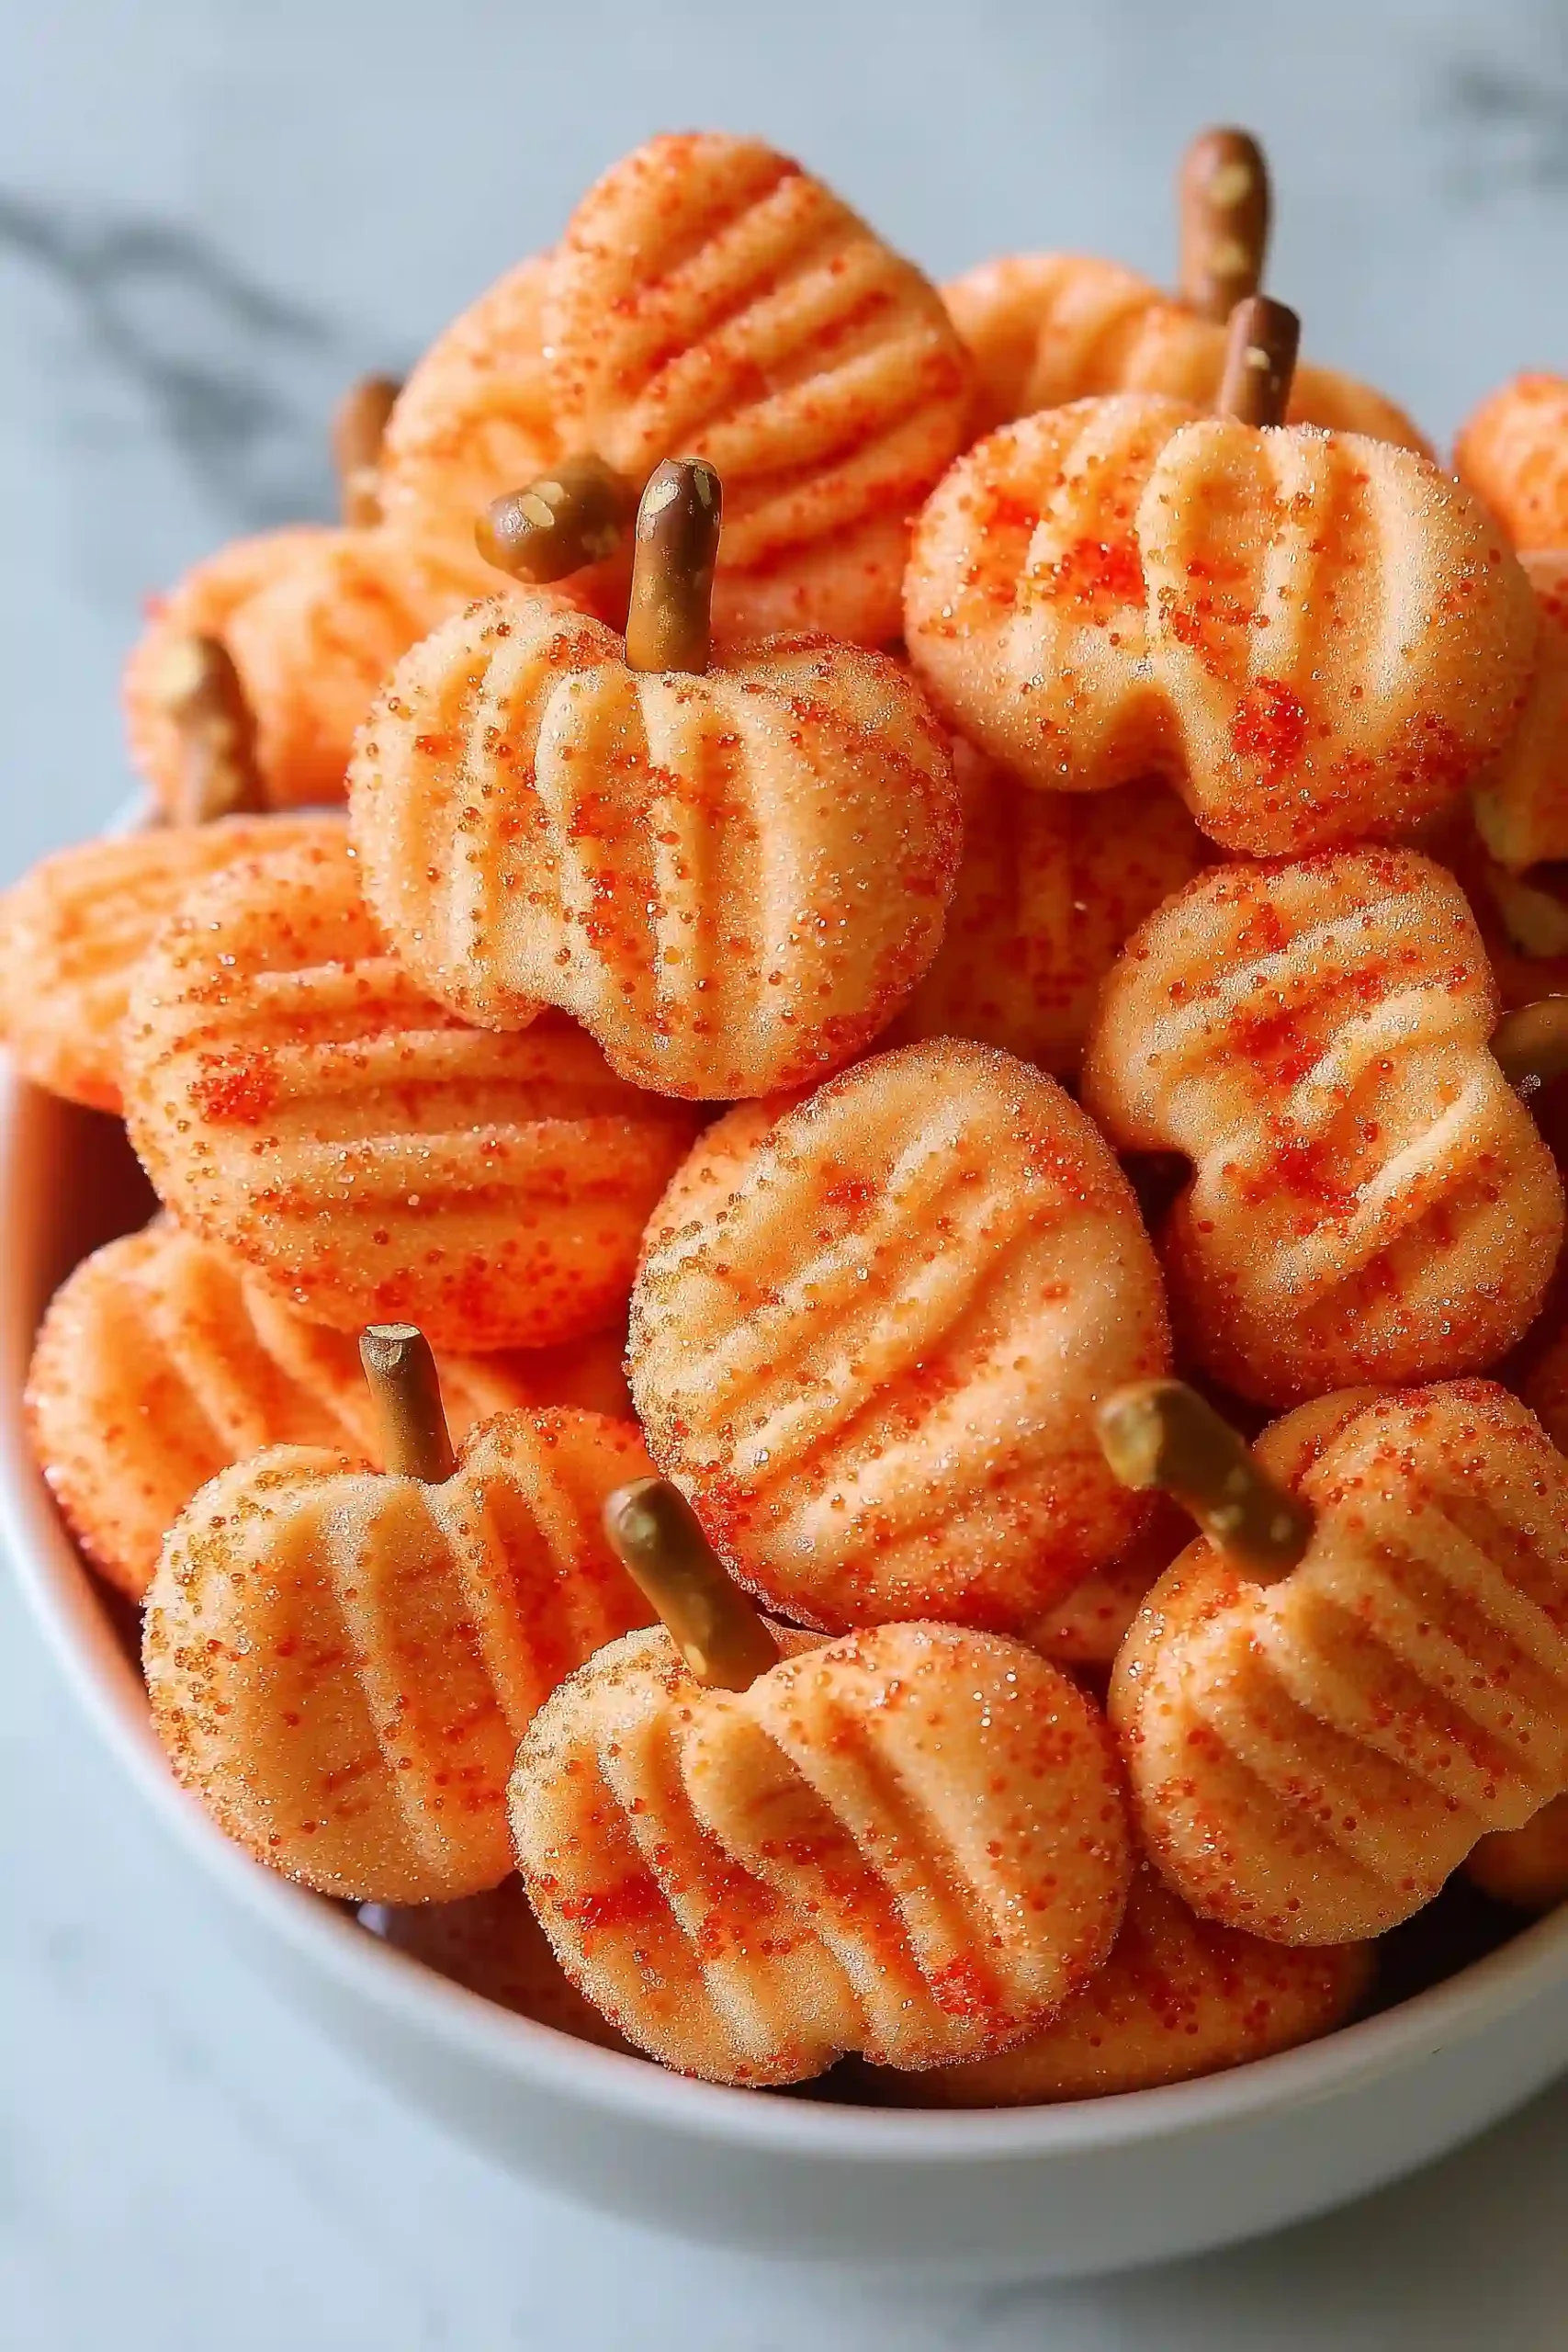
The best part? These little mints are no-bake, which means I can make them while dinner is in the oven. They’re perfect for Halloween parties, fall gatherings, or just when you want something sweet that tastes like autumn. Trust me, once you try these, you’ll be making them all season long.
Why You’ll Love These Pumpkin Cream Cheese Mints
- Quick and easy to make – These adorable treats come together in just 15-25 minutes, making them perfect for last-minute party prep or when you need a sweet treat fast.
- No baking required – You don’t need to turn on the oven for these mints – just mix, shape, and chill for a hassle-free dessert experience.
- Perfect for fall celebrations – The cute pumpkin shape and orange color make these ideal for Halloween parties, Thanksgiving gatherings, or any autumn get-together.
- Simple ingredients – With just cream cheese, powdered sugar, and a few basic items, you probably already have most of what you need in your kitchen.
- Fun to make with kids – Rolling and shaping these little pumpkins is a great activity to do with children, and they’ll love helping create something so cute and tasty.
What Kind of Cream Cheese Should I Use?
For these pumpkin cream cheese mints, you’ll want to use regular full-fat cream cheese rather than the low-fat or whipped varieties. The full-fat version gives you the best texture and helps the mints hold their shape properly. Make sure your cream cheese is completely softened before you start – I like to take it out of the fridge about an hour before making the recipe, or you can soften it quickly in the microwave for 15-20 seconds. Brand-wise, any standard cream cheese from the grocery store will work perfectly, whether it’s Philadelphia, store brand, or whatever you have on hand.
Options for Substitutions
These little pumpkin treats are pretty forgiving when it comes to swaps:
- Cream cheese: You can substitute with softened butter for a different texture, though the flavor will be richer and less tangy. Make sure whatever you use is at room temperature for easy mixing.
- Almond extract: Feel free to swap this with vanilla extract, peppermint extract, or even orange extract to match the pumpkin theme. Start with less since some extracts are stronger than others.
- Orange food dye: If you don’t have orange dye, mix red and yellow food coloring to get that pumpkin color. You can also skip the coloring entirely for white mints.
- Colored orange sugar: Regular granulated sugar works fine, or you can make your own colored sugar by mixing white sugar with a few drops of food coloring in a small bowl.
- Stick pretzels: Small pretzel sticks, toothpicks, or even small pieces of green candy can work as pumpkin stems. Just make sure they’re food-safe if people will be eating them.
- Powdered sugar: This is pretty essential for the right texture and sweetness, so I’d recommend sticking with powdered sugar rather than substituting with regular sugar.
Watch Out for These Mistakes While Cooking
The biggest mistake when making pumpkin cream cheese mints is adding the powdered sugar too quickly, which can create a lumpy, unworkable mixture – instead, add it gradually while mixing to achieve a smooth, moldable consistency.
Another common error is using too much food coloring, which can make your mints taste bitter and look artificial, so start with just a drop or two and build up the orange color slowly.
To prevent your mints from becoming too soft or sticky to handle, make sure your cream cheese is softened but not warm, and if the mixture gets too soft while working, pop it in the fridge for 15-20 minutes to firm up.
For the best results, roll your mints in the colored sugar immediately after shaping since the surface will dry out quickly, and store them in the refrigerator to maintain their shape and texture.
What to Serve With Pumpkin Cream Cheese Mints?
These little pumpkin mints are perfect for fall gatherings and work great as part of a dessert spread alongside other seasonal treats like apple cider donuts or pumpkin cookies. I love setting them out on a candy dish during Halloween parties or Thanksgiving dinner – they’re such a fun conversation starter! They pair really well with warm drinks like spiced cider, pumpkin spice lattes, or even a cozy cup of chai tea. You can also add them to a fall-themed candy buffet with other orange and brown sweets, or package them up in small bags as party favors for your guests to take home.
Storage Instructions
Keep Fresh: These little pumpkin mints are best stored in an airtight container in the refrigerator for up to one week. Layer them between sheets of parchment paper so they don’t stick together, and the cream cheese will keep them nice and soft.
Freeze: You can definitely freeze these cute treats for longer storage! Place them in a single layer on a baking sheet first, then transfer to a freezer-safe container once they’re solid. They’ll keep for up to 3 months and taste just as good.
Serve: Let frozen mints thaw at room temperature for about 10-15 minutes before serving. If you’re making these for a party, you can pull them out of the fridge about 5 minutes early so they’re not too cold and firm when your guests bite into them.
| Preparation Time | 15-20 minutes |
| Cooking Time | 0-5 minutes |
| Total Time | 15-25 minutes |
| Level of Difficulty | Easy |
Estimated Nutrition
Estimated nutrition for the whole recipe (without optional ingredients):
- Calories: 1300-1500
- Protein: 5-7 g
- Fat: 25-30 g
- Carbohydrates: 280-320 g
Ingredients
- orange coloring gel
- 3 oz softened cream cheese (full-fat gives better texture)
- 1/2 tsp almond extract
- pretzel sticks (for pumpkin stems)
- 3 cups confectioners’ sugar (sifted to prevent lumps)
- orange decorating sugar
Step 1: Mix Cream Cheese and Extract
- 3 oz softened cream cheese
- 1/2 tsp almond extract or other extract
In a mixing bowl, combine the softened cream cheese with the almond extract (or your preferred extract).
Mix until the extract is well incorporated and the mixture is smooth.
Step 2: Incorporate Sugar and Coloring
- 3 cups confectioners’ sugar
- orange coloring gel
Gradually beat in the confectioners’ sugar to the cream cheese and extract mixture, adding a little at a time to avoid lumps, until the mixture is completely smooth.
Add a toothpick full of orange coloring gel and blend until the color is evenly distributed and the dough is smooth.
I like to add the coloring gently at first—remember, you can always add more for a brighter orange.
Step 3: Shape and Coat the Mints
- orange decorating sugar
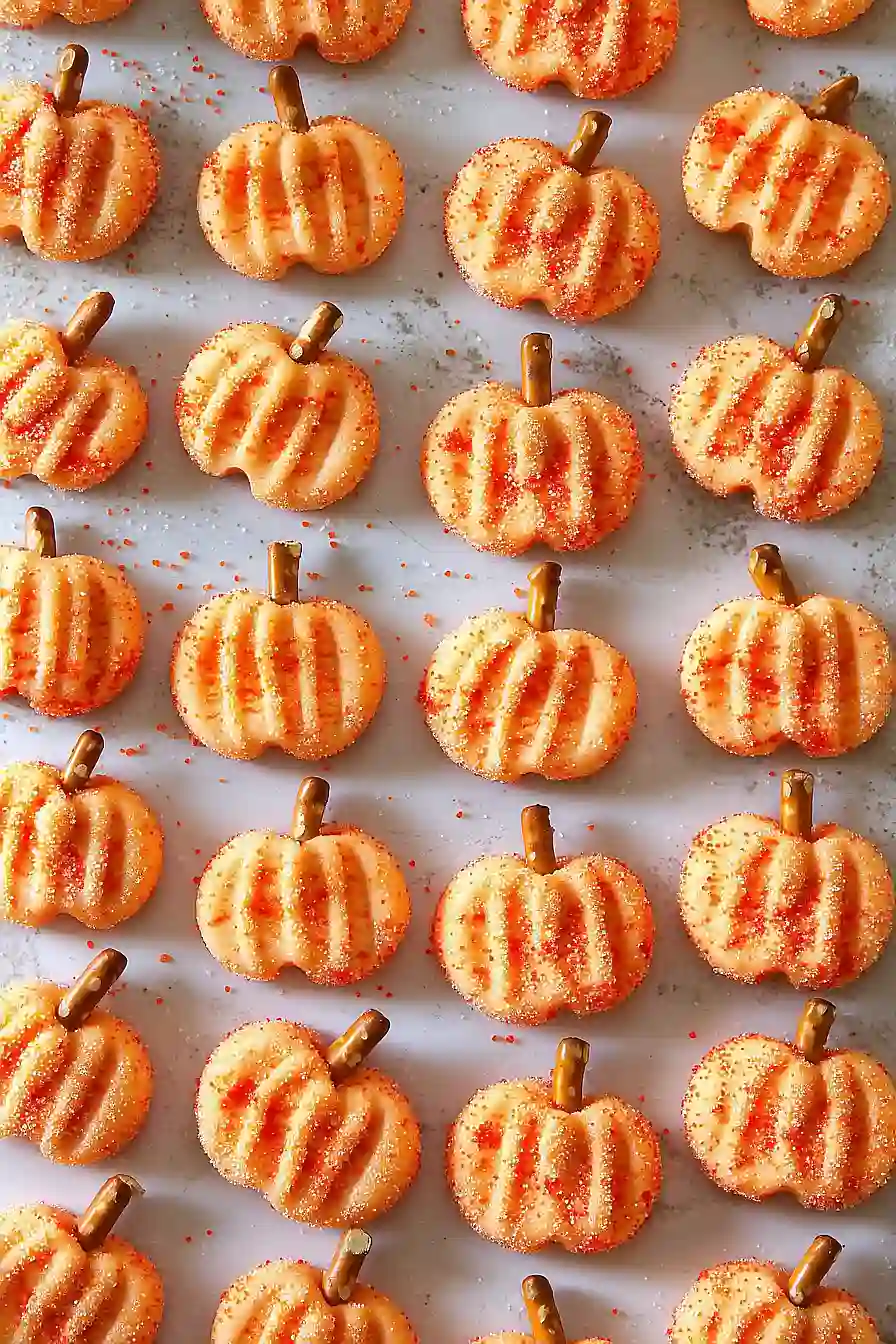
Pinch off pieces of the cream cheese mixture and roll them into 1/2-inch sized balls using your hands (about the size of a nickel).
Roll each ball in orange decorating sugar to coat them evenly.
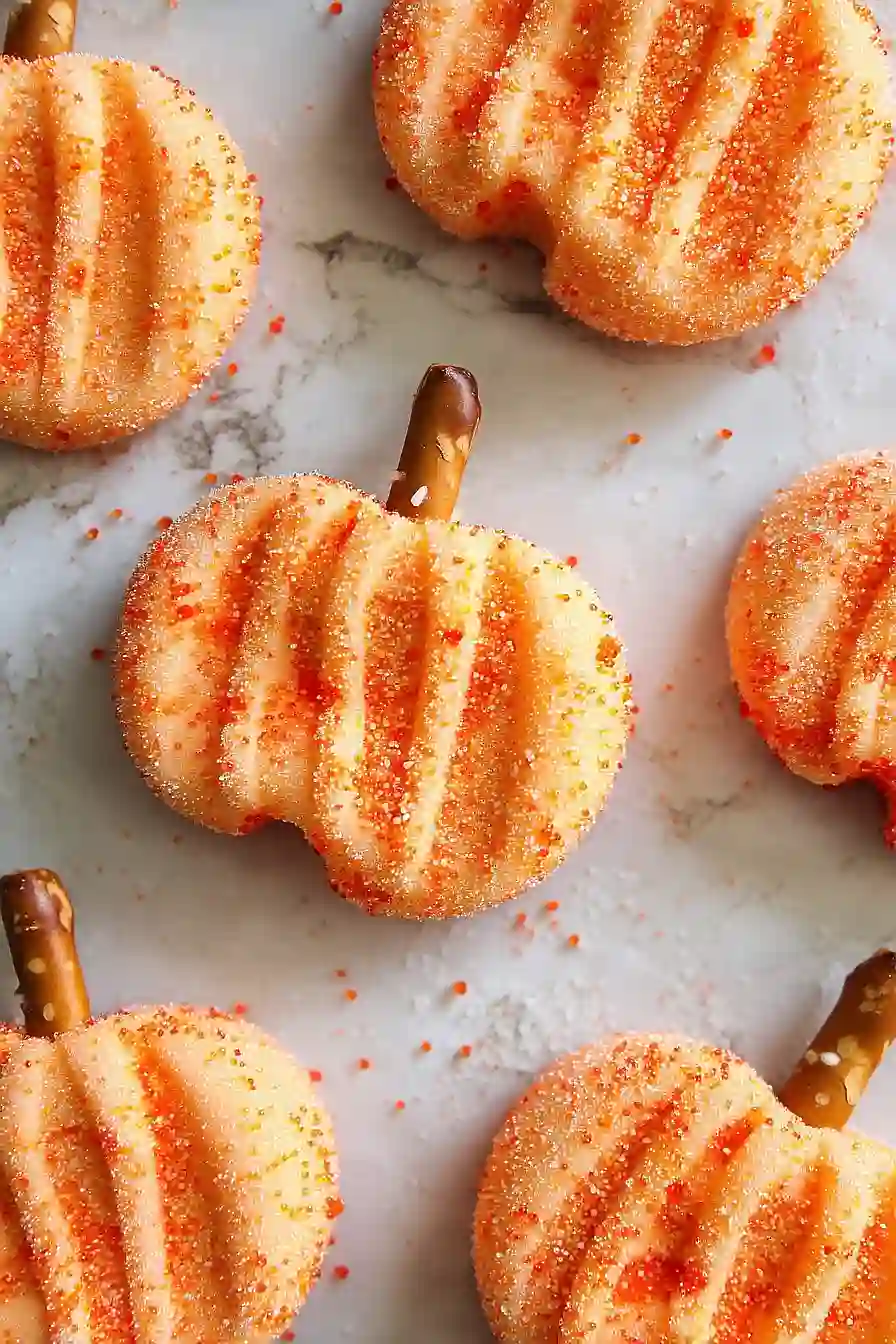
Arrange the coated balls on a baking sheet lined with waxed paper and flatten each slightly with a fork to create a pumpkin-like appearance.
Step 4: Add Pretzel Stems and Finish Mints
- pretzel sticks
Break off the top third of each pretzel stick.
Gently press a piece into the top of each flattened cream cheese ball to create a ‘pumpkin stem.’ At the same time, make a small indentation in the bottom of the mint using your finger or another pretzel.
Ensure that the pretzel stem is inserted about a quarter of the way into the mint so it holds securely.
Step 5: Chill and Store the Mints
Carefully transfer the prepared mints to an airtight container and store them in the freezer or refrigerator until ready to serve.
This helps set their shape and keeps them fresh.
I find that chilling for a few hours makes the texture even better.
Enjoy your festive cream cheese pumpkin mints!
