Growing up, scalloped potatoes always meant one thing in my house: layers and layers of cheese. My mom would pile on the cheddar until you could barely see the potatoes underneath. Don’t get me wrong, I loved those cheesy casseroles. But sometimes you want to taste the actual potato, you know?
That’s how I discovered scalloped potatoes without cheese. It sounds like something’s missing, but trust me on this one. The creamy sauce lets the potato flavor shine through in a way that cheese just covers up. Plus, it’s lighter on your stomach and your wallet.
I started making this version when my daughter went through her “no melted cheese” phase. Now it’s become our go-to side dish for Sunday dinners. The potatoes get tender and creamy, and that hint of herbs makes everything taste homemade and comforting.
Why You’ll Love These Scalloped Potatoes
- Classic comfort food – These creamy, tender potatoes in rich white sauce bring back all those cozy family dinner memories without any fuss.
- Simple, everyday ingredients – You probably already have potatoes, butter, flour, and milk in your kitchen right now, making this an easy go-to side dish.
- Perfect for any occasion – Whether it’s a weeknight dinner or holiday gathering, these scalloped potatoes pair beautifully with almost any main dish.
- Make-ahead friendly – You can assemble this dish earlier in the day and pop it in the oven when you’re ready, making dinner prep so much easier.
- Naturally cheese-free – The creamy white sauce is rich and satisfying on its own, perfect for those who prefer their scalloped potatoes without cheese or have dairy restrictions.
What Kind of Potatoes Should I Use?
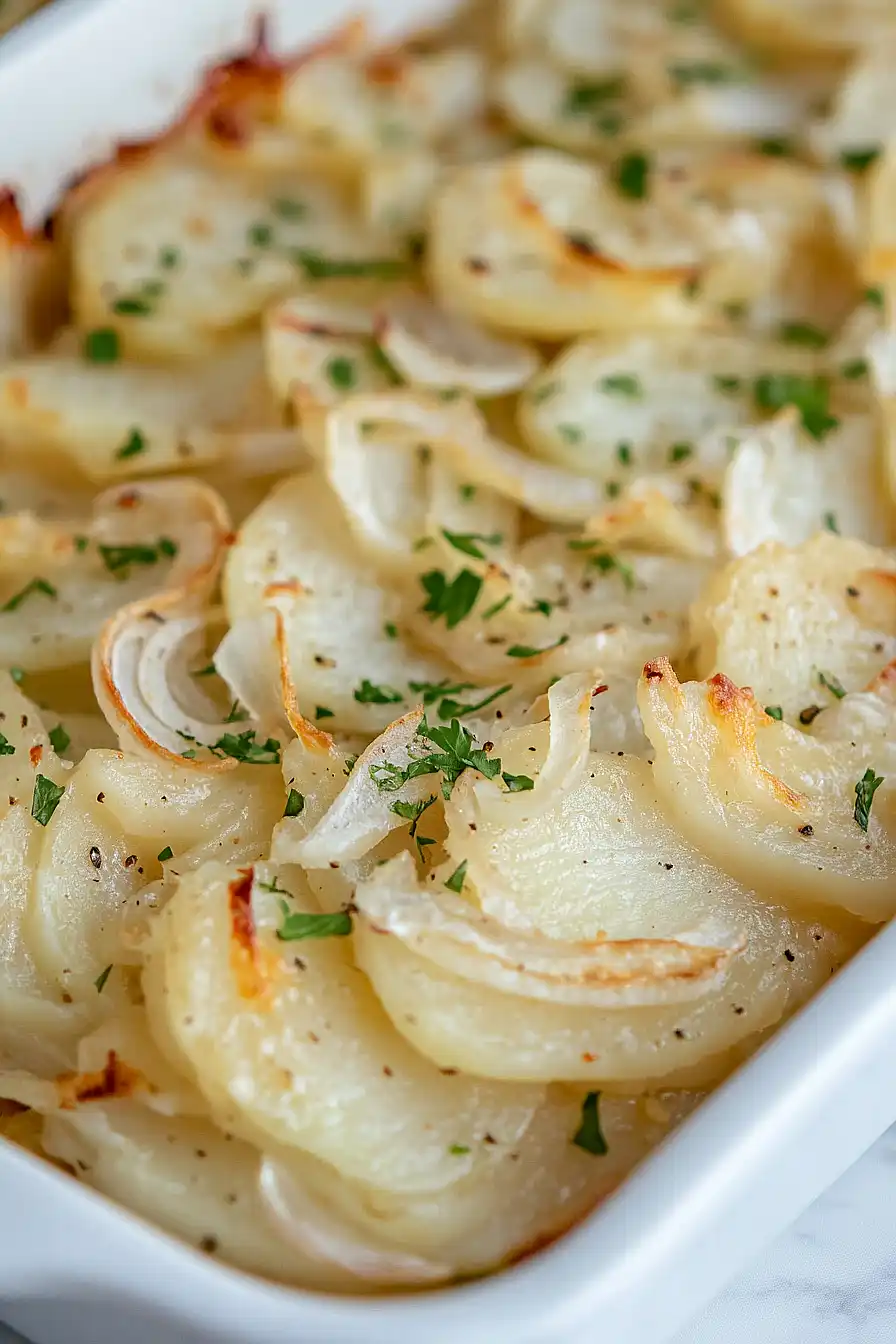
For scalloped potatoes, you’ll want to choose a potato that holds its shape well during the long baking process. Waxy potatoes like red potatoes, Yukon Gold, or fingerlings are your best bet since they have less starch and won’t fall apart as easily. Red potatoes are particularly great because their thin skin doesn’t need to be peeled, saving you prep time. Avoid russet or Idaho potatoes for this recipe since they’re too starchy and tend to get mushy when baked in liquid for extended periods. When slicing your potatoes, aim for pieces that are about 1/8 to 1/4 inch thick so they cook evenly and create those perfect layers.
Options for Substitutions
This classic scalloped potato recipe is pretty forgiving when it comes to swaps:
- Red potatoes: While red potatoes hold their shape nicely, you can use Yukon Gold or russet potatoes instead. Yukon Gold will give you a creamier texture, while russets might break down a bit more but still taste great.
- Salted butter: Unsalted butter works fine – just add an extra pinch of salt to the recipe. You can also use margarine, though the flavor won’t be quite as rich.
- All-purpose flour: If you’re out of all-purpose flour, you can use the same amount of cornstarch mixed with a little cold milk first to prevent lumps.
- Whole milk: Heavy cream makes this extra rich, while 2% milk works if that’s what you have. For dairy-free options, try unsweetened oat milk or cashew milk – they’ll give you the best creamy texture.
- Yellow onions: White onions or sweet onions work just as well. You can even skip the onions entirely if you’re not a fan, though they do add nice flavor to the dish.
Watch Out for These Mistakes While Baking
The biggest mistake when making scalloped potatoes is slicing your potatoes too thick, which leads to uneven cooking and hard centers – aim for slices about 1/8 inch thick using a mandoline or sharp knife for consistent results. Another common error is not scalding the milk properly, so make sure to heat it until small bubbles form around the edges and steam rises, which helps create a smooth, creamy sauce that won’t curdle. Don’t rush the roux either – cook your butter and flour mixture for at least 2-3 minutes to eliminate any raw flour taste before gradually whisking in that hot milk. Finally, cover your casserole with foil for the first hour of baking to prevent the top from browning too quickly, then remove it for the last 15-20 minutes to get that golden finish while ensuring the potatoes are fork-tender throughout.
What to Serve With Scalloped Potatoes?
These creamy scalloped potatoes are the perfect side dish for just about any protein you can think of! They pair beautifully with roasted chicken, baked ham, or grilled pork chops since the rich, buttery sauce complements savory meats so well. I love serving them alongside a simple green vegetable like steamed broccoli or green beans to balance out all that creamy goodness. For a complete comfort food meal, try them with meatloaf or roast beef, and don’t forget a fresh salad to cut through the richness of the potatoes.
Storage Instructions
Refrigerate: Leftover scalloped potatoes taste amazing the next day! Store them covered in the fridge for up to 4 days. The creamy sauce gets even more absorbed into the potatoes, making them extra flavorful. I actually think they’re better on day two!
Freeze: You can freeze portions of this dish for up to 3 months in freezer-safe containers. Just know that the texture might be a little different after thawing – the potatoes can get slightly softer and the sauce may separate a bit, but it still tastes great.
Warm Up: To enjoy your leftovers, cover with foil and bake at 350°F for about 20-30 minutes until heated through. You can also microwave individual portions, but the oven method keeps that nice creamy texture better. Add a splash of milk if the sauce seems too thick after reheating.
| Preparation Time | 20-30 minutes |
| Cooking Time | 60-80 minutes |
| Total Time | 80-110 minutes |
| Level of Difficulty | Medium |
Estimated Nutrition
Estimated nutrition for the whole recipe (without optional ingredients):
- Calories: 2100-2300
- Protein: 50-60 g
- Fat: 80-90 g
- Carbohydrates: 320-350 g
Ingredients
For the potato layers:
- 1/2 cup butter (melted and cooled slightly)
- 3 yellow onions (thinly sliced)
- 2 1/2 tsp salt
- 8-10 medium red potatoes (peeled and thinly sliced about 1/8-inch thick)
- 6 tbsp flour
- 1 1/2 tsp black pepper (freshly ground for best flavor)
For the liquid:
- 4.3 cups hot milk (whole milk works best for richness, about 105-115°F)
Step 1: Prepare the Potatoes and Onions
- 8 to 10 medium red potatoes
- 3 yellow onions, sliced into half-rounds
Preheat your oven to 350°F (176°C).
Wash, peel, and slice the red potatoes into 1/8 inch thick rounds using a food processor, mandoline, or by hand.
Slice the onions into half-rounds and set aside.
For even, tender potato layers, try to keep the thickness uniform.
Step 2: Scald the Milk (Optional)
- 4.3 cups hot milk
In a saucepan over medium heat, heat the milk until it is just below boiling, stirring occasionally.
This helps the sauce come together more smoothly but is optional.
I like to scald the milk for a silkier baked result.
Step 3: Layer the Casserole
- sliced potatoes from Step 1
- sliced onions from Step 1
- 6 tbsp plain flour
- 1/2 cup salted butter
- 2 1/2 tsp salt
- 1 1/2 tsp ground black pepper
In a 13×9 inch casserole dish, layer 1/3 of the sliced potatoes from Step 1, followed by 1/3 of the sliced onions.
Dot with 1/2 of the flour and 1/3 of the butter, then evenly sprinkle 1/3 of the salt and black pepper.
Repeat with another 1/3 each of potatoes and onions, then the rest of the flour, another 1/3 of the butter, another 1/3 of the salt and pepper.
For the final layer, arrange the remaining potatoes, then the rest of the onions, dot with the remaining butter, and sprinkle the remaining salt and pepper evenly.
Step 4: Add Milk and Bake
- hot milk from Step 2
Carefully pour the hot milk from Step 2 over the layered casserole.
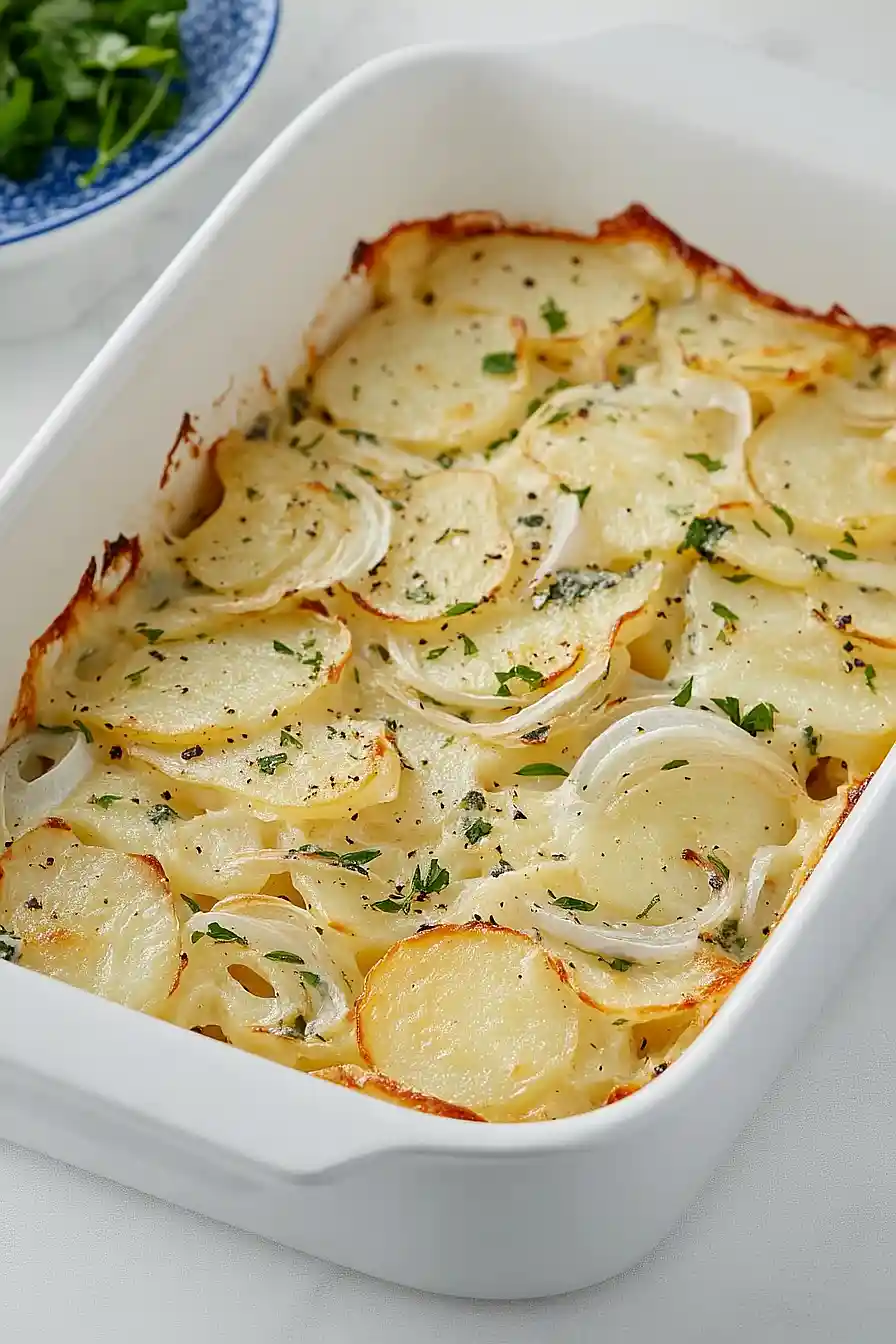
Bake uncovered in the preheated oven for 60 to 80 minutes, or until the potatoes are tender and the top is golden brown.
If the casserole browns too quickly before the potatoes are done, cover loosely with foil.
For a deeply golden top, you can broil for the last 1-2 minutes.
I sometimes tent the dish with foil for the first 45 minutes to speed up the cooking, then finish uncovered for a crispy top.
Step 5: Rest and Serve
Let the casserole set for 5 minutes after removing it from the oven.
This helps the layers firm up and makes serving easier.
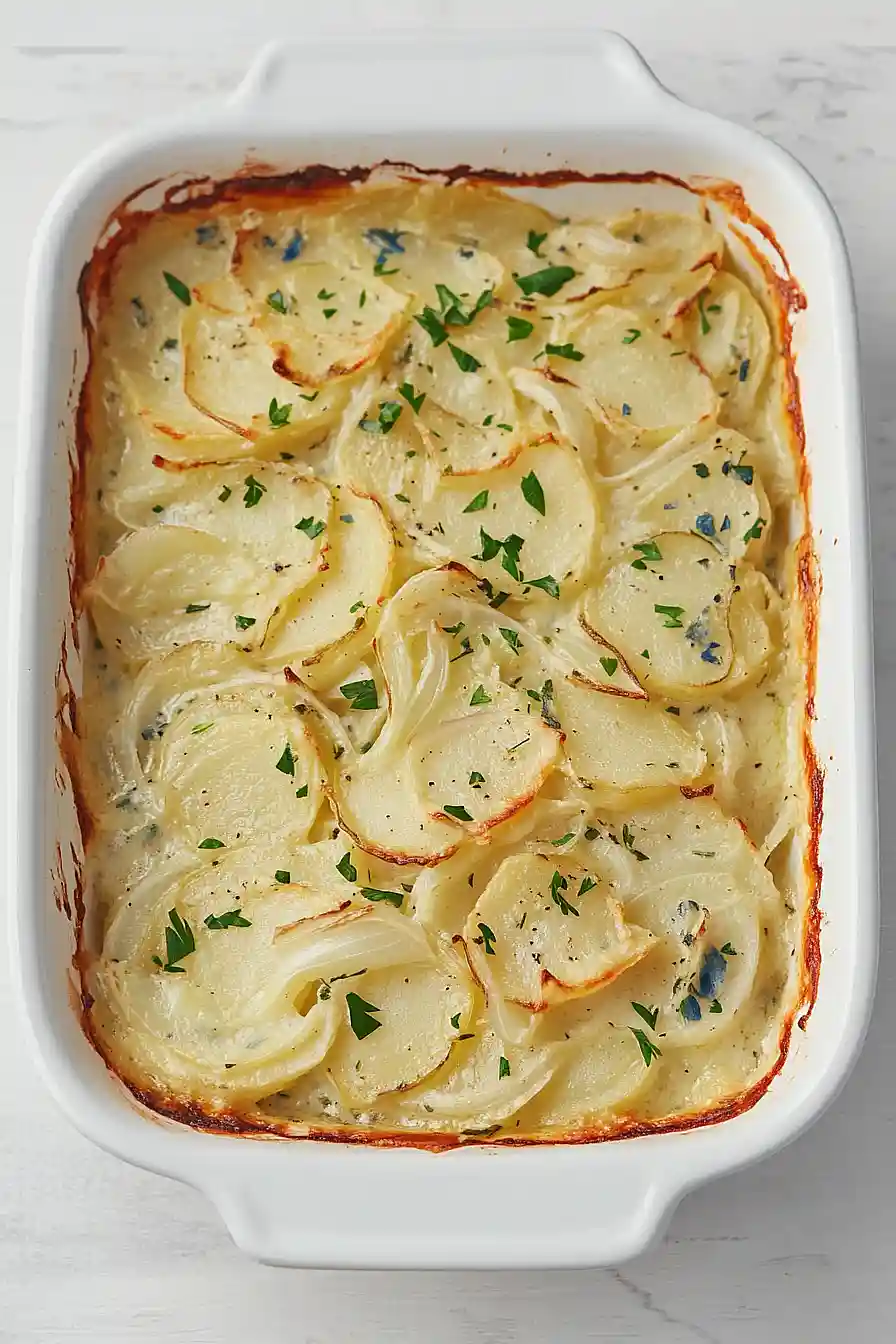
Garnish with parsley, green onions, or chives if desired for a fresh finish.
