Bread is one of those things I thought I’d have to give up forever when my daughter was diagnosed with celiac disease three years ago. We tried so many store-bought options, but they all tasted like cardboard or fell apart the moment you touched them. I was ready to accept a life without good bread.
Then I discovered focaccia was actually easier to make gluten-free than regular bread. The texture that makes focaccia special – that soft, airy inside with a crispy crust – works perfectly with gluten-free flour. You don’t need the same structure that makes other breads tricky.
Now I make this focaccia at least twice a month. My kids don’t even realize it’s gluten-free, and honestly, I think it tastes better than the regular version I used to make. The best part? It’s ready in about two hours, and most of that time is just waiting for it to rise.
Why You’ll Love This Gluten Free Focaccia
- Gluten-free friendly – Finally, a focaccia recipe that lets you enjoy this classic Italian bread without worrying about gluten, and it tastes just as good as the traditional version.
- Quick and easy – Ready in just 45-70 minutes from start to finish, this recipe is much faster than traditional bread making and perfect for when you want fresh bread without the all-day commitment.
- Simple ingredients – Made with basic pantry staples and gluten-free flour, you probably already have most of what you need to make this bread at home.
- Foolproof recipe – Even if you’re new to gluten-free baking, this focaccia comes together easily and turns out fluffy and flavorful every time.
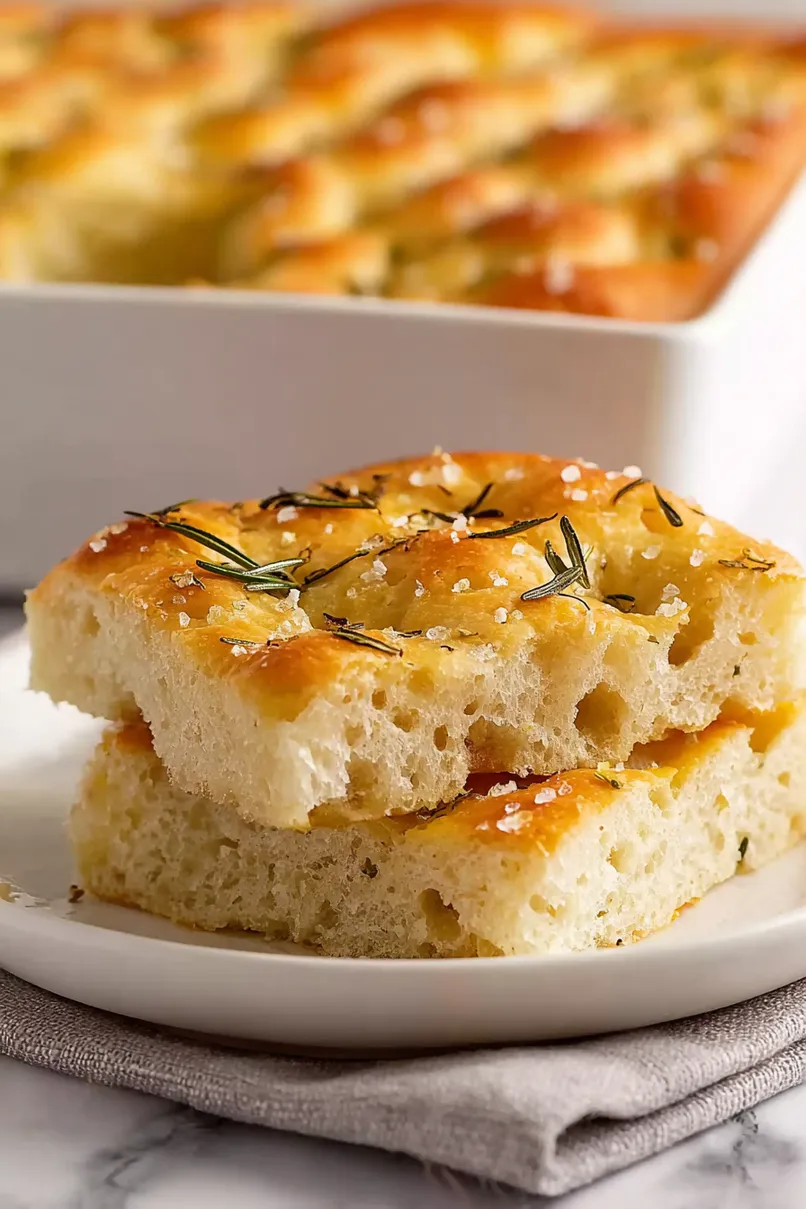
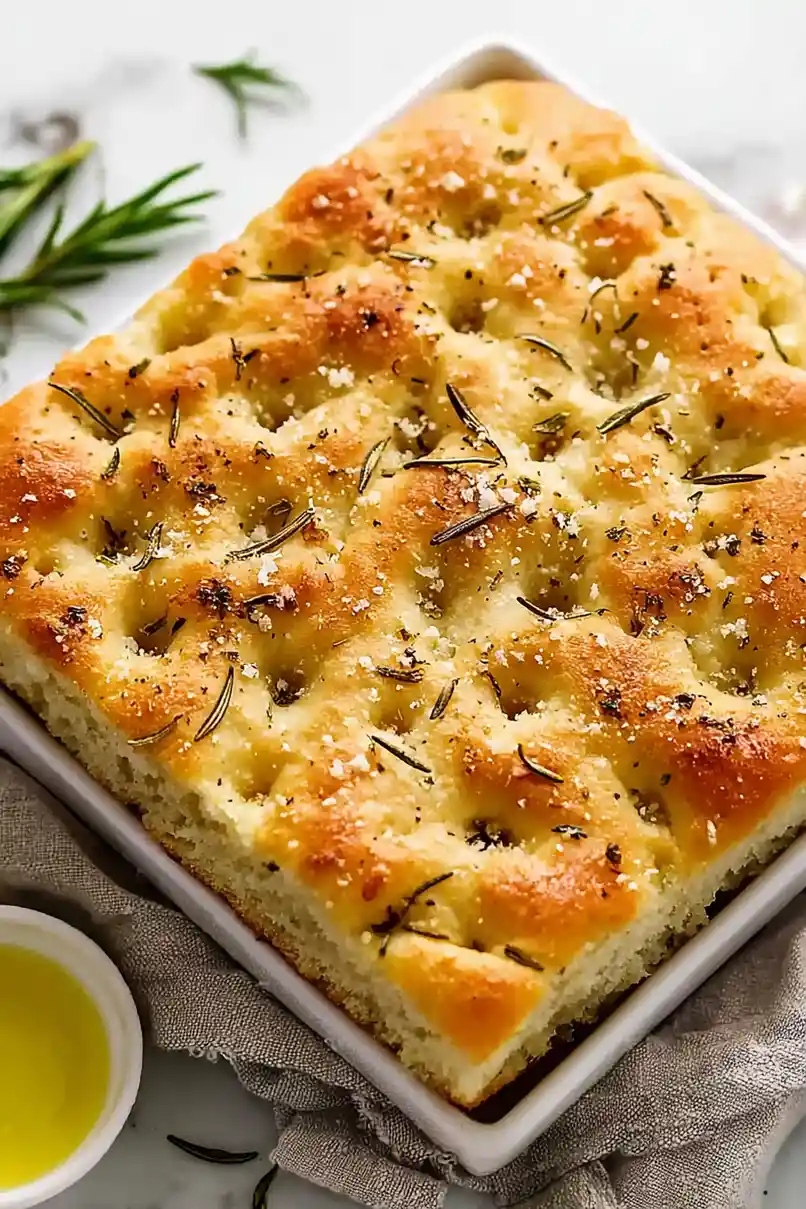
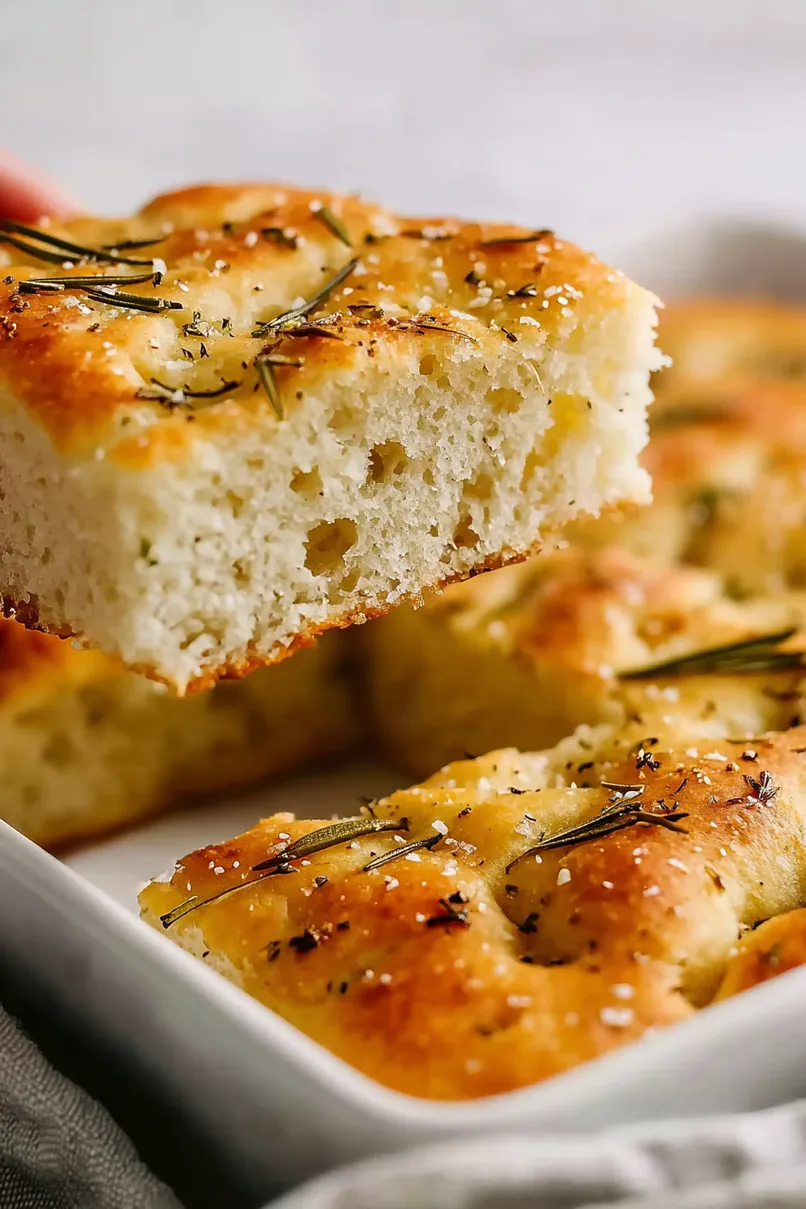
- Fresh herb flavor – The combination of rosemary, olive oil, and flaky sea salt on top gives you that authentic Italian taste that makes this bread irresistible.
What Kind of Gluten Free Flour Should I Use?
For this focaccia, you’ll want to stick with a good quality gluten free 1:1 flour blend rather than trying to mix your own flours. King Arthur Measure for Measure is my top pick because it’s specifically designed to replace regular flour cup-for-cup and gives you the best texture and rise. Bob’s Red Mill 1:1 Baking Flour is another solid option that works well in yeast breads. Avoid using single flours like rice flour or almond flour on their own, as they won’t give you the structure you need for a proper focaccia. The key is finding a blend that contains xanthan gum, which helps bind everything together and mimics the elasticity that gluten normally provides.
Options for Substitutions
This gluten-free focaccia is pretty adaptable, but there are a few key ingredients you’ll want to stick with:
- Gluten-free 1:1 flour: This is one ingredient you really can’t substitute – regular flour won’t work for a gluten-free recipe. If you don’t have King Arthur, other good 1:1 blends like Bob’s Red Mill or Cup4Cup work well too.
- Instant yeast: You can use active dry yeast instead, but you’ll need to proof it first in the warm water with sugar for about 5 minutes until it gets foamy before mixing with the flour.
- Sugar: Honey or agave work great as mentioned, but regular white sugar, brown sugar, or even maple syrup will do the job of feeding the yeast.
- Fresh rosemary: Dried rosemary works fine – just use about 1 teaspoon instead of the tablespoon. You could also try thyme, oregano, or even everything bagel seasoning for different flavors.
- Parmesan cheese: Skip the cheese entirely for a vegan version, or try nutritional yeast for that cheesy flavor. Regular grated Parmesan works just as well as the vegan version.
- Flaky sea salt: Regular kosher salt or coarse sea salt will work, but use a bit less since flaky salt is milder. You could also try garlic salt for extra flavor.
Watch Out for These Mistakes While Baking
The biggest mistake with gluten-free focaccia is using water that’s too hot, which will kill your yeast – stick to that 120-130°F range and test it with a thermometer if you’re unsure, as the water should feel warm but not hot to the touch. Another common error is not letting the dough rise long enough, since gluten-free doughs often need extra time to develop properly, so be patient and give it at least an hour in a warm spot. Don’t skip the olive oil that goes on top before baking, as this creates that signature crispy, golden crust that makes focaccia so irresistible. Finally, resist the urge to cut into it right away – let the focaccia cool for at least 10 minutes after baking so the interior can set properly and you don’t end up with a gummy texture.
What to Serve With Gluten Free Focaccia?
This herb-topped focaccia is perfect for dipping into olive oil mixed with balsamic vinegar, or you can serve it alongside a big bowl of minestrone or tomato soup. I love cutting it into squares and using it as the base for sandwiches – it holds up really well to ingredients like roasted vegetables, fresh mozzarella, and basil. It also makes a great side for pasta dishes, especially creamy ones where you can use the bread to soak up any leftover sauce. For a simple appetizer, just slice it up and serve with some good cheese, olives, and maybe a little prosciutto for a nice Italian spread.
Storage Instructions
Keep Fresh: Your gluten free focaccia tastes best when stored at room temperature wrapped in a clean kitchen towel or in an airtight container for up to 3 days. The crust might soften a bit, but the flavor stays great. I like to slice it up and keep it covered on the counter for easy snacking.
Freeze: This focaccia freezes really well for up to 3 months! Let it cool completely, then wrap it tightly in plastic wrap and pop it in a freezer bag. You can freeze the whole loaf or cut it into portions first – whatever works better for your family.
Warm Up: To bring back that fresh-baked taste, warm slices in a 350°F oven for about 5-8 minutes, or toast them lightly. If you’re thawing a frozen loaf, let it sit at room temperature for a few hours, then warm it in the oven wrapped in foil for about 10 minutes to get that crispy crust back.
| Preparation Time | 20-40 minutes |
| Cooking Time | 25-30 minutes |
| Total Time | 45-70 minutes |
| Level of Difficulty | Medium |
Estimated Nutrition
Estimated nutrition for the whole recipe (without optional ingredients):
- Calories: 1300-1450
- Protein: 18-22 g
- Fat: 35-45 g
- Carbohydrates: 220-240 g
Ingredients
For the dough:
- 1 1/4 oz instant yeast (Red Star brand works well here)
- 1 1/2 cups warm water (120–130°F is ideal for activating yeast)
- 1 tbsp granulated sugar
- 2 1/2 cups gluten-free 1:1 flour (King Arthur Measure-for-Measure recommended for best results)
- 1 tsp kosher salt (Diamond Crystal preferred)
- 2 tsp baking powder
- 4 tbsp olive oil, divided (good quality extra virgin olive oil for flavor)
For the topping:
- 1/4 tsp ground black pepper
- 1/2 tsp flaky sea salt (Maldon sea salt adds a great crunch)
- 1 tbsp fresh rosemary, chopped
- 1-2 tbsp vegan parmesan
Step 1: Combine Dry Ingredients
- 2 1/2 cups (300 grams) gluten-free 1:1 flour (King Arthur Flour Measure-for-Measure recommended)
- 2 tsp baking powder
- 1 tsp kosher salt
In a large mixing bowl, whisk together the gluten-free flour, kosher salt, and baking powder until fully combined.
Set this dry mixture aside while you prepare the wet ingredients.
Step 2: Bloom the Yeast
- 1 1/2 cups warm water (120–130°F)
- 1 1/4 oz package instant or rapid-rise yeast (2 1/4 tsp)
- 1 tbsp granulated sugar, honey, or agave
Warm the water in the microwave or on the stovetop until it reaches between 120–130°F (warm but not hot to the touch).
Add the instant yeast and sugar (or honey/agave) to the warm water, stir, and let the mixture rest for 3–5 minutes until it turns foamy on top.
Step 3: Combine Wet and Dry Ingredients
- 2 tbsp olive oil
- yeast mixture from Step 2
- dry mixture from Step 1
Pour 2 tablespoons of olive oil and the bloomed yeast mixture from Step 2 over the flour mixture from Step 1.
Stir together until a batter-like dough forms; it will be much wetter and more like batter than typical bread dough.
No kneading is required.
Step 4: Prepare the Pan and Transfer Dough
- 3 tbsp olive oil
- focaccia dough from Step 3
Line an 8×8 or 9×9 metal baking pan with parchment paper.
Drizzle 2 tablespoons of olive oil onto the parchment.
Gently transfer the focaccia batter to the pan and pat it out with a spatula or oiled fingers to spread evenly (dipping your fingers in oil can make this easier!).
Drizzle one more tablespoon of olive oil over the top of the dough.
Step 5: Rise the Dough
Cover the pan loosely with plastic wrap or a clean dish towel.
Let the dough rise in a warm area for at least 30 minutes if using rapid-rise yeast, or about an hour with regular yeast, until it roughly doubles in size.
Step 6: Dimple and Top the Dough
- 1 tbsp fresh rosemary, chopped
- 1–2 tbsp vegan parmesan or Parmesan cheese
- 1/2 tsp flaky sea salt (such as Maldon)
- 1/4 tsp ground black pepper
During the last 20 minutes of rising, preheat your oven to 400°F.
Once the dough has risen, coat your fingertips with olive oil and gently press several holes in the dough to create characteristic focaccia dimples (don’t deflate it).
Sprinkle the dough with chopped fresh rosemary, vegan parmesan or Parmesan cheese, flaky sea salt, and ground black pepper.
I like to drizzle a little extra olive oil on top to help the toppings stick and create a deliciously crisp crust.
Step 7: Bake and Cool
Bake the focaccia in the preheated 400°F oven for 25–30 minutes, or until the top is golden brown.
Remove from the oven and allow the bread to cool in the pan for at least 10–12 minutes before slicing and serving.
I like to let it rest so the crumb sets up nicely and stays soft.
Store leftovers in an airtight container at room temperature for 2–3 days, or freeze for up to 2 months.
