Packing school lunches that kids will actually eat can feel like an everyday puzzle. Between rushing to get everyone ready in the morning and making sure the lunch stays fresh until noon, it’s enough to make any parent want to give up and hand over lunch money instead.
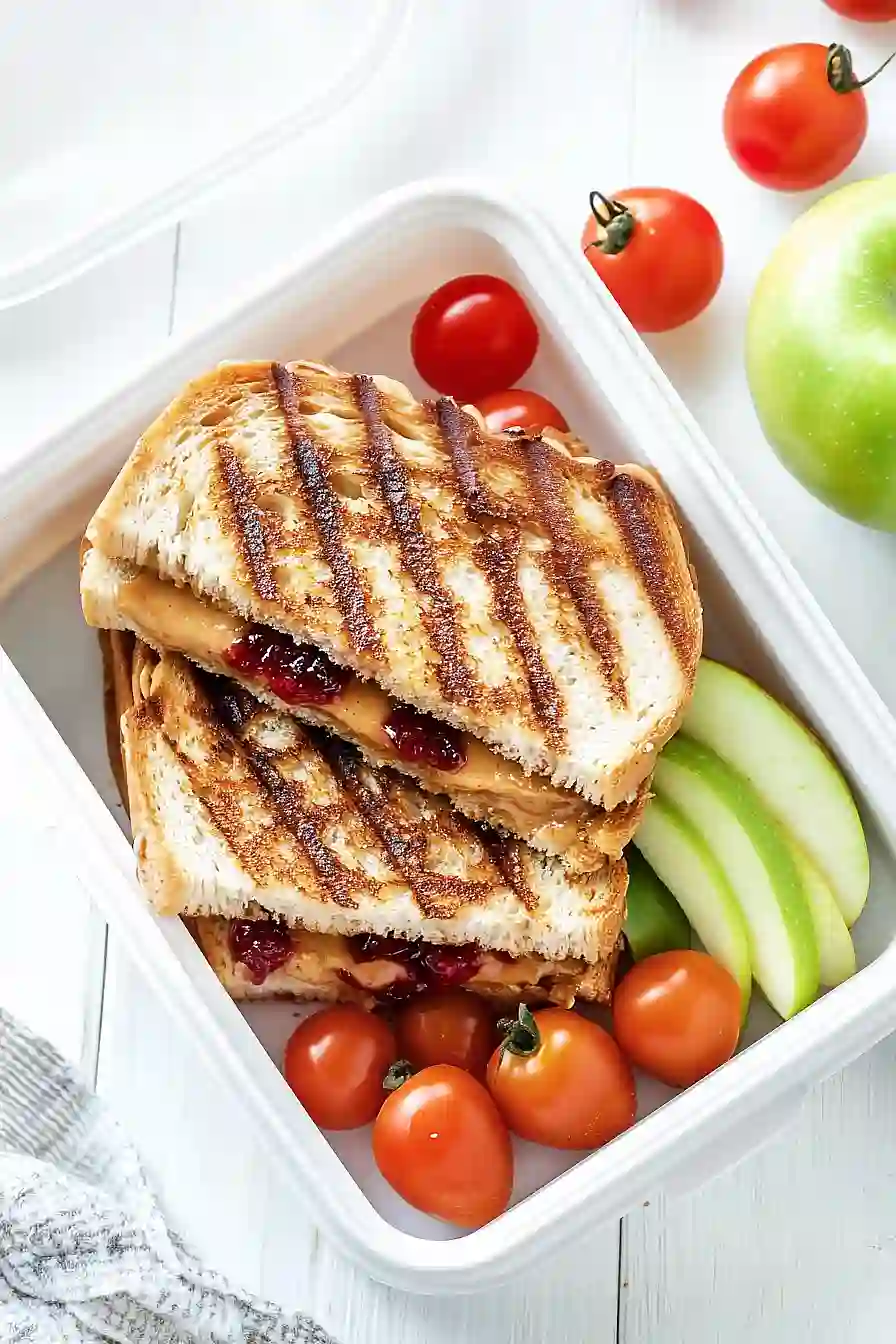
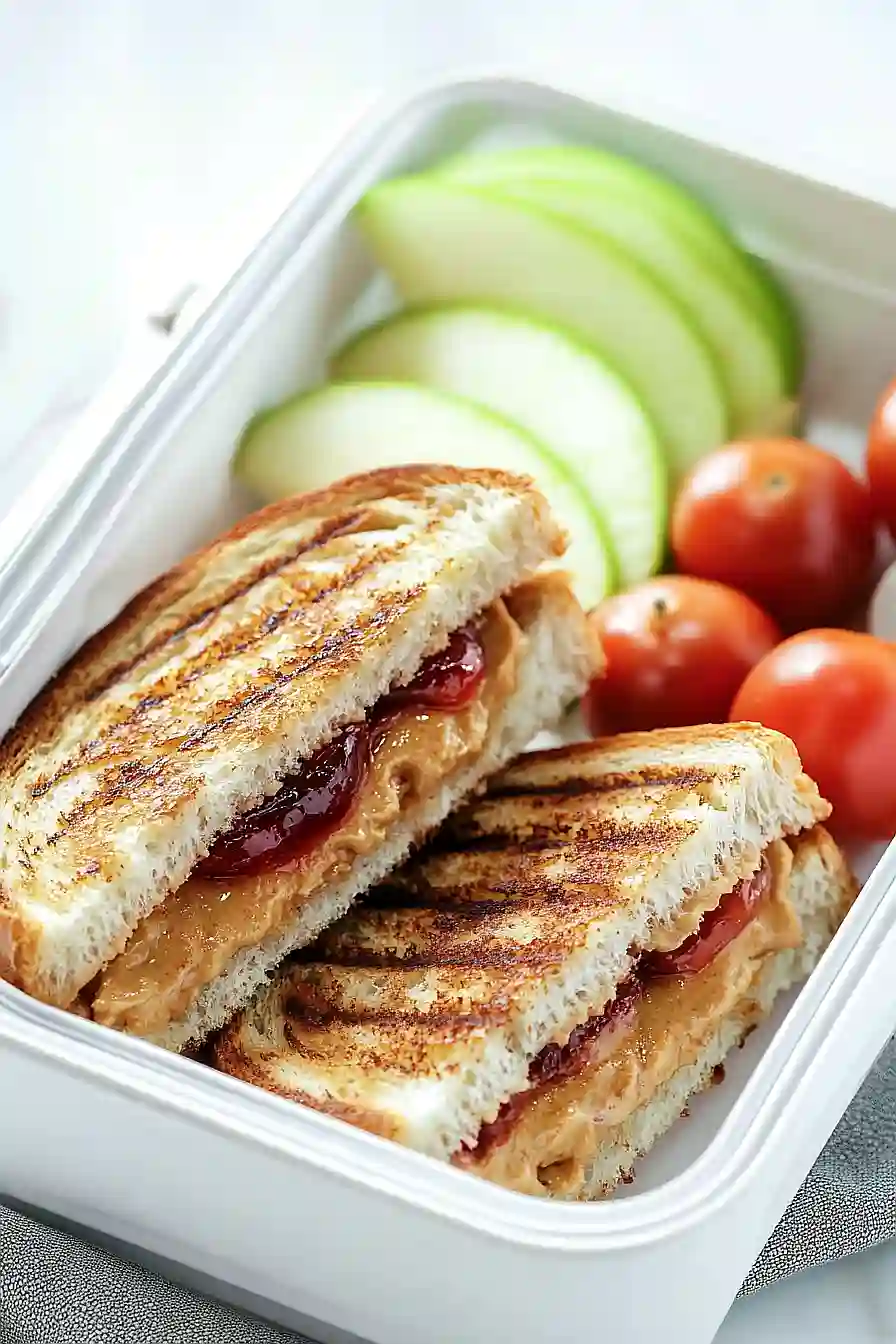
That’s why this peanut butter and jelly sandwich bento has become my family’s go-to solution: it’s a familiar favorite with a fun twist, easy to prepare the night before, and perfectly portable with compartments that keep everything fresh and separate until lunchtime.
Why You’ll Love This PB&J Bento
- Quick lunch prep – This bento comes together in just 15 minutes or less, perfect for busy mornings when you’re packing lunch for work or school.
- Kid-friendly meal – The classic PB&J sandwich paired with fresh fruits and vegetables makes this a lunch that children will actually eat – no more untouched lunch boxes coming back home!
- Budget-friendly – Using simple pantry staples and fresh produce, this bento is an affordable way to pack a satisfying lunch that beats expensive takeout.
- Balanced nutrition – This lunch box combines protein from peanut butter, whole grains from bread, and fresh produce for a well-rounded meal that keeps you energized throughout the day.
What Kind of Peanut Butter Should I Use?
Both creamy and crunchy peanut butter work great for classic PB&J sandwiches, so go with whichever texture you prefer. Natural peanut butter (the kind you need to stir) can be a bit tricky since it’s runnier and might make your sandwich soggy, but if that’s your go-to, just spread it on a bit thinner. Regular commercial brands like Jif or Skippy tend to hold up better in packed lunches since they don’t separate or get too drippy at room temperature. Just make sure whatever peanut butter you choose is fresh and well-stirred before spreading it on your bread.
Options for Substitutions
This simple bento lunch is easy to customize based on what you have in your pantry and fridge:
- Peanut butter: If you have allergies or just ran out, try almond butter, sunflower seed butter, or cashew butter instead. Each will give you a different but tasty twist on the classic sandwich.
- Jelly or jam: Any flavor works here! You can also use honey, apple butter, or even mashed banana as a natural sweet option. If using banana, eat the sandwich the same day to prevent browning.
- Sandwich bread: While white bread is classic, whole wheat, sourdough, or gluten-free bread all work great. Just make sure to toast it if it’s gluten-free to help prevent it from falling apart.
- Apple: Feel free to swap the apple with any fresh fruit you have – pears, orange segments, or berries all make good alternatives. Just pick something that won’t get too mushy in the lunch box.
- Cherry tomatoes: You can replace these with baby carrots, cucumber slices, or snap peas if you’re not a fan of tomatoes or want to switch up the vegetables.
- Butter: For toasting, you can use margarine, coconut oil, or skip it altogether if you prefer your sandwich untoasted.
Watch Out for These Mistakes While Making
The biggest challenge when preparing a PB&J bento is timing – making it too far in advance can lead to soggy bread, so it’s best to assemble your sandwich just before packing or toast the bread lightly to create a moisture barrier.
A common mistake is spreading the peanut butter and jelly too close to the edges, which can cause messy leaks in your bento box – leave about a 1/4 inch border around the edges and press the corners firmly to seal.
To keep your apple pieces from browning, toss them in a little lemon juice before packing, and always place juicy ingredients like cherry tomatoes in separate compartments to prevent them from making other foods wet.
For the best bento experience, pack heavier items at the bottom of your box and more delicate items on top, using small silicone cups or dividers to keep everything neat and organized.
What to Serve With a PB&J Bento?
Since this bento already includes fresh fruit and veggies, you can round out the meal with some fun and kid-friendly sides that add different textures and flavors. A handful of crunchy pretzels or potato chips makes a perfect salty companion to the sweet and creamy sandwich. For extra protein, try adding some string cheese or a hard-boiled egg to keep tummies full until dinner. If you’re packing this for lunch, don’t forget to include a small treat like chocolate-covered raisins or a few animal crackers – because sometimes lunch needs a little something special!
Storage Instructions
Pack: For the best bento experience, pack your sandwich and sides in separate compartments of your lunch box. This keeps everything fresh and prevents the bread from getting soggy from the fruit and tomatoes. If you’re making this the night before, wrap the sandwich in wax paper or plastic wrap before placing it in the bento box.
Keep Cool: Once packed, keep your bento in the refrigerator until you’re ready to head out. If you’re carrying it to work or school, use an insulated lunch bag with an ice pack to keep everything fresh until lunchtime. The sandwich will taste best if eaten within 4-6 hours of preparation.
Prep Ahead: To save time in the morning, cut up your apple pieces and tomatoes the night before. Just toss the apple slices with a little lemon juice to prevent browning, and store them in an airtight container in the fridge. The sandwich itself is best assembled fresh or just a few hours before eating.
| Preparation Time | 5-10 minutes |
| Cooking Time | 4-5 minutes |
| Total Time | 9-15 minutes |
| Level of Difficulty | Easy |
Estimated Nutrition
Estimated nutrition for the whole recipe (without optional ingredients):
- Calories: 450-500
- Protein: 10-12 g
- Fat: 18-22 g
- Carbohydrates: 65-70 g
Ingredients
For the sandwich:
- 2 slices bread (whole wheat or white, depending on your preference)
- butter (softened for easy spreading)
- 1 1/2 tbsp peanut butter (creamy or crunchy works well)
- 1 1/2 tbsp jelly (raspberry or strawberry are classic choices)
For the accompaniments:
- 1 apple (Honeycrisp or Fuji are great for snacking)
- 1/2 cup cherry tomatoes (halved for easier eating)
Step 1: Prepare the Sandwich
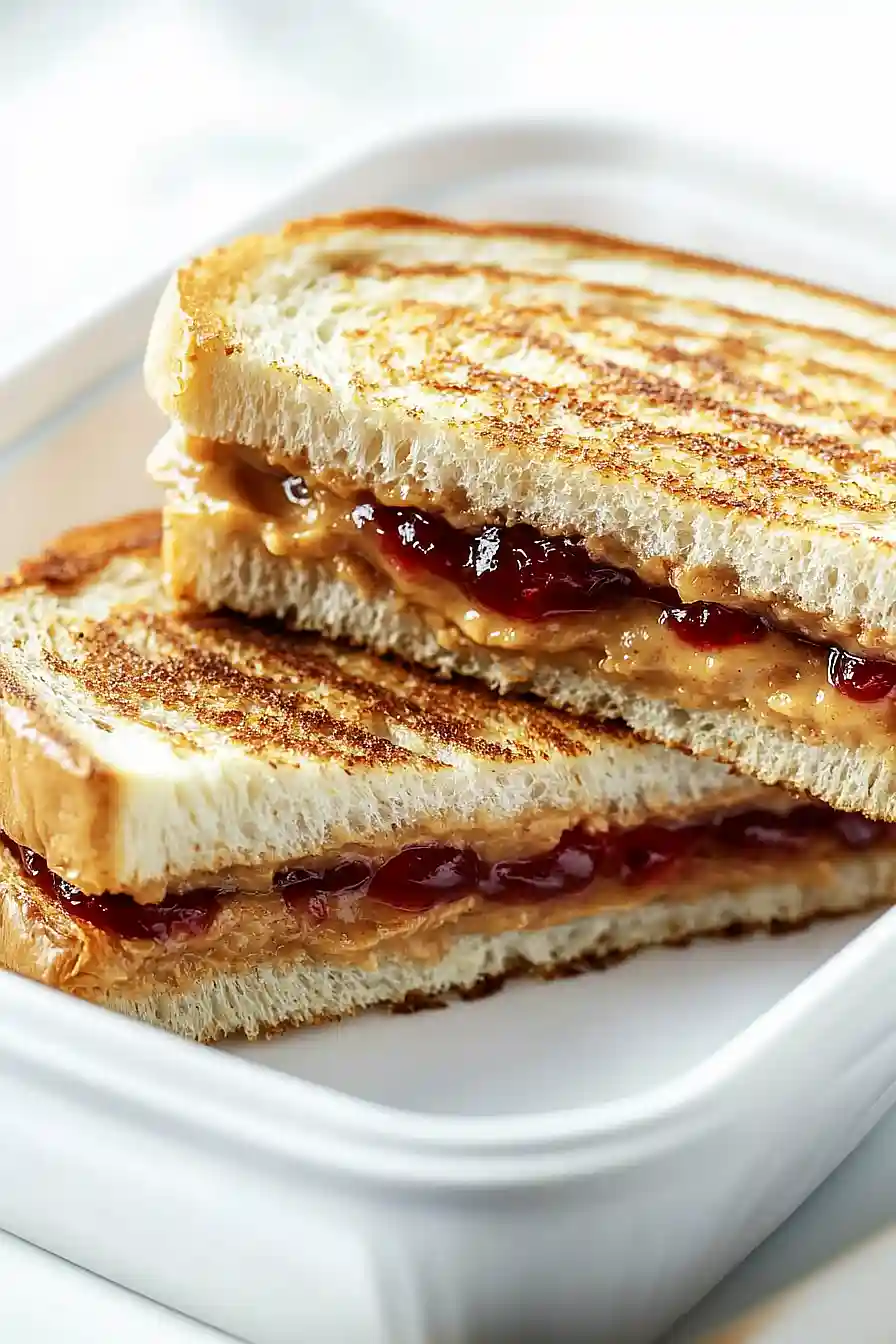
Begin by spreading peanut butter evenly onto one slice of bread.
Next, spread a layer of jelly over the peanut butter, then top with the second slice of bread.
Be cautious not to add too much jelly if packing for lunch, as it can ooze out during transport.
Step 2: Butter and Grill the Sandwich
Butter both outer sides of the sandwich to ensure a crispy texture once grilled.
Heat a non-stick pan over medium heat.
Place the buttered sandwich into the hot pan and grill for 2 minutes.
Flip the sandwich and grill for another 2 minutes or until both sides are golden brown.
Step 3: Cool and Pack the Sandwich
Remove the grilled sandwich from the pan and allow it to cool down to room temperature.
Once cooled, pack the sandwich into a lunch container to preserve its freshness during transport.
Step 4: Prepare and Pack Accompaniments
Slice apples and prepare grape tomatoes, placing each into separate compartments of the lunch container to keep them fresh and crisp.
Close the lunchbox securely and place it into a lunch bag, ensuring everything is well-organized for a delightful lunch experience.
