I can’t remember a 4th of July party growing up that didn’t involve ice cream sandwiches. Mom would buy them by the box, and we’d grab them straight from the freezer, racing to eat them before they melted in the summer heat.
That’s what inspired me to make this ice cream sandwich cake. It takes those childhood favorites and turns them into something that’s both nostalgic and party-ready. And the best part? There’s no actual baking involved – just some simple assembly that even the kids can help with.
Why You’ll Love This Ice Cream Sandwich Cake
- No-bake dessert – Perfect for hot summer days when you don’t want to turn on the oven – just assemble and freeze!
- Make-ahead friendly – You can prepare this cake up to 3 days before your event, making party planning so much easier.
- Simple ingredients – Using store-bought ice cream sandwiches and common pantry items means no special shopping trips or hard-to-find ingredients.
- Kid-friendly preparation – Little ones can help layer the ice cream sandwiches and add the sprinkles, making this a fun family activity.
- Customizable design – You can switch up the food coloring and sprinkles to match any holiday or celebration theme, not just the 4th of July.
What Kind of Ice Cream Sandwiches Should I Use?
While Klondike is specified in this recipe, you can actually use any brand of rectangular ice cream sandwiches you find at your grocery store. The classic vanilla ice cream and chocolate wafer combination works best since it creates a neutral base that won’t compete with the other flavors in the cake. If your store carries different sizes, look for the standard rectangular sandwiches rather than the square or mini versions – they’ll be easier to layer and will create cleaner-looking sides in your finished cake. Just make sure to keep them in the freezer until right before you need them, as they can soften quickly at room temperature and become tricky to work with.
Options for Substitutions
This fun ice cream cake is pretty adaptable – here are some easy swaps you can try:
- Ice Cream Sandwiches: Any brand of rectangular ice cream sandwiches will work here. You can even try different flavors like mint or neapolitan for a twist. Just make sure they’re the same size to keep the layers even.
- Marshmallow creme: If you can’t find marshmallow creme, you can melt 2 cups of mini marshmallows with 2 tablespoons of butter in the microwave. Let it cool before using. Or skip it entirely and just use extra whipped topping.
- Whipped topping: You can use real whipped cream instead – beat 3 cups of heavy cream with ¼ cup powdered sugar until stiff peaks form. Just know the cake might not hold up as long in the freezer.
- Instant vanilla pudding: Feel free to use any instant pudding flavor that sounds good – chocolate, cheesecake, or white chocolate all work great. We’re just using the dry mix for structure.
- Food coloring: Regular liquid food coloring works fine if you don’t have gel colors. You might need to use a bit more to get bright colors. Natural food dyes are okay too, but the colors might be more pastel.
- Sprinkles: Any decorative toppings work here – crushed cookies, mini chocolate chips, or chopped nuts are all good options. Or leave them off completely!
Watch Out for These Mistakes While Making
The biggest challenge when making an ice cream sandwich cake is timing – working too slowly can lead to melting and mess, so make sure all your ingredients are ready and your freezer space is cleared before you begin. Working quickly with ice cream sandwiches requires some planning, so it’s best to let your whipped topping thaw in the fridge overnight, but keep the ice cream sandwiches frozen solid until the moment you need them. Another common mistake is not letting each layer freeze completely before adding the next one – give each layer at least 30 minutes in the freezer to firm up, which prevents the colors from bleeding together and keeps your layers distinct. For the smoothest results, let your marshmallow creme come to room temperature before mixing it with the whipped topping, and avoid overmixing when adding food coloring as this can make the mixture too soft.
What to Serve With Ice Cream Sandwich Cake?
This cool and creamy dessert is perfect on its own, but there are some fun ways to make it even more special for your summer gatherings! Fresh berries like strawberries and blueberries make great side options – they not only match the patriotic theme but also add a fresh contrast to the sweet ice cream. I love setting up a quick toppings bar with warm chocolate sauce, caramel sauce, and extra whipped cream so everyone can customize their slice. Since this is such a sweet dessert, serving it with some hot coffee or cold brew helps balance out the flavors and gives grown-ups a nice caffeine boost during those warm afternoon celebrations.
Storage Instructions
Keep Frozen: This festive ice cream cake needs to stay in the freezer until you’re ready to serve. Keep it covered tightly with plastic wrap or in an airtight container to prevent freezer burn. It’ll stay fresh and tasty for up to 2 weeks in the freezer, though the colors might start to fade slightly after a week.
Make Ahead: This is a perfect dessert to make in advance! You can prepare it 2-3 days before your party or gathering. Just keep it wrapped well in the freezer until the big day. The layers will actually set better with some extra freezing time, making it easier to slice and serve.
Serve: When it’s party time, take the cake out of the freezer about 5-10 minutes before serving – just enough time to make it easier to slice but not so long that it starts melting. If you have leftovers, pop them back in the freezer right away to maintain the best texture.
| Preparation Time | 15-25 minutes |
| Cooking Time | 0-0 minutes |
| Total Time | 240-300 minutes |
| Level of Difficulty | Easy |
Estimated Nutrition
Estimated nutrition for the whole recipe (without optional ingredients):
- Calories: 3200-3500
- Protein: 40-50 g
- Fat: 160-180 g
- Carbohydrates: 450-480 g
Ingredients
For the cake:
- 2 packages ice cream sandwiches (24 total sandwiches)
For the creamy filling:
- 1 small package instant vanilla pudding mix (do not prepare as directed, just the powder)
- 7 oz marshmallow crème (I use Fluff brand)
- 2 containers (8 oz each) frozen whipped topping, thawed (like Cool Whip, ensure it’s fully thawed)
For decoration:
- red gel food coloring (for vibrant color without adding liquid)
- blue gel food coloring
- sprinkles (red, white, and blue for a festive touch)
Step 1: Prepare the Marshmallow Mixture
In a large mixing bowl, combine marshmallow fluff with pudding.
Keep in mind that the mixture will be thick.
Tip: To easily remove marshmallow fluff from the jar, microwave it for 10-20 seconds.
Step 2: Incorporate the Whipped Topping
Fold in one container of whipped topping into the marshmallow and pudding mixture.
Stir until the mixture is smooth and well-combined.
Step 3: Divide and Color the Mixture
Divide the marshmallow mixture into two separate bowls.
Add food coloring to each to achieve your desired shades for a visually appealing dessert.
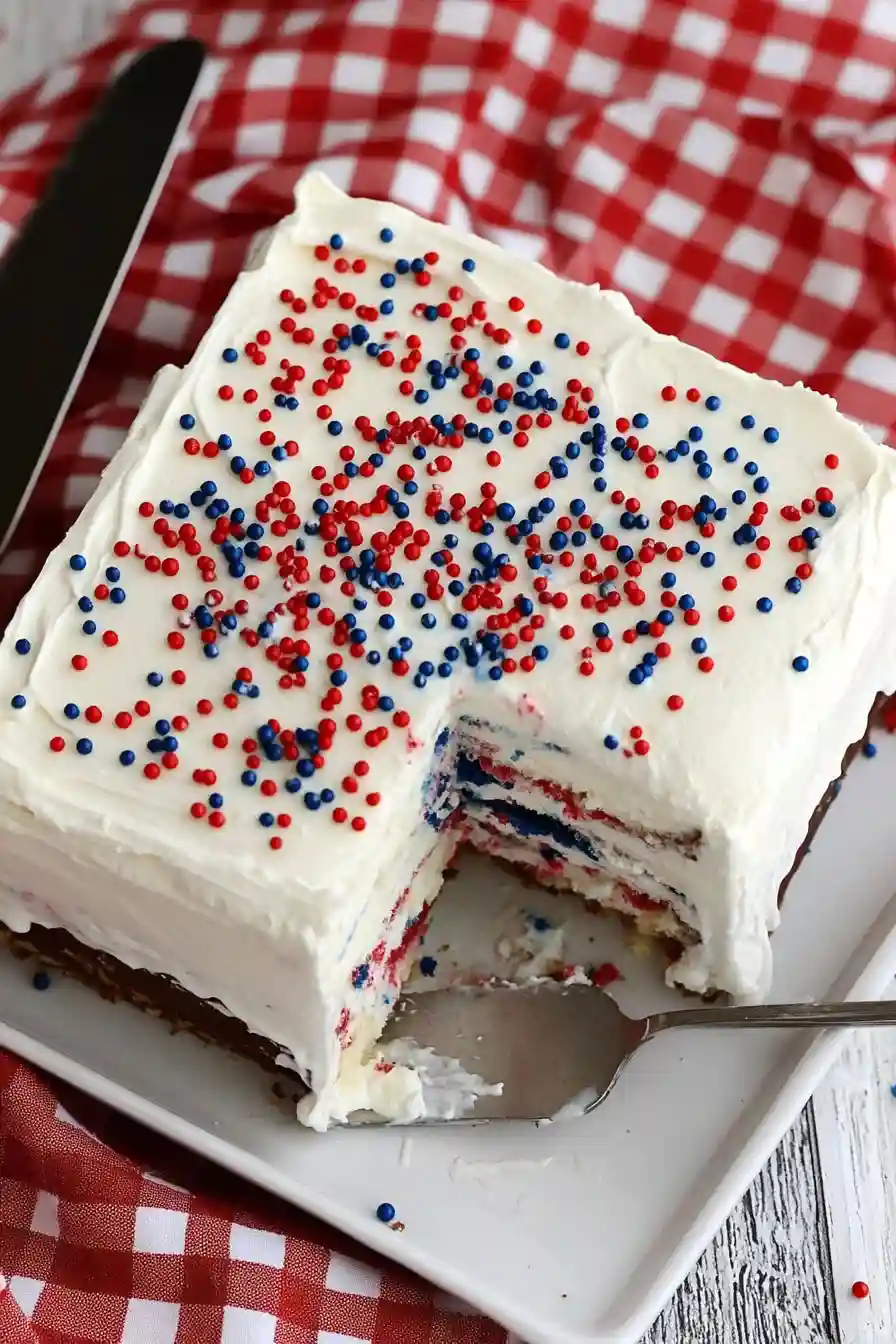
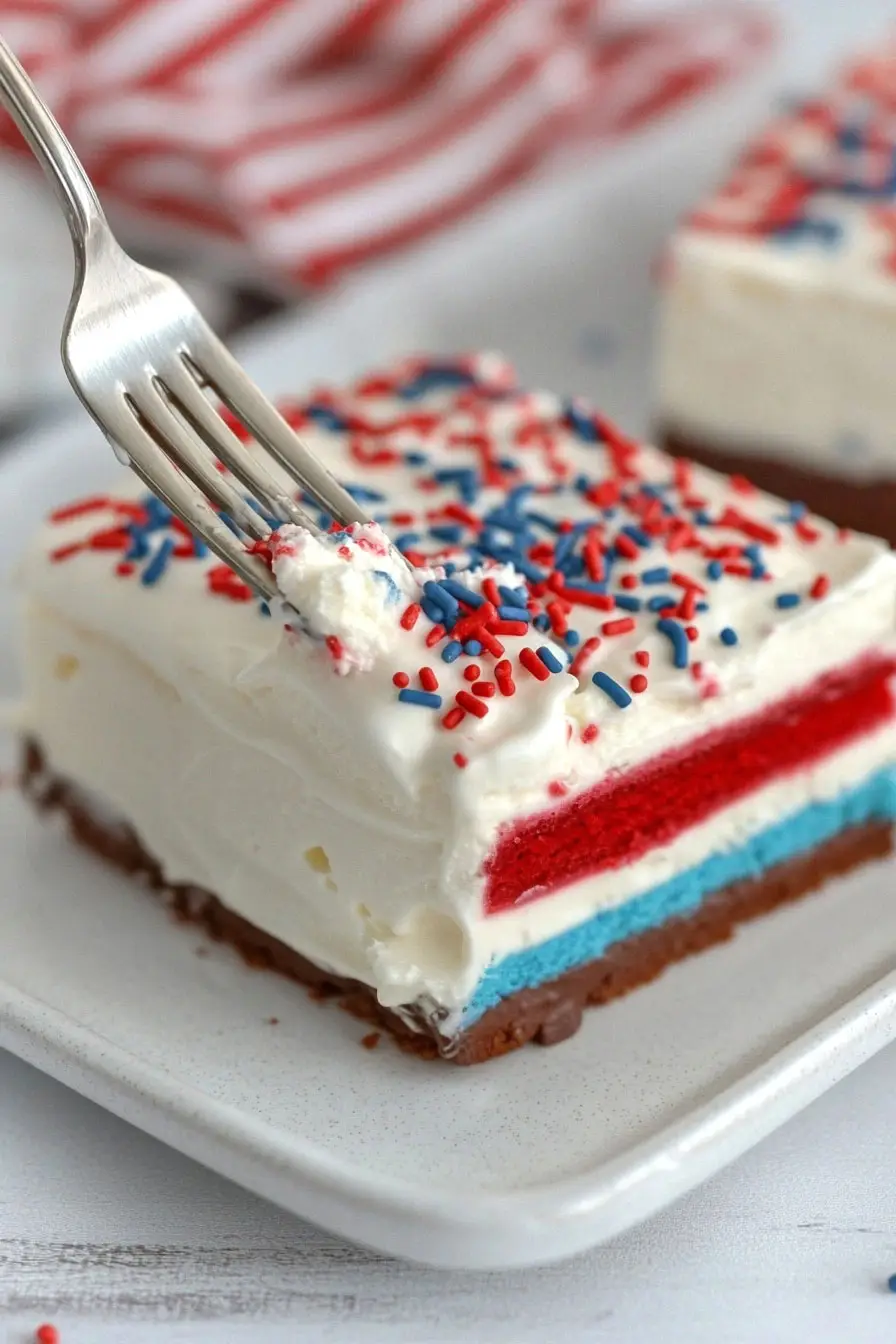
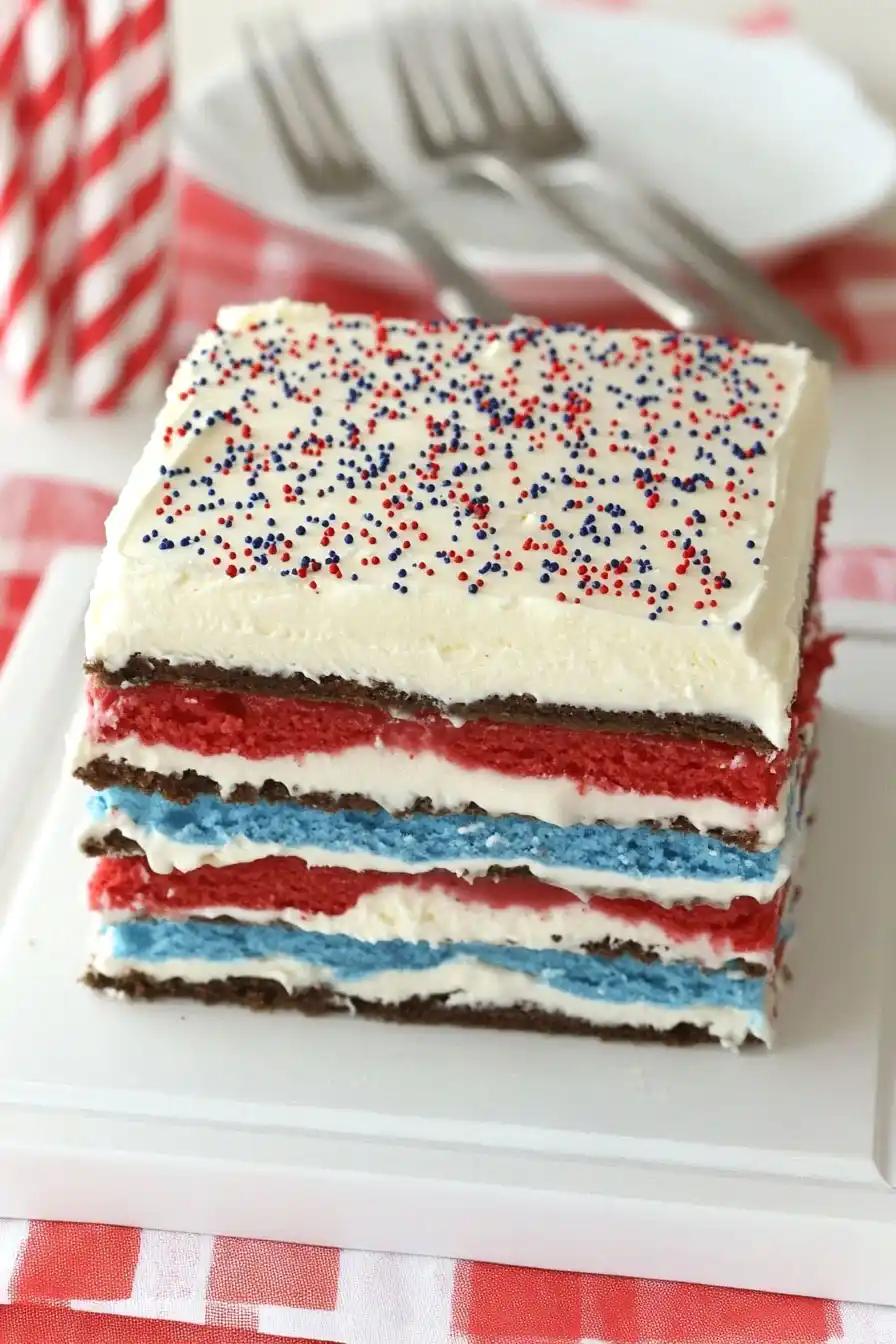
Step 4: Assemble the Ice Cream Sandwich Layers
Line a cookie sheet with foil to prepare for assembly.
Place 4 ice cream sandwiches on the prepared sheet.
Frost these sandwiches with the first color of marshmallow mixture.
Add another layer of 4 ice cream sandwiches on top, gently pressing them into the frosting for better adherence.
Proceed to frost this layer with the second color of marshmallow mixture, then top with 4 more ice cream sandwiches.
Step 5: Freeze the Assembled Cake
Place the assembled ice cream cake in the freezer for about 20 minutes to set the layers.
After this initial freeze, frost the entire exterior with additional whipped topping for a smooth finish.
Step 6: Final Freeze and Decorate
Once frosted, place the cake back into the freezer for at least 4 hours, or up to overnight, to fully set.
Before serving, remove from the freezer and add sprinkles for a decorative touch.
Store any leftovers in the freezer to keep them fresh.
