Let me tell you about my go-to party appetizer – seven layer Mexican dip. It’s the first thing my friends ask about whenever I host game day at our house. Every time I bring it to potlucks, the bowl comes home completely empty. But here’s the best part – it’s one of those no-fuss recipes that you can put together while catching up on your favorite TV show.
I usually make this dip the night before, which lets all those flavors come together nicely in the fridge. Plus, it saves me from rushing around right before guests arrive. Just pull it out, add a final sprinkle of fresh toppings, and you’re good to go.
Not a fan of one of the layers? No problem! That’s what I love about this dip – you can swap things in and out to match your taste. My kids skip the olives, my husband adds extra jalapeños, and I sometimes sneak in an extra layer of cheese (because why not?).

Why You’ll Love This Seven Layer Dip
- Quick assembly – This no-cook dip comes together in just 20 minutes – perfect for when guests are on their way or you need a last-minute party appetizer.
- Make-ahead friendly – You can prepare this dip up to 24 hours in advance and keep it covered in the fridge, making party prep so much easier.
- Crowd-pleasing appetizer – With layers of creamy guacamole, zesty salsa, and melty cheese, this dip is always the first to disappear at parties and potlucks.
- Customizable layers – You can easily swap ingredients based on what you have or prefer – use different types of cheese, add jalapeños for heat, or switch up the beans to make it your own.
- No cooking required – Just layer and serve – no stove, oven, or special equipment needed. It’s as simple as that!
What Kind of Refried Beans Should I Use?
When it comes to refried beans, you’ve got several options at the grocery store that’ll work great in this dip. Traditional refried pinto beans are the most common choice and give that classic Mexican restaurant flavor, but you could also use refried black beans for a slightly different taste. If you’re watching the store shelves, you’ll see both regular and vegetarian versions – the main difference is that traditional refried beans are made with lard while vegetarian ones use vegetable oils instead. For this recipe, either style works perfectly fine, though I find the regular version tends to be a bit creamier. Just remember to give your beans a good stir and thin them out with a little water if they’re too thick – this makes them easier to spread in your dip.

Options for Substitutions
This dip is super adaptable and you can switch things up based on what you have in your kitchen:
- Refried beans: You can use black beans (mashed with a fork) or pinto beans instead. For a twist, try refried black beans. Just make sure to season them well with the taco spices.
- Cheddar cheese: Feel free to use Monterey Jack, Mexican cheese blend, or pepper jack if you want a bit of heat. Just avoid soft cheeses as they won’t give you that same nice layer.
- Guacamole: Store-bought or homemade both work great. If you’re in a pinch, you can mash ripe avocados with lime juice, salt, and garlic powder as a quick substitute.
- Sour cream: Greek yogurt makes a great substitute – it’s tangier and has more protein. You might want to add a pinch of salt to match sour cream’s flavor.
- Red/green onion: These are interchangeable, or you can use white onion. If you’re not big on raw onion, try using pickled onions or just skip them.
- Black olives: Not an olive fan? Leave them out or replace with diced tomatoes, pickled jalapeños, or extra corn.
- Cilantro: If you’re not a cilantro person, try using fresh parsley or just skip it altogether – the dip will still be tasty!
Watch Out for These Mistakes While Making
The biggest mistake when making seven layer dip is not properly draining your salsa and corn, which can lead to a watery mess that pools at the bottom of your dish and makes the layers slide around.
Getting the right consistency for your refried beans is crucial – mixing them with a little water and warming them slightly makes them easier to spread without tearing through the other layers, while cold beans straight from the can will be too stiff to work with.
Another common error is adding the guacamole too far in advance, as it can quickly turn brown – to prevent this, either make the dip right before serving or press plastic wrap directly onto the surface of the guacamole layer.
For the best presentation and easy scooping, make sure to spread each layer evenly to the edges of your dish, and consider chilling the dip for 30 minutes before serving to help the layers set and the flavors meld together.
What to Serve With Seven Layer Dip?
When it comes to serving seven layer dip, tortilla chips are the obvious go-to, but there are lots of other fun options too! I like to put out a variety of dippers including sturdy corn chips, crispy tortilla strips, and even fresh veggies like bell pepper slices and baby carrots for a healthier option. Since this dip is pretty filling, it pairs really well with lighter Mexican-inspired sides like a simple street corn salad or a fresh lime-dressed coleslaw. For a party spread, you might want to serve it alongside other crowd-pleasers like chicken wings, quesadillas, or fresh salsa and chips – just remember to save room for the dip!
Storage Instructions
Keep Fresh: Your seven layer dip will stay good in the fridge for up to 3 days when covered tightly with plastic wrap. I recommend pressing the wrap directly onto the surface of the dip to prevent any browning of the guacamole layer. The flavors actually get better as they meld together overnight!
Make Ahead: Want to prep this dip in advance? You can assemble all the layers except the guacamole up to 24 hours ahead. Just add the guacamole layer right before serving to keep it fresh and green. If you’re taking this to a party, transport it in a cooler to keep it nice and cold.
Serve: For the best taste and texture, take the dip out of the fridge about 15-20 minutes before serving – this takes the chill off and makes it easier to scoop. Keep in mind that this dip isn’t freezer-friendly due to the fresh ingredients and dairy components.
| Preparation Time | 15-20 minutes |
| Cooking Time | 5-10 minutes |
| Total Time | 20-30 minutes |
| Level of Difficulty | Easy |
Estimated Nutrition
Estimated nutrition for the whole recipe (without optional ingredients):
- Calories: 2600-2900
- Protein: 65-75 g
- Fat: 150-170 g
- Carbohydrates: 250-280 g
Ingredients
- 1/2 cup finely diced red onion
- 1 cup shredded sharp cheddar cheese (freshly shredded for best flavor)
- 2 tbsp chopped cilantro (freshly chopped for vibrant color and flavor)
- 1 cup salsa
- 1 tsp taco spice mix (I like McCormick’s original taco seasoning)
- 2 tbsp water
- 1 cup corn
- 15 oz refried beans (warmed for easier spreading)
- 8 oz guacamole (chunky style for better texture)
- 1 cup sliced black olives
- 1 cup sour cream
Step 1: Prepare the Bean Mixture
In a small saucepan, combine the refried beans, a bit of water, and taco seasoning.
Warm over medium heat, stirring occasionally, until the mixture is smooth and well-combined.
This step helps to make the beans spreadable and adds flavor from the taco seasoning.
Step 2: Layer the Ingredients in the Pie Dish
Once the bean mixture is warm and smooth, spread it evenly in the bottom of a 9-inch round pie dish.
Immediately sprinkle a layer of cheddar cheese over the warm beans, allowing it to slightly melt.
This will help the cheese adhere to the beans.
Step 3: Add the Guacamole and Sour Cream Layers
Gently spread the guacamole over the melted cheese, creating an even layer.
Next, carefully spread the sour cream over the guacamole layer, ensuring each layer remains distinct.
Step 4: Top with Salsa and Vegetables
Spoon the salsa over the sour cream layer.
When doing this, try to avoid the excess liquid in the salsa to prevent the dip from becoming watery.
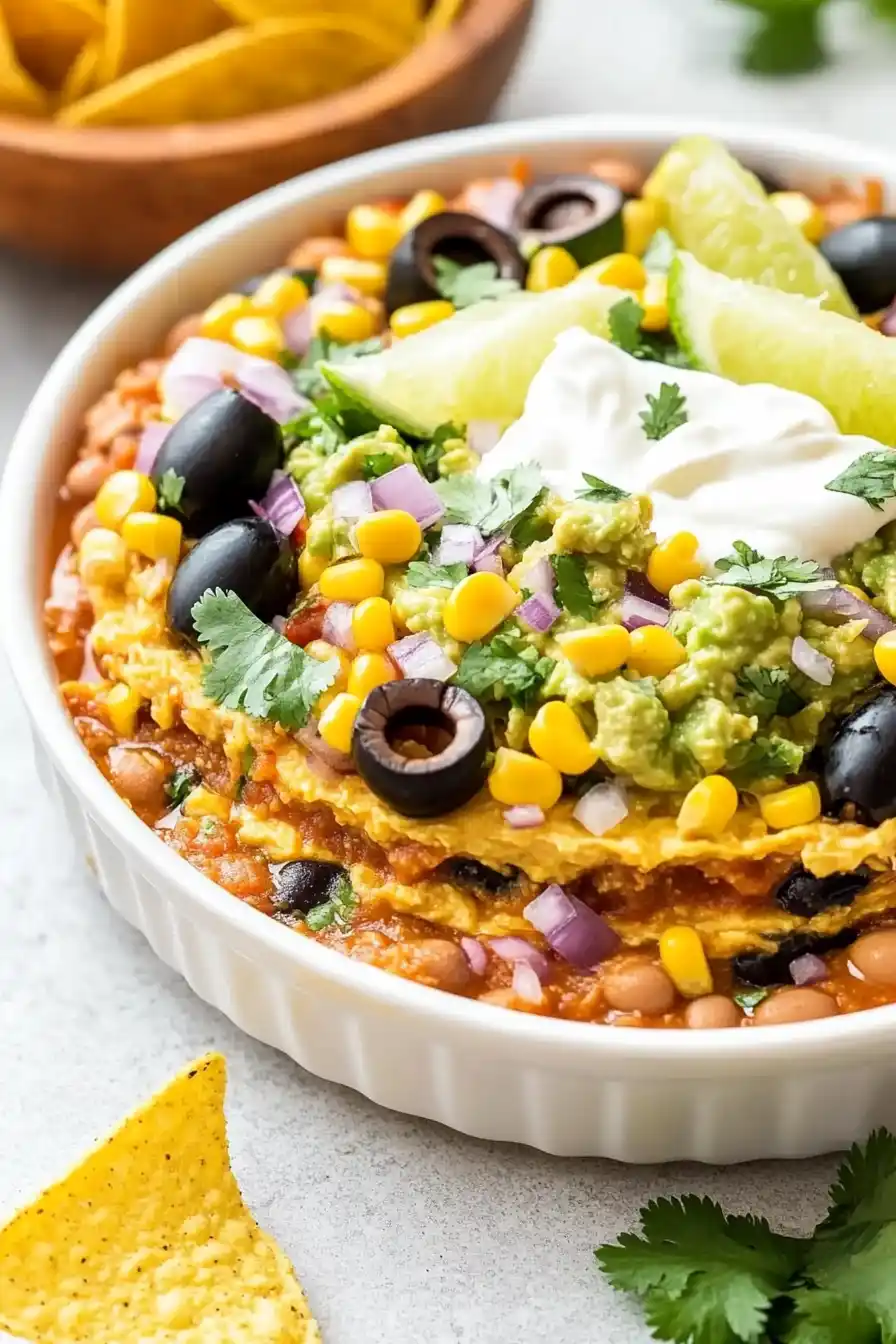
Sprinkle chopped red onion, sliced black olives, and corn evenly over the salsa.
Finish by garnishing the top with fresh cilantro for added flavor and a pop of color.
Step 5: Chill and Serve
Cover the pie dish with a lid or plastic wrap and refrigerate until you’re ready to serve.
This resting period allows the flavors to meld together.
Serve the layered dip cold with your favorite tortilla chips for dipping.
Enjoy your fresh and flavorful multi-layered dip!
