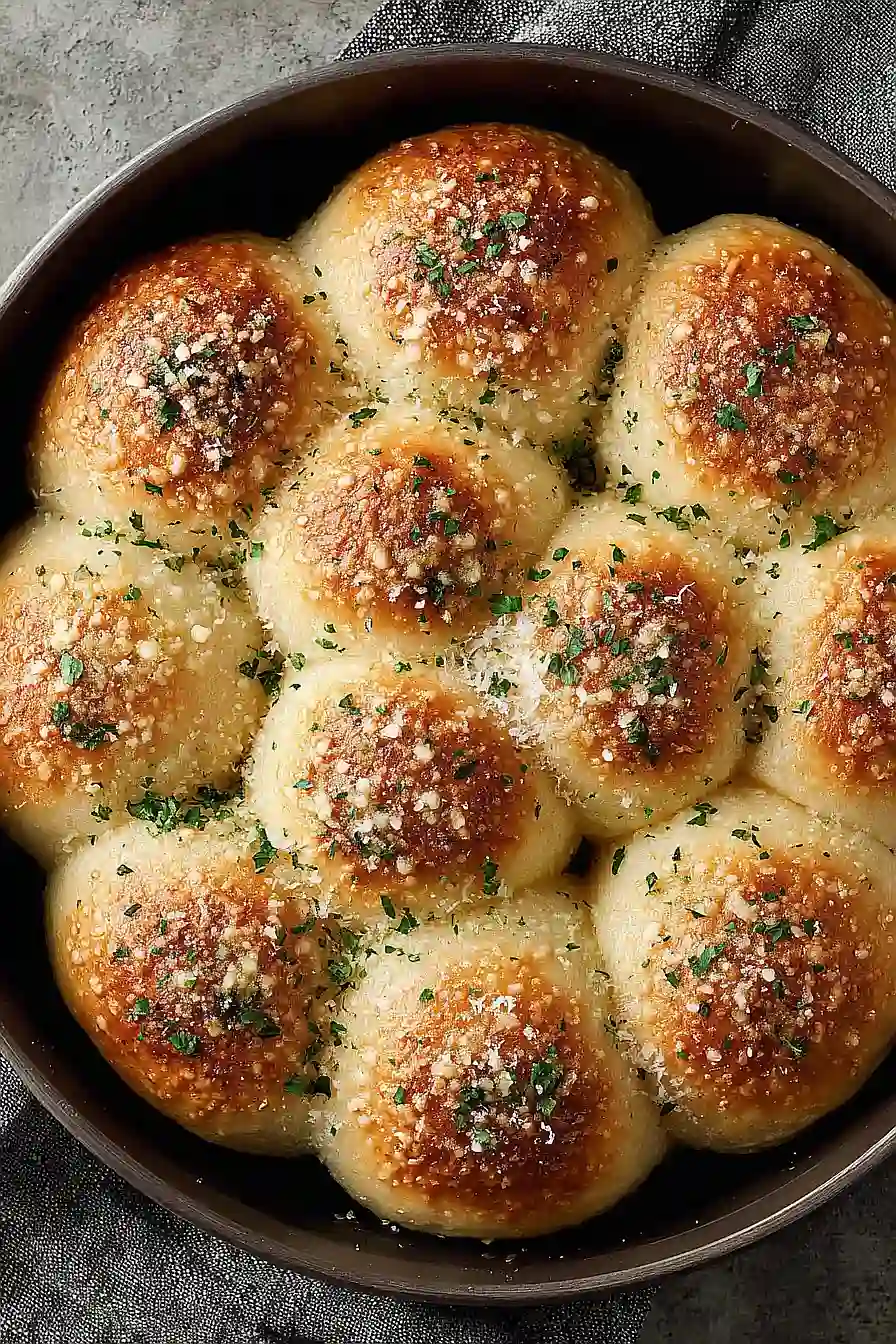
If you ask me, garlic butter dinner rolls are pure comfort food magic.
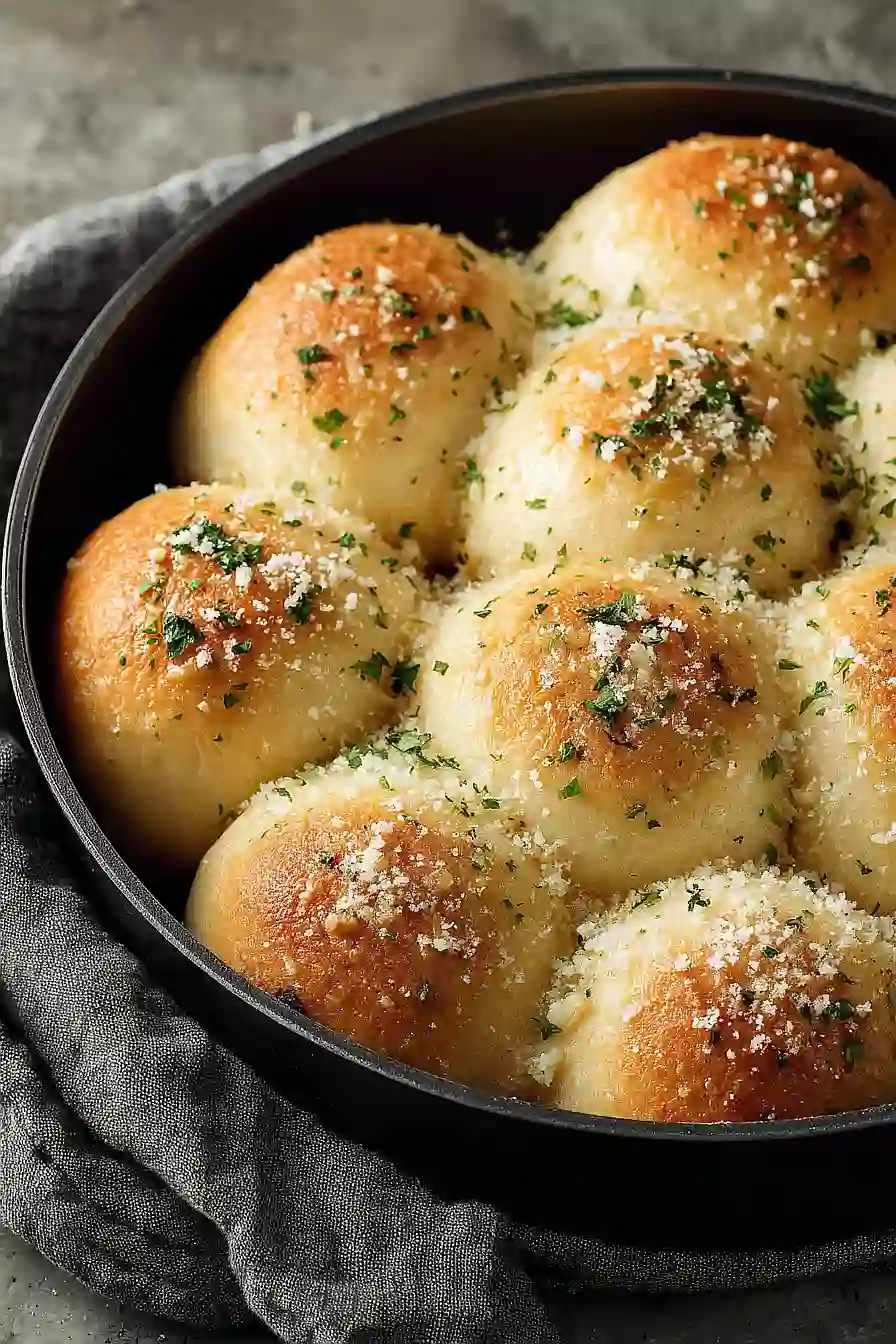
These soft, pillowy rolls are brushed with rich garlic butter and topped with nutty parmesan cheese. They’re the kind of side dish that makes everyone at the table reach for seconds before they’ve even finished their first roll.
The rolls bake up golden brown with crispy edges and a tender, fluffy center. Fresh garlic mixed into melted butter creates an irresistible aroma that fills your kitchen.
They’re perfect alongside pasta night, soup dinners, or really any meal that needs a little extra warmth and flavor.
Why You’ll Love These Garlic Butter Parmesan Dinner Rolls
- Bakery-quality rolls at home – These soft, fluffy dinner rolls taste like they came from your favorite restaurant, but you can make them right in your own kitchen.
- Simple ingredients – You probably have most of these pantry staples on hand already, making this an easy recipe to whip up anytime.
- Irresistible garlic butter topping – The combination of melted butter, fresh garlic, and parmesan cheese creates a golden, flavorful coating that makes these rolls absolutely addictive.
- Perfect for any meal – Whether you’re serving them with soup, pasta, or a holiday dinner, these rolls complement just about everything and always disappear fast.
- Ready in about an hour – From start to finish, you can have fresh, warm dinner rolls on the table in 45-70 minutes, making them doable for weeknight dinners too.
What Kind of Flour Should I Use?
All-purpose flour is your best bet for these dinner rolls, and it’s what most people already have in their pantry. You want to make sure you’re measuring it correctly by spooning it lightly into your measuring cup and leveling it off with a knife – don’t pack it down or scoop directly from the bag. If you only have bread flour on hand, that will work too and might even give you slightly chewier rolls, though all-purpose creates the perfect tender texture. Avoid using cake flour or self-rising flour for this recipe, as they’ll change the structure and rise of your rolls in ways you don’t want.
Options for Substitutions
These dinner rolls are pretty forgiving when it comes to swaps, but there are a few key ingredients you’ll want to keep as-is:
- Instant yeast: You can use active dry yeast instead, but you’ll need to proof it first in the warm water with sugar for about 5 minutes until foamy. Use the same amount.
- All-purpose flour: Bread flour works great too and will give you slightly chewier rolls. Don’t substitute with cake flour or self-rising flour as they’ll change the texture completely.
- Parmesan cheese: Romano or Asiago cheese make good swaps, or you can use sharp cheddar for a different flavor profile. Fresh grated always beats pre-shredded for better melting.
- Fresh garlic: Garlic powder works in a pinch – use about 1 teaspoon instead of the 3 fresh cloves. Fresh minced garlic from a jar is another option.
- Parsley: Since this is optional anyway, you can skip it or try fresh chives, oregano, or even dried Italian seasoning for different herb notes.
- Unsalted butter: Salted butter works fine – just reduce the added salt by half. For dairy-free rolls, use plant-based butter, though the flavor will be a bit different.
Watch Out for These Mistakes While Baking
The biggest mistake when making dinner rolls is using water that’s too hot for the yeast – anything over 115°F will kill it, so test the temperature with a thermometer or make sure it feels just slightly warm to your wrist, not hot.
Another common error is not letting the dough rise long enough in a warm, draft-free spot, which results in dense, heavy rolls instead of light and fluffy ones – aim for the dough to double in size, which usually takes about an hour.
Don’t skip the second rise after shaping the rolls, as this step is crucial for achieving that perfect tender texture, and resist the urge to add extra flour while kneading since too much will make your rolls tough.
Finally, brush the garlic butter mixture on while the rolls are still warm from the oven so it soaks in properly, and if your garlic butter seems too thick, warm it slightly to make it easier to spread.

What to Serve With Garlic Butter Parmesan Dinner Rolls?
These buttery, garlicky rolls are perfect alongside just about any dinner, but they really shine with Italian dishes like spaghetti and meatballs, lasagna, or chicken parmesan. They’re also amazing with soups – think minestrone, chicken noodle, or even a simple tomato soup where you can dip and soak up all that flavor. For a cozy family dinner, serve them with roasted chicken, beef stew, or pork chops, and don’t forget they make great sandwich rolls too if you have any leftovers. The garlic and parmesan flavors pair beautifully with salads dressed in balsamic vinaigrette or Caesar dressing as well.
Storage Instructions
Store: These garlic butter rolls taste amazing fresh, but they’ll keep nicely in an airtight container at room temperature for up to 3 days. I like to wrap them in a clean kitchen towel first to help maintain that soft texture. Just make sure they’re completely cooled before storing them away.
Freeze: You can freeze these rolls for up to 3 months in a freezer-safe bag or container. I often make a double batch and freeze half for busy weeknights. They thaw quickly on the counter in about an hour, or you can pop them straight from the freezer into a warm oven.
Warm Up: To bring back that fresh-from-the-oven taste, wrap the rolls in foil and warm them in a 350°F oven for about 10 minutes. You can also microwave them for 15-20 seconds, but the oven method gives you that nice crusty exterior again. A little extra garlic butter brushed on top doesn’t hurt either!
| Preparation Time | 25-40 minutes |
| Cooking Time | 20-30 minutes |
| Total Time | 45-70 minutes |
| Level of Difficulty | Medium |
Estimated Nutrition
Estimated nutrition for the whole recipe (without optional ingredients):
- Calories: 2150-2300
- Protein: 45-55 g
- Fat: 80-95 g
- Carbohydrates: 320-340 g
Ingredients
For the dough:
- 1 1/2 cups warm water (110°F is ideal for activating yeast)
- 1 tsp kosher salt
- 2 tbsp granulated sugar
- 1 tbsp instant yeast (I use SAF-Instant yeast)
- 2 tbsp unsalted butter (room temperature, about 70°F)
- 4 cups all-purpose flour (King Arthur all-purpose flour works great here)
For the topping:
- 1 tbsp chopped parsley (optional, for color and freshness)
- 1/4 cup Parmesan cheese (finely grated)
- 3 garlic cloves (freshly grated for best flavor)
- More kosher salt (for sprinkling before baking)
- 6 tbsp unsalted butter (melted and cooled slightly)
Step 1: Prepare the Yeast Mixture
- 1 1/2 cups warm water (110°F)
- 1 tbsp instant yeast
- 2 tbsp granulated sugar
In the bowl of a stand mixer fitted with the dough hook, combine the warm water, instant yeast, and granulated sugar.
Stir together and let stand for about 5 minutes, until the mixture becomes creamy.
This helps activate the yeast, which is important for getting fluffy rolls.
Step 2: Make and Knead the Dough
- 2 tbsp unsalted butter, room temperature
- 4 cups all-purpose flour (lightly spooned and leveled)
- 1 tsp kosher salt
Add the room temperature unsalted butter, all-purpose flour, and kosher salt to the creamy yeast mixture from Step 1.
Mix on low speed until the ingredients just begin to come together.
Then, increase the speed to medium and knead the dough until it is smooth and elastic, about 5 minutes.
You’ll know it’s ready when the dough starts to make a slapping sound as it hits the sides of the bowl.
Step 3: Let the Dough Rise
Remove the mixer bowl with the dough from the stand mixer and cover it with a dish towel.
Allow the dough to rise in a warm place until doubled in volume, about 20 to 30 minutes.
If your kitchen is on the cooler side, use the higher end of the rise time.
This rise is key for pillowy, airy rolls.
I like to set the bowl near a slightly warm oven to help the dough along.
Step 4: Prepare Garlic Butter and Baking Pans
- 6 tbsp unsalted butter
- 3 garlic cloves, grated
While the dough rises, melt the unsalted butter in a small saucepan over low-medium heat, then add the grated garlic and cook until the butter is fully melted and the garlic is fragrant, being careful not to brown the garlic.
Brush about half of this garlic butter over the bottom and sides of two cake pans, or use a 9×13-inch baking dish if you prefer.
Reserve the other half of the garlic butter for later.
Step 5: Shape and Arrange the Dough Balls
- dough from Step 3
- garlic butter-brushed pans from Step 4
After the dough has completed its first rise, turn it out onto a lightly floured surface and shape it into a smooth, even ball.
Slice the dough into 16 even portions and gently roll each piece into a ball.
Arrange the dough balls in the prepared cake pans brushed with garlic butter from Step 4.
Step 6: Second Rise and Bake Rolls
- reserved garlic butter from Step 4
- 1/4 cup parmesan cheese, grated
- more kosher salt, for sprinkling
Preheat the oven to 400°F (200°C).
Place the filled pans near the warm oven and let the dough balls rise for another 15 minutes.
Bake the rolls for 15 minutes, or until they just start to turn golden brown on top.
Remove the rolls from the oven and generously brush them with the reserved garlic butter.
Sprinkle the grated parmesan cheese on top of the rolls, then return them to the oven and bake for another 3 to 5 minutes, until they are cooked through and deep golden brown.
I like to add a light sprinkle of kosher salt at this point to enhance the flavor.
Step 7: Finish and Serve the Rolls
- 1 tbsp chopped parsley (optional)
Once the rolls are golden and fragrant, remove them from the oven and, if you’d like, sprinkle chopped parsley over the top for a pop of color and freshness.
Let the rolls cool in the pan for 10 minutes before turning them out onto a wire rack or serving platter.
These taste best enjoyed on the same day they’re baked.
