There’s something special about ice cream cake that takes me right back to childhood birthday parties. And while store-bought versions are nice, making your own raspberry ice cream cake at home is so much more fun. I started making these for my kids’ summer gatherings, but now it’s become our go-to dessert for any celebration.
What I love most about this recipe is how easy it is to put together ahead of time. You can make it the day before and let it hang out in the freezer until you’re ready. Plus, the combination of fresh raspberries and creamy ice cream is just perfect for those warm summer days when you want something cool and refreshing.
The best part? You don’t need any fancy equipment or special skills. If you can layer ingredients and spread ice cream (and who can’t?), you can make this cake. Trust me, once you see how simple it is, you’ll wonder why you haven’t been making ice cream cakes all along.

Why You’ll Love This Ice Cream Cake
- Make-ahead friendly – You can prepare this cake in advance and keep it frozen until you’re ready to serve, making it perfect for parties or special occasions.
- Gluten-free option – Using gluten-free flour means everyone can enjoy this decadent dessert, even those with dietary restrictions.
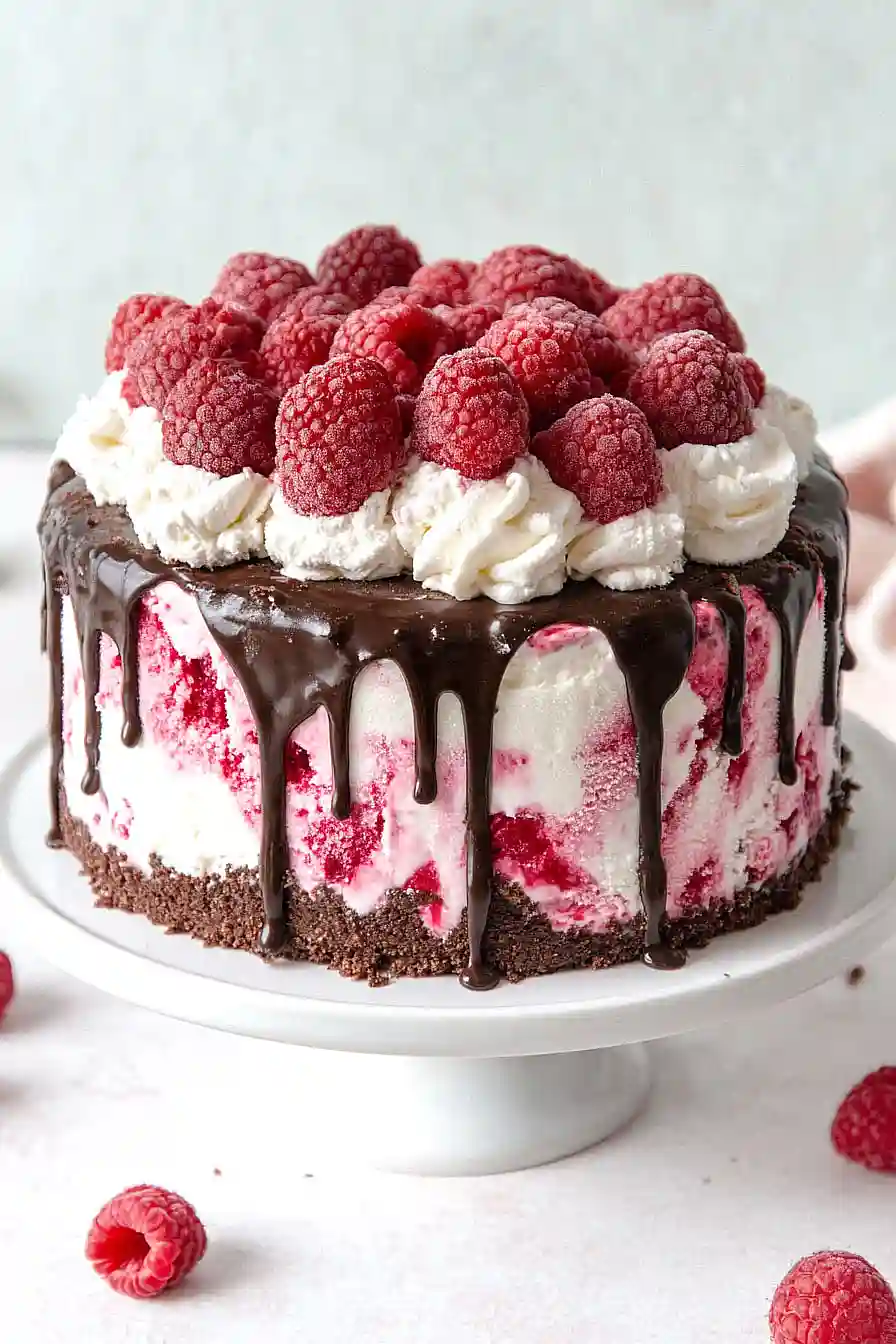
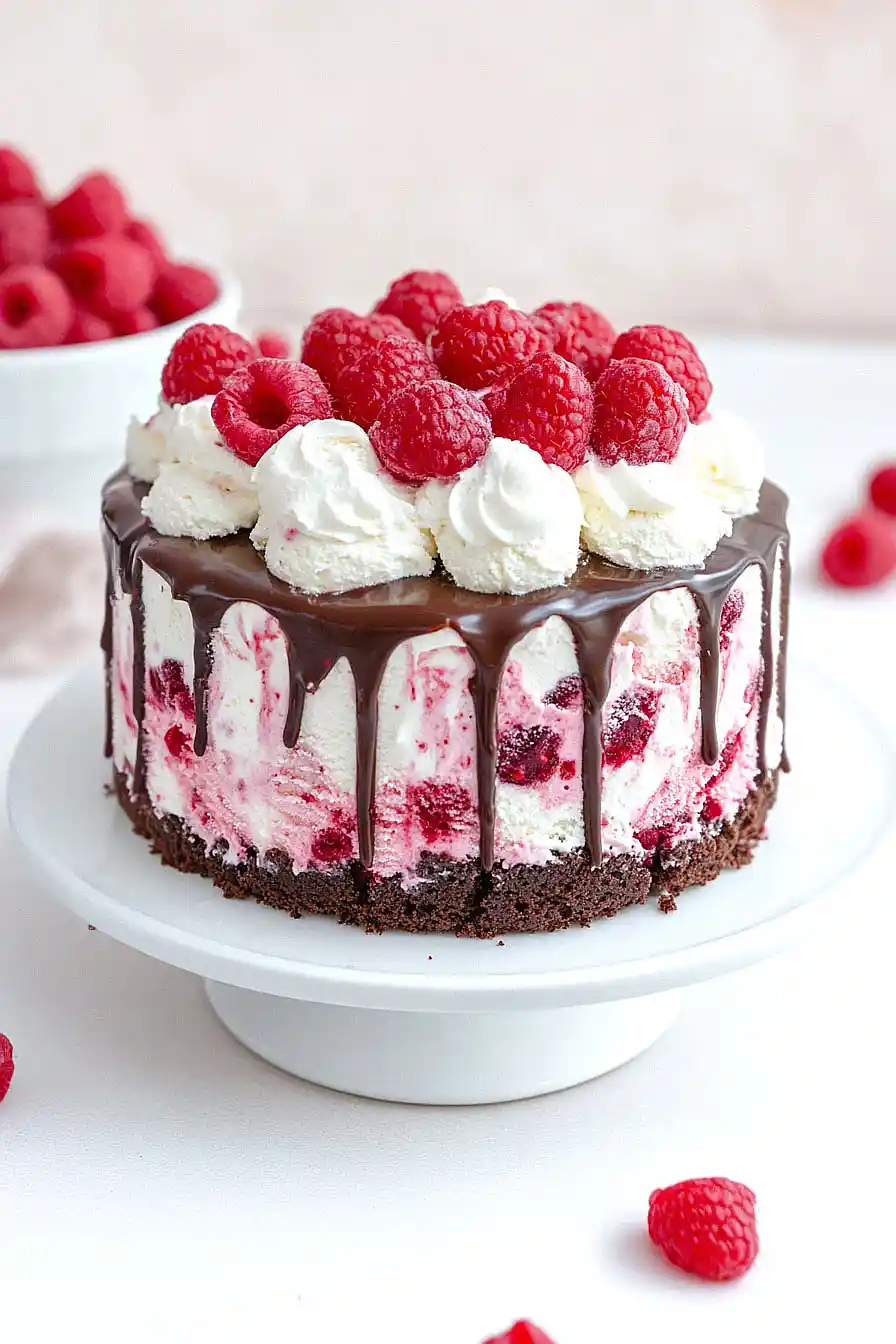
- Perfect combination of flavors – The rich chocolate cake pairs beautifully with creamy vanilla ice cream and tart raspberries, creating a balanced dessert that’s not too sweet.
- Show-stopping presentation – With its layers of cake, ice cream, and fresh raspberry garnish, this dessert looks like it came from a fancy bakery – but you made it yourself!
- Customizable – You can easily swap the vanilla ice cream for your favorite flavor or use different berries to make it your own.
What Kind of Raspberries Should I Use?
Fresh raspberries are ideal for this ice cream cake, but you’ll want to make sure they’re ripe and firm without being mushy. When shopping, look for berries that are bright red, plump, and free from any mold or soft spots. If fresh raspberries aren’t in season or are too expensive, you can actually use frozen raspberries for the jam portion of this recipe – just thaw them completely and drain off any excess liquid first. For the garnish though, stick with fresh berries since they’ll look prettier and hold their shape better on top of the cake.
Options for Substitutions
This ice cream cake recipe has several ingredients that you can swap out if needed:
- Gluten-free flour: If you don’t need the cake to be gluten-free, you can use regular all-purpose flour. Just skip the xanthan gum since regular flour already contains gluten for structure.
- Dutch process cocoa: Natural cocoa powder can work here, but the cake might be slightly less dark in color and have a different flavor profile. If using natural cocoa, reduce the baking soda to 3/4 teaspoon.
- Avocado oil: Any neutral-flavored oil works well – try canola, vegetable, or even melted coconut oil (just make sure other ingredients are room temperature if using coconut oil).
- Buttermilk: No buttermilk? Mix 5 tablespoons regular milk with 1/2 teaspoon lemon juice or white vinegar and let it sit for 5 minutes before using.
- Corn syrup: You can skip the corn syrup in the chocolate topping – it just helps make it extra shiny. The cake will still taste great without it.
- Fresh raspberries: For both the sauce and garnish, frozen raspberries work fine – just thaw and drain them well. You could also use strawberries or blackberries for a different twist.
- Vanilla ice cream: Feel free to swap in any ice cream flavor that pairs well with chocolate and raspberries – strawberry, chocolate, or even coffee ice cream would be nice options.
Watch Out for These Mistakes While Baking
Temperature control is crucial when making an ice cream cake – letting your ice cream get too soft before assembly can lead to a melty mess, so work quickly and return the cake to the freezer between layers. The chocolate cake layer needs special attention too – don’t skip bringing the egg to room temperature, as cold eggs can prevent proper rising and lead to a dense, tough cake. When making the ganache topping, avoid overheating the chocolate and cream mixture or it will become grainy – instead, heat the cream just until steaming and let the residual heat melt the chocolate while stirring gently. For the best texture and easy slicing, always allow your finished cake to freeze for at least 4 hours (preferably overnight), and let it sit at room temperature for 5-10 minutes before serving to ensure the perfect consistency.
What to Serve With Raspberry Ice Cream Cake?
This dessert is pretty spectacular on its own, but there are some nice ways to dress it up for serving! A cup of hot coffee or espresso makes a perfect contrast to the cold ice cream cake, while also complementing the chocolate layers. If you want to go all out for a special occasion, add a scoop of vanilla bean ice cream on the side – trust me, no one will complain about extra ice cream! For a lighter option, some fresh berries scattered around the plate (think blackberries and extra raspberries) add a nice pop of color and fresh flavor that goes perfectly with the cake’s raspberry filling.
Storage Instructions
Keep Frozen: This raspberry ice cream cake needs to stay in the freezer to maintain its shape and texture. Keep it well-wrapped or in an airtight container to prevent freezer burn. It’ll stay fresh and tasty for up to 2 weeks in the freezer.
Make Ahead: You can make this cake 2-3 days before serving, which is perfect for parties and special occasions. Just keep it covered in the freezer until you’re ready to serve. The flavors actually get better as they meld together!
Serve: When it’s time to serve, take the cake out of the freezer about 10-15 minutes beforehand to soften slightly. This will make it easier to slice and give it the perfect creamy texture. If you have leftovers, pop them back in the freezer right away.
| Preparation Time | 45-60 minutes |
| Cooking Time | 25-30 minutes |
| Total Time | 12-14 hours (including freezing time) |
| Level of Difficulty | Medium |
Estimated Nutrition
Estimated nutrition for the whole recipe (without optional ingredients):
- Calories: 3200-3500
- Protein: 35-40 g
- Fat: 180-200 g
- Carbohydrates: 400-420 g
Ingredients
For the raspberry filling:
- 3 oz fresh raspberries
- 2 tbsp white sugar
- 1/2 tbsp cornstarch
- 1/2 tbsp water
For the chocolate cake layers:
- 7 tbsp dutch-process cocoa powder (sifted, for best results)
- 1 1/4 tsp white vinegar
- 1 1/4 cups granulated sugar
- 1 1/4 tsp vanilla extract
- 3/8 tsp salt
- 3/4 cup hot water
- 1/4 cup avocado oil (or any neutral oil)
- 1 tsp baking soda
- 1 large egg (at room temperature)
- 5 tbsp buttermilk
- 1 1/4 cups gluten-free all-purpose flour (King Arthur is my favorite brand)
For the ice cream layer:
- Prepared raspberry filling
- 2 1/2 cups vanilla ice cream (softened, for easy spreading)
For the chocolate ganache:
- 1/2 tbsp light corn syrup (optional, for shine)
- 1 tbsp whole milk (optional, for desired consistency)
- 2 1/2 tbsp heavy cream
- 1 1/2 oz dark chocolate (finely chopped, for quick melting)
For the whipped cream topping:
- 1/4 cup heavy cream (very cold, for optimal whipping)
- 1 1/2 tsp powdered sugar
- 1/4 tsp vanilla extract
- Fresh raspberries (for decoration)
Step 1: Make the Raspberry Jam
- 3 oz fresh raspberries, rinsed
- 2 tbsp white sugar
- 1/2 tbsp cornstarch
- 1/2 tbsp water
Combine the fresh raspberries and sugar in a small saucepan set over medium heat.
As the raspberries start to cook and soften, mash them into the sugar until well combined.
In a separate small bowl, whisk together the cornstarch and water until smooth to make a slurry.
Slowly pour the slurry into the raspberry mixture while whisking constantly.
Continue cooking, whisking often, until the mixture thickens—this should take about 1 to 1 ½ minutes after boiling.
Once thickened, remove the jam from the heat, transfer it to a small bowl, cover with plastic wrap, and refrigerate until it is fully cooled.
