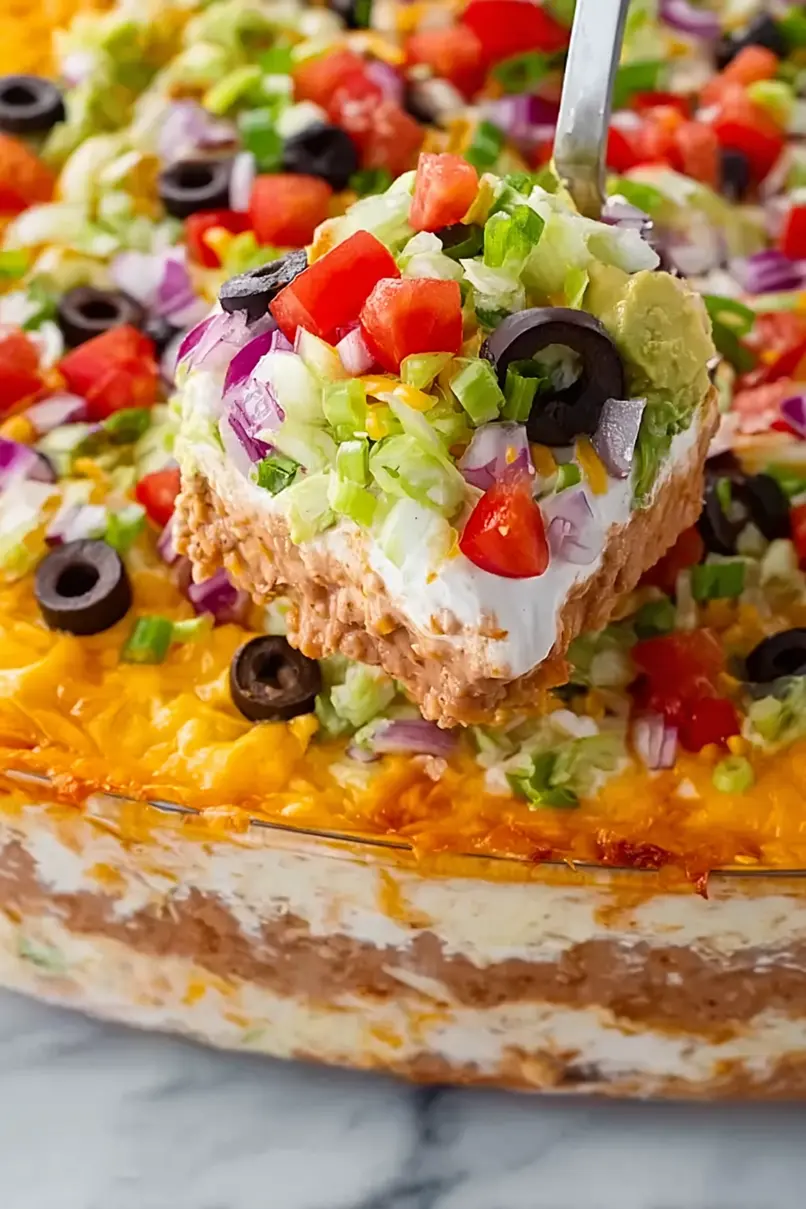
Seven layer dip has been a go-to party snack in my house for as long as I can remember. It’s one of those recipes that always gets people gathering around the table, chatting and laughing while they scoop up another bite with their tortilla chips. The best part? It’s so simple to put together, and you can make it ahead of time.
I love how each layer brings something different to the table – creamy refried beans, cool sour cream, fresh guacamole, and all those toppings that make it feel like a fiesta in a dish. Whenever I bring this to potlucks or game day parties, the dish always comes home empty. Not that I’m complaining – it gives me an excuse to make another batch!
And let’s be honest, who doesn’t love a dip that counts as practically a whole meal? With all those layers of Mexican-inspired ingredients, it’s basically like having a deconstructed burrito, minus the tortilla (though you’ll need plenty of chips for dipping!).
Why You’ll Love This Seven Layer Dip
- No cooking required – This dip comes together in just minutes without turning on the stove or oven – perfect for hot summer days or when you’re short on time.
- Make-ahead friendly – You can prepare this dip up to 24 hours in advance, making it perfect for parties, game days, or potlucks.
- Customizable layers – Each layer can be adjusted to your taste – add more cheese, skip the olives, or spice it up with extra hot sauce. It’s your dip, your way!
- Party favorite – This classic appetizer always disappears fast at gatherings. The combination of creamy, crunchy, and zesty layers keeps everyone coming back for more.
- Budget-friendly – Using simple pantry staples and fresh ingredients, this dip feeds a crowd without breaking the bank.
What Kind of Refried Beans Should I Use?
When it comes to refried beans, you’ve got quite a few options at the grocery store. Traditional refried pinto beans are the most common choice and work great in this dip, but you could also use refried black beans for a slightly different flavor profile. If you’re grabbing canned beans, look for ones labeled “traditional” or “authentic style” – these usually have a better texture and taste than the fat-free versions. You can also find varieties with added spices like jalapeño or green chiles, which can add an extra kick to your dip. Just make sure to give the beans a good stir before using them, as they can get a bit dense in the can.
Options for Substitutions
This party favorite is pretty flexible with substitutions. Here’s what you can swap out:
- Refried beans: You can use black refried beans instead of pinto, or even mash whole black beans with some Mexican seasonings. For a twist, try refried black beans mixed with cream cheese.
- Avocados: Store-bought guacamole works in a pinch, just use about 1½ cups. If you’re not an avocado fan, you can skip this layer, though it’s a fan favorite!
- Sour cream: Greek yogurt makes a great tangy substitute – just make sure to use plain, full-fat yogurt for the best texture and taste.
- Iceberg lettuce: Romaine or green leaf lettuce work well too. Just remember to chop it finely and pat it dry to prevent excess moisture.
- Cheddar cheese: Feel free to use Monterey Jack, Mexican blend, or even pepper jack for some heat. Just keep it finely shredded for the best texture.
- Green onions: Red onions (finely diced) or white onions work too. If using regular onions, soak them in cold water for 10 minutes first to reduce their sharp bite.
- Black olives: These are totally optional – you can skip them or replace with pickled jalapeños if you like more heat.
Watch Out for These Mistakes While Making
The biggest challenge when making seven layer dip is managing moisture – excess liquid can make your dip runny and soggy, so be sure to drain your tomatoes well and pat them dry with paper towels before adding them. Another common mistake is not creating proper barriers between wet ingredients – spreading your refried beans all the way to the edges of your dish creates a seal that prevents liquid from pooling at the bottom, while mixing the taco seasoning with sour cream helps it stay put instead of dissolving into other layers. To keep your avocado layer from browning, make sure to mix it with lime juice immediately and press plastic wrap directly onto its surface if you’re making the dip ahead of time. For the best presentation and serving experience, chill your dip for at least 2 hours before serving, which allows the layers to set and the flavors to blend together perfectly.
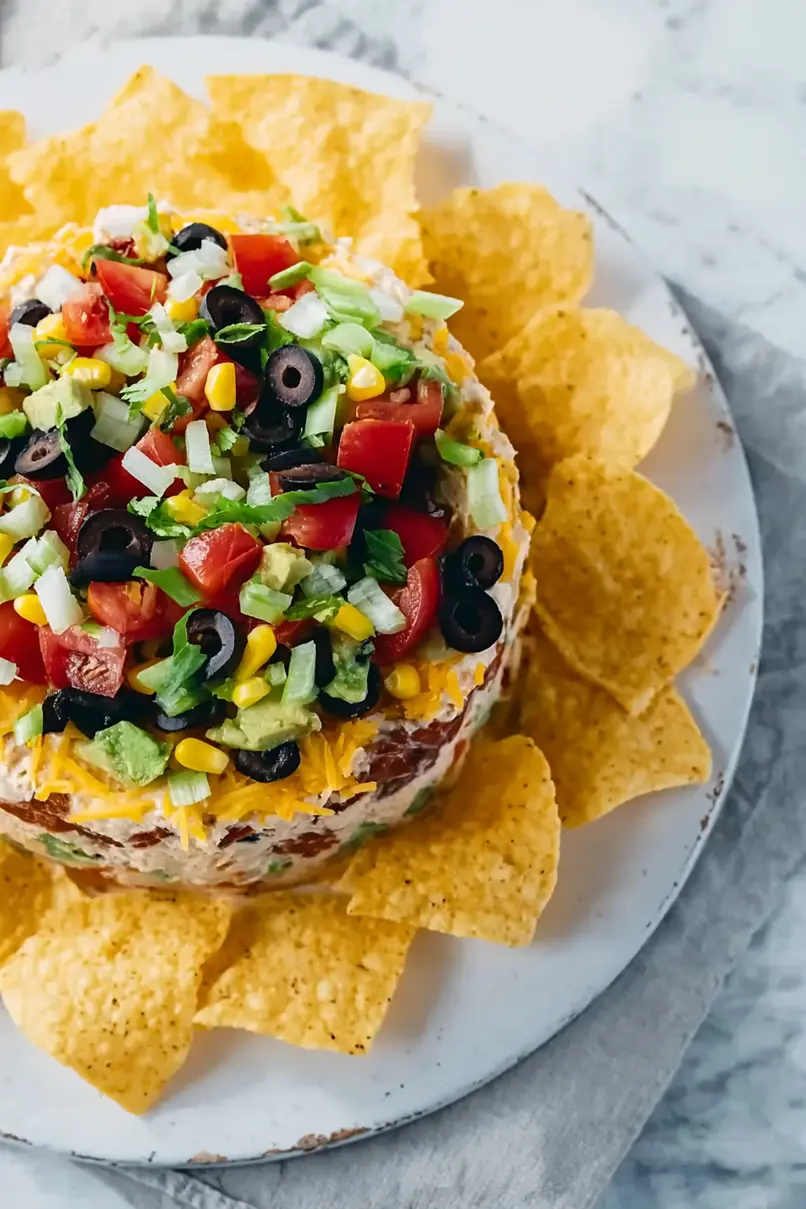
What to Serve With Seven Layer Dip?
While tortilla chips are the go-to choice for scooping up this tasty dip, there are lots of other fun options to round out your snack spread! Try setting out a variety of dippers like corn chips, sturdy vegetables (think bell pepper strips, cucumber rounds, and baby carrots), or even warm flour tortillas cut into triangles. Since seven layer dip is pretty filling, I like to keep the sides simple – maybe some fresh salsa and guacamole for guests who want extra dips, or a bowl of spicy pickled jalapeños for heat lovers. This dip is perfect for game day spreads, so you might want to serve it alongside other party favorites like chicken wings or sliders.
Storage Instructions
Keep Fresh: Your seven layer dip will stay good in the fridge for up to 3 days when covered tightly with plastic wrap. The avocado layer might darken a bit, but the lime juice helps slow this down. For the best presentation and texture, I recommend enjoying this dip within 24 hours of making it.
Make Ahead: Want to prep this dip in advance? You can make the individual layers up to a day ahead and store them separately in the fridge. Just assemble everything right before your party or gathering. This helps keep the lettuce crisp and prevents the layers from getting watery.
Serving Tips: Take the dip out of the fridge about 15-20 minutes before serving to take the chill off – this makes it easier to scoop and lets the flavors shine. If you notice any liquid pooling after storage, just carefully drain it off and give the top a quick touch-up with fresh tomatoes or lettuce if needed.
| Preparation Time | 10-15 minutes |
| Cooking Time | 0 minutes |
| Total Time | 10-15 minutes |
| Level of Difficulty | Easy |
Estimated Nutrition
Estimated nutrition for the whole recipe (without optional ingredients):
- Calories: 1500-1700
- Protein: 40-50 g
- Fat: 100-120 g
- Carbohydrates: 120-140 g
Ingredients
For the bean layer:
- 1/2 cup salsa
- 1 can refried beans (I use Rosarita Traditional Refried Beans)
For the avocado layer:
- 2 avocados (ripe, mashed well)
- juice from 1/2 lime
- 1 tsp chili garlic paste (or your preferred hot sauce for a kick)
- 1/2 tsp salt
For the sour cream layer:
- 1 packet taco seasoning mix
- 8 oz sour cream (full-fat for best texture)
For the toppings:
- 6 green onions (thinly sliced)
- 1 1/2 cups shredded cheddar cheese (sharp cheddar provides best flavor)
- 2 cups shredded iceberg lettuce (thinly shredded)
- 1 roma tomato (diced into small pieces)
- 1/4 cup sliced black olives
Step 1: Prepare the Bean Layer
In a small bowl, mix the refried beans and salsa until well combined.
Spread this mixture in an even layer at the bottom of your serving dish.
This creates the flavorful base for your layered dip.
Step 2: Make the Avocado Layer
In another small bowl, combine the avocado, chili garlic sauce, and a pinch of salt.
Squeeze fresh lime juice over the mixture.
Mash and mix until you have a smooth avocado spread.
Dollop this over the bean layer and spread it out to mostly cover the beans.
Step 3: Add the Sour Cream Layer
Mix the sour cream with taco seasoning in a small bowl until well-blended.
Dollop this mixture over the avocado layer and spread it carefully, ensuring it covers the avocado evenly.
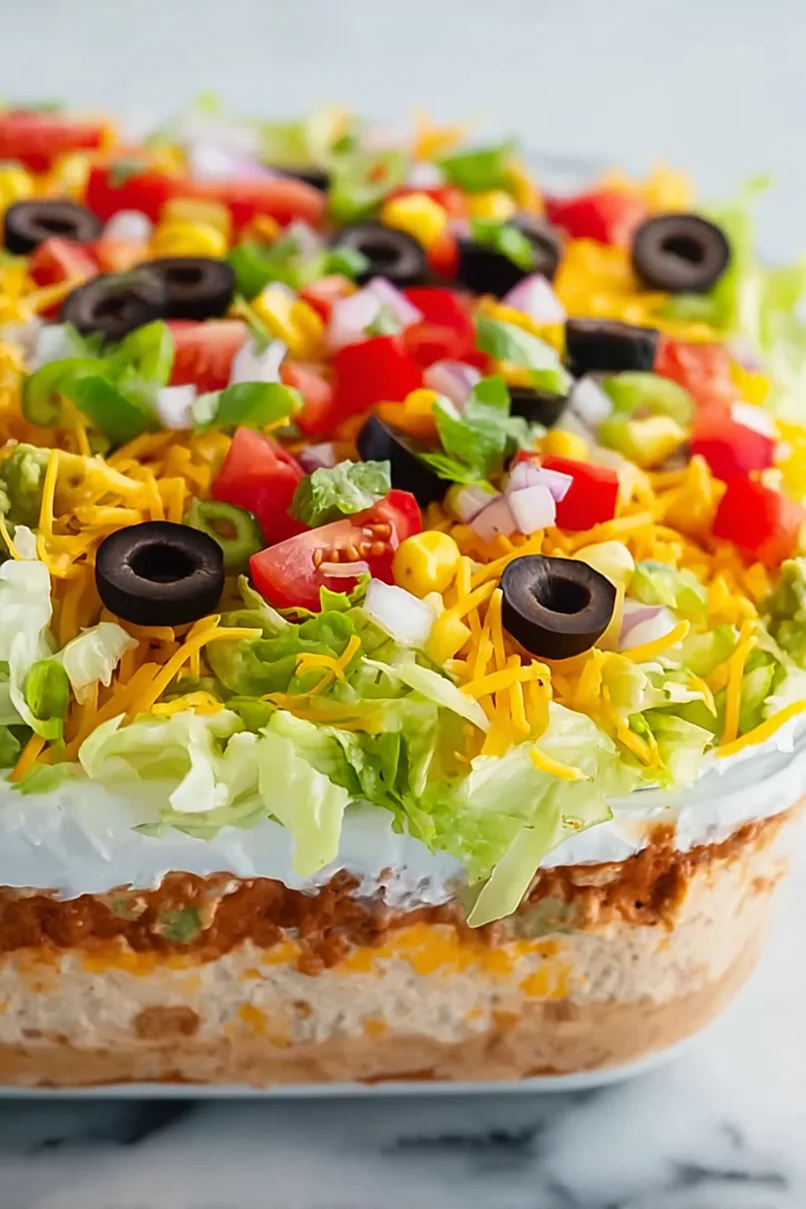
Step 4: Assemble the Toppings
Begin assembling the final layers by sprinkling shredded lettuce over the sour cream.
Follow this with a generous sprinkle of finely shredded cheese over the lettuce.
Next, add sliced green onions on top of the cheese.
Step 5: Finish with Tomatoes and Olives
As the final step, sprinkle chopped tomatoes and black olives over the top layer.
These vibrant veggies add color and additional flavor to your delicious layered dip.
