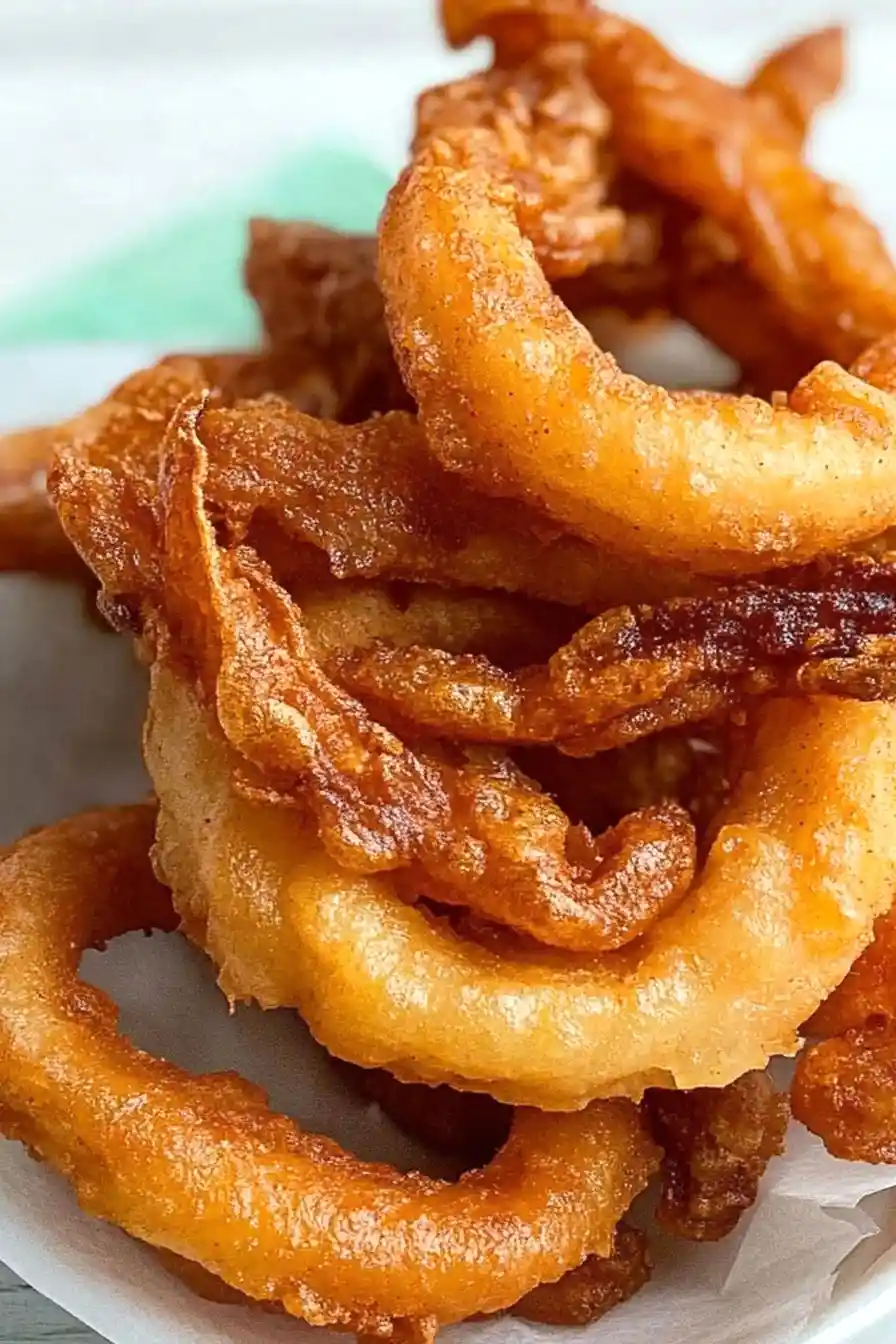
If you ask me, homemade onion rings are one of life’s simple pleasures.
These Bisquick onion rings bring back memories of county fairs and backyard barbecues, but they’re surprisingly easy to make right in your own kitchen. The Bisquick coating creates a nice, crispy shell around sweet, tender onions.
They’re perfect alongside burgers or sandwiches, and the best part is you don’t need any fancy ingredients or deep-frying experience. Just a few pantry staples and fresh onions are all it takes.
It’s a family-friendly side dish that always gets eaten up fast, making it perfect for casual dinners or game day snacking.

Why You’ll Love These Onion Rings
- Quick preparation – These onion rings come together in just 30 minutes, making them perfect for when you’re craving a crispy snack without the long wait.
- Simple ingredients – You only need 5 basic ingredients that you probably already have in your kitchen – no special ingredients or trip to the store needed.
- Budget-friendly – Using Bisquick instead of specialty batters makes these onion rings much more affordable than restaurant versions or pre-made frozen ones.
- Crispy texture – The Bisquick batter creates a perfectly crispy coating while keeping the onion inside tender and sweet – just like your favorite diner’s version.
What Kind of Onion Should I Use?
Sweet onions are definitely the way to go for homemade onion rings, and you’ve got several good options to choose from. Vidalia onions are probably the most popular choice since they’re naturally mild and sweet, but Walla Walla or Maui onions work great too. When picking your onion, look for one that feels firm and heavy for its size, with no soft spots or green sprouts. For the best rings, try to choose a larger onion – about the size of a softball – since these will give you those classic restaurant-style rings. Just remember to slice them about 1/4 inch thick so they’ll cook evenly and stay crispy.
Options for Substitutions
Making these onion rings but missing something? Here are some helpful swaps you can try:
- Baking mix (Bisquick): If you’re out of Bisquick, you can make your own by mixing 2 cups all-purpose flour with 1 tablespoon baking powder, 1 teaspoon salt, and 2 tablespoons vegetable oil. Mix well until crumbly.
- Sweet onion: While sweet onions give the best flavor, you can use yellow or white onions too. Red onions work as well but will give a stronger taste.
- Canola oil: Any neutral-flavored oil with a high smoke point works great – try vegetable oil, peanut oil, or corn oil. Avoid olive oil as it can affect the taste and doesn’t handle high heat as well.
- Milk: Regular milk can be swapped with buttermilk for extra tang, or non-dairy alternatives like unsweetened almond or soy milk. If using buttermilk, reduce the amount to 3/4 cup as it’s thicker.
- Eggs: For a vegan version, try using 1/2 cup of carbonated water mixed with 2 tablespoons of cornstarch instead of eggs. The fizzy water helps create a light, crispy coating.
Watch Out for These Mistakes While Frying
The biggest challenge when making Bisquick onion rings is maintaining the right oil temperature – if it’s too hot, your rings will burn on the outside while staying raw inside, and if it’s too cool, they’ll become greasy and soggy. Keep your oil between 350-375°F using a thermometer for the crispiest results. Another common mistake is making the batter too thin, which leads to flimsy coating – your batter should be thick enough to coat the back of a spoon while still dripping slowly. To prevent your onion rings from sticking together in the oil, drop them in one at a time and avoid overcrowding the pan, as this will lower the oil temperature and make your rings greasy. For extra-crispy rings, try chilling your batter for 15-20 minutes before dipping the onions, and make sure to let them drain on paper towels immediately after frying.
What to Serve With Onion Rings?
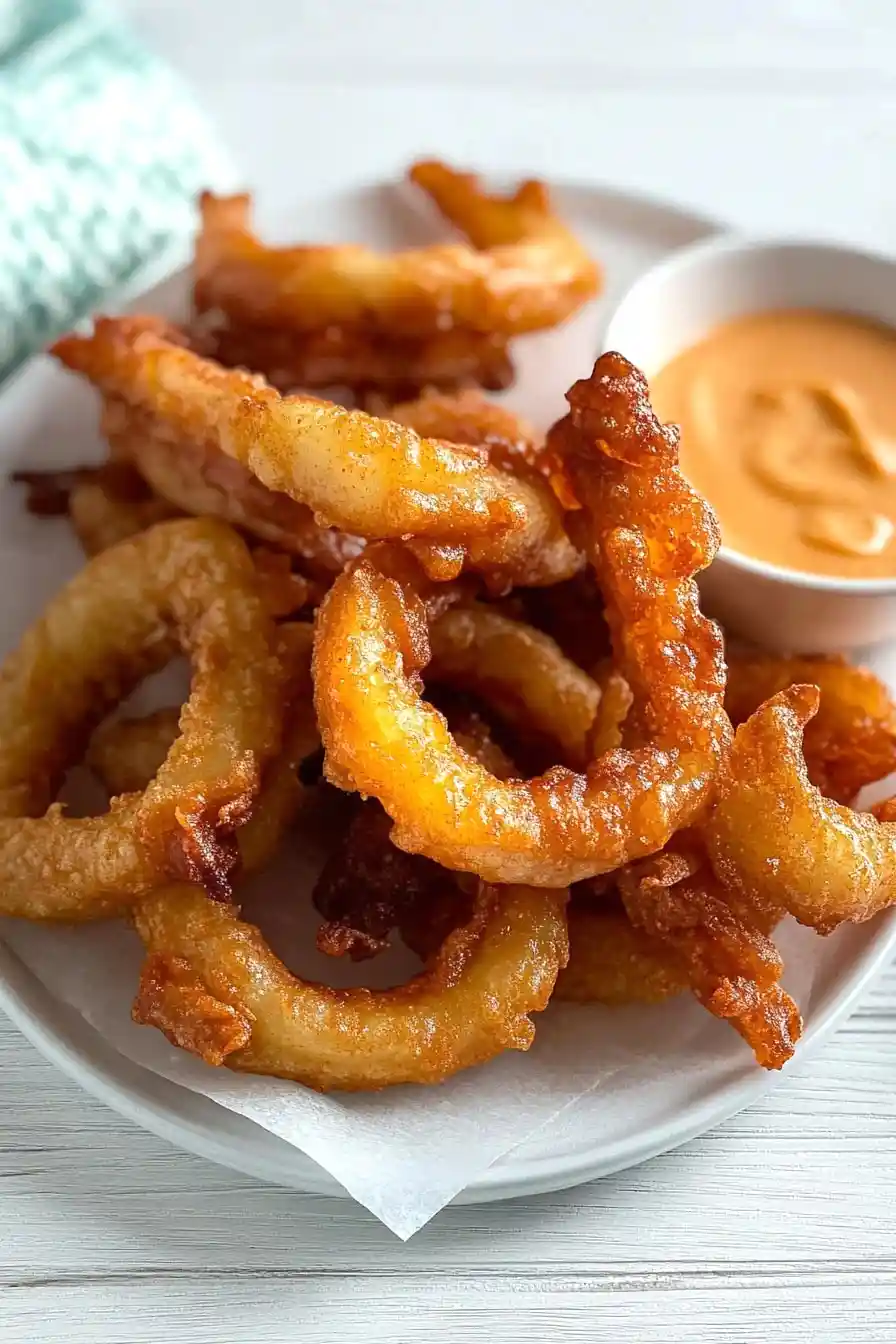
These crispy onion rings are perfect alongside your favorite burger or sandwich – they’re basically the ultimate sidekick for any casual meal! A creamy dipping sauce like ranch, honey mustard, or spicy mayo makes these rings even more fun to eat. Since onion rings are on the heavier side, I like to balance things out with some fresh coleslaw or a simple green salad on the plate. You can also serve them as an appetizer with other finger foods like chicken wings or mozzarella sticks for a great game day spread.
Storage Instructions
Keep Fresh: These onion rings are best enjoyed right after cooking when they’re hot and crispy. If you have leftovers, let them cool completely and store them in an airtight container lined with paper towels in the fridge for up to 2 days. Just know they won’t be quite as crispy as when fresh.
Make Ahead: You can slice your onions ahead of time and keep them in an airtight container in the fridge for up to 24 hours. The batter is best made fresh though, as it gives the crispiest results.
Crisp Up: To bring back some crispiness to leftover onion rings, place them on a baking sheet and warm them in a 350°F oven for about 5-7 minutes. Avoid using the microwave as it will make them soggy.
| Preparation Time | 10-15 minutes |
| Cooking Time | 15-20 minutes |
| Total Time | 25-35 minutes |
| Level of Difficulty | Easy |
Estimated Nutrition
Estimated nutrition for the whole recipe (without optional ingredients):
- Calories: 3000-3500
- Protein: 30-40 g
- Fat: 360-400 g
- Carbohydrates: 150-200 g
Ingredients
- 1 cup milk (whole milk creates a richer batter)
- 2 cups baking mix (I use Bisquick Original Pancake and Baking Mix)
- 2 large eggs (beaten lightly for an easy coating)
- 1 large sweet onion (such as Vidalia, peeled and sliced into 1/2-inch rings)
- 3 cups canola oil (or other neutral oil like vegetable oil for frying)
Step 1: Prepare the Onion Rings
Start by slicing a large onion into ¼ inch rings.
Carefully separate the rings, ensuring they remain intact.
These will be the base for your delicious onion rings.
Step 2: Make the Batter
In a mixing bowl, combine Bisquick, eggs, and milk.
Stir until the mixture is well combined, creating a smooth batter.
Ensure there are no lumps for the best coating results.
Step 3: Heat the Oil
Pour vegetable oil into a heavy deep frying pan or Dutch oven.
You’re aiming for the oil to be 1 ½ to 2 inches deep, so adjust the amount based on your pan size.
Heat the oil over high heat, using an instant-read thermometer to reach 375 degrees Fahrenheit.
This temperature is crucial for achieving crispy onion rings.
Step 4: Fry the Onion Rings
Once the oil is hot, carefully dunk each onion ring into the batter, ensuring it is completely coated.
Using a fork, lower the onion rings into the hot oil with care to avoid splashes.
Fry the rings until they are golden brown, which typically takes only a few minutes.
Step 5: Drain and Serve
Using a slotted spoon, scoop the golden-brown onion rings from the oil and place them on paper towels to drain off excess oil.
Let them rest for a few minutes to crisp up.
Serve the onion rings with your choice of ketchup or hot sauce for a savory taste, or try them with warmed maple syrup for a sweet twist.
Enjoy!
