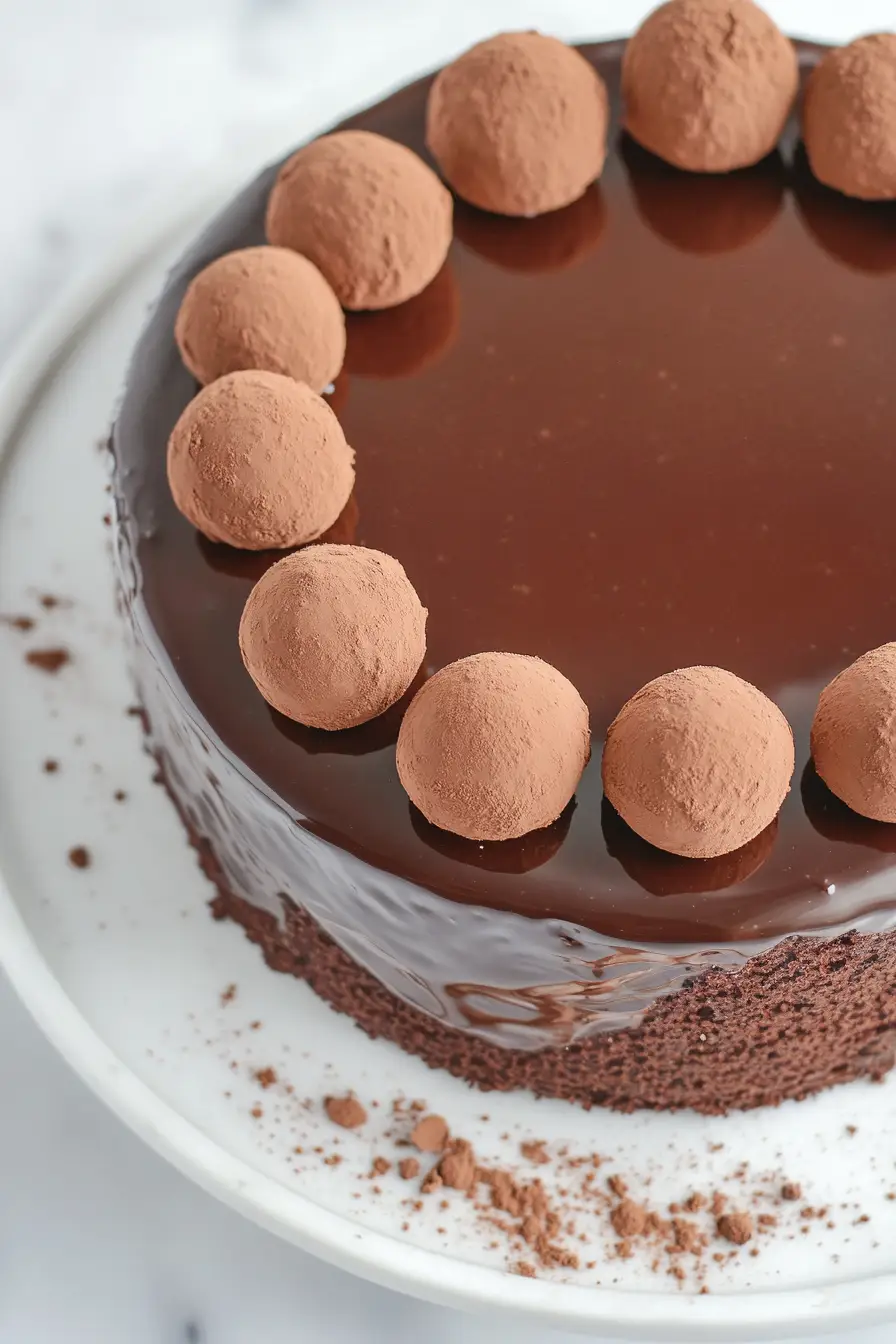
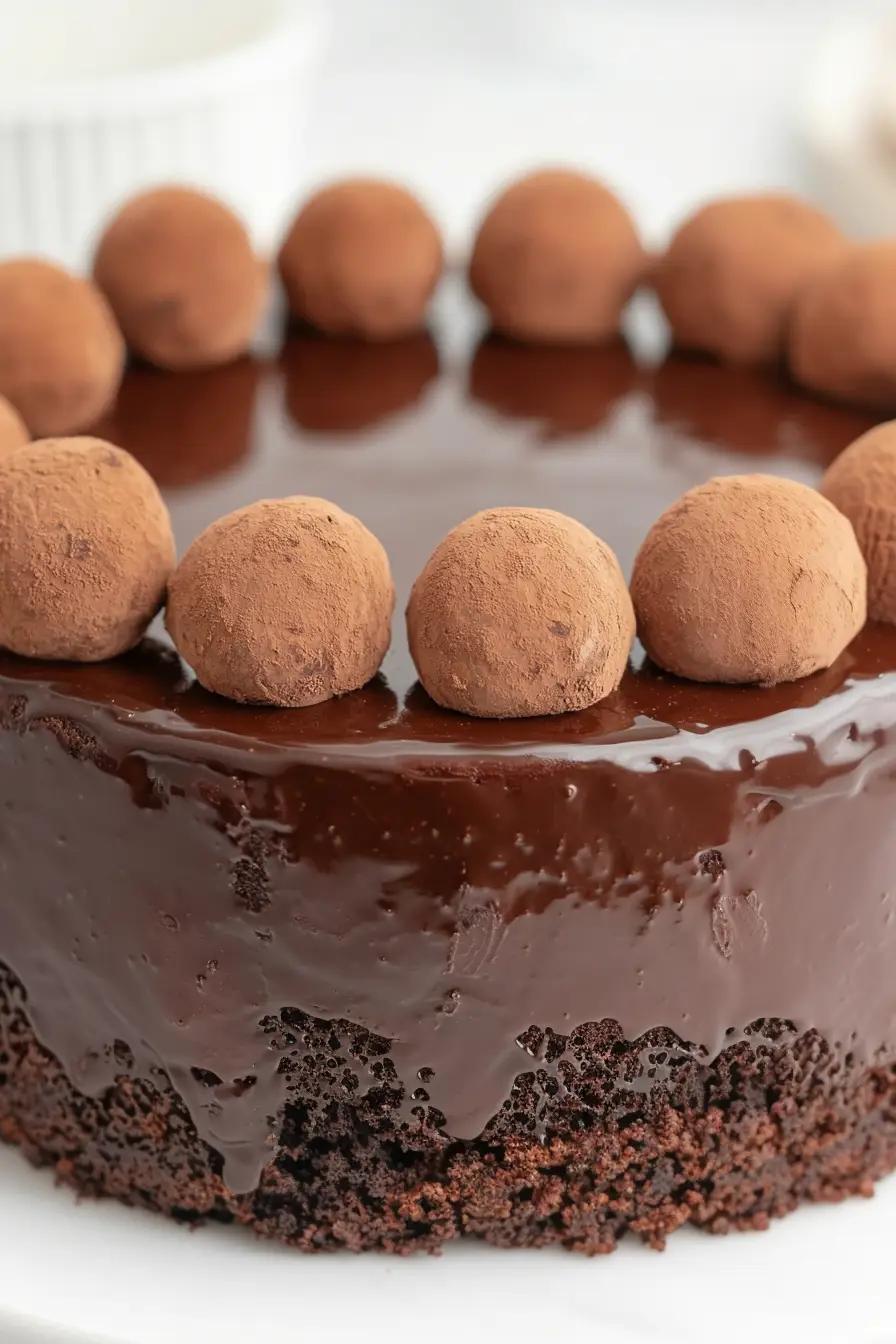
Here’s my go-to chocolate truffles on cake recipe, featuring a rich chocolate cake base topped with smooth, handmade truffles that are rolled in cocoa powder, chopped nuts, or shredded coconut.
This dessert has become my secret weapon at birthday parties and special gatherings. I usually make extra truffles because they tend to disappear before they even make it onto the cake. And let’s be honest – who can resist sneaking a few chocolate truffles while decorating?

Why You’ll Love This Chocolate Truffle Cake
- Rich chocolate experience – With three different forms of chocolate – cocoa powder, chocolate pieces, and truffles – this cake delivers an intense chocolate flavor in every bite.
- Make-ahead friendly – You can prepare the cake and truffles separately, making it perfect for busy schedules or special occasions when you want to split up the work.
- Basic pantry ingredients – Despite its fancy appearance, this cake uses common baking ingredients you might already have in your kitchen.
- Perfect celebration cake – The combination of moist cake and decadent truffles makes this recipe ideal for birthdays, holidays, or any special occasion when you want to impress your guests.
What Kind of Chocolate Should I Use?
For this truffle-topped cake recipe, you’ll want to use good quality chocolate since it’s really the star of the show. Semi-sweet chocolate (around 50-60% cocoa) works great for both the cake and truffles, but you could also use dark chocolate if you prefer a less sweet dessert. When shopping, look for chocolate that’s specifically made for baking – these bars or chips will melt more smoothly than regular eating chocolate. Just stay away from chocolate chips that are designed to hold their shape (like the ones used for cookies), since they contain additives that can make them tricky to melt properly. For the best results, chop your chocolate into small, even pieces before melting to ensure it melts evenly and smoothly.
Options for Substitutions
While some ingredients are essential for this chocolate truffle cake, there are several substitutions you can try:
- All-purpose flour: You can swap all-purpose flour with cake flour for an even softer texture – just add 2 extra tablespoons per cup. For a gluten-free version, use a 1:1 gluten-free flour blend that contains xanthan gum.
- Cocoa powder: Natural cocoa powder or Dutch-processed both work here. Just don’t skip it – it’s crucial for the chocolate flavor! If using Dutch-processed, reduce the baking soda by 1/4 teaspoon.
- Heavy cream: For the truffle topping, heavy cream is pretty important, but you could use whipping cream as a direct substitute. Avoid using milk or half-and-half as they won’t give you the right consistency.
- Corn syrup: You can replace corn syrup with honey or golden syrup – the texture will be slightly different but still tasty. Or skip it altogether, though your truffles might be a bit less shiny.
- Sweetened condensed milk: This one’s tricky to replace, but in a pinch, you can use evaporated milk mixed with 1/4 cup sugar per can. Heat them together until the sugar dissolves completely before using.
- Vanilla extract: Feel free to swap vanilla extract with vanilla bean paste (same amount) or even almond extract for a different flavor profile.
Watch Out for These Mistakes While Baking
Temperature control is crucial when making chocolate truffles and cake – using ingredients that are too cold can cause your chocolate to seize up, so make sure your cream and butter are at room temperature before starting. When melting chocolate for the truffles, avoid overheating it – use a double boiler or microwave in short 20-second bursts, stirring between each interval, as burnt chocolate will become grainy and unusable. For the cake batter, resist the urge to overmix once you’ve combined the wet and dry ingredients – stop as soon as everything is just incorporated, or you’ll end up with a tough, dense cake instead of a light, tender crumb. To achieve the smoothest truffle coating, let your ganache cool completely in the refrigerator (about 2-3 hours) before rolling, and keep your hands cool while shaping the truffles to prevent them from melting.
What to Serve With Chocolate Truffles Cake?
This rich chocolate cake calls for something to balance out its decadent flavors! A scoop of vanilla ice cream or fresh whipped cream makes a perfect companion, cutting through the richness while adding a cool, creamy element. If you want to keep things simple, a glass of cold milk is always a good choice – it’s like they were made for each other. For the coffee lovers out there, a hot cup of espresso or cappuccino pairs wonderfully with this dessert, bringing out the deep chocolate notes in both the cake and truffles.
Storage Instructions
Keep Fresh: Your chocolate truffle cake will stay moist and tasty in an airtight container in the fridge for up to 5 days. I recommend using a cake carrier or covering it well with plastic wrap to protect those pretty truffles on top and keep the cake from absorbing any fridge odors.
Freeze: If you want to make this cake ahead, you can freeze it for up to 2 months! Just wrap it well in plastic wrap, then aluminum foil. Though keep in mind the truffles might lose a bit of their shine after freezing, but they’ll still taste great. For best results, freeze the cake and make fresh truffles when you’re ready to serve.
Bring to Room Temperature: When you’re ready to enjoy your cake, take it out of the fridge about 30 minutes before serving. This lets the cake and truffles come to the perfect temperature where all those chocolate flavors really shine. If frozen, thaw overnight in the fridge before bringing to room temperature.
| Preparation Time | 20-30 minutes |
| Cooking Time | 30-40 minutes |
| Total Time | 50-70 minutes |
| Level of Difficulty | Medium |
Estimated Nutrition
Estimated nutrition for the whole recipe (without optional ingredients):
- Calories: 4500-4800
- Protein: 50-60 g
- Fat: 280-300 g
- Carbohydrates: 450-480 g
Ingredients
- 2 1/4 cups all-purpose flour (270g)
- 3/4 cup cocoa powder (90g)
- 1 1/2 teaspoons baking powder (6g)
- 1 1/2 teaspoons baking soda (9g)
- 1 1/2 cans sweetened condensed milk (600g)
- 3/4 cup butter, melted (150g)
- 3/4 cup milk (180ml)
- 1 1/2 teaspoons vanilla extract (7ml)
- 1 3/4 cups chocolate pieces (300g)
- 1 1/2 cups heavy cream (270g)
- 1 1/2 cups chocolate pieces (260g)
- 6 tablespoons butter (75g)
- 2 tablespoons corn syrup (40g)
Step 1: Prepare the Cake Pans and Oven
Preheat your oven to 180°C (350°F).
Line two 8-inch cake pans by rubbing oil on the surface and placing a piece of parchment paper on the bottom of each pan.
This ensures that the cakes will not stick when baked.
Step 2: Mix Dry and Wet Ingredients Separately
In a bowl, combine the dry ingredients: maida, cocoa powder, baking powder, and baking soda.
Mix well to ensure they’re evenly distributed, then set aside.
In another bowl, mix the melted butter and condensed milk together.
Add the milk and vanilla extract, then whisk to thoroughly combine all the wet ingredients.
Step 3: Combine Ingredients and Bake
Using a spatula, combine the wet and dry ingredients, mixing everything evenly until you get a smooth batter.
Transfer the batter into the prepared cake pans, spreading it evenly.
Place the pans in the preheated oven and bake for approximately 30 minutes or until a toothpick inserted into the center comes out clean.
Once baked, remove from the oven and allow the cakes to cool completely in the pans.
Step 4: Prepare the Chocolate Ganache
To make the chocolate ganache, pour the heavy cream into a saucepan and heat it over low-medium heat until it reaches a slight simmer.
Be careful not to let it boil.
Pour the hot cream over the chopped chocolate in a bowl and let it sit for 30 seconds.
Use a spatula or whisk to mix the chocolate and cream until smooth.
Place the ganache in the refrigerator for at least 30 minutes to let it cool and thicken.
Step 5: Whip the Ganache
Once the ganache is chilled, whisk it on high speed for 3-4 minutes until it forms stiff peaks.
This will make the ganache light and fluffy, perfect for filling and frosting the cake layers.
Step 6: Assemble the Cake
Carefully demould the cooled cakes from the pans.
Layer them with the whipped chocolate ganache between each cake layer.
Use the remaining ganache to cover the top and sides of the cake as desired.
Serve and enjoy your delicious homemade chocolate cake!
