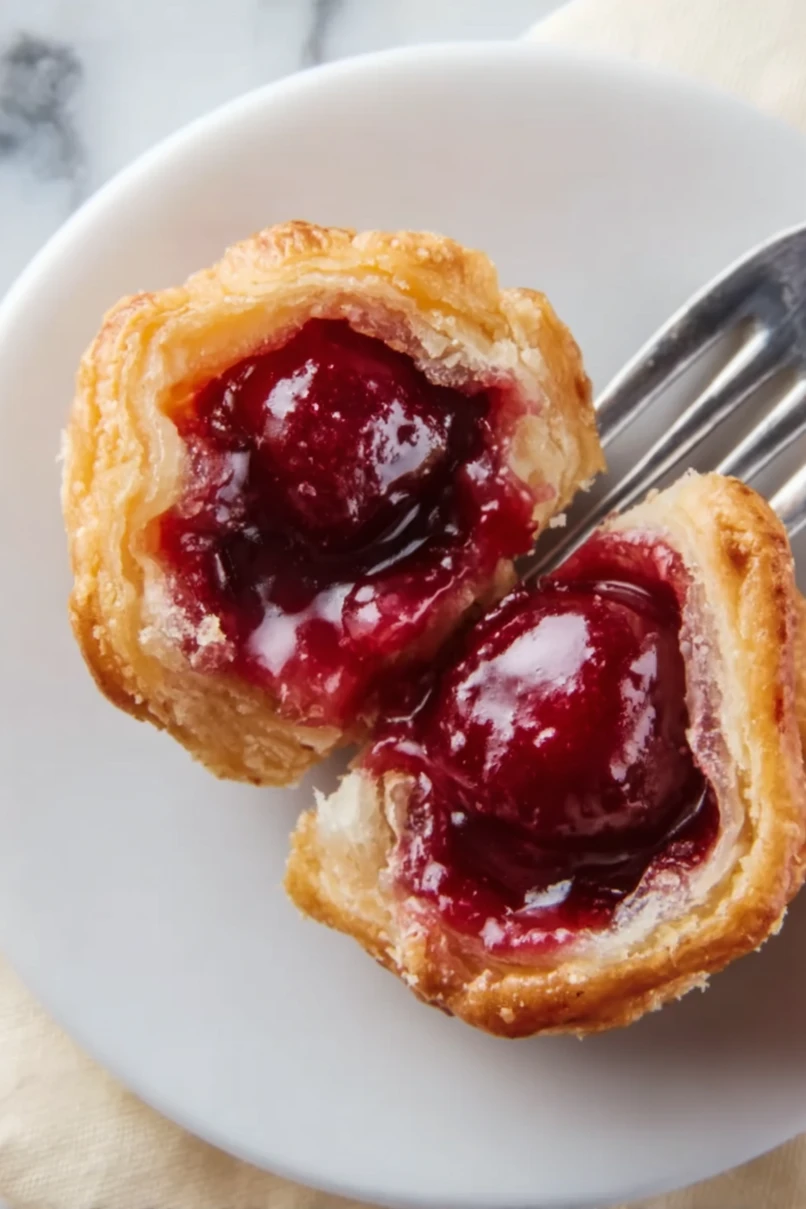
Remember those summer afternoons when your mom would cut up a whole cherry pie into tiny pieces so you could snack on them without making a mess? Well, I did that exact same thing for my kids last week, and it hit me – why not just make cherry pie in bite-sized portions from the start?
These cherry pie bites came from that simple thought. They’re basically all the good stuff from a regular cherry pie, just smaller and easier to handle. No plates needed, no forks required, and honestly, they’re perfect for those times when you want just a taste of dessert without committing to a whole slice.
Why You’ll Love These Cherry Pie Bites
- Quick preparation – These sweet treats come together in under 30 minutes, making them perfect for last-minute dessert cravings or unexpected guests.
- 4-ingredient recipe – With just crescent rolls, cherry filling, powdered sugar, and milk, you can create these delicious bites using items you probably already have in your pantry.
- No baking skills needed – Even if you’ve never baked before, you can make these perfectly – they’re as simple as fill, roll, and bake!
- Perfect for sharing – These bite-sized treats are ideal for potlucks, bake sales, or afternoon snacks with the family – and they’re always a hit with kids and adults alike.
What Kind of Cherry Pie Filling Should I Use?
The grocery store typically offers several options when it comes to canned cherry pie filling, and any of them will work well in this recipe. The most common variety uses tart red cherries, which provide a nice balance of sweet and tangy flavors that most people love. You can also find dark sweet cherry pie filling if you prefer a sweeter taste, or go with a premium brand that includes whole cherries rather than pieces. If you’re feeling ambitious, you could even make your own filling using fresh or frozen cherries – just make sure it’s cooled completely before using it in this recipe. Just keep in mind that whatever filling you choose should be thick enough to stay put when you’re assembling the bites.
Options for Substitutions
These sweet little treats are pretty simple to make, and you’ve got some room to play around with the ingredients:
- Cherry pie filling: Feel free to swap the cherry filling with any other pie filling you like – apple, blueberry, or strawberry all work great here. You can even use homemade fruit filling if you have some on hand.
- Crescent roll dough: While crescent rolls give the best flaky texture, you can use puff pastry sheets as an alternative. Just cut them into triangles similar to crescent roll size. Regular pie crust can work too, though the texture will be different.
- Confectioners’ sugar glaze: For the glaze, you can replace milk with cream, half-and-half, or even non-dairy milk like almond or oat milk. If you want to skip the glaze altogether, try a light dusting of regular powdered sugar, or leave them plain – they’re still tasty!
Watch Out for These Mistakes While Baking
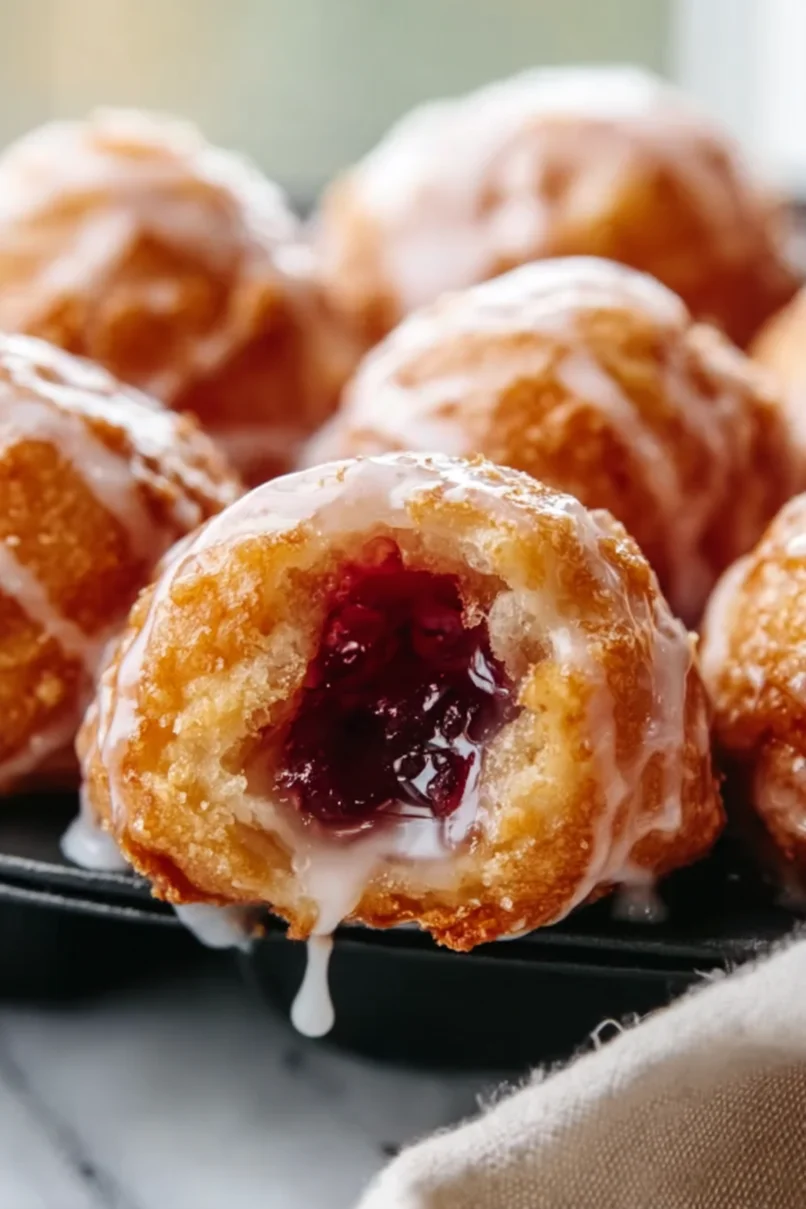
The biggest challenge when making cherry pie bites is overfilling each crescent roll – using more than 1-2 tablespoons of filling will cause the cherries to burst out during baking and create a messy situation in your oven. Another common mistake is not sealing the edges of the dough properly – make sure to pinch them firmly and roll them slightly to prevent the filling from leaking out while baking. When making the glaze, start with just a small amount of milk and add more gradually – it’s much easier to thin out a thick glaze than to fix one that’s too runny. For the best results, let these cherry bites cool for at least 10 minutes before adding the glaze, otherwise it will melt right off and create a puddle around your treats.
What to Serve With Cherry Pie Bites?
These sweet little cherry pie bites are perfect for serving alongside a scoop of vanilla ice cream – the warm, flaky pastry and cool ice cream is such a great combination! A dollop of fresh whipped cream also works really well, especially if you want something a bit lighter than ice cream. For a morning or afternoon treat, pair these fruity bites with a hot cup of coffee or tea, which helps balance out the sweetness. If you’re serving these at a party, consider putting out some fresh berries on the side to add a fresh element to the plate.
Storage Instructions
Keep Fresh: These cherry pie bites are best enjoyed the day they’re made, but you can keep them in an airtight container at room temperature for up to 2 days. If you live in a warm climate, it’s better to pop them in the fridge where they’ll stay good for up to 4 days.
Make Ahead: Want to prep these in advance? You can make the bites and hold off on the glaze. Store them unglazed in an airtight container, then whip up and add the fresh glaze just before serving. This way, they’ll look and taste their best!
Warm Up: If you’re craving that fresh-from-the-oven taste, pop them in the microwave for 10-15 seconds or in a 300°F oven for about 5 minutes. Just keep in mind that the glaze might get a bit melty, but they’ll still be super yummy!
| Preparation Time | 10-15 minutes |
| Cooking Time | 13-14 minutes |
| Total Time | 23-29 minutes |
| Level of Difficulty | Easy |
Estimated Nutrition
Estimated nutrition for the whole recipe (without optional ingredients):
- Calories: 1500-1800
- Protein: 15-20 g
- Fat: 70-90 g
- Carbohydrates: 220-250 g
Ingredients
For the cherry bites:
- 1 can cherry pie filling (21 oz)
- 2 tubes crescent roll dough (8 oz each)
For the glaze:
- 1 to 2 tbsp milk
- 1 cup confectioners’ sugar (sifted for a smoother glaze)
Step 1: Preheat the Oven and Prepare the Muffin Tin
Preheat your oven to 375°F (190°C).
Lightly grease a standard muffin tin with nonstick cooking spray to prevent the dough from sticking and to ensure easy release of the cherry bites after baking.
Step 2: Arrange the Crescent Dough
Unroll the crescent roll dough and place each piece into a muffin tin.
Ensure the widest part of each dough triangle is at the bottom of the muffin cup, forming a small nest to hold the filling.
Step 3: Add the Cherry Filling
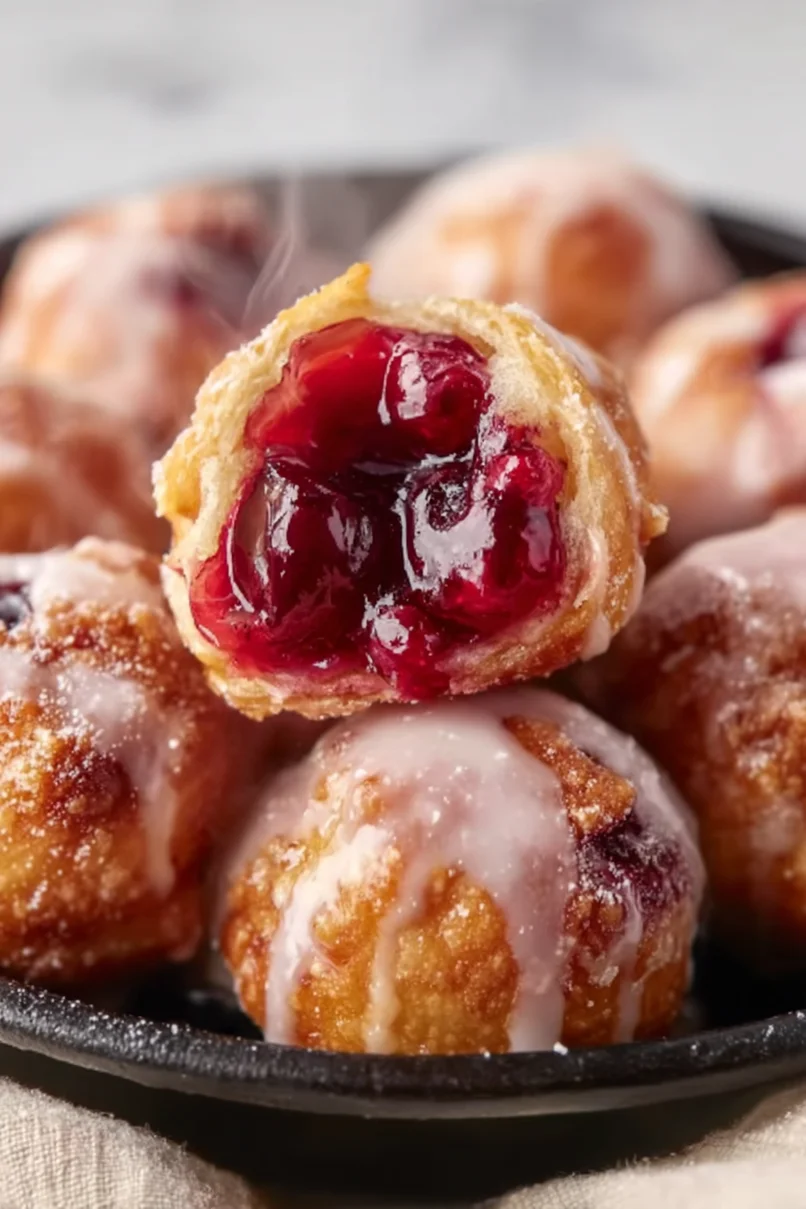
Spoon cherry pie filling into each dough cup, using about 3 to 4 heaping tablespoons per cup.
It’s perfectly fine if some of the filling overflows during the baking process; this just adds to the rustic charm and flavor.
Step 4: Fold and Bake the Dough
Gently fold the corners of the dough over the cherry filling to enclose it as much as possible.
This helps in keeping most of the filling contained and gives a nice finished shape.
Place the muffin tin in the preheated oven and bake for 13-14 minutes, or until the cherry bites are golden brown and cooked through.
Step 5: Prepare the Glaze
While the cherry bites are baking, prepare the glaze.
In a small bowl, whisk together powdered sugar and milk until smooth.
You can adjust the amount of milk to reach your desired glaze consistency, whether you prefer a thicker or a thinner drizzle.
Step 6: Glaze and Serve
Once the cherry bites are done baking, remove them from the oven and allow them to cool slightly.
Drizzle the prepared glaze over the warm cherry bites using a spoon to achieve a nice pattern or coverage.
Serve warm and enjoy the deliciousness!
