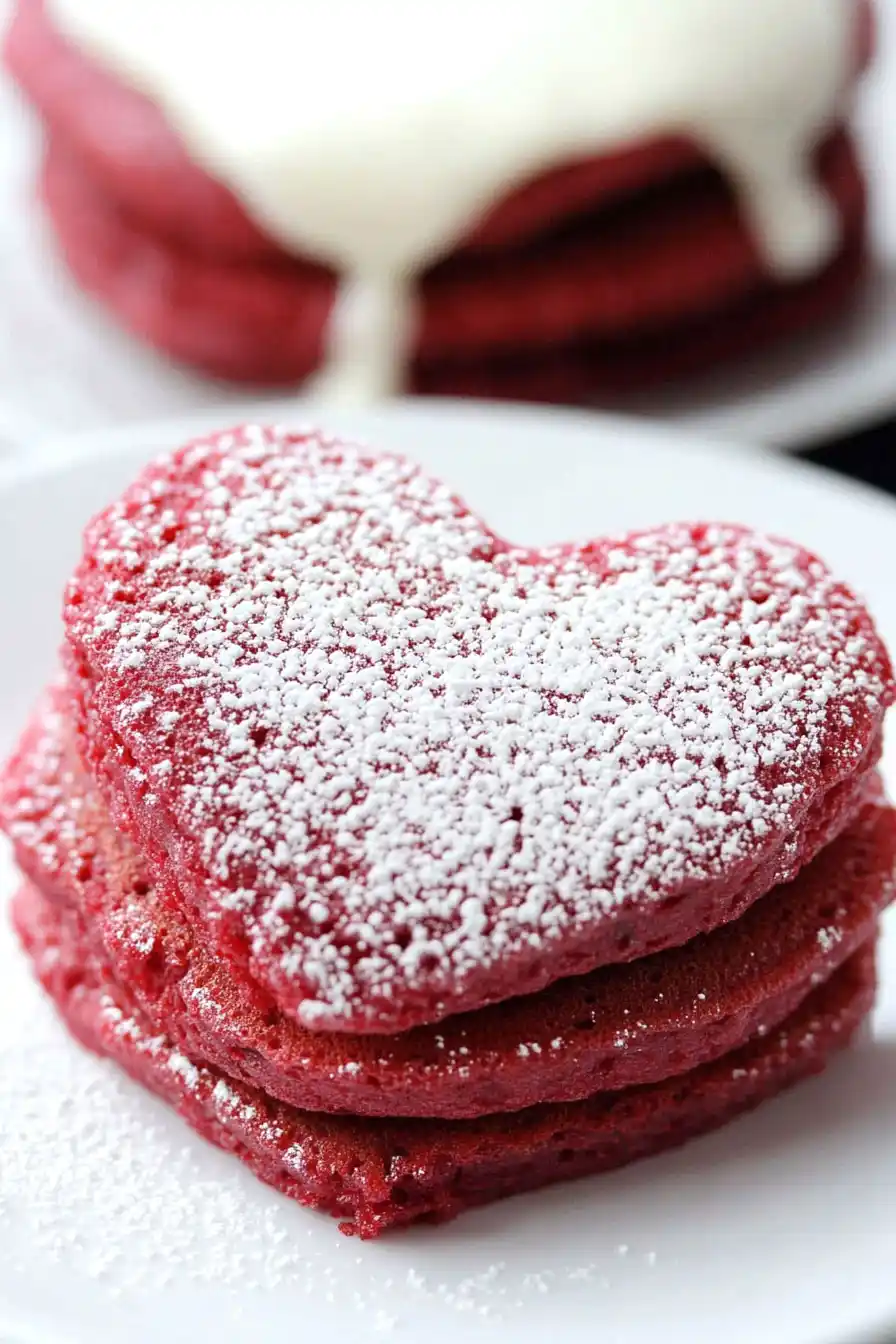
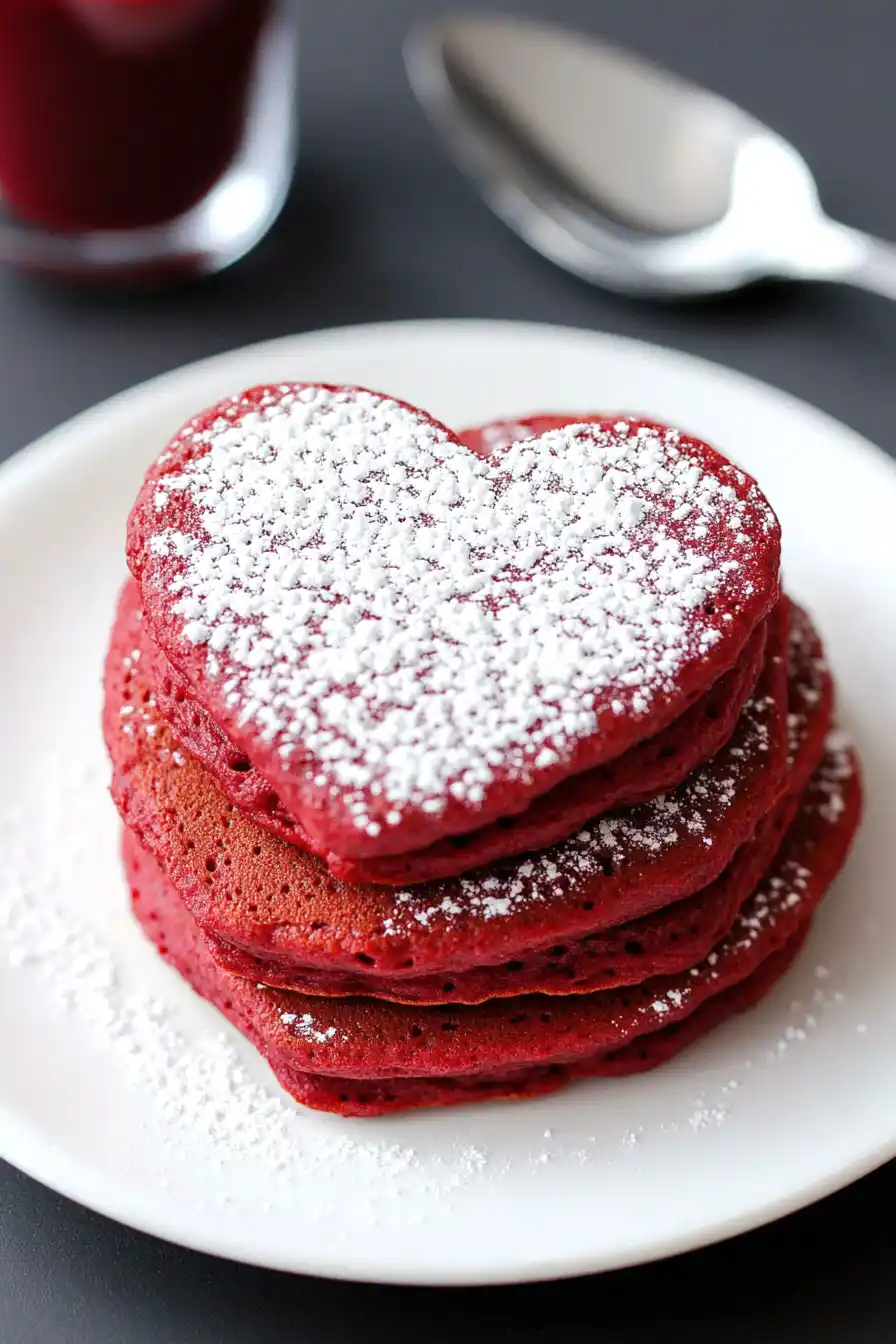
I never thought breakfast could make my kids’ faces light up quite like these heart shaped red velvet pancakes. Growing up, pancakes at our house were always just round and brown – my mom wasn’t one for getting fancy in the kitchen. When I made my first batch of these for Valentine’s Day, my youngest actually squealed with joy.
The best part? These pancakes aren’t nearly as complicated as they look. Sure, they’re red and heart-shaped, but at their core, they’re just pancakes with a little cocoa powder and food coloring. And unlike my first attempt at making regular red velvet cake (which was a complete disaster), these are pretty hard to mess up.
Why You’ll Love These Red Velvet Pancakes
- Perfect for special occasions – These heart-shaped red velvet pancakes add a sweet touch to Valentine’s Day breakfast, anniversaries, or any morning you want to make extra special.
- Classic red velvet taste – With cocoa powder and cream cheese frosting, you get all the beloved flavors of red velvet cake in a fun breakfast format.
- Quick preparation – You can whip up these pancakes in just 30-45 minutes using basic pantry ingredients you likely already have on hand.
- Kid-friendly fun – The bright red color and heart shapes make these pancakes exciting for kids to help make and eat – they’re like having dessert for breakfast!
What Kind of Cocoa Powder Should I Use?
For red velvet pancakes, natural unsweetened cocoa powder is your best bet since it works better with the baking soda in the recipe and helps create that classic red velvet color. Dutch-processed cocoa powder can work too, but it might make it harder to achieve that bright red shade we’re looking for since it’s darker and more neutral in pH. When measuring your cocoa powder, make sure to spoon it into the measuring spoon rather than scooping directly from the container – this prevents using too much and making your pancakes too bitter. If you’re opening a fresh container of cocoa powder, give it a quick sift to break up any lumps that might have formed during storage.

Options for Substitutions
Need to make some swaps? Here’s what you can do with this red velvet pancake recipe:
- Regular flour: You can use cake flour for lighter pancakes, or swap in whole wheat flour for a nuttier taste (though the color might be slightly different). For gluten-free needs, try a 1:1 gluten-free flour blend.
- Milk and vinegar: This combo makes buttermilk, but you can use real buttermilk instead. No buttermilk? Try using plain yogurt or sour cream thinned with a bit of milk.
- Red food coloring: Natural alternatives include beet powder or beet juice, though the color won’t be as bright. You’ll need about 2-3 tablespoons of beet juice or 2 teaspoons of beet powder.
- Cream cheese frosting ingredients: For the topping, mascarpone can replace cream cheese. Light cream can be swapped with milk or half-and-half. If you’re dairy-free, try using dairy-free cream cheese and butter substitutes.
- Cocoa powder: This is essential for the red velvet flavor, but you can use Dutch-process or natural cocoa powder interchangeably in this recipe.
Watch Out for These Mistakes While Cooking
The biggest challenge when making red velvet pancakes is achieving that perfect fluffy texture – overmixing the batter will activate too much gluten and result in tough, rubbery pancakes, so stop stirring as soon as the dry and wet ingredients are just combined, even if some small lumps remain. Getting the right pan temperature is crucial – if your pan is too hot, you’ll end up with burnt outsides and raw centers, so test with a small amount of batter first and adjust the heat to medium-low if needed. When it comes to creating heart shapes, avoid making them too large as they’ll be harder to flip without breaking – use a squeeze bottle or piping bag for more control, and wait until you see bubbles forming on the surface before attempting to flip. For the cream cheese topping, make sure both the cream cheese and butter are properly softened at room temperature (but not melted) to prevent lumps in your frosting.
What to Serve With Red Velvet Pancakes?
These festive red velvet pancakes are perfect for a special breakfast or brunch spread! While they’re delicious on their own with the cream cheese topping, you can round out the meal with some crispy bacon or breakfast sausage links for a savory contrast. Fresh berries like strawberries, raspberries, or blackberries make a beautiful addition and add a nice pop of natural sweetness. For drinks, try serving them with hot coffee, cold milk, or even a strawberry smoothie if you’re feeling fancy – the combination of red velvet and fresh fruit is always a winner at the breakfast table.
Storage Instructions
Keep Fresh: If you’ve got leftover pancakes, place them in an airtight container with wax paper between each layer to prevent sticking. They’ll stay good in the fridge for up to 3 days. It’s best to store the cream cheese topping separately in its own container – this way, your pancakes won’t get soggy!
Freeze: These red velvet beauties freeze really well! Let them cool completely, then place them in a freezer bag with parchment paper between each pancake. They’ll keep for up to 2 months. Just remember to freeze the pancakes without the cream cheese topping.
Warm Up: When you’re ready to enjoy your stored pancakes, pop them in the microwave for 20-30 seconds if refrigerated, or about 1 minute if frozen. You can also warm them up in a toaster on low setting. Add the cream cheese topping after reheating, and they’ll taste almost as good as fresh!
| Preparation Time | 15-25 minutes |
| Cooking Time | 15-20 minutes |
| Total Time | 30-45 minutes |
| Level of Difficulty | Medium |
Estimated Nutrition
Estimated nutrition for the whole recipe (without optional ingredients):
- Calories: 1800-2100
- Protein: 30-35 g
- Fat: 80-100 g
- Carbohydrates: 250-280 g
Ingredients
For the pancakes:
- 2 1/2 tbsp melted salted butter
- 1/2 tsp baking soda
- 1 tsp baking powder
- 1 cup milk
- 1 cup all-purpose flour
- red food coloring
- 1 1/2 tbsp cocoa powder
- 1/4 cup sugar
- 1/4 tsp salt
- 1 tbsp white vinegar
- 1 pinch vanilla powder
- 1 large egg
For the cream cheese glaze:
- 3 tbsp light cream
- 3 oz cream cheese
- 1/4 cup unsalted butter
- 1 1/4 cups powdered sugar
- 1 pinch vanilla powder
Step 1: Prepare the Cream Cheese Glaze
Begin by preparing the cream cheese glaze.
Using an electric hand mixer, beat together cream cheese and butter until the mixture becomes light and fluffy.
Next, add vanilla, half and half, and powdered sugar.
Continue beating the mixture until it is well-combined and smooth.
Set the glaze aside for later use.
Step 2: Prepare the Griddle and Dry Ingredients
Preheat a griddle over medium-low heat.
In a medium-sized bowl, whisk together the dry ingredients: flour, cocoa powder, baking powder, baking soda, and salt.
Once well-blended, set this bowl of dry ingredients aside.
Step 3: Mix the Wet Ingredients
Pour milk into a glass measuring cup and stir in vinegar.
Allow the mixture to sit for 2 minutes to thicken slightly.
In a separate mixing bowl, combine the milk mixture, sugar, egg, vanilla, melted butter, and red food coloring.
Whisk everything together until the ingredients are well-combined and the mixture is smooth.
Step 4: Combine Wet and Dry Ingredients
Slowly whisk the dry ingredients into the wet mixture, taking care to incorporate them without overmixing.
Whisk until the ingredients are just combined and the batter is smooth.
This will ensure tender pancakes.
Step 5: Cook the Pancakes
If necessary, lightly coat the preheated griddle with nonstick cooking spray.
Use a medium cookie scoop, approximately 3 tablespoons, to portion out the batter onto the heated griddle.
Spread the batter into a circular shape using the back of the cookie scoop for even cooking.
Cook the pancakes until bubbles appear on the surface and the edges begin to set.
Carefully flip the pancakes over and cook for an additional minute or two until fully cooked.
Step 6: Serve the Pancakes
Once the pancakes are cooked through, remove them from the griddle.
Repeat the cooking process with the remaining batter.
Serve the warm pancakes with the prepared cream cheese glaze drizzled over the top.
Enjoy your delicious, colorful treat!
