Mini cheesecakes have been my go-to dessert for special occasions. There’s something about these little bites of joy that makes everyone smile, especially at weddings where guests want something sweet but not too heavy. I started making these years ago when my sister asked me to help with her wedding dessert table, and they’ve been a hit ever since.
These individual-sized treats are perfect for parties because you can make them ahead of time, and there’s no messy cutting or serving involved. I usually prep them the day before and keep them in the fridge until it’s time to serve. Plus, everyone gets their own little cheesecake – no sharing required!
Like classic cheesecake but worried about the work? These minis are your answer. Want to add different toppings? Go for it. I’ve made them with fruit, chocolate, and even caramel, and they always disappear within minutes.
Why You’ll Love These Mini Cheesecakes
- Perfect portion control – Each mini cheesecake is individually sized, making them ideal for parties and preventing the temptation to cut ‘just a little more’ from a full-sized cake.
- Make-ahead friendly – You can prepare these little treats up to 3 days in advance and store them in the fridge, making them perfect for busy hosts and special occasions.
- Basic ingredients – With just 8 common pantry and fridge staples, you can create these impressive little desserts without hunting down specialty items.
- No water bath needed – Unlike traditional cheesecakes, these minis don’t require the fussy water bath step, making them much simpler to prepare and practically crack-proof.
- Customizable toppings – Each mini cheesecake can be topped differently, letting your guests choose their favorite fruit, chocolate, or caramel topping.
What Kind of Cream Cheese Should I Use?
For cheesecakes, full-fat block cream cheese is the way to go – skip the spreadable kinds that come in tubs. Philadelphia brand is a popular choice among bakers, but any block-style cream cheese will work well. Just make sure it’s completely softened to room temperature before you start mixing, which usually takes about an hour on your counter. If you’re in a hurry, you can cut the cream cheese into cubes to speed up the softening process, but avoid microwaving it as this can affect the texture. Remember to mix your softened cream cheese until it’s completely smooth and free of lumps before adding other ingredients – this is key for getting that classic, silky cheesecake texture.
Options for Substitutions
Need to make some swaps? Here are some helpful substitutions for these mini cheesecakes:
- Graham cracker crumbs: Out of graham crackers? Try using crushed digestive biscuits, vanilla wafers, or even gingersnaps for a spicier base. Just keep the amounts the same.
- Cream cheese: This is the star ingredient that you really shouldn’t substitute. Full-fat cream cheese gives these cheesecakes their signature texture and flavor.
- Sour cream: You can swap sour cream with plain Greek yogurt in the same amount. This will give you a similar tangy taste with maybe a bit more protein!
- Vanilla essence: Feel free to use vanilla extract, vanilla bean paste, or even the seeds from half a vanilla pod. You could also try other flavors like almond or lemon extract.
- White sugar: Regular white sugar works best, but you can use caster sugar too. Brown sugar isn’t recommended as it will change the color and add a molasses flavor.
- Unsalted butter: If you only have salted butter, that’s fine – just use it as is. You can also try coconut oil for a slight coconut flavor in the crust.
Watch Out for These Mistakes While Baking
The biggest challenge when making mini cheesecakes is getting that perfectly smooth, crack-free top – which starts with having all your ingredients at room temperature, especially the cream cheese, eggs, and sour cream.
Another common mistake is overmixing the batter once the eggs are added, as this incorporates too much air and can lead to cracks and bubbles on the surface – mix just until the ingredients are combined, and tap the pan gently on the counter a few times to release any trapped air bubbles.
The water bath isn’t just an optional step – skipping it can lead to dry, cracked cheesecakes, so place your muffin tin inside a larger baking pan filled with hot water halfway up the sides.
For the perfect texture, resist the urge to overbake – the centers should still be slightly jiggly when you take them out (they’ll continue cooking from residual heat), and always let them cool gradually at room temperature before chilling to prevent sudden temperature changes that can cause cracks.
What to Serve With Mini Cheesecakes?
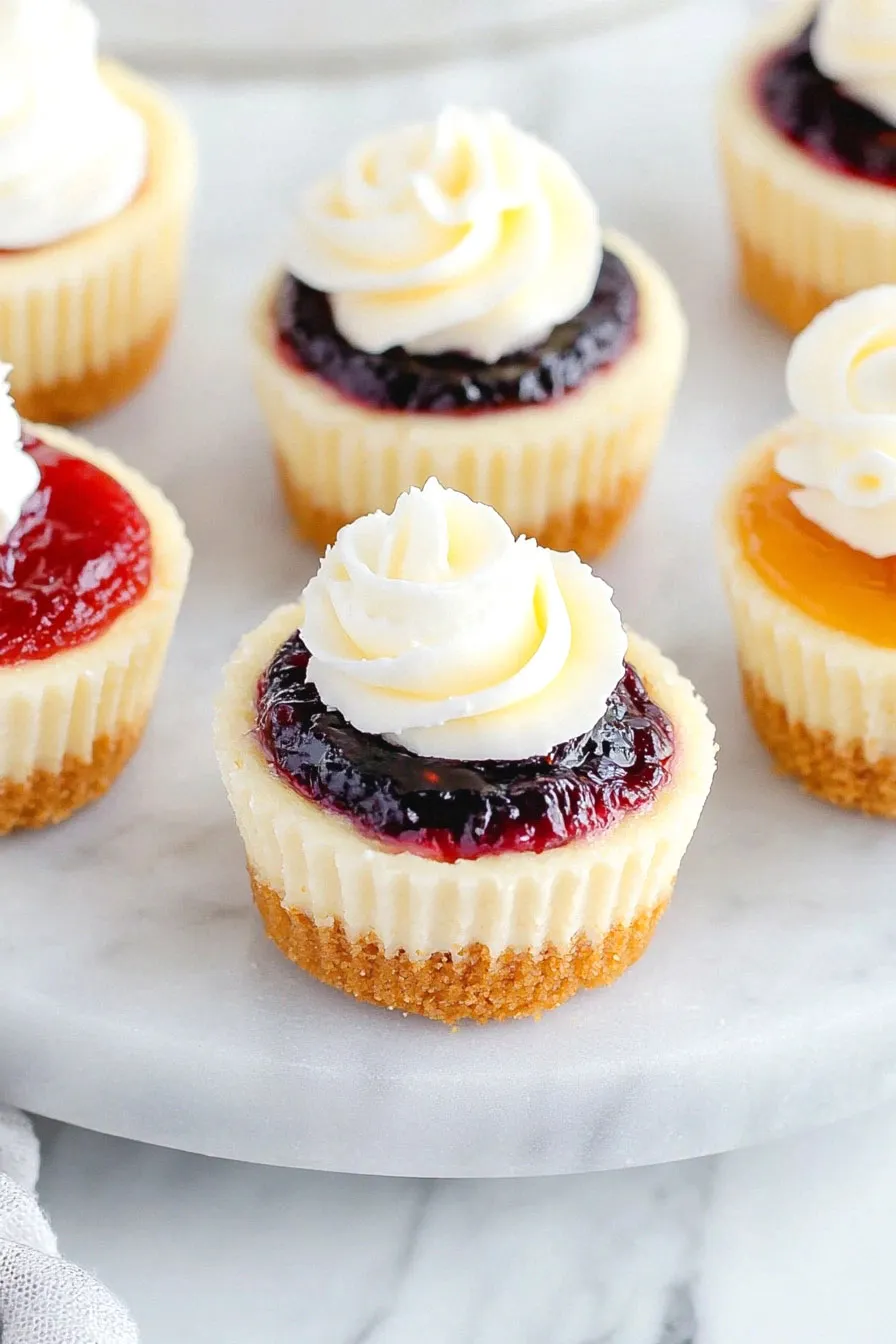
These cute little cheesecakes are perfect for serving with a variety of toppings and sauces that let your guests customize their dessert. A simple berry compote made from fresh strawberries, raspberries, or blueberries adds a nice pop of color and tartness that balances the rich, creamy filling. For chocolate lovers, try offering a warm chocolate sauce or a drizzle of caramel on the side. You can also set out some whipped cream, fresh mint leaves, and different fruit sauces to create a fun DIY topping bar that lets everyone dress up their mini cheesecake exactly how they like it.
Storage Instructions
Keep Chilled: These mini cheesecakes stay fresh in the fridge for up to 5 days when stored in an airtight container. I like to place them in a single layer to keep their pretty tops intact. They actually taste even better the next day after the flavors have had time to develop!
Freeze: Good news – these little treats freeze really well! Place them in a freezer-safe container, separating layers with parchment paper, and they’ll keep for up to 3 months. This makes them perfect for planning ahead for special events or when you want to have some ready-made desserts on hand.
Thaw & Serve: When you’re ready to enjoy your frozen cheesecakes, just transfer them to the fridge the night before and let them thaw slowly. Once thawed, they taste just as creamy and delicious as freshly made ones. Add any toppings just before serving for the best presentation.
| Preparation Time | 20-30 minutes |
| Cooking Time | 22-25 minutes |
| Total Time | 3-6 hours |
| Level of Difficulty | Medium |
Estimated Nutrition
Estimated nutrition for the whole recipe (without optional ingredients):
- Calories: 2200-2400
- Protein: 30-40 g
- Fat: 140-160 g
- Carbohydrates: 230-250 g
Ingredients
For the crust:
- 1 cup graham cracker crumbs
- 3.5 tbsp unsalted butter (melted and cooled slightly)
- 3 tbsp white sugar
For the cheesecake filling:
- 1/3 cup sour cream (full-fat for best texture)
- 2 large eggs
- 1/2 cup white sugar
- 1 tsp vanilla essence (I like Nielsen-Massey for baking)
- 16 oz cream cheese (softened to room temperature)
Step 1: Prepare the Oven and Muffin Pan
Preheat your oven to 325°F (163°C).
Line a 12-count muffin pan with cupcake liners and set it aside to have it ready for the crust and cheesecake filling.
Step 2: Make and Bake the Crust
In a large mixing bowl, combine the graham cracker crumbs and sugar.
Pour in the melted butter and mix until all of the crumbs are moistened.
Evenly distribute the crumb mixture among the 12 cupcake liners, pressing down firmly to form an even layer for the crust.
Bake the crusts at 325°F (163°C) for 5 minutes.
Once done, remove from the oven, but keep the oven temperature at 325°F (163°C).
Set the pan aside to cool slightly while you prepare the filling.
Step 3: Prepare the Cheesecake Filling
In the bowl of a stand mixer fitted with the paddle attachment, or using an electric mixer in a large mixing bowl, blend the cream cheese and sour cream until smooth and creamy.
Add in the sugar and vanilla extract, mixing until fully combined.
Be sure to scrape down the sides of the bowl as needed.
Finally, add the eggs one at a time, mixing on low speed just until each one is incorporated to avoid over-mixing.
Step 4: Fill the Liners and Bake the Cheesecakes
Evenly distribute the cheesecake batter into the prepared muffin liners, filling each one nearly to the top.
Bake at 325°F (163°C) for 17-20 minutes, or until the tops of the cheesecakes appear set.
Once they’re baked, remove the pan from the oven and allow the cheesecakes to cool in the pan for 1 hour.
Step 5: Cool and Chill the Cheesecakes
After the initial cooling period, carefully remove the cheesecakes from the pan.
Transfer them to an airtight container and refrigerate for 3-4 hours, or preferably overnight.
This chilling time allows the flavors to develop and the texture to become denser and more flavorful before serving.
