Making Japanese curry from scratch on busy weeknights can feel like an impossible task. Between juggling after-school activities, work deadlines, and the usual dinner rush, spending hours in the kitchen to simmer and stir a traditional curry just isn’t realistic for most of us.
That’s why this rice cooker Japanese curry has become my weeknight hero – it’s hands-off, foolproof, and brings all those comforting curry flavors we love with minimal effort. Just toss everything in your rice cooker, press start, and let it do all the work while you tackle the rest of your evening routine.
Why You’ll Love This Japanese Curry
- One-pot convenience – Everything cooks together in your rice cooker, meaning fewer dishes to wash and less kitchen cleanup time.
- Beginner-friendly – Using store-bought curry roux blocks takes the guesswork out of seasoning, making this foolproof for anyone new to Japanese cooking.
- Customizable recipe – You can use any protein you like – chicken, beef, tofu, or even just extra vegetables – making this perfect for any dietary preference.
- Meal prep friendly – This curry tastes even better the next day and reheats beautifully, perfect for making ahead and enjoying throughout the week.
- Budget-conscious – Basic ingredients like rice, carrots, and potatoes help stretch your grocery budget while still creating a filling, satisfying meal.
What Kind of Rice Should I Use?
For Japanese curry, short-grain Japanese rice (also called sushi rice) is your best bet. This type of rice has more starch than long-grain varieties, giving you those sticky, slightly chewy grains that perfectly complement the curry sauce. While you could use medium-grain rice in a pinch, avoid long-grain rice like jasmine or basmati – they’re just too fluffy and separate to give you that authentic Japanese curry experience. Before cooking, make sure to rinse your rice several times until the water runs clear, which removes excess surface starch and helps prevent your rice from becoming too gummy. Most Japanese rice brands like Nishiki, Koshihikari, or Calrose will work great for this recipe.
Options for Substitutions
This rice cooker curry recipe is pretty adaptable – here’s what you can switch up:
- Japanese curry roux: While the curry roux block is key for authentic Japanese curry flavor, you can make your own with 3 tablespoons each of flour and butter, plus 2 tablespoons curry powder, 1 teaspoon garam masala, and a pinch of cayenne. Just cook the flour and butter first until golden.
- Rice: Short-grain Japanese rice is ideal, but medium-grain or jasmine rice work too. Just follow your rice cooker instructions for water ratios with different rice types.
- Protein: This recipe works great with chicken, beef, pork, tofu, or even chickpeas. Just cut your protein into similar-sized pieces for even cooking.
- Shredded apple: No apple? Use 2 tablespoons of applesauce or even grated pear. This adds natural sweetness and helps tenderize the meat.
- Honey: You can swap honey with maple syrup, brown sugar, or even skip it if your apple is sweet enough.
- Olive oil: Any neutral cooking oil works here – vegetable, canola, or even butter are good options.
Watch Out for These Mistakes While Cooking
The biggest challenge when making rice cooker curry is adding too much liquid, which can lead to a soupy mess – stick to the recommended 2 cups of water and let the natural moisture from the vegetables do the rest. Getting the timing right is crucial: adding the curry roux too early can cause it to stick to the bottom and burn, so wait until all the vegetables are tender before mixing it in. To make your curry extra flavorful, don’t skip browning your onions and protein first – this step creates a deeper, richer taste that makes a huge difference in the final dish. A helpful tip is to cut all vegetables in similar-sized chunks (about 1-inch pieces) to ensure they cook evenly, and remember to place the potatoes and carrots at the bottom of the rice cooker since they take longer to cook through.
What to Serve With Japanese Curry?
Japanese curry is such a satisfying meal on its own, but there are some simple sides that make it even better! A crisp cucumber salad with rice vinegar dressing adds a cool, refreshing crunch that balances out the rich curry sauce perfectly. I love serving some quick-pickled vegetables on the side – especially red cabbage or daikon radish – which help cut through the curry’s richness. For an extra touch, try adding a soft-boiled egg on top of your curry, or include a side of miso soup if you’re going for a full Japanese-style meal.
Storage Instructions
Keep Fresh: Japanese curry tastes even better the next day! Place it in an airtight container and keep it in the fridge for up to 3-4 days. I recommend storing the curry and rice separately – this way the rice won’t get mushy and you’ll maintain the best texture for both components.
Freeze: This curry is perfect for batch cooking! Let it cool completely, then portion it into freezer-safe containers (again, separate from the rice) and it’ll keep well for up to 3 months. Just remember that potatoes might change texture slightly after freezing, but the flavor will still be great.
Warm Up: To enjoy your leftover curry, heat it in a pot over medium-low heat, stirring occasionally until hot. Or pop it in the microwave, stirring halfway through. If it seems too thick, add a splash of water while reheating. For the rice, sprinkle a few drops of water before reheating to bring back its fluffy texture.
| Preparation Time | 15-20 minutes |
| Cooking Time | 35-45 minutes |
| Total Time | 50-65 minutes |
| Level of Difficulty | Medium |
Estimated Nutrition
Estimated nutrition for the whole recipe (without optional ingredients):
- Calories: 1200-1400
- Protein: 60-70 g
- Fat: 30-40 g
- Carbohydrates: 180-200 g
Ingredients
For the curry:
- 1 2/3 cups uncooked rice
- salt, to taste
- 1/2 package curry roux (I use S&B Golden Curry Medium Hot)
- 9 oz chosen protein (chicken thigh or beef sirloin work well)
- 2 garlic cloves (minced)
- 1 tbsp olive oil
- 1 large potato (cut into 1-inch chunks)
- 1 brown onion (diced into 1-inch pieces)
- 1/4 cup shredded apple (grated from a crisp apple like Fuji)
- black pepper, to taste
- 1 carrot (peeled and sliced into 1/2-inch rounds)
- 2 cups water
- 1 tbsp honey
For serving (optional):
- worcestershire sauce
- pickled red ginger
- pickled shallots
Step 1: Prepare the Ingredients
Begin by starting to cook the rice according to your usual method.
While the rice is cooking, cut the meat into bite-sized pieces and set aside.
Peel and cut the potatoes, carrot, and onion into large bite-sized pieces and set them aside as well.
Finally, peel and slice the garlic.
Step 2: Sauté the Garlic and Onion
In a pot, heat some olive oil over medium heat.
Add the sliced garlic and sauté until it becomes fragrant.
Once the garlic is aromatic, add the chopped onion to the pot and cook until it starts to soften.
Step 3: Cook the Meat and Vegetables
Add the chicken to the pot and cook until the pieces become whitish in color.
Once the chicken is partially cooked, add the cut potatoes, carrots, and onions.
Stir everything with a wooden spatula to coat all the ingredients in oil.
Continue cooking until the potatoes’ outer edges begin to look transparent.
Step 4: Simmer the Curry
Add water, honey, and grated apple to the pot.
Bring the mixture to a boil, then reduce the heat to low and let it simmer.
Allow it to cook until the potatoes are tender, and all the ingredients are cooked through, which should take about 15 minutes.
Step 5: Add Curry Sauce
Turn off the heat and break the curry sauce blocks apart.
Add them to the pot.
To help each piece of curry roux dissolve, use a pair of chopsticks and break it apart in a ladle with some of the cooking liquid.
Once dissolved, turn the heat back on to low and bring the curry to a gentle simmer to thicken the sauce.
Step 6: Serve and Garnish
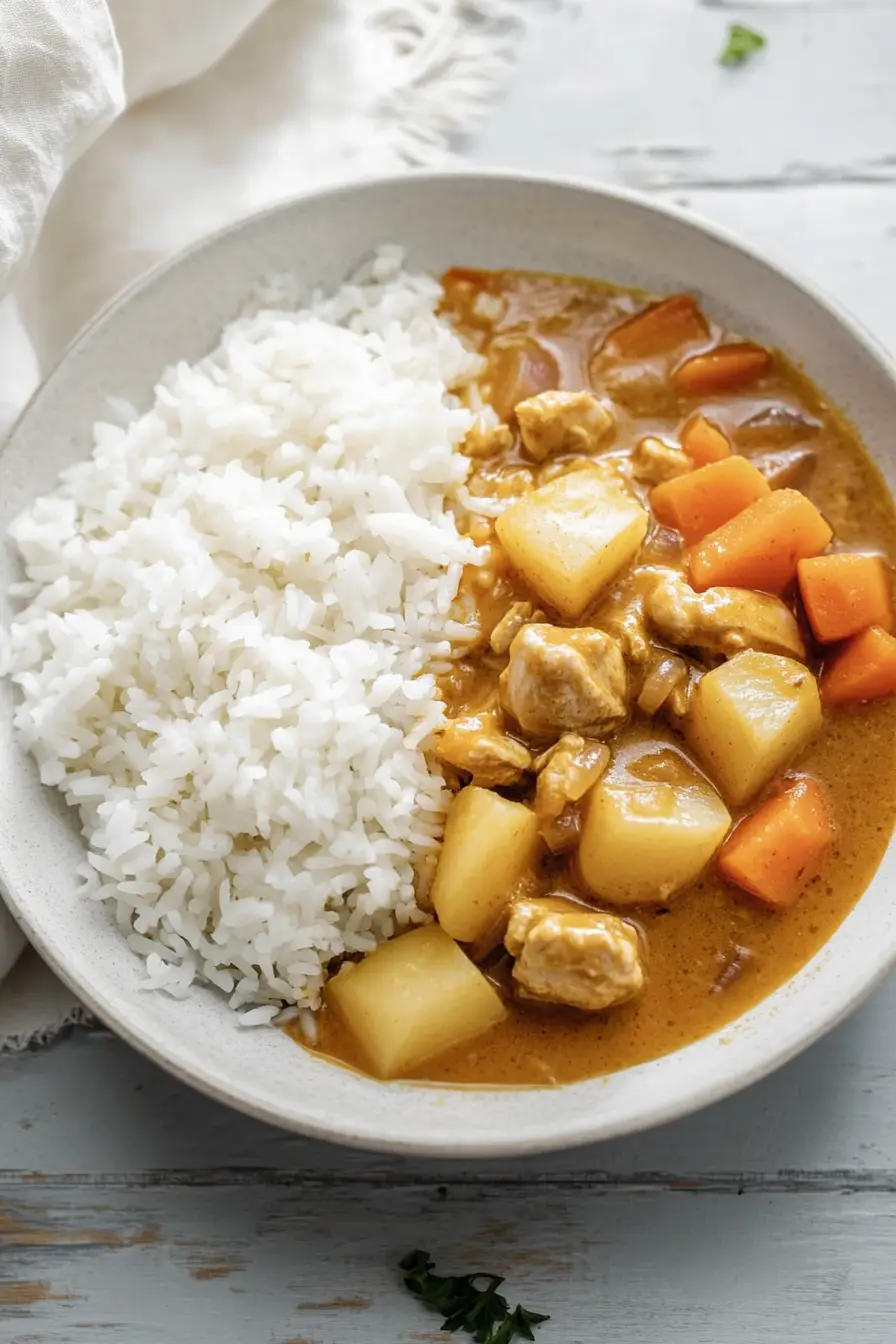
Once the curry has thickened, it’s ready to be served over the cooked plain rice.
Spoon the curry into a shallow bowl over the rice.
For an optional garnish, add a bit of Fukushinduke and Rakkyo atop the curry for extra flavor and texture.
Enjoy your delicious homemade curry!
