I was in my thirties before I discovered that chocolate lava cake wasn’t just a fancy dessert you could only get at restaurants. Growing up, it seemed like some mysterious creation that only professional chefs could pull off. When I tried making it at home, it was either too dry or completely undercooked.
That’s because I was overthinking it—turns out, making a single-serving lava cake is actually pretty simple. You don’t need special equipment or chef-level skills, just a few basic ingredients and about 15 minutes. For anyone who’s ever wanted dessert without making a whole cake, this recipe is perfect.
Why You’ll Love This Lava Cake
- Perfect single serving – No need to make a whole batch when you’re craving something sweet – this recipe makes just one perfect portion of warm, gooey chocolate cake.
- Quick preparation – You’re just 20 minutes away from a restaurant-worthy dessert, using basic ingredients you probably already have in your pantry.
- Customizable recipe – Make it your own by adding peanut butter for extra richness or a splash of bourbon for sophisticated flavor – or keep it classic with pure chocolate goodness.
- Minimal cleanup – With just one mixing bowl and one ramekin needed, you won’t spend your evening washing dishes.
What Kind of Chocolate Should I Use?
For a lava cake, the chocolate you choose really matters since it’s the star of the show. Semi-sweet chocolate chips work great and are easy to find, but you could also use chopped dark chocolate with anywhere from 60% to 70% cocoa content. While milk chocolate might seem tempting, it’s usually too sweet and doesn’t give you that rich, molten center that makes a lava cake so special. Just make sure you’re using real chocolate chips or bars rather than candy melts or chocolate-flavored coating – the real stuff melts much better and gives you that perfect gooey center. If you’re using chocolate chips, stick with a good quality brand since you’ll really taste the difference in this recipe.
Options for Substitutions
Making this cozy single-serve lava cake? Here are some helpful swaps if you need them:
- Chocolate chips: You can use any chocolate you have – milk, semi-sweet, or dark chocolate bars chopped into small pieces work just as well as chips. Just avoid white chocolate as it behaves differently when melted.
- Unsalted butter: If you only have salted butter, that’s fine – just skip the pinch of salt in the recipe. You can also use coconut oil, though the flavor will be slightly different.
- Natural peanut butter: This is optional, but if you want that nutty touch, you can use any nut butter – almond, cashew, or even cookie butter for a different twist.
- Bourbon: Skip it entirely, or try a splash of vanilla extract, rum, or coffee liqueur instead.
- Plain flour: All-purpose flour is best here, but you can use self-rising flour – just omit the salt if you do. This is one ingredient I wouldn’t suggest substituting with alternative flours as they might affect the cake’s texture.
- Egg: The egg is crucial for this recipe and can’t be substituted – it provides the structure needed for that perfect molten center.
Watch Out for These Mistakes While Baking
The trickiest part of making a lava cake is getting that perfect molten center – baking even one minute too long will turn your gooey chocolate paradise into a regular chocolate cake. To nail the timing, start checking your cake at the 8-minute mark – the edges should be set but the center should still have a slight jiggle.
Another common mistake is not properly greasing and coating your ramekin, which can lead to the cake sticking and breaking apart when you try to unmold it – take extra time to butter every nook and cranny and coat it thoroughly with cocoa powder.
Temperature control is crucial: using cold eggs can make your chocolate seize up, and melting chocolate at too high a heat can make it grainy and unusable – always use room temperature ingredients and melt chocolate slowly over low heat or in 20-second microwave intervals.
For the smoothest results, let your lava cake rest for exactly one minute after removing from the oven – any longer and the center will continue cooking from residual heat, any shorter and it might be too runny to hold its shape when unmolded.
What to Serve With Chocolate Lava Cake?
This warm, gooey dessert practically begs for a scoop of cold vanilla ice cream on top – the contrast between hot and cold is just perfect! A few fresh berries like raspberries or strawberries on the side add a nice pop of freshness and help balance out the richness of the chocolate. If you’re feeling fancy, a light dusting of powdered sugar and maybe a drizzle of caramel sauce or a dollop of whipped cream would make this dessert even more special. You could also add a few mint leaves as a garnish to make it look like it came straight from a restaurant kitchen.
Storage Instructions
Prepare Ahead: You can mix up the batter and pour it into your prepared ramekin up to 8 hours before baking. Just cover it with plastic wrap and keep it in the fridge until you’re ready to bake. Let it sit at room temperature for about 30 minutes before popping it in the oven.
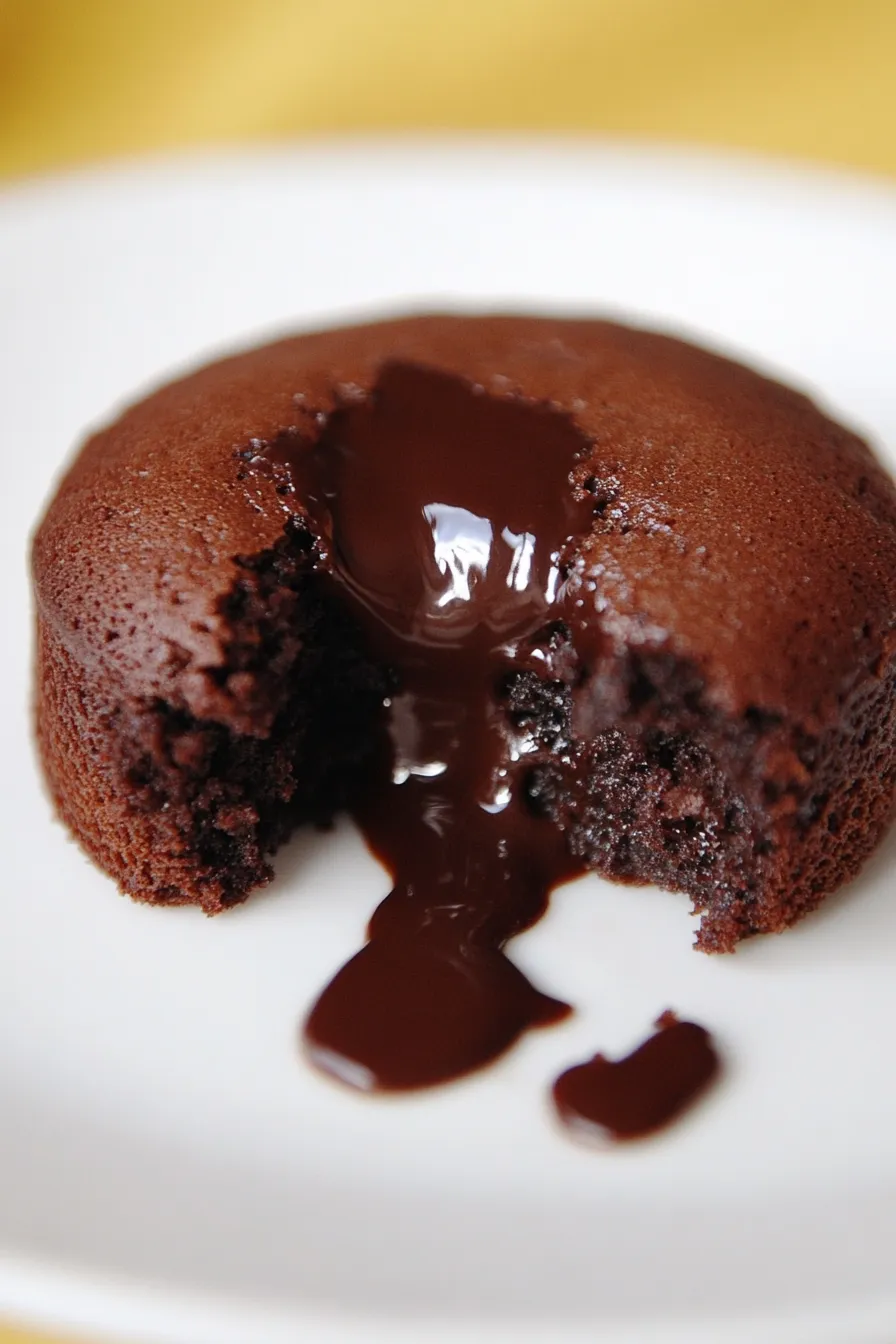
Enjoy Fresh: This chocolate lava cake is best enjoyed right after baking while the center is still warm and gooey. The magic happens when you dig in and that molten chocolate center flows out! Since this recipe makes just one serving, there’s usually no need to store leftovers.
Save Extra Batter: If you’ve made extra batter, you can keep it in an airtight container in the fridge for up to 24 hours. Just give it a quick stir before pouring it into your ramekin when you’re ready to bake.
| Preparation Time | 10-15 minutes |
| Cooking Time | 7-12 minutes |
| Total Time | 17-27 minutes |
| Level of Difficulty | Easy |
Estimated Nutrition
Estimated nutrition for the whole recipe (without optional ingredients):
- Calories: 400-450
- Protein: 8-10 g
- Fat: 25-30 g
- Carbohydrates: 40-45 g
Ingredients
- 1/2 teaspoon unsalted butter for greasing the baking dish plus 1 tablespoon unsalted butter for the mixture
- Approximately 1 teaspoon unsweetened cocoa powder to coat the baking dish (alternatively use flour or sugar)
- Heaping 1/4 cup semi-sweet or dark chocolate chips
- 1 large egg, preferably at room temperature
- 1 tablespoon plus 1 teaspoon sugar
- 1 tablespoon natural peanut butter, if desired
- A dash of bourbon, if desired
- A pinch of salt
- 2 teaspoons plain flour
Step 1: Prepare the Oven and Ramekin
Preheat your oven to 375°F and place a baking sheet on the center rack.
Grease a 3/4-cup ramekin with 1/2 teaspoon of butter, then dust it with unsweetened cocoa powder.
This will help the cake release easily after baking.
Set the prepared ramekin aside.
Step 2: Melt Chocolate and Butter
Place 1 tablespoon of butter and your chocolate chips in a small heatproof bowl.
Set the bowl over a small pan of simmering water and stir until the chocolate melts completely.
Allow it to cool for a few minutes.
Alternatively, you can melt the butter and chocolate slowly in the microwave, checking frequently to avoid burning.
Choose the method that is most convenient for you.
Step 3: Mix the Wet Ingredients
In a small bowl, whisk together the egg and sugar until blended.
If you’re adding peanut butter, incorporate it into the mixture now.
For an adult twist, add a small splash of your favorite liquor.
Once combined, whisk in the cooled chocolate mixture until the ingredients are well incorporated.
Step 4: Combine and Pour Batter
Gently stir in a pinch of salt and flour just until the batter comes together.
Be careful not to overmix.
Pour the prepared batter into the greased ramekin, ensuring an even surface for consistent baking.
Step 5: Bake the Cake
Place the ramekin on the baking sheet and bake in the preheated oven.
For a molten center, aim for 7 to 10 minutes (a 3/4-inch ring around the edge will appear dull).
For a soft center, bake for 10 to 12 minutes (the edge of the cake will slightly puff up).
Step 6: Cool and Serve
Allow the cake to cool in the ramekin for 2 to 3 minutes.
Using a towel or pot holders to protect your hands, carefully invert the ramekin onto a plate.
Serve immediately and enjoy the cake warm, savoring its rich, gooey center.
