Looking for a way to make your appetizers feel a bit more special without spending hours in the kitchen? We’ve all been there – trying to come up with something that’ll impress guests at dinner parties or holiday gatherings, but getting stuck in the same old routine of cheese and crackers.
That’s where these deviled eggs with caviar come in: they’re classic yet fancy, quick to put together, and just special enough to make any occasion feel like a celebration.

Why You’ll Love These Deviled Eggs
- Elegant appetizer – These aren’t your average deviled eggs – the addition of caviar turns this classic into an impressive starter that’s perfect for special occasions.
- Quick preparation – You can whip these up in about 30 minutes, making them a great last-minute party appetizer that still looks fancy.
- Make-ahead friendly – You can prepare the egg filling up to 24 hours in advance – just add the caviar right before serving.
- Simple ingredients – Besides the caviar, these deviled eggs use basic ingredients you probably already have in your kitchen.
What Kind of Eggs Should I Use?
For deviled eggs, fresh eggs actually aren’t your best bet – eggs that are about 1-2 weeks old will be much easier to peel after boiling. Free-range eggs are a good choice since they typically have firmer whites and richer-colored yolks, which makes for a better presentation. When shopping, pick eggs that are grade AA or A, as these have the strongest whites and will hold their shape well when cut and filled. Just make sure to bring your eggs to room temperature before boiling them – this helps prevent the shells from cracking and makes for more even cooking.
Options for Substitutions
While deviled eggs are pretty straightforward, there are several ways you can mix things up with substitutions:
- Caviar: If caviar isn’t your thing or it’s not in your budget, try topped with smoked salmon, tiny capers, or even finely diced pickled red onions for that salty pop of flavor.
- Mayonnaise: You can swap the mayo with Greek yogurt for a tangier, lighter version. Or go half mayo, half yogurt for the best of both worlds.
- Dijon mustard: Regular yellow mustard works fine here, or try whole grain mustard for extra texture. Just use the same amount as called for in the recipe.
- White wine vinegar: Apple cider vinegar or plain white vinegar can step in here – use the same amount to keep that nice acidic kick.
- Chives: Out of chives? Try finely chopped green onions, dill, or even parsley for that fresh herb finish.
- Paprika: Regular paprika is traditional, but you could try smoked paprika for a different flavor profile, or even a tiny pinch of cayenne if you like heat.
Watch Out for These Mistakes While Cooking
The biggest challenge when making deviled eggs is getting perfectly cooked egg yolks without that dreaded green ring – start with eggs in cold water, bring to a boil, then remove from heat and let stand covered for exactly 10 minutes before plunging into an ice bath. When it comes to peeling, fresh eggs are actually your enemy – eggs that are 7-10 days old will peel much more easily since their membranes have had time to separate from the shell. Another common mistake is over-mixing the yolk filling, which can make it too loose and paste-like – instead, mash the yolks with a fork until just broken down, then gently fold in your mayo and seasonings until smooth but still fluffy. For the most elegant presentation, pipe the filling using a star tip rather than spooning it in, and add the caviar right before serving to prevent it from drying out or bleeding color into the filling.
What to Serve With Deviled Eggs?
These fancy deviled eggs work perfectly as part of an appetizer spread at your next party or gathering. I like to serve them alongside other classic finger foods like smoked salmon on crackers, mini cucumber sandwiches, or crispy crostini. Since these eggs have a rich, creamy texture, it’s nice to balance them with some fresh, crunchy vegetables like asparagus spears or a platter of rainbow crudités with dip. For a casual brunch setting, pair them with fresh fruit, croissants, and maybe some crispy bacon or prosciutto to round out the spread.
Storage Instructions
Keep Fresh: These fancy deviled eggs are best enjoyed the day they’re made, but if you need to store them, place them in an airtight container in the fridge. They’ll stay good for up to 24 hours – just wait to add the caviar and chive garnish until right before serving to keep everything looking fresh.
Make Ahead: Want to prep these in advance? You can boil the eggs and make the filling up to 2 days ahead. Keep the egg whites and filling separate in airtight containers in the fridge. When you’re ready to serve, just pipe the filling into the whites and add your toppings.
Serve: Once assembled, these deviled eggs should be served within 2 hours if left at room temperature. For a party or gathering, try placing them on a bed of crushed ice to keep them properly chilled while serving.
| Preparation Time | 15-25 minutes |
| Cooking Time | 7-10 minutes |
| Total Time | 22-35 minutes |
| Level of Difficulty | Medium |
Estimated Nutrition
Estimated nutrition for the whole recipe (without optional ingredients):
- Calories: 500-600
- Protein: 30-35 g
- Fat: 40-45 g
- Carbohydrates: 5-10 g
Ingredients
For the eggs:
- 6 large eggs (free range preferred for richer yolks)
For the filling:
- 1/8 tsp salt
- 1 tbsp chives (finely chopped)
- 1/2 tsp white wine vinegar
- 3 tbsp mayonnaise (I prefer Hellmann’s real mayonnaise for its classic flavor)
- 2 tsp Dijon mustard
- 1/8 tsp black pepper (freshly ground for best aroma)
- 1/2 tsp paprika
For the garnish:
- 1/2 tbsp chives (finely chopped)
- 1 tbsp lumpfish caviar (for a briny pop)
- 3/8 tsp paprika
Step 1: Cook and Cool the Eggs
Place 6 large eggs in a pan just big enough to hold them snugly to prevent movement that could cause splitting.
Cover the eggs entirely with cold water and place a lid on the pan.
Bring the water to a boil, then continue cooking the eggs for 7 minutes using a timer.
Meanwhile, prepare a large bowl filled with very cold water, adding ice cubes to ensure it is really cold.
Once the eggs have cooked for the allotted time, drain the hot water and transfer the eggs into the bowl of ice-cold water to cool them completely.
This rapid cooling will make peeling the eggs easier.
Step 2: Peel and Prepare the Eggs
Once the eggs are cooled, tap each egg all over on a hard surface to crack the shell and peel it off.
Rinse if necessary to remove any residual shell bits.
Slice a tiny amount off of both ends of each egg lengthways to create a flat base that prevents slipping around on a platter.
Then, slice each egg in half lengthways, resulting in 12 halves.
Using a teaspoon, carefully pop the yolks out of the cavities; they should come out easily.
Step 3: Prepare the Filling
Push the yolks through a fine-meshed sieve suspended over a small mixing bowl using the back of a small spoon.
Be sure to scrape the back of the sieve to collect all the yolk.
Add mayonnaise, Dijon mustard, paprika, white wine vinegar, salt, and pepper to the yolks, mixing well.
Taste the mixture and adjust the seasoning to your liking.
Stir in some finely chopped chives for added flavor.
Step 4: Fill the Egg Whites
Transfer the creamy yolk mixture into a piping bag fitted with a wide star nozzle.
Pipe the mixture into the cavities of each egg white half, filling them generously.
This creates a visually appealing presentation and ensures each bite is flavorful.
Step 5: Garnish and Serve
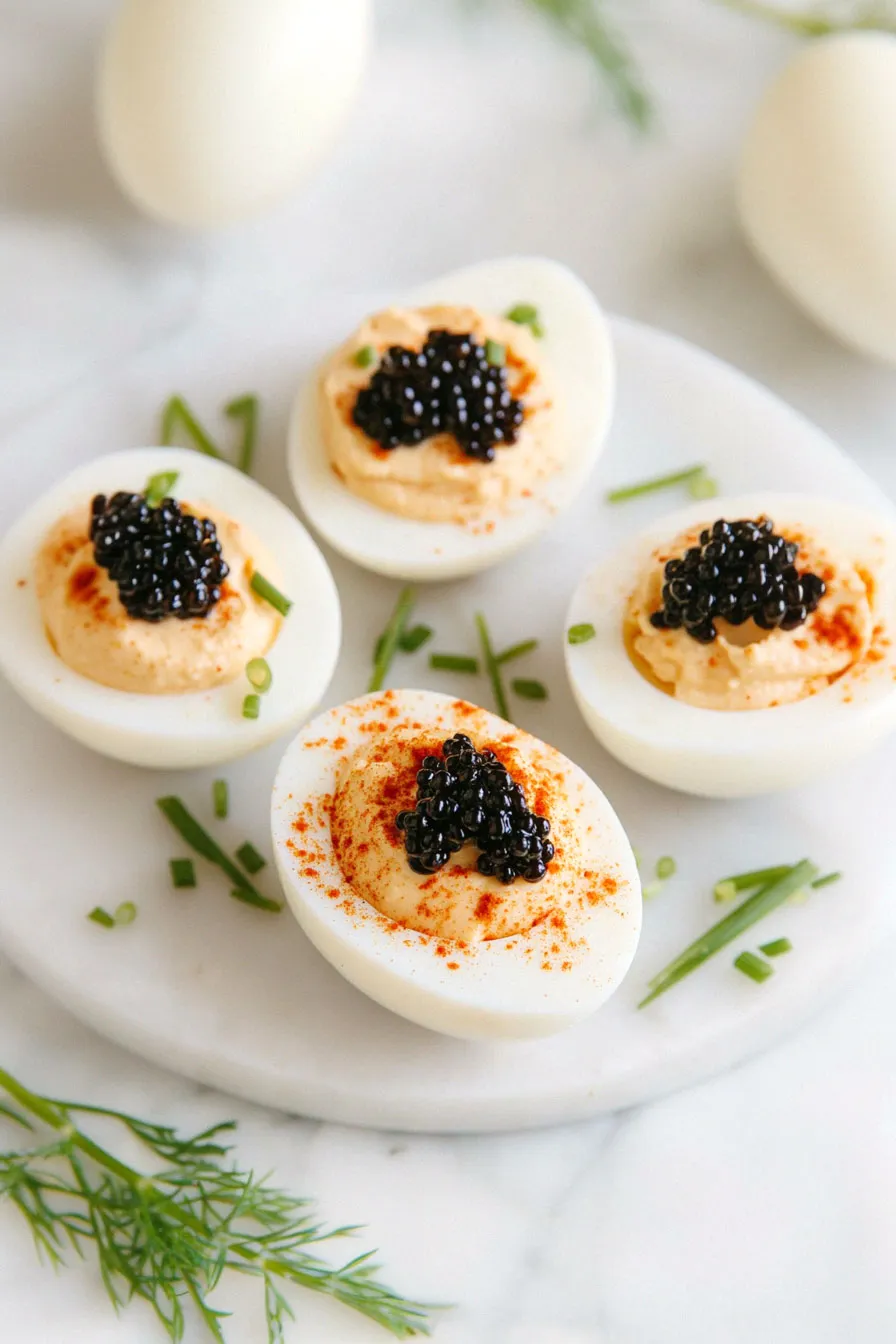
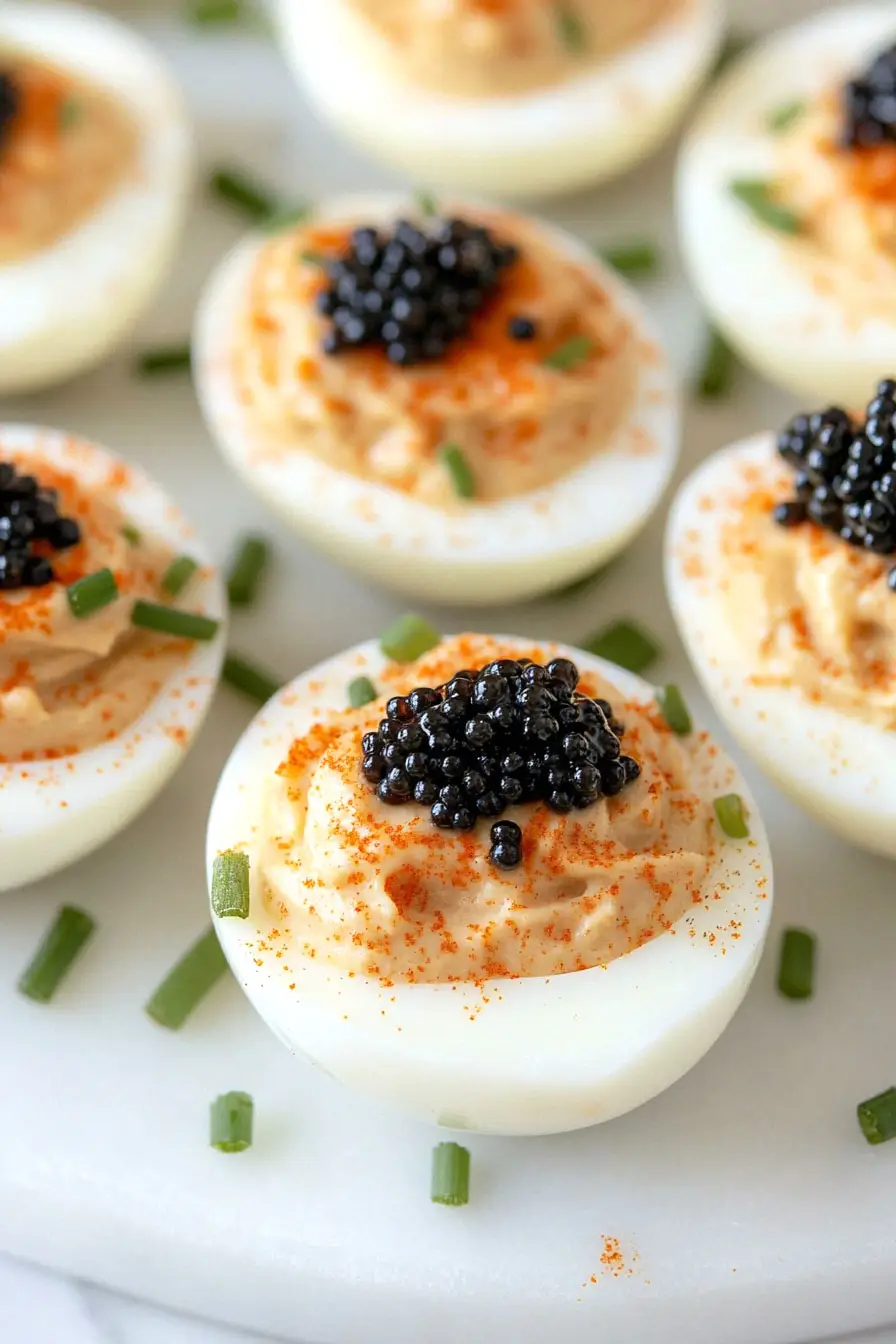
Finish each egg by sprinkling some paprika over the top and scattering with chopped chives.
Add a small spoonful (1/4 – 1/2 teaspoon) of caviar on top of each for a touch of elegance.
These deviled eggs are best served straight away.
For making in advance, refer to recipe notes to ensure the best taste and presentation.
