I never thought I’d get excited about turnip kimchi, but here we are! Growing up, the only way I knew turnips was in my grandmother’s beef stew. These days, I’m always looking for new ways to use vegetables, especially when they’re in season and practically giving them away at the farmers market. Making kimchi felt a bit scary at first – all that fermentation talk can be intimidating. But after trying it a few times, I realized it’s actually pretty straightforward.
What I love about turnip kimchi is how it brings together the familiar (those humble turnips) with the tangy kick of traditional Korean flavors. It’s become my go-to way to use up turnips, and honestly, it’s way more interesting than just roasting them. Plus, it keeps in the fridge for weeks, so I can add a little zip to everything from rice bowls to sandwiches whenever I want.

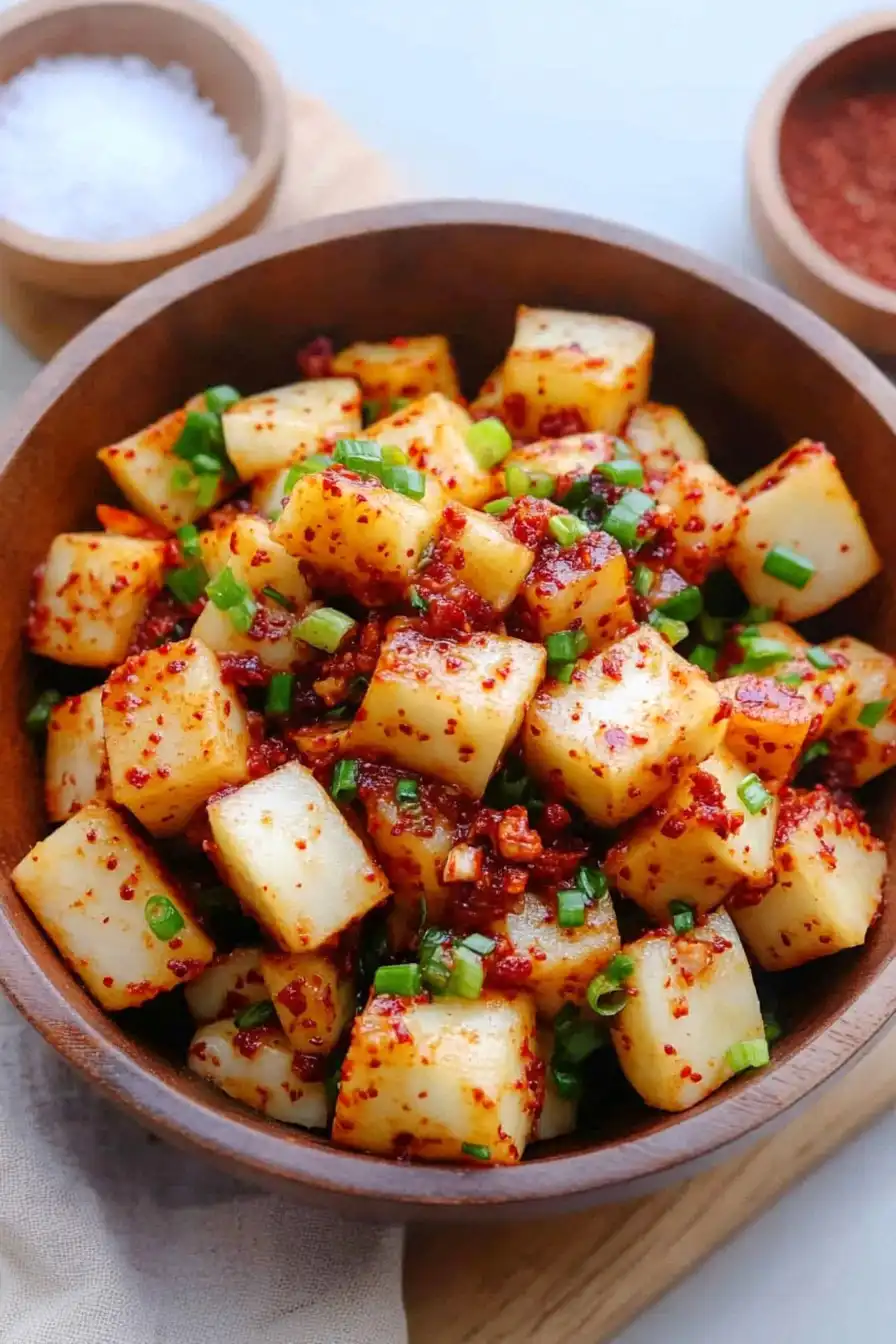
Why You’ll Love This Turnip Kimchi
- Probiotic-rich – This fermented dish is packed with gut-healthy probiotics that support your digestive health and immune system.
- Budget-friendly – With just a handful of basic ingredients like turnips and seasonings, this kimchi is an affordable way to add bold flavor to your meals.
- Long-lasting – Once fermented, this kimchi keeps for months in the fridge, giving you a ready-to-eat side dish or condiment whenever you need it.
- Customizable heat level – You can easily adjust the amount of chili powder and peppers to make it as mild or spicy as you prefer.
What Kind of Turnips Should I Use?
Japanese hakurei turnips are ideal for making kimchi since they’re small, tender, and have a mild sweetness that takes on fermented flavors really well. Regular white salad turnips from the grocery store work great too – just look for ones that are firm, smooth, and about 2-3 inches wide. When picking your turnips, smaller ones tend to be sweeter and less woody than larger ones. Make sure to choose turnips that feel heavy for their size and don’t have any soft spots or blemishes. If the turnips still have their greens attached, you can tell they’re fresh, but don’t worry if they don’t – just give them a gentle squeeze to check for firmness.

Options for Substitutions
Making kimchi at home can be adapted with some smart substitutions if needed:
- Turnips: If turnips aren’t your thing, you can use daikon radish, regular radishes, or even carrots cut into similar sizes. Each veggie will bring its own unique crunch and flavor to the kimchi.
- Red chili powder (gochugaru): This Korean red pepper powder is pretty important for authentic kimchi flavor, but if you can’t find it, mix regular red pepper flakes (reduce amount by half) with sweet paprika. Just know the taste won’t be exactly the same.
- Serrano peppers: You can swap serranos with jalapeños for less heat, or Thai bird chilies for more kick. Adjust the amount based on how spicy you like things.
- Spring onions: Regular green onions work perfectly here, or you could use chives or even thin-sliced regular onions in a pinch.
- Salt: Sea salt is traditional, but kosher salt works just as well. Just avoid iodized table salt as it can make the kimchi taste metallic and affect fermentation.
Watch Out for These Mistakes While Making
The biggest challenge when making turnip kimchi is using too much salt in the initial salting process, which can make your final product unbearably salty – instead, aim for just enough salt to draw out moisture and soften the turnips, usually about 1-2 tablespoons per pound of turnips.
A common error is rushing the fermentation process by keeping the kimchi at room temperature for too long, which can lead to mushy turnips and off-flavors – let it sit at room temperature for just 1-2 days before moving it to the refrigerator where it will continue to ferment slowly.
To prevent unwanted mold growth, make sure your jar and utensils are completely clean and dry, and always use your clean hands or gloves when mixing the ingredients, as any bacteria from dirty hands can interfere with proper fermentation.
For the crunchiest texture, cut your turnips into uniform sizes and avoid over-packing them in the jar – leave about an inch of space at the top to allow for expansion during fermentation.
What to Serve With Turnip Kimchi?
This spicy, tangy turnip kimchi makes a perfect side dish for Korean and Asian-inspired meals. I love serving it alongside a bowl of steamed white rice and grilled meats like bulgogi or Korean BBQ. For a simple lunch, try adding it to rice bowls with a fried egg on top, or use it to spice up your sandwich wraps and burgers. You can also serve it as part of a larger Korean spread with dishes like japchae (glass noodles) or pajeon (savory pancakes) for a more traditional meal experience.
Storage Instructions
Ferment: Let your turnip kimchi ferment at room temperature for 1-2 days until it develops that perfect tangy flavor. You’ll notice some bubbles forming – that’s a good sign! Once it reaches your desired taste, move it to the refrigerator.
Keep: Pop your kimchi in an airtight glass jar and store it in the refrigerator. The flavors will continue to develop slowly, and it’ll stay good for 2-3 months. Just remember to use clean utensils each time you serve it to keep it fresh longer.
Mature: Like most fermented foods, turnip kimchi gets more complex and sour over time. Some folks love it fresh, while others prefer it after a few weeks when it’s developed a stronger taste. Try it at different stages to find your sweet spot!
| Preparation Time | 30-45 minutes |
| Cooking Time | 0 minutes |
| Total Time | 3 months |
| Level of Difficulty | Medium |
Estimated Nutrition
Estimated nutrition for the whole recipe (without optional ingredients):
- Calories: 50-70
- Protein: 2-3 g
- Fat: 0-1 g
- Carbohydrates: 10-15 g
Ingredients
- Turnips
- Crushed red serrano chili peppers
- Spring onions
- Red chili powder (gochugaru)
- Salt
Step 1: Prepare Ingredients
Start by gathering all necessary ingredients: turnips, crushed red serrano pepper, green onions, and gochugaru (Korean chili powder).
These will be the base for your homemade kimchi.
Step 2: Cut and Brine the Turnips
Cut the turnips into cubes and place them into a mixing bowl.
Add salt to the cubed turnips and let them sit.
This process will draw out moisture, helping to create a brine which is essential for fermentation.
Step 3: Mix in Flavorings
Add the crushed red serrano pepper and chopped green onions to the salted turnips.
Then, mix in gochugaru to your desired spice level, ensuring that the turnips are evenly and well-coated with the spices and seasonings.
Step 4: Begin Fermentation
Transfer the seasoned turnip mixture into a fermentation jar.
As you transfer, press down firmly to eliminate any air pockets that could disrupt the fermentation process.
Step 5: Ferment the Kimchi
Allow the jarred mixture to ferment at room temperature for about three months.
If you’re in a cooler climate, consider fermenting for a longer period.
Check periodically to ensure the fermentation process is proceeding well.
Step 6: Taste and Store
After the fermentation period, taste the kimchi to determine if it has reached your preferred level of tanginess and flavor.
Once satisfied with the fermentation, store the kimchi in the refrigerator to slow down further fermentation and keep it fresh.