If you ask me, angel food cake with vanilla pudding is pure comfort food magic.
This simple dessert brings together light, airy cake with smooth, creamy pudding that melts in your mouth. The fluffy cake soaks up just enough vanilla pudding to create the perfect bite every time.
It’s made with basic ingredients you probably already have in your pantry. Store-bought angel food cake works great, and homemade vanilla pudding takes just minutes on the stove.
It’s a family-friendly treat that feels fancy but couldn’t be easier to put together, perfect for Sunday dinners or when you need something sweet without all the fuss.
Why You’ll Love This Angel Food Cake with Vanilla Pudding
- No-bake dessert – This treat requires zero time in the oven since you’re using store-bought angel food cake, making it perfect for hot summer days or when you want dessert without heating up the kitchen.
- Make-ahead friendly – You can assemble this dessert hours or even a day before serving, which makes it ideal for parties, potlucks, or busy weeknights when you want something special ready to go.
- Simple assembly – Just layer the ingredients and chill – no complicated techniques or special skills needed to create this impressive-looking dessert.
- Crowd-pleasing flavors – The combination of fluffy cake, creamy vanilla pudding, and sweet cherry topping creates a classic flavor combination that reminds everyone of their favorite bakery treats.
- Feeds a crowd – This recipe makes enough to serve a large group, so it’s perfect for family gatherings, church potlucks, or any time you need to feed lots of people without breaking the bank.
What Kind of Angel Food Cake Should I Use?
You can absolutely use store-bought angel food cake for this recipe, and honestly, it’s the easiest route to go. Most grocery stores carry pre-made angel food cakes in the bakery section, and they work perfectly for this dessert. If you’re feeling ambitious, homemade angel food cake will also work beautifully, but don’t feel like you need to make it from scratch to get great results. Just make sure whatever cake you choose is fresh and springy to the touch – avoid any that feel dry or have hard edges, as they won’t absorb the pudding mixture as well.
Options for Substitutions
This dessert is pretty forgiving when it comes to swapping ingredients around:
- Angel food cake: You can absolutely make your own angel food cake from scratch if you prefer, or substitute with pound cake or even ladyfingers for a different texture. Just keep the same amount by weight.
- Cherry pie filling: Feel free to switch this up with strawberry, blueberry, or peach pie filling. Fresh berries work too – just toss 3 cups with 2-3 tablespoons sugar and let them sit for 15 minutes to create their own syrup.
- Instant vanilla pudding mix: Other pudding flavors like banana, coconut, or even chocolate can work here. You could also make homemade vanilla pudding, but make sure it’s completely cooled before mixing with the other ingredients.
- Whole milk: 2% milk works fine, though the pudding might be slightly less rich. Half and half makes it extra creamy, or you can use buttermilk for a slight tang.
- Cool Whip: You can substitute with 1 cup of heavy cream whipped with 2 tablespoons powdered sugar. Just fold it in gently to keep the light texture.
- Sour cream: Greek yogurt makes a great substitute here and adds extra protein. Use the same amount and make sure it’s plain, not vanilla flavored.
Watch Out for These Mistakes While Making
The biggest mistake when making this layered dessert is not letting your vanilla pudding set properly before assembling – rushing this step will result in runny layers that won’t hold their shape when you cut into the dessert.
Make sure to whisk your pudding mix thoroughly with the milk for at least 2 minutes to avoid lumps, and then let it chill in the fridge for at least 5 minutes before folding in the sour cream and Cool Whip.
Another common error is cutting your angel food cake pieces too small, which can make them soggy when they absorb moisture from the other layers – aim for 1-inch cubes that will maintain some texture.
For the best presentation, chill the assembled dessert for at least 2 hours before serving, as this allows all the flavors to meld together and makes slicing much cleaner.
What to Serve With Angel Food Cake?
This layered angel food cake dessert is pretty much a complete treat on its own, but it pairs beautifully with a hot cup of coffee or tea to balance out all that creamy sweetness. If you’re serving it at a party, consider adding some fresh berries like strawberries or blueberries on the side for a little extra color and freshness. A scoop of vanilla ice cream never hurts either, especially if you want to make it feel even more indulgent. For something lighter, try serving small portions with sparkling water or lemonade to cleanse the palate between bites.
Storage Instructions
Refrigerate: This dessert needs to stay chilled in the fridge at all times since it has dairy components. Cover it tightly with plastic wrap or store in an airtight container for up to 3 days. The flavors actually get better after sitting overnight, so it’s perfect for making a day ahead of your gathering.
Make Ahead: You can absolutely assemble this dessert the night before you plan to serve it. Just wait to add the sliced almonds until right before serving so they stay crunchy. The pudding and Cool Whip layers will set up nicely overnight, making it even more delicious.
Serve: Keep this dessert cold until you’re ready to serve it. It’s best enjoyed straight from the fridge since the Cool Whip and pudding can get a bit soft at room temperature. If you have leftovers, just pop them back in the fridge right away.
| Preparation Time | 20-30 minutes |
| Cooking Time | 0 minutes |
| Total Time | 480-960 minutes |
| Level of Difficulty | Medium |
Estimated Nutrition
Estimated nutrition for the whole recipe (without optional ingredients):
- Calories: 2700-2900
- Protein: 34-38 g
- Fat: 60-70 g
- Carbohydrates: 510-540 g
Ingredients
For the base and filling:
- 1 cup sour cream (full-fat for best texture)
- 1 1/2 cups whole milk (or half & half for extra richness)
- 14 oz angel food cake (ready-to-use, I like Sara Lee brand)
- 1 can cherry pie filling
- 1 box instant vanilla pudding
For the topping and garnish:
- 8 oz cool whip, thawed
- 1/4 cup sliced almonds (optional, for crunch and garnish)
Step 1: Prepare Angel Food Cake
- 14 oz ready-to-use angel food cake
Using a serrated knife, cut the 14 oz angel food cake into 1-inch square chunks.
This will help the cake layers absorb flavors and make serving easier.
Step 2: Layer Cake and Cherry Pie Filling
- angel food cake chunks from Step 1
- 1 can (21 oz) cherry pie filling
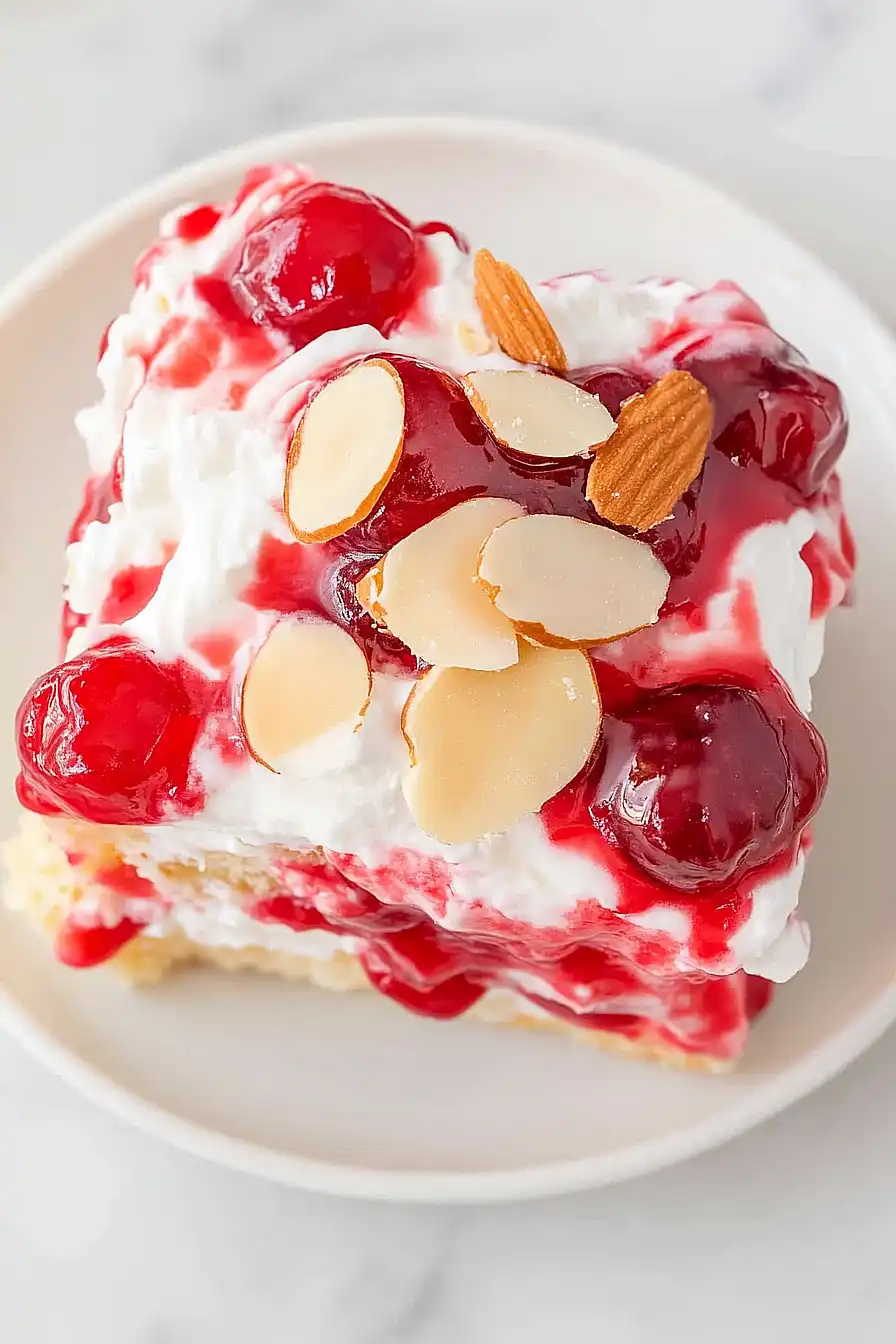
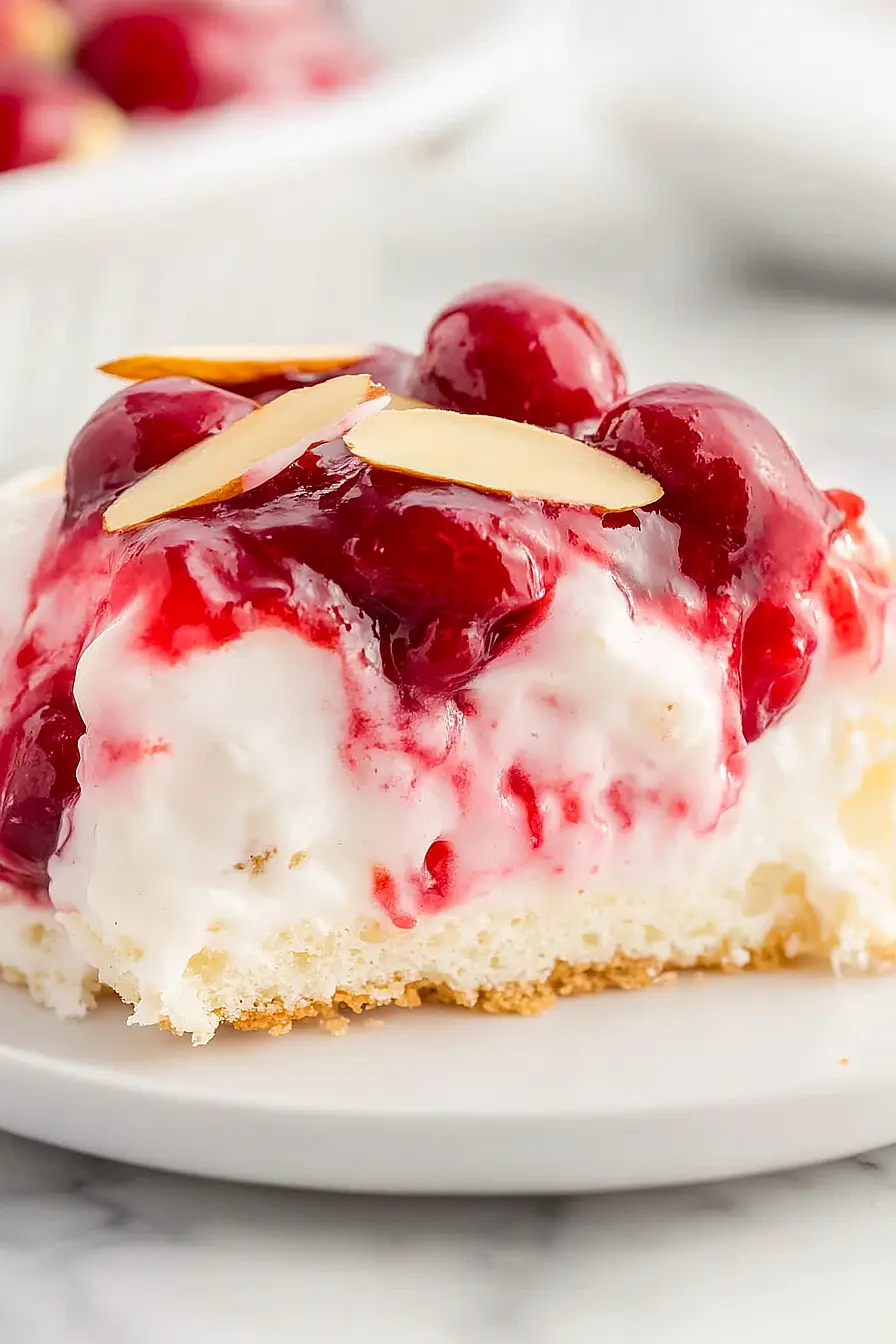
In a deep 8×8-inch (or standard 9×9-inch) baking dish, evenly layer half of the angel food cake chunks on the bottom.
Then, spread half of the cherry pie filling over the cake.
Top with the remaining angel food cake chunks, creating another even layer.
This step creates the delicious base and fruity middle for your dessert.
Step 3: Prepare Vanilla Pudding Mixture
- 1 box (3.4 oz) instant vanilla pudding
- 1 1/2 cups whole milk or half & half
- 1 cup sour cream
In a mixing bowl, combine the dry instant vanilla pudding mix, whole milk or half & half, and sour cream.
Stir with a wire whisk for 1-2 minutes, until thoroughly combined, smooth, and thick.
If necessary, let it sit for a few minutes to thicken further.
I recommend using whole milk for an extra creamy texture.
Step 4: Assemble Pudding and Cool Whip Layers
- vanilla pudding mixture from Step 3
- 8 oz Cool Whip, thawed
- remaining cherry pie filling from Step 2
Spread the prepared pudding mixture (from Step 3) evenly over the layered cake and cherry filling in the baking dish.
Next, gently spread the thawed Cool Whip into an even layer over the pudding.
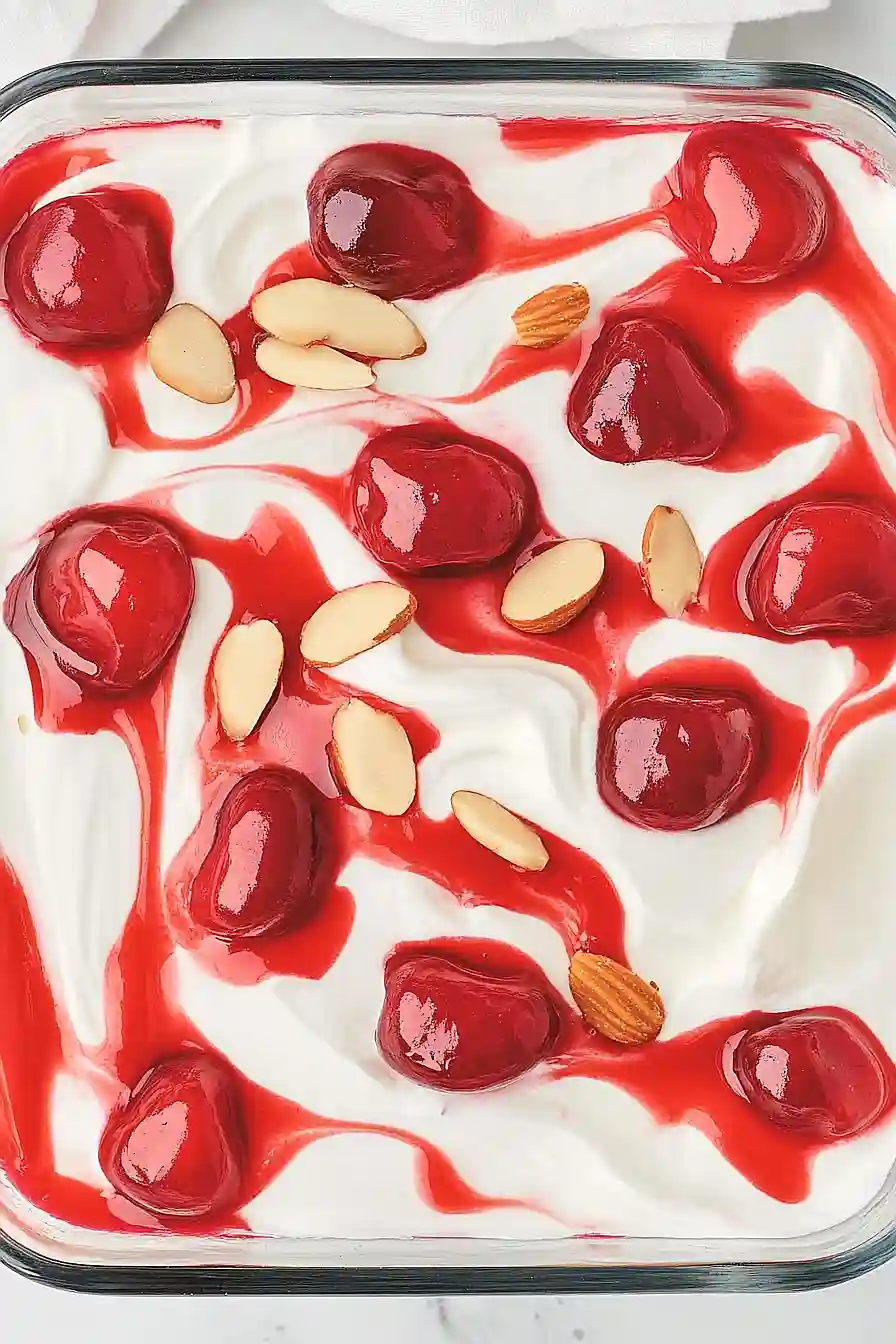
Finally, dollop the remaining cherry pie filling on top of the Cool Whip, and use a toothpick or spoon to gently swirl it into a decorative pattern.
For a fun touch, I like to swirl the cherry filling in a spiral design.
Step 5: Chill the Dessert
Cover the assembled cake with plastic wrap, foil, or a lid.
Refrigerate for at least 8 hours, or preferably overnight (12-16 hours) to allow the flavors to meld and the dessert to set properly.
Step 6: Top with Sliced Almonds and Serve
- 1/4 cup sliced almonds (optional)
Just before serving, sprinkle the sliced almonds over the top of the dessert for a crunchy finishing touch.
If you’re not a fan of nuts or want to skip them, this step is optional—but I always find they add a delightful texture contrast.
