Here’s my tried-and-true no bake cheesecake recipe, with a simple graham cracker crust and a smooth, creamy filling that sets up perfectly in the fridge every time.
This cheesecake has become my go-to dessert for summer gatherings when it’s too hot to turn on the oven. I always make an extra one to keep at home because my kids can’t resist sneaking slices from the fridge. Who can blame them for wanting cheesecake as an afternoon snack?
Why You’ll Love This No-Bake Cheesecake
- No oven needed – Perfect for hot summer days or when you don’t want to heat up your kitchen – this cheesecake sets beautifully in your refrigerator without any baking.
- Foolproof recipe – With no water bath or temperature monitoring needed, this recipe is much simpler than traditional baked cheesecake and practically impossible to crack.
- Make-ahead friendly – You can prepare this dessert up to 2 days in advance, making it perfect for parties and special occasions when you want to plan ahead.
- Creamy texture – The combination of cream cheese, heavy cream, and sour cream creates an incredibly smooth and rich texture that melts in your mouth.
- Basic ingredients – You’ll only need common pantry and dairy items that are easy to find at any grocery store.
What Kind of Cream Cheese Should I Use?
For a no-bake cheesecake, full-fat block cream cheese is absolutely the way to go. Skip the spreadable cream cheese that comes in tubs – it’s too soft and contains additives that can prevent your cheesecake from setting properly. Philadelphia brand is a popular choice among bakers, but any block-style cream cheese will work well. Just make sure your cream cheese is properly softened at room temperature (about 1-2 hours on the counter) before you start mixing. This helps prevent those pesky lumps that can make your cheesecake grainy instead of silky smooth.

Options for Substitutions
Let’s talk about what you can swap in this no-bake cheesecake recipe if you’re missing something:
- Graham crackers: Don’t have graham crackers? You can use digestive biscuits, vanilla wafers, or even Oreos (with cream removed). Just crush them into fine crumbs the same way.
- Cream cheese: Full-fat cream cheese is really important here and can’t be substituted with low-fat versions – they won’t set properly. This is one ingredient you shouldn’t swap!
- Sour cream: You can replace sour cream with plain full-fat Greek yogurt in the same amount. The taste will be slightly different but still good.
- Heavy cream: Whipping cream works exactly the same as heavy cream in this recipe. Just don’t try to use half-and-half or milk – your cheesecake won’t set up right.
- Lemon juice: You can use lime juice instead, or if you’re out of fresh citrus, use 1 teaspoon of white vinegar to get that needed tang.
- Brown sugar: For the crust, you can use white sugar instead of brown, though you’ll miss that slight caramel note. Adding a quarter teaspoon of cinnamon can help make up for the lost flavor.
Watch Out for These Mistakes While Making
The biggest challenge with no-bake cheesecake is achieving the right texture – using cream cheese straight from the fridge will result in a lumpy filling, so make sure it’s properly softened at room temperature for at least 2 hours before starting.
When whipping the heavy cream, stop as soon as stiff peaks form – overbeating will turn it into butter and ruin the smooth texture of your cheesecake, while underbeating will make the filling too soft to hold its shape.
Temperature control is crucial throughout the process – if your ingredients aren’t all at room temperature when mixing, you’ll end up with tiny lumps that won’t smooth out, and the filling needs at least 6 hours (preferably overnight) in the fridge to set properly.
For the graham cracker crust, press it firmly and evenly into the pan using the bottom of a measuring cup – a loose crust will crumble when serving, and don’t skip chilling the crust for 30 minutes before adding the filling, as this helps it hold together better.
What to Serve With No Bake Cheesecake?
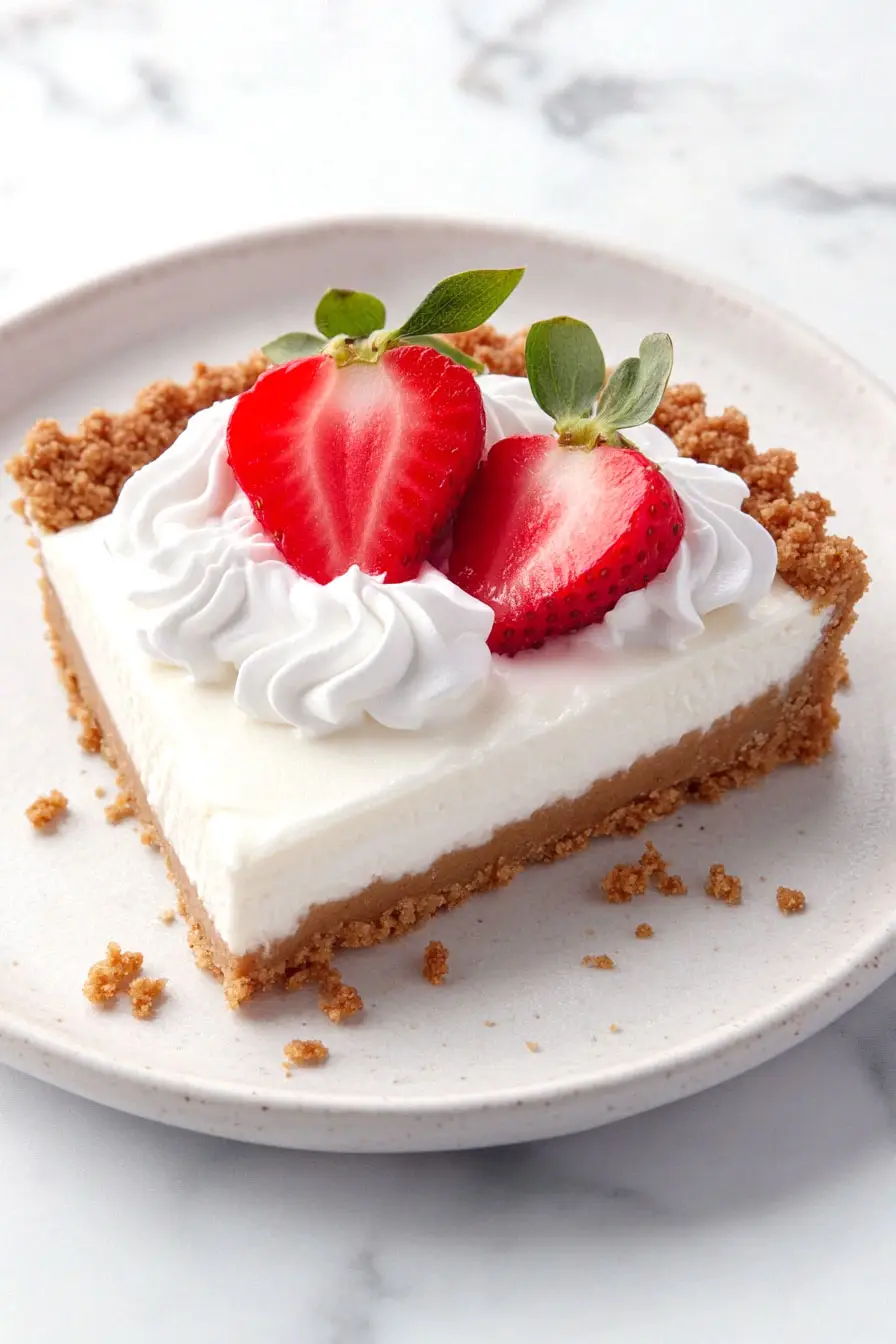
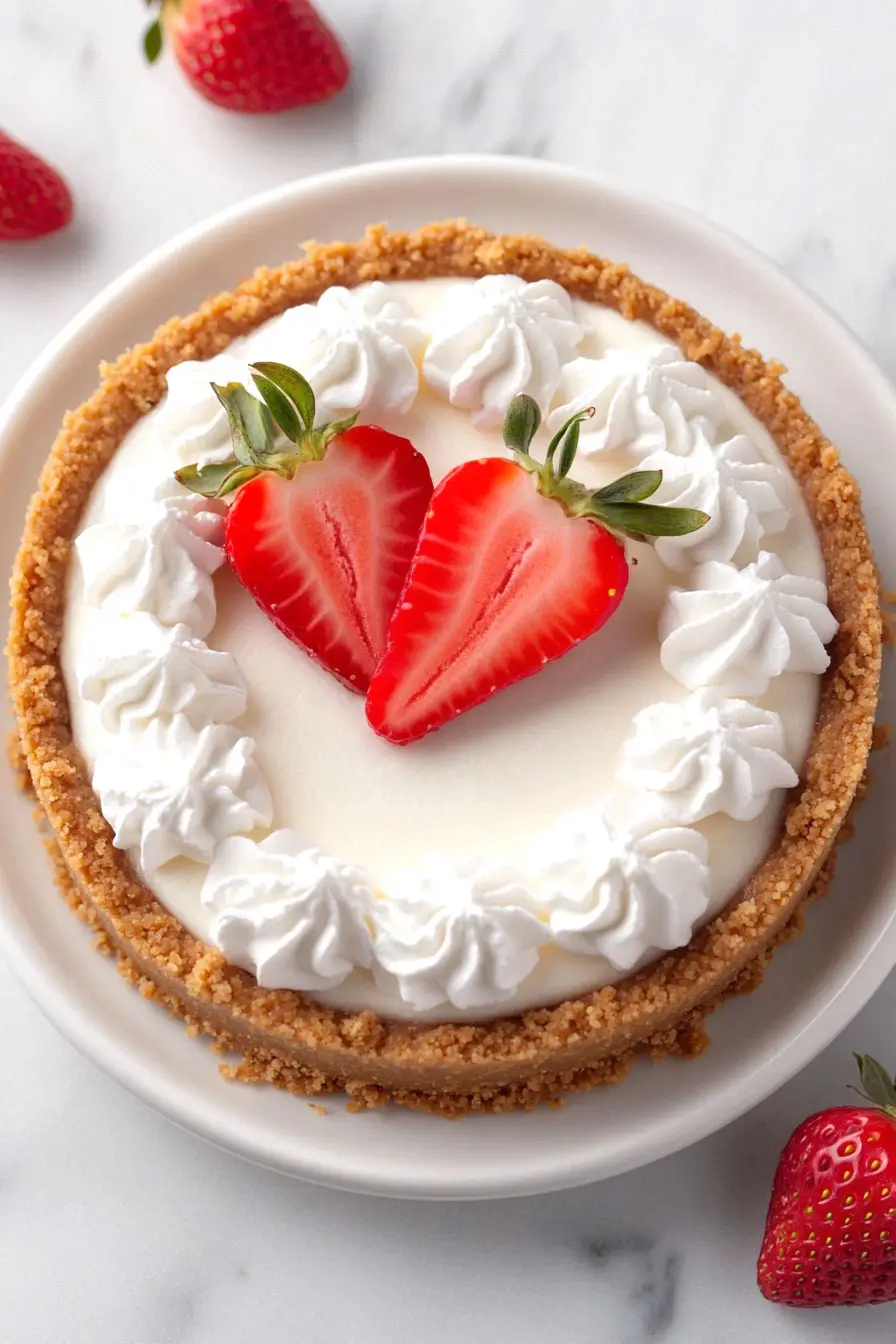
This creamy no bake cheesecake is wonderful on its own, but adding some simple toppings can make it even more special! Fresh berries like strawberries, raspberries, or blueberries are perfect for adding a bit of tartness and color to each slice. If you’re in the mood for something more indulgent, try a drizzle of caramel sauce, chocolate sauce, or even a dollop of whipped cream. For a cozy fall twist, you can serve it with warm apple or cherry compote – the contrast between the cold cheesecake and warm fruit is really nice. Keep a jar of lemon curd on hand too – it adds a bright, citrusy kick that works great with the rich, creamy filling.
Storage Instructions
Keep Fresh: Your no-bake cheesecake will stay perfect in the fridge for up to 5 days. Just cover it well with plastic wrap or pop it in an airtight container. The flavor actually gets even better after a day or two as everything settles together!
Freeze: Want to save some for later? This cheesecake freezes really well for up to 3 months. Wrap individual slices or the whole cake tightly in plastic wrap, then aluminum foil. It’s like having a dessert emergency fund in your freezer!
Thaw: When you’re ready to enjoy your frozen cheesecake, just move it to the fridge and let it thaw overnight. Don’t rush the process by leaving it at room temperature – slow and steady wins the race here for the best texture.
Make Ahead: This is a great dessert to make in advance! You can prepare it up to 2 days before serving. Just keep it covered in the fridge until you’re ready to add any toppings or serve it to your guests.
| Preparation Time | 20-30 minutes |
| Cooking Time | 0 minutes |
| Total Time | 360-480 minutes |
| Level of Difficulty | Medium |
Estimated Nutrition
Estimated nutrition for the whole recipe (without optional ingredients):
- Calories: 3500-4000
- Protein: 40-50 g
- Fat: 250-270 g
- Carbohydrates: 350-370 g
Ingredients
For the crust:
- 2 cups graham cracker crumbs
- 1/3 cup packed brown sugar
- 1/2 cup melted unsalted butter (I like Kerrygold unsalted butter for this)
For the filling:
- 2 tbsp powdered sugar
- 1/4 cup sour cream (at room temperature to prevent lumps)
- 24 oz softened cream cheese (full-fat cream cheese for a rich texture)
- 2 tsp lemon juice (freshly squeezed preferred)
- 1 tsp vanilla essence (pure vanilla extract for better flavor)
- 1 1/4 cups heavy cream (full-fat for best results)
- 1/2 cup white sugar
Step 1: Prepare the Graham Cracker Crust
Start by stirring the graham cracker crust ingredients together until well combined.
Pour the mixture into a 9-inch or 10-inch springform pan.
Use the bottom of a measuring cup to pack the crumbs very tightly into the bottom and up the sides of the pan.
This helps ensure that the crust does not fall apart when slicing the cheesecake.
Once packed, place the crust in the freezer for 10–20 minutes to set while you prepare the filling.
Step 2: Whip the Heavy Cream
With a hand mixer or a stand mixer fitted with a whisk attachment, whip the cold heavy cream on medium-high speed until stiff peaks form, approximately 4–5 minutes.
Set the whipped cream aside once it reaches the desired consistency.
Step 3: Prepare the Cream Cheese Filling
In a large mixing bowl, beat the cream cheese and granulated sugar together using a hand mixer or stand mixer fitted with a whisk or paddle attachment.
Mix on medium speed until the blend is perfectly smooth and creamy.
Be sure to scrape down the sides and bottom of the bowl with a silicone spatula to ensure even mixing.
Add the confectioners’ sugar, sour cream, lemon juice, and vanilla extract.
Continue beating on medium-high speed for 2–3 minutes until fully combined and smooth.
Make sure there are no lumps of cream cheese; if there are, continue to mix until the mixture is completely smooth.
Step 4: Fold in the Whipped Cream
Gently fold the previously whipped cream into the cheesecake filling using your mixer on low speed or a silicone spatula.
Take care to retain as much air and volume in the whipped cream as possible to create a light and airy filling.
This process requires several careful turns of your spatula.
Step 5: Assemble and Chill the Cheesecake
Take the crust out of the freezer and spread the cream cheese filling evenly over the crust.
Use an offset spatula to smooth the top of the filling.
Cover the cheesecake tightly with plastic wrap or aluminum foil and refrigerate for at least 6–8 hours, or up to 2 days, to allow the cheesecake to set.
For the best results, chill the cheesecake for about 12 hours or overnight.
Step 6: Serve the Cheesecake
Once the cheesecake has set, use a knife to gently separate it from the rim of the springform pan and then remove the rim.
Using a clean, sharp knife, cut the cheesecake into slices for serving.
For neat slices, wipe the knife clean between each cut.
Serve your no-bake cheesecake with your choice of toppings.
Store any leftover cheesecake in the refrigerator for up to 5 days.
