Growing up, Easter cookies in our house meant those basic round sugar cookies with sprinkles on top. My mom wasn’t big on decorating – she’d usually just shake some colored sugar over them and call it done. Whenever I saw those adorable lamb-shaped cookies at church bake sales, I’d beg her to make them, but she always said they were too complicated.
Now that I make these Easter lamb cookies myself, I realize they’re not complicated at all. You just need the right cookie cutter and a simple decorating technique. Even my kids help out – though their lambs sometimes end up looking more like abstract art than barnyard animals!
Why You’ll Love These Lamb Cookies
- Perfect holiday activity – These adorable lamb cookies are ideal for Easter celebrations and make a fun baking project to do with kids or friends.
- Make-ahead friendly – You can bake the cookies ahead of time and decorate them later, or store the finished cookies for up to a week in an airtight container.
- Basic cookie ingredients – The cookie base uses simple pantry staples you likely already have, while the decorative elements transform them into cute Easter lambs.
- Customizable design – Once you master the basic lamb shape, you can experiment with different expressions and decorative elements to give each cookie its own personality.
What Kind of Butter Should I Use?
For these Easter lamb cookies, unsalted butter is definitely the way to go since it gives you complete control over the salt content in your recipe. Make sure your butter is properly softened at room temperature – this usually takes about 30-45 minutes on your counter. You can test if it’s ready by pressing your finger into it – it should leave an indent but still feel cool to the touch. While European-style butter with its higher fat content can work, regular American butter is perfectly fine and more cost-effective for these cookies. Just avoid using margarine or butter substitutes, as they’ll change the texture and can make your cookies spread too much during baking.
Options for Substitutions
Let’s talk about what you can swap in these cute lamb cookies if you’re missing something:
- Unsalted butter: If you only have salted butter, that’s fine – just skip the pinch of salt in the recipe. Make sure it’s still at room temperature. Margarine can work too, but the cookies might spread a bit more during baking.
- Meringue powder: This is pretty important for the icing’s stability, but if you can’t find it, you can make a simple glaze with powdered sugar and milk. Just know that it won’t dry as hard or be as good for detailed decorating.
- Lemon essence: Feel free to use vanilla, almond, or any other flavor extract you like. You can also use fresh lemon zest for a natural citrus kick.
- Black gel food coloring: Any brand of black gel color works – just avoid liquid food coloring as it can make your icing too runny. In a pinch, you can mix blue, red, and green gel colors to make black.
- Sugar pearls and beads: These are for decoration, so you can get creative! Try sprinkles, mini chocolate chips, or even small candies. Just make sure whatever you use isn’t too heavy for the icing.
Watch Out for These Mistakes While Baking
The success of sugar cookies largely depends on the temperature of your butter – too soft or melted butter will lead to spread-out cookies that lose their lamb shape, while too cold butter won’t cream properly with sugar. When making the royal icing, a common mistake is adding too much water at once, which can make it too runny and impossible to pipe clean lines – instead, add water gradually, just a few drops at a time, until you reach the right consistency. The third crucial point is not letting each layer of icing dry completely before adding the next color or detail, which can cause colors to bleed and ruin your lamb design. For the best results, let your cookies cool completely before decorating, and work in a non-humid environment as moisture can prevent your royal icing from setting properly. To achieve clean edges on your cookies, chill the cut-out dough for 15-20 minutes before baking, as this helps them maintain their shape in the oven.

What to Serve With Easter Lamb Cookies?
These sweet Easter lamb cookies make a perfect addition to your holiday dessert spread or afternoon tea setup. A cup of hot chocolate or warm milk makes for a cozy pairing that kids especially love, while adults might prefer these cookies alongside a cup of coffee or Earl Grey tea. Since these cookies are on the sweeter side, I like to balance them out with some fresh fruit – strawberries and sliced oranges work particularly well. You can also create a fun cookie platter by combining these lamb cookies with other Easter-themed treats like chocolate eggs or bunny-shaped cookies.
Storage Instructions
Keep Fresh: These adorable Easter lamb cookies stay fresh when stored in an airtight container at room temperature. Place a piece of parchment paper between layers to protect the decorations, and they’ll keep well for up to 1 week. Just make sure they’re completely cool before storing to maintain their crisp texture.
Freeze Undecorated: If you want to get ahead, freeze the undecorated cookies in an airtight container with parchment paper between layers for up to 3 months. The decorated cookies don’t freeze well since the icing and sugar decorations can become sticky when thawed.
Make Ahead: You can prepare the cookie dough up to 2 days in advance – just wrap it well and keep it in the fridge. When you’re ready to bake, let the dough sit at room temperature for about 15 minutes until it’s soft enough to roll out. The royal icing can also be made a day ahead and stored in an airtight container in the fridge.
| Preparation Time | 30-60 minutes |
| Cooking Time | 12-15 minutes |
| Total Time | 120-150 minutes |
| Level of Difficulty | Medium |
Estimated Nutrition
Estimated nutrition for the whole recipe (without optional ingredients):
- Calories: 4000-4500
- Protein: 30-35 g
- Fat: 220-250 g
- Carbohydrates: 500-550 g
Ingredients
For the cookies:
- 1 pinch salt
- 1 egg
- 3 cups flour (I use King Arthur all-purpose flour)
- 1 cup sugar
- 1 tsp vanilla essence
- 1 cup unsalted butter (softened to room temperature)
For the royal icing:
- 4 cups powdered sugar
- 1 tsp lemon essence
- 1 to 2 tsp black gel food coloring (I use Wilton)
- 3 tbsp meringue powder (for stability and stiffness)
- 1/2 cup warm water
For the decorations:
- 6 oz white sugar beads
- 36 black sugar pearls
- 6 oz black sugar beads
Step 1: Prepare the Cookie Dough
In the bowl of an electric mixer fitted with the paddle attachment, mix together the butter and sugar until just incorporated.
Be careful not to over-mix at this stage to prevent the cookies from spreading while baking.
Add the egg and vanilla extract, mixing on low speed and stopping to scrape down the sides of the bowl as needed.
In a separate medium bowl, whisk together the flour and salt.
Add this dry mixture to the butter and egg mixture, mixing on low speed until a dough forms and there are no streaks of butter left.
If the dough appears crumbly and does not come together, add ice cold water 1 tablespoon at a time until the dough clumps properly.
Step 2: Roll and Chill the Dough
Roll the dough flat between sheets of parchment paper to prevent sticking.
Chill the dough until it’s firm and ready for use, for at least 30 minutes.
This step makes the dough easier to handle and ensures it holds its shape during baking.
Step 3: Cut and Bake the Cookies
Preheat your oven to 350°F (175°C) and line two baking sheets with parchment paper.
Use a 4-inch lamb or sheep motif cookie cutter to stamp shapes out of the dough, transferring them onto the prepared baking sheets.
Chill the shaped cookies in the refrigerator for 15 minutes to help them maintain their shape.
Bake the cookies for 12-15 minutes, or until they are lightly browned around the edges.
Once baked, transfer the cookies to a wire rack to cool completely.
Re-roll any dough scraps and repeat the process.
Step 4: Prepare and Color the Royal Icing
In the clean bowl of an electric mixer fitted with the whisk attachment, stir the confectioners’ sugar and meringue powder on low speed until combined.
Gradually add the water and beat the mixture on medium-high speed until thickened.
Mix in the desired flavoring, then scrape down the bowl and beat again for consistency.
Divide the icing into three bowls and cover them with damp paper towels to prevent drying.
Tint one bowl with a tiny drop of black gel food color to achieve a medium grey.
In another bowl, add more black color to reach a deep black.
Leave the third bowl untinted for white icing.
Adjust the consistency of each by adding drops of water until the icing is like a thick, pourable milkshake.
Step 5: Decorate the Cookies
Transfer the three different flood frostings into disposable piping bags, securing the ends with rubber bands.
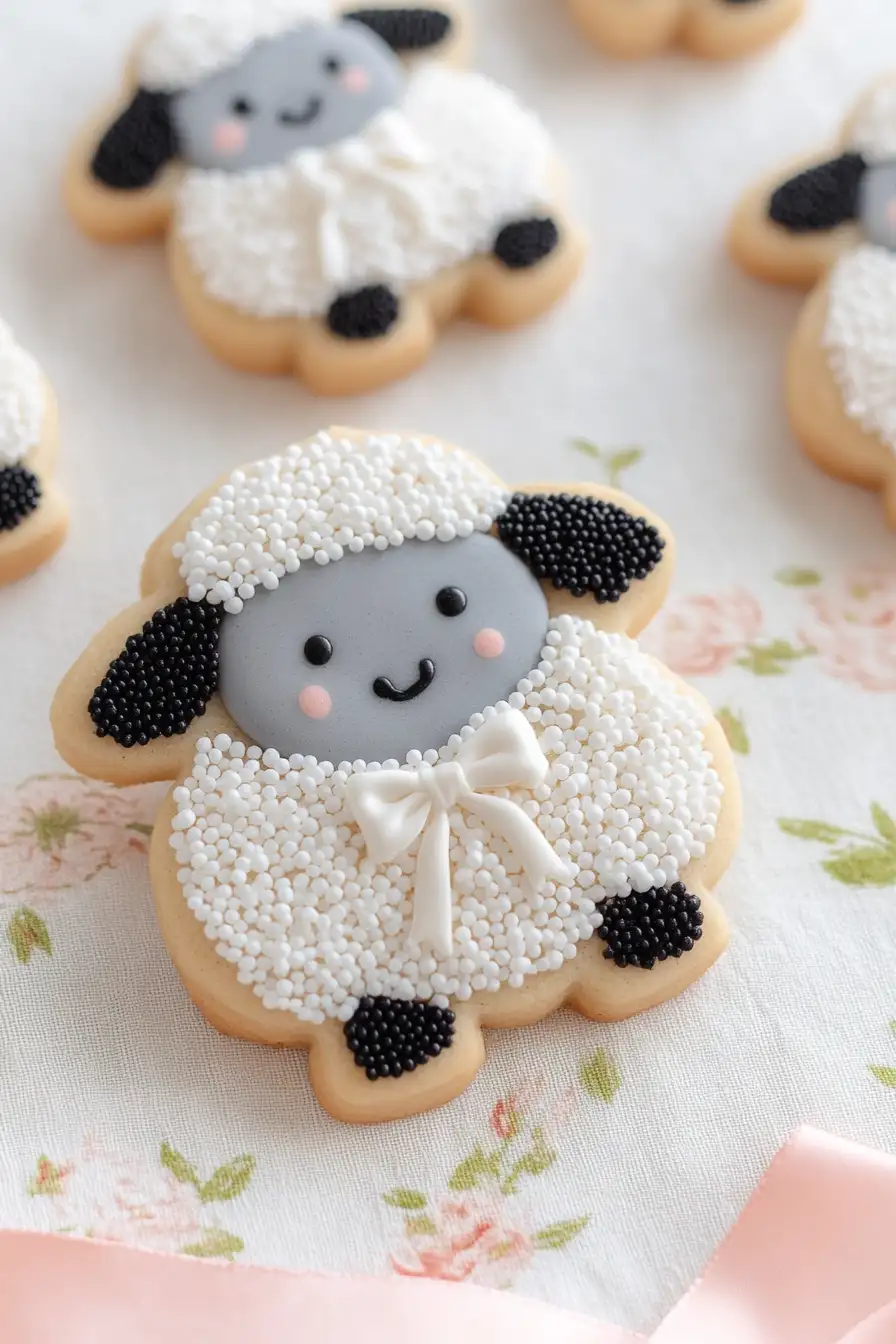
Use the grey icing to pipe faces and legs onto the cookies, placing a black sugar pearl at the center of each face while the icing is still wet.
Allow these to dry for about 2 hours.
Once set, flood half of the cookies with white royal icing, ensuring you stay within the edge.
Use a toothpick to gently push the icing closer to the edges without overflowing.
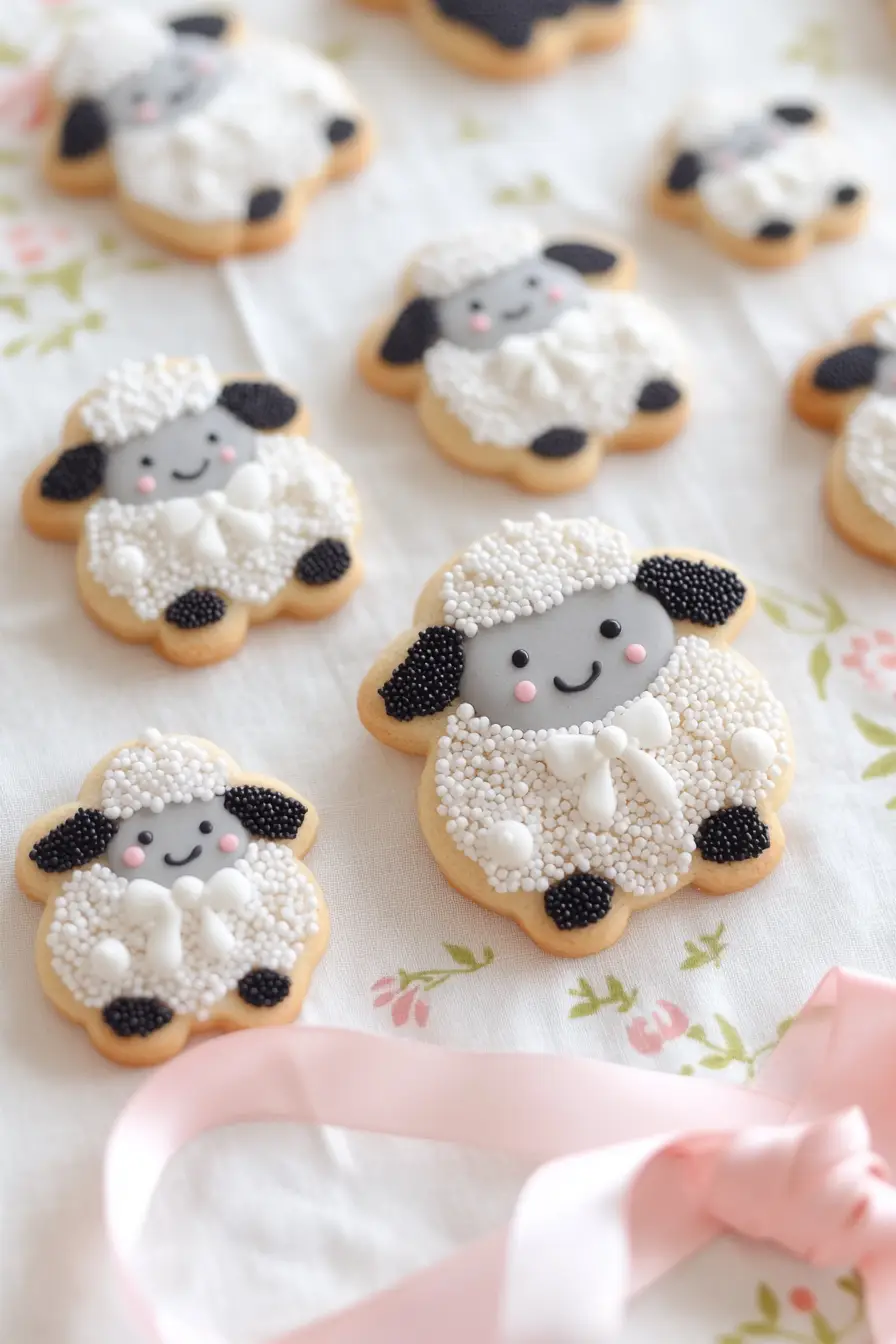
Immediately sprinkle with nonpareils while the icing is wet, shake off any excess, and move to a cooling rack.
Repeat with black icing and black nonpareils on the remaining cookies.
Allow them to dry uncovered for at least 4 hours, preferably overnight.
Step 6: Package and Store the Cookies
Once the cookies are completely dry and firm, package them in cellophane bags for gifting or store them in an airtight container to keep them fresh.
