Looking for a sweet treat that’s perfect for Valentine’s Day? I’ve been making this chocolate bark recipe for years, and it’s become a February tradition in our house. There’s something special about giving homemade chocolate treats to the people you care about – and the best part is how simple it is to make.
What I love most about making chocolate bark is that you can put it together while watching your favorite TV show in the evening. Just melt some chocolate, add your favorite toppings, and let it set overnight in the fridge. No complicated steps, no fancy equipment needed.
Whether you’re planning a cozy night in with someone special or need a thoughtful gift for friends and family, this chocolate bark never disappoints. Plus, you can mix and match toppings to create different flavors – I’ve tried everything from nuts and dried fruit to candy pieces, and they all work great.
Why You’ll Love This Chocolate Bark
- Quick and easy – This chocolate bark comes together in just 30 minutes with minimal hands-on time – perfect for last-minute Valentine’s treats or gifts.
- Only 4 ingredients – With just chocolate, candy melts, and decorative toppings, you don’t need a long list of complicated ingredients to make something special.
- No special skills needed – If you can melt chocolate and spread it on a pan, you can make this bark – it’s that simple! No fancy techniques or equipment required.
- Customizable design – You can make each batch unique by switching up your toppings and swirl patterns – perfect for getting creative in the kitchen.
What Kind of Chocolate Should I Use?
For chocolate bark, it’s best to use high-quality chocolate that contains real cocoa butter rather than cheaper compound chocolate or candy melts (except for the pink accent color in this case). Look for chocolate bars or chips that list cocoa butter in the first few ingredients – brands like Ghirardelli, Lindt, or Baker’s are good options for this recipe. When working with white chocolate, be especially careful to choose real white chocolate made with cocoa butter instead of palm oil-based alternatives, as these won’t set properly or taste as good. Remember to chop your chocolate into similarly-sized pieces so it melts evenly. If you’re new to working with chocolate, consider using chocolate chips since they’re already uniform in size and contain stabilizers that make them a bit more forgiving to melt.
Options for Substitutions
Making this chocolate bark but need to switch things up? Here are some helpful swaps:
- White chocolate: You can use white chocolate chips instead of chopped white chocolate – just reduce melting time to prevent scorching. Or try ruby chocolate for a natural pink color!
- Pink candy melts: If you can’t find pink candy melts, use white chocolate and add a few drops of pink food coloring. You can also use regular white chocolate and skip the pink altogether.
- Semi-sweet chocolate: Feel free to use milk chocolate or dark chocolate based on your preference. Chocolate chips work too, though they don’t melt quite as smoothly as bar chocolate.
- Candy hearts and sprinkles: The fun part is that decorations are totally up to you! Try crushed candy canes, chopped nuts, dried fruit, or any colorful sprinkles you have on hand. M&Ms or other small candies work great too.
Watch Out for These Mistakes While Making
The biggest mistake when making chocolate bark is overheating the chocolate, which can cause it to become grainy and lose its smooth, glossy finish – always melt your chocolate slowly in 30-second intervals in the microwave, stirring between each burst, or use a double boiler method keeping the heat gentle and steady.
Getting even a drop of water in your melted chocolate can make it seize up and become unusable, so make sure all your tools and bowls are completely dry before starting, and avoid working with chocolate on humid days.
To achieve those clean, crisp layers, let each chocolate layer set for about 5-10 minutes in the refrigerator until it’s just starting to firm up but still slightly tacky before adding the next layer – if you wait too long between layers, they might separate when you break the bark.
For the perfect finishing touch, add your decorative toppings while the final layer is still wet, and gently press them into the surface to ensure they stick once the bark sets.

What to Serve With Chocolate Bark?
This sweet treat is perfect for serving alongside other Valentine’s Day goodies at a dessert table or party! A warm cup of coffee, hot chocolate, or tea makes the perfect beverage pairing – the warmth of the drink helps bring out the richness of both the white and dark chocolate. If you’re putting together a dessert platter, try adding some fresh strawberries, raspberries, or other red fruits to keep with the Valentine’s theme. For a fun movie night setup, serve the bark broken into smaller pieces alongside some salty snacks like popcorn or pretzels to create that perfect sweet-and-salty combo that everyone loves.
Storage Instructions
Keep Fresh: This chocolate bark stays perfect when kept in an airtight container at room temperature, away from direct sunlight and heat. It’ll keep its snap and shine for up to 2 weeks. I like to place pieces of parchment paper between layers to prevent them from sticking together.
Cool Storage: If your kitchen runs warm, you can store the bark in the fridge. Just keep in mind that when you take it out, you might notice some condensation on the surface – this is totally normal! Let it come to room temperature before enjoying to get the best texture and flavor.
Gift Packaging: Planning to give this as a gift? Package the bark in cellophane bags or pretty boxes lined with parchment paper. If you’re shipping it, choose cooler days and include an ice pack if needed to prevent melting during transit.
| Preparation Time | 10-15 minutes |
| Cooking Time | 15-20 minutes |
| Total Time | 25-35 minutes |
| Level of Difficulty | Easy |
Estimated Nutrition
Estimated nutrition for the whole recipe (without optional ingredients):
- Calories: 1400-1600
- Protein: 15-20 g
- Fat: 80-90 g
- Carbohydrates: 150-180 g
Ingredients
For the white chocolate layer:
- 6 oz white chocolate (high-quality white chocolate is key for a smooth melt)
- 2 oz pink candy melts
For the dark chocolate layer:
- 8 oz semi-sweet chocolate (use Ghirardelli for best flavor)
For the decoration:
- candy hearts (small, pastel-colored hearts work best)
- sprinkles (Valentine’s Day themed preferred)
Step 1: Prepare the Baking Sheet
Line a large baking sheet with parchment paper or a silicone baking mat.
Set this aside for later use.
This will help your chocolate bark release easily once it’s set.
Step 2: Melt the Chocolates
Begin by melting the white chocolate and pink candy melts together.
You can use a double boiler or a microwave for this process.
If you opt for the microwave, make sure to stir the chocolate every 20 seconds to prevent it from seizing.
Once melted, set aside.
Next, melt the semi-sweet chocolate separately.
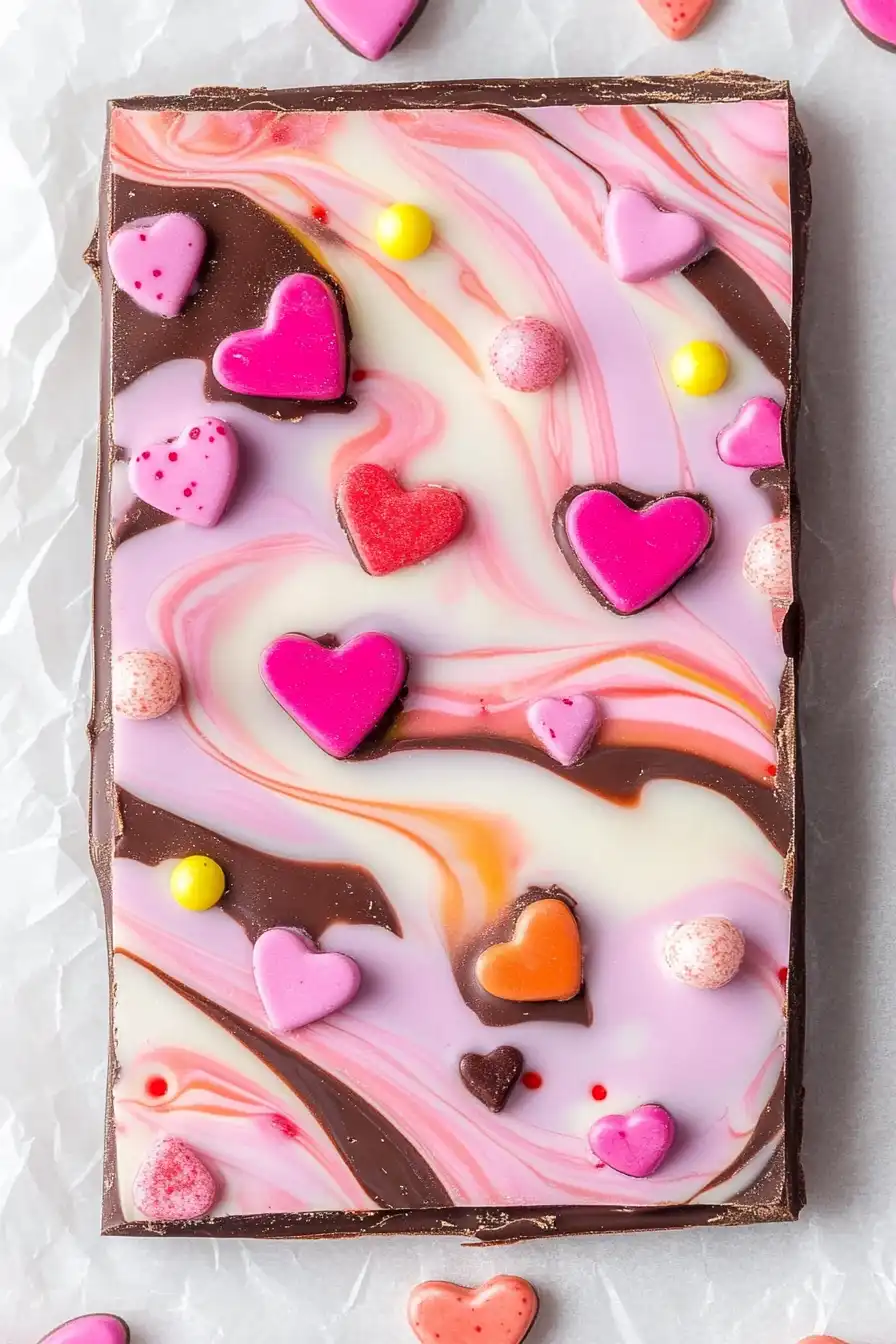
Step 3: Create the Swirled Bark
Pour the melted semi-sweet chocolate onto the prepared baking sheet and spread it out into a large, even rectangle.
Drizzle the previously melted white chocolate mixture on top.
Using a toothpick or knife, gently swirl the layers together to create a marble effect.
Step 4: Decorate and Set
While the chocolate is still soft, decorate the top of the bark with candy hearts and sprinkles to your liking.
Allow the chocolate to set uncovered, either at room temperature or in the refrigerator.
It typically takes about 45 minutes to set in the refrigerator.
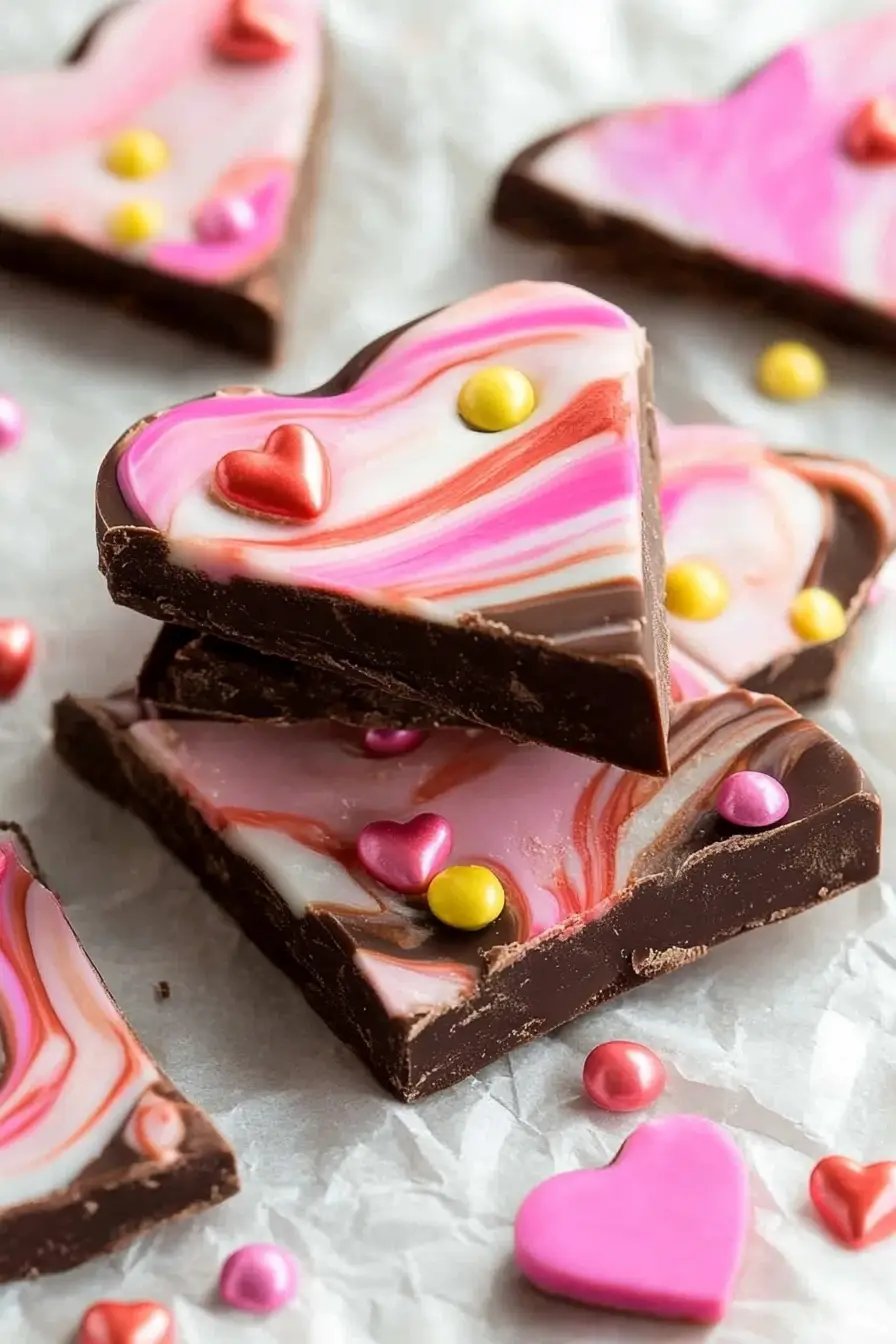
Step 5: Break and Store
Once the chocolate has fully hardened, break it into pieces as large or as small as you prefer.
For storage, keep the bark in an airtight container at room temperature in a cool, dry place for up to 1 week, or in the refrigerator for up to 2 weeks.
