I thought I was being clever when I first made a peanut butter and jelly sandwich cake for my daughter’s birthday. She was obsessed with PB&J sandwiches at the time, so I figured, why not turn her favorite lunch into dessert?
What I didn’t expect was how much the adults would love it too. It turns out there’s something really comforting about those familiar flavors in cake form. The peanut butter frosting tastes just like the real thing, and the jelly layer adds that sweet-tart kick we all remember from childhood. Plus, it’s way easier to make than it looks—basically just a vanilla cake with some smart flavor additions.
Why You’ll Love This Peanut Butter and Jelly Sandwich Cake
- Nostalgic comfort food – This cake brings back all those childhood memories of your favorite sandwich, but in dessert form that both kids and adults will go crazy for.
- Simple ingredients – You probably already have most of these pantry staples at home, making it an easy last-minute dessert option.
- Quick and easy – Using a boxed cake mix as the base saves you time while still delivering a homemade taste that no one will guess came from a box.
- Perfect for any occasion – Whether it’s a birthday party, potluck, or just because you’re craving something sweet, this cake fits the bill perfectly.
- Crowd-pleasing flavors – The classic combination of peanut butter and jelly never goes out of style, making this a guaranteed hit with everyone at the table.
What Kind of Peanut Butter Should I Use?
For this cake, you’ll want to stick with creamy peanut butter rather than crunchy since it needs to blend smoothly into the frosting. Regular store-bought peanut butter like Jif or Skippy works perfectly here – the slightly sweet, processed varieties actually complement the cake better than natural peanut butters. Natural peanut butter can be a bit too oily and might make your frosting too thin, plus it doesn’t have that classic PB&J flavor we’re going for. If you only have natural peanut butter on hand, just make sure to stir it well and maybe use a little less milk in your frosting to account for the extra oils.
Options for Substitutions
This fun cake is pretty forgiving when it comes to swaps, so here are some easy substitutions:
- White cake mix: Yellow cake mix works just as well and gives you that classic cake flavor. You can even try vanilla cake mix if that’s what you have on hand.
- Creamy peanut butter: Crunchy peanut butter adds a nice texture if you like a bit of crunch in your frosting. Just make sure it’s not the natural kind that separates, as it won’t mix as smoothly.
- Grape jelly: Feel free to use strawberry jam, raspberry preserves, or any flavor you love. Just avoid chunky preserves with big fruit pieces as they can make spreading tricky.
- Milk: Heavy cream makes the frosting extra rich, or you can use any milk you have – even almond or oat milk works fine.
- Confectioners’ sugar: Start with 1½ cups and add more as needed to get your desired consistency. The amount can vary depending on how thick your peanut butter is.
- Unsalted butter: Salted butter works too – just reduce any added salt in the recipe by half. The frosting will have a slightly different flavor but still tastes great.
Watch Out for These Mistakes While Baking
The biggest mistake when making this nostalgic cake is not letting your butter and peanut butter come to room temperature first, which can lead to lumpy frosting that won’t spread smoothly across your cake layers.
Another common error is making the peanut butter frosting too thick – start with less confectioners’ sugar and add gradually until you reach a spreadable consistency, adding milk one tablespoon at a time if needed.
When it comes to the jelly layer, resist the urge to spread it too thick or it will ooze out the sides and make your cake messy, and always let each cake layer cool completely before assembling to prevent the jelly from melting.
Finally, don’t skip greasing and flouring your cake pans properly – this cake can be sticky due to the peanut butter, so take extra care to ensure easy removal from the pans.
What to Serve With Peanut Butter and Jelly Sandwich Cake?
This fun cake is perfect on its own, but a cold glass of milk is pretty much mandatory – it’s like having a PB&J sandwich but in cake form! I love serving it with vanilla ice cream on the side, especially if you want to make it feel more like a special dessert. Fresh strawberries or sliced bananas work great too since they pair so well with both peanut butter and jelly flavors. For parties, try cutting it into smaller squares and serving with coffee or even chocolate milk for the kids who want the full nostalgic experience.
Storage Instructions
Keep Fresh: This cake stays moist and delicious when covered with plastic wrap or stored in a cake keeper at room temperature for up to 3 days. The peanut butter frosting actually helps keep everything nice and soft. Just make sure it’s completely cooled before covering so the frosting doesn’t get messy.
Refrigerate: If you want to keep your cake longer, pop it in the fridge where it’ll stay good for up to a week. The cool temperature might firm up the peanut butter frosting a bit, but just let it sit out for about 30 minutes before serving and it’ll soften right back up.
Freeze: You can freeze individual slices wrapped in plastic wrap and then placed in freezer bags for up to 3 months. This is great for portion control or when you want to save some for later. Just thaw at room temperature for about an hour before enjoying.
| Preparation Time | 20-30 minutes |
| Cooking Time | 30-35 minutes |
| Total Time | 60-70 minutes |
| Level of Difficulty | Medium |
Estimated Nutrition
Estimated nutrition for the whole recipe (without optional ingredients):
- Calories: 3800-4200
- Protein: 45-55 g
- Fat: 145-170 g
- Carbohydrates: 570-620 g
Ingredients
For the cake:
- All-purpose flour, for dusting
- 1 stick unsalted butter (I like Kerrygold unsalted butter for this)
- 1 box white cake mix
For the peanut butter frosting:
- 1 cup creamy peanut butter (I use Jif creamy peanut butter)
- 2 to 3 tbsp milk
- 1 to 1 1/3 cups confectioners’ sugar
- 1 stick unsalted butter
For the jelly layer:
- 3/4 cup grape jelly
Step 1: Prepare the Cake Pan
- 1 stick unsalted butter, at room temperature, plus more for the pan
- all-purpose flour, for dusting
Preheat your oven to 350°F (175°C).
Generously butter a 9-inch-square cake pan, then line it with parchment paper.
Butter the parchment as well and dust the entire pan with all-purpose flour to prevent sticking.
Step 2: Mix and Bake the Cake
- 1 box white cake mix (18.25 oz), plus what the mix requires
Prepare the white cake mix according to its package instructions, using any additional ingredients the mix requires.
Pour the batter into your prepared pan, filling it about three-quarters full; save any leftover batter for another use.
Bake the cake for 30 to 35 minutes, or until a toothpick inserted in the center comes out clean.
Step 3: Cool and Slice the Cake
Let the cake cool in the pan for 10 minutes, then invert it onto a wire rack.
Allow it to cool completely.
Once fully cooled, move the cake to a work surface.
Use a serrated knife to trim off the domed top if necessary, then slice the cake horizontally to create two even layers.
I find letting the cake cool completely prevents it from crumbling when slicing.
Step 4: Make the Peanut Butter Frosting
- 1 stick unsalted butter, at room temperature
- 1 cup creamy peanut butter
- 1 to 1 1/3 cups confectioners’ sugar
- 2 to 3 tbsp milk
In a mixing bowl, beat together 1 stick of unsalted butter (at room temperature) and 1 cup of creamy peanut butter until the mixture is smooth.
Gradually incorporate 1 to 1 1/3 cups of confectioners’ sugar and 2 to 3 tablespoons of milk, alternating between the two and beating after each addition, until the frosting is fluffy and spreadable.
Step 5: Prepare the Grape Jelly and Assemble Filling
- peanut butter frosting from Step 4
- 3/4 cup grape jelly
In a separate bowl, whisk 3/4 cup of grape jelly until it becomes loose and easy to spread.
Set aside.
Place the bottom cake layer on your work surface.
Spread a thick, even layer of the peanut butter frosting (from Step 4) over the bottom layer.
Next, gently spread the whisked grape jelly over the peanut butter layer, ensuring it reaches the edges.
For extra nostalgia, I like to slightly warm the jelly so it spreads perfectly without tearing the frosting.
Step 6: Complete and Present the Cake
- sliced cake layers from Step 3
- assembled cake with filling from Step 5
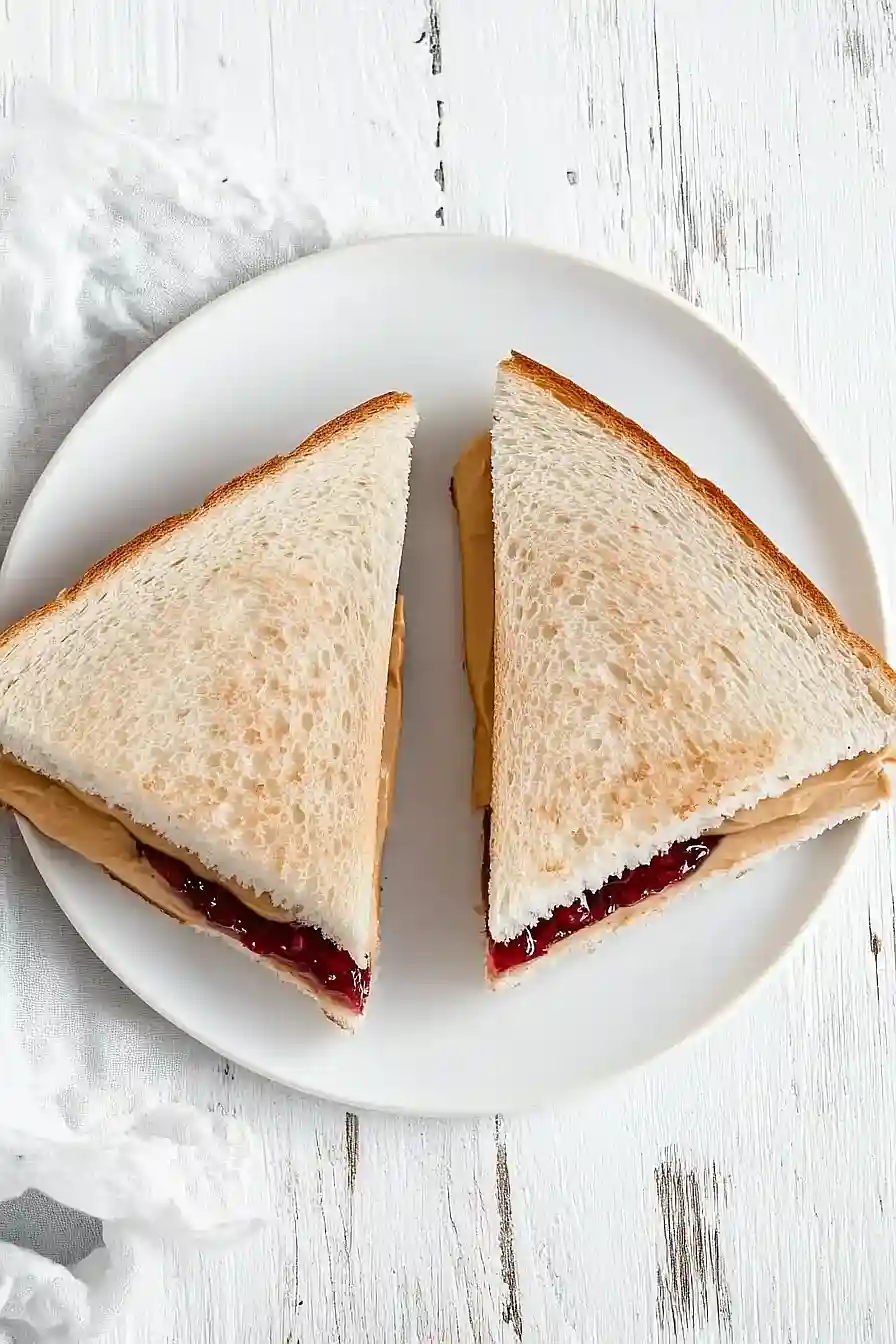
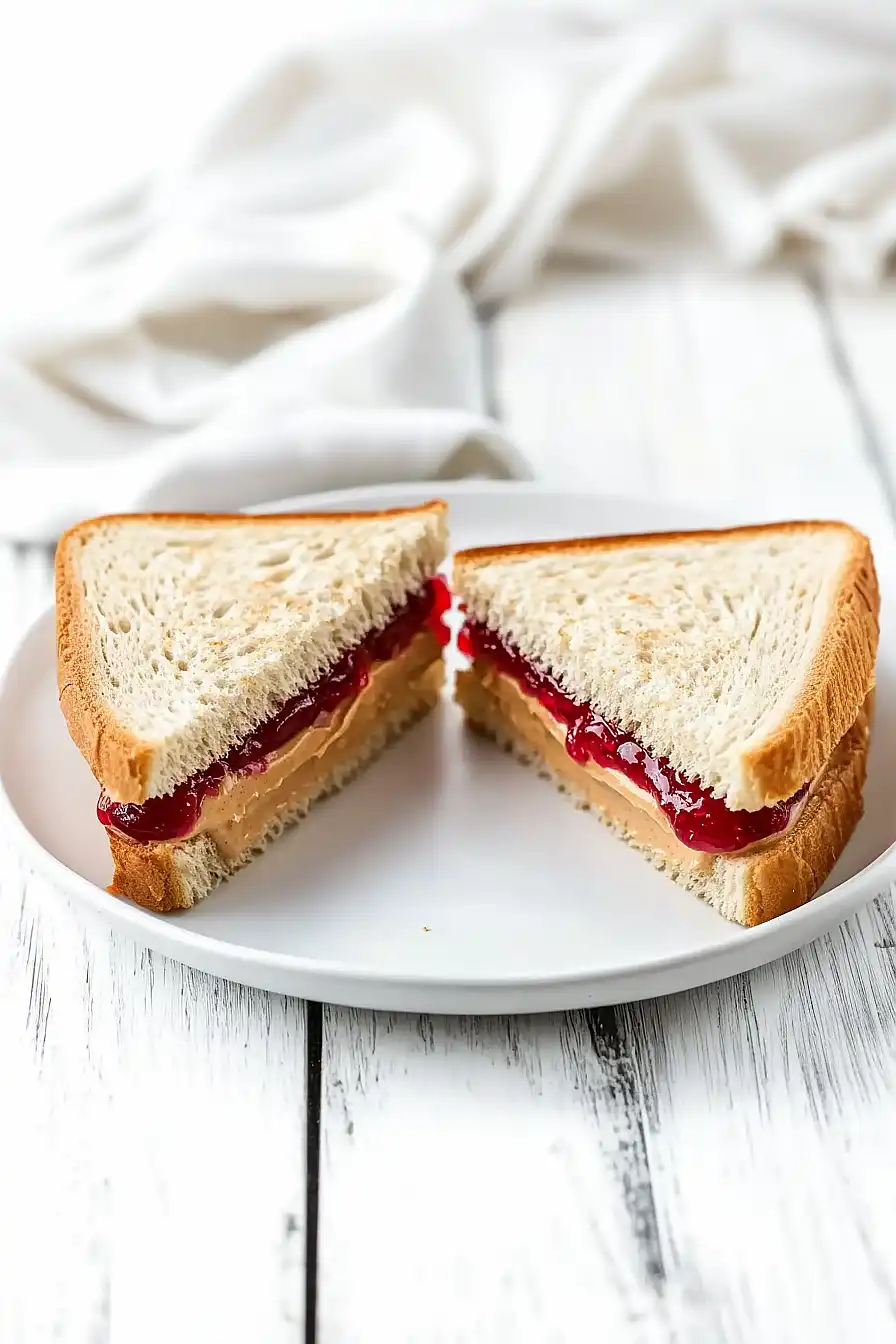
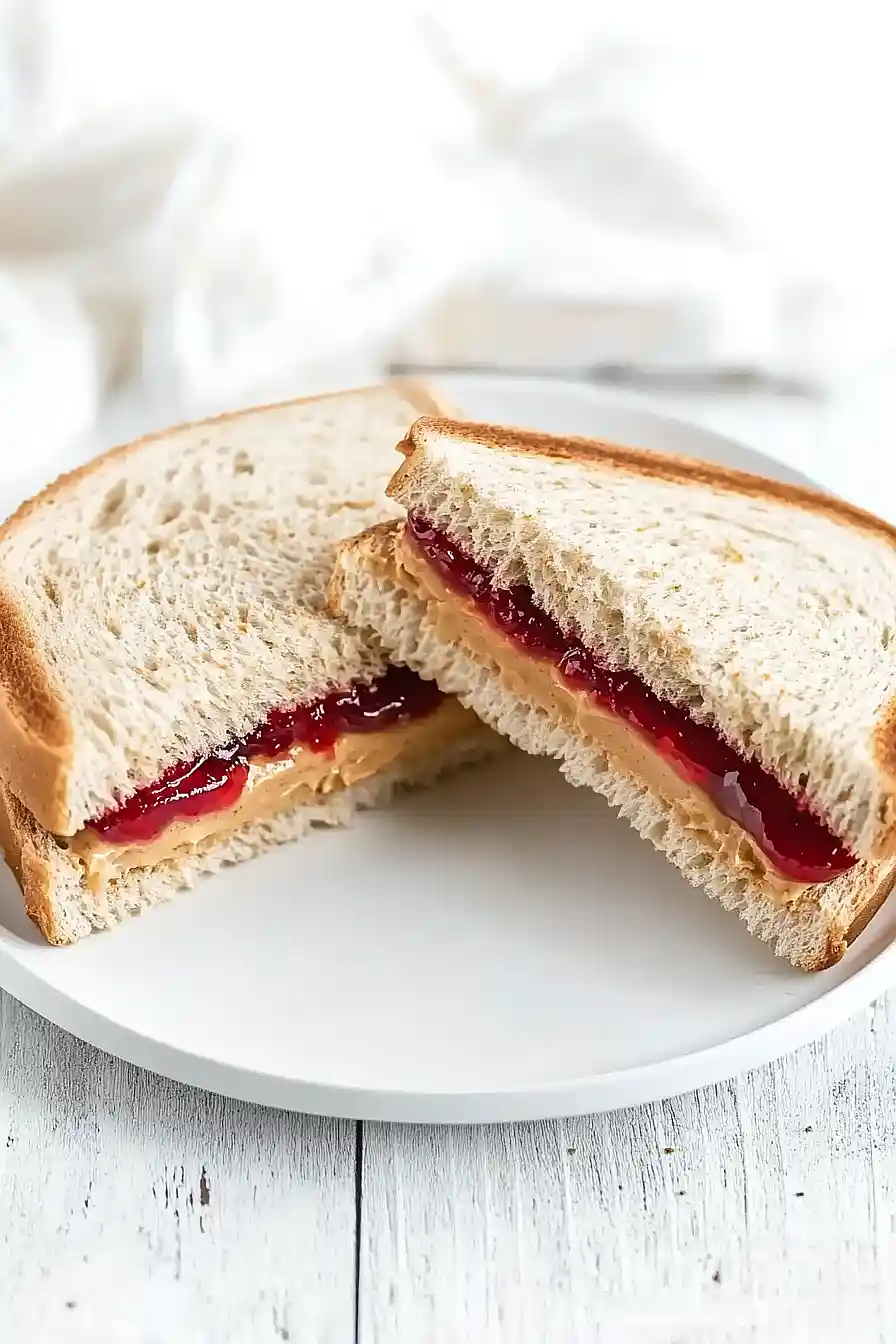
Carefully place the remaining cake layer on top of the jelly-covered layer to assemble the cake.
Cut the assembled cake diagonally in half and transfer the halves to a serving plate, separating them slightly to showcase the delightful peanut butter and jelly filling.
