Coming up with fun fall treats that actually look as good as they taste can feel like an uphill battle. Between work deadlines and getting the kids to their after-school activities, who has time to fuss with complicated decorating techniques or worry about whether your dessert will fall apart the moment someone tries to serve it?
That’s where this pumpkin shaped fudge comes to the rescue: it’s simple enough to make on a busy afternoon, looks festive without requiring any fancy skills, and tastes so good that both kids and adults will be asking for seconds.
Why You’ll Love This Pumpkin Shaped Fudge
- Perfect fall treat – These adorable pumpkin-shaped pieces bring all the cozy autumn vibes to your dessert table and make everyone smile.
- Simple ingredients – You probably have most of these pantry staples on hand already, making this an easy last-minute dessert option.
- Great for parties – The cute pumpkin shape makes these perfect for Halloween parties, fall gatherings, or just adding some seasonal fun to your week.
- Real pumpkin flavor – The pumpkin puree and cinnamon give this fudge that authentic fall taste without being too overwhelming or artificial.
- Make-ahead friendly – You can prepare these a day or two in advance, making them ideal for busy holiday schedules or when you’re hosting guests.
What Kind of Pumpkin Puree Should I Use?
For this fudge recipe, you’ll want to use plain pumpkin puree, not pumpkin pie filling – there’s a big difference! Pumpkin pie filling already has spices and sugar added, which will throw off the balance of your fudge. Look for canned pumpkin puree in the baking aisle, with brands like Libby’s being a reliable choice. You can also make your own puree from fresh pumpkins if you’re feeling ambitious, but the canned version works perfectly and saves you time. Just make sure to give the can a good stir before measuring, as the puree can separate a bit while sitting on the shelf.
Options for Substitutions
This pumpkin fudge is pretty forgiving when it comes to swaps, though a few ingredients are key to getting that perfect texture:
- Sweetened condensed milk: This is really the backbone of the fudge, so I wouldn’t recommend substituting it. It’s what gives the fudge its creamy, smooth texture that sets properly.
- Pumpkin puree: Make sure you’re using plain pumpkin puree, not pumpkin pie filling. If you don’t have canned puree, you can roast and mash your own pumpkin, just make sure to drain any excess moisture.
- Semi-sweet chocolate chips: You can use milk chocolate chips for a sweeter fudge, or dark chocolate chips if you prefer less sweetness. White chocolate chips would also work for a different flavor profile.
- Cinnamon: Feel free to get creative with spices! Try pumpkin pie spice, nutmeg, or a pinch of ginger instead. You could also add a dash of vanilla extract for extra flavor.
- Unsalted butter: Salted butter works fine too – just reduce any additional salt in the recipe. The butter helps with texture, so don’t skip it entirely.
Watch Out for These Mistakes While Cooking
The biggest mistake when making pumpkin fudge is not stirring constantly while heating the mixture, which can cause the bottom to burn and create a bitter taste that ruins the whole batch.
Another common error is adding the pumpkin puree too quickly or when the mixture is too hot, as this can cause the fudge to seize up or become grainy instead of smooth and creamy.
To get the perfect consistency, make sure to cook the mixture until it reaches the soft-ball stage (around 235°F on a candy thermometer), and don’t rush the cooling process – let it set at room temperature for at least 2 hours before cutting.
For easier shaping, lightly grease your hands or use a small cookie scoop when forming the pumpkin shapes, and remember that the fudge will firm up more as it cools completely.

What to Serve With Pumpkin Shaped Fudge?
This cute pumpkin fudge is perfect on its own as a sweet treat, but it really shines when served alongside other fall desserts at parties or gatherings. I love setting it out on a dessert table with apple cider donuts, caramel apples, or some warm snickerdoodle cookies for a cozy autumn spread. The rich, creamy texture pairs beautifully with a hot cup of coffee or spiced apple cider, especially on chilly evenings. You can also crumble pieces over vanilla ice cream or use them as a fun topping for pumpkin spice cupcakes to double down on those fall flavors.
Storage Instructions
Store: Your pumpkin fudge will stay fresh and creamy when kept in an airtight container in the refrigerator for up to 2 weeks. I like to layer pieces between parchment paper to prevent them from sticking together. The fudge actually tastes even better after a day or two as the flavors meld together!
Freeze: This fudge freezes really well for longer storage. Wrap individual pieces in plastic wrap or store them in a freezer-safe container with parchment paper between layers for up to 3 months. It’s great to have some stashed away for unexpected guests or when you need a quick sweet treat.
Serve: Let frozen fudge thaw at room temperature for about 10-15 minutes before serving – it’ll be perfectly soft and ready to enjoy. If you’re serving straight from the fridge, you can let it sit out for just a few minutes to take the chill off, though many people love it cold too!
| Preparation Time | 15-25 minutes |
| Cooking Time | 15-20 minutes |
| Total Time | 90-100 minutes |
| Level of Difficulty | Medium |
Estimated Nutrition
Estimated nutrition for the whole recipe (without optional ingredients):
- Calories: 1300-1400
- Protein: 20-25 g
- Fat: 30-35 g
- Carbohydrates: 240-260 g
Ingredients
For the pumpkin fudge base:
- 1 tbsp unsalted butter
- 1 tsp ground cinnamon (for best flavor and aroma)
- 1/4 cup pumpkin puree
- 14 oz sweetened condensed milk
For shaping and coating:
- 1 tbsp unsalted butter (melted and cooled slightly)
- 1/2 cup granulated sugar (for coating the fudge)
For decorating:
- 9 semi-sweet chocolate chips (for the pumpkin stems)
Step 1: Cook the Pumpkin Fudge Base
- 1 can (14 oz) sweetened condensed milk
- 1/4 cup pureed pumpkin
- 1 tbsp unsalted butter
- 1 tsp ground cinnamon
In a medium saucepan, combine the sweetened condensed milk, pureed pumpkin, unsalted butter, and ground cinnamon.
Cook over medium heat, stirring constantly to prevent sticking.
The mixture will come to a low boil.
Continue cooking and stirring until the mixture thickens, about 5-7 minutes.
You’ll know it’s ready when you can run a silicone spoon along the bottom of the pan and the mixture slowly comes back together after about 5-8 seconds.
Remove from the heat and transfer the mixture to a large bowl.
Allow it to cool at room temperature for 10-15 minutes, then place it in the refrigerator to chill for 1 hour.
Step 2: Prepare Sugar and Shaping Tools
- 1/2 cup granulated sugar
- 1 tbsp unsalted butter (for greasing hands, use as needed)
While the pumpkin fudge mixture is chilling, pour the granulated sugar into a small bowl and set it aside for coating.
Line a baking sheet with parchment paper to prevent sticking, and prepare to grease your hands with a small amount of butter or non-stick spray for rolling the fudge.
Step 3: Shape and Coat the Pumpkin Fudge
- chilled pumpkin fudge mixture from Step 1
- granulated sugar from Step 2
Once the fudge mixture is thoroughly chilled, grease your hands lightly with butter to prevent sticking.
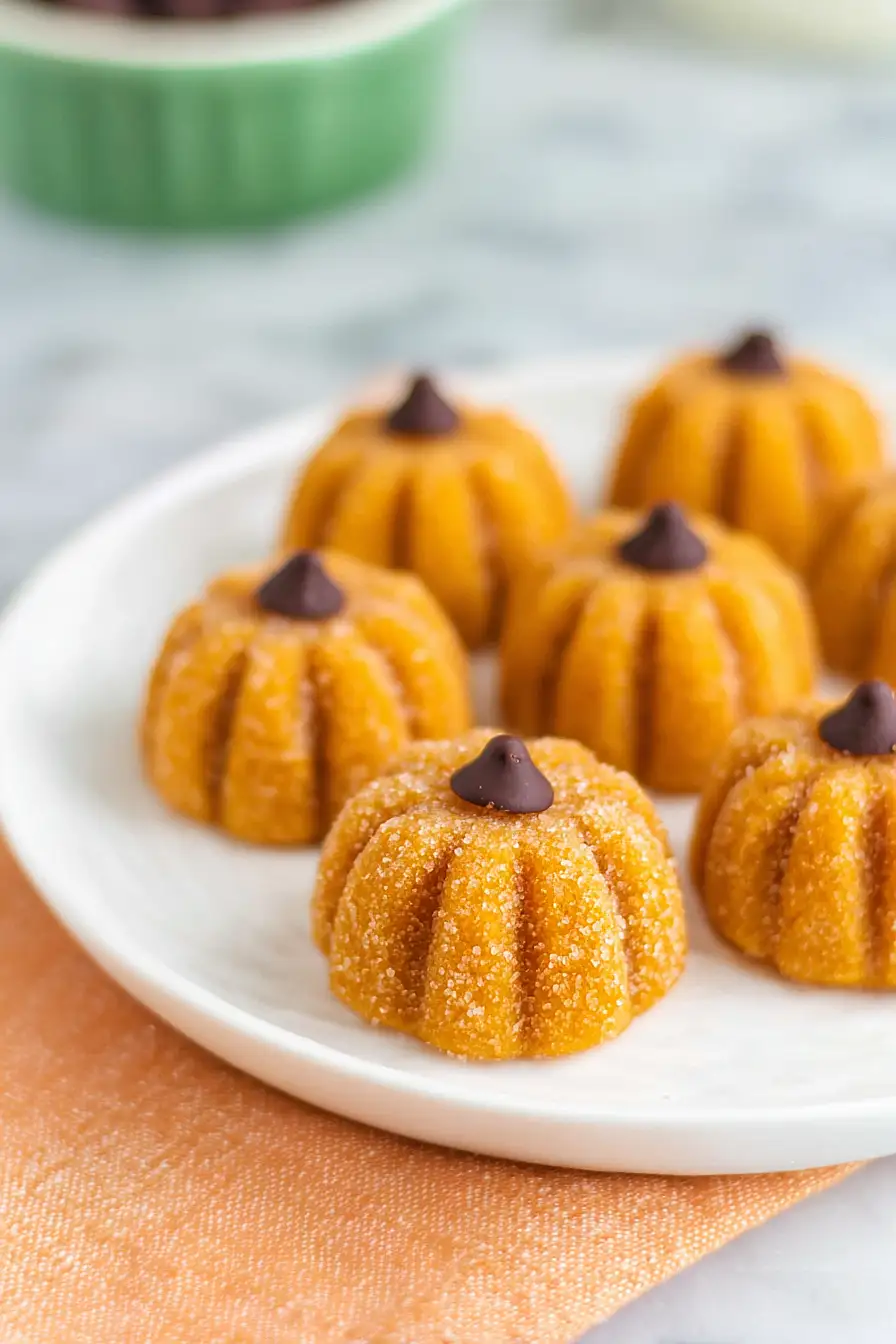
Take about 2 tablespoons of the cooled mixture and roll it into a ball.
Dip each ball into the sugar and roll until completely coated, then place on the prepared tray.
If you prefer smaller pumpkins, use just 1 tablespoon of mixture per ball to yield 18 pieces instead of 9.
I find that using a bit of butter on your hands really helps keep the fudge from sticking, making this step much easier!
Step 4: Decorate and Finish the Pumpkins
- 9 semi-sweet chocolate chips
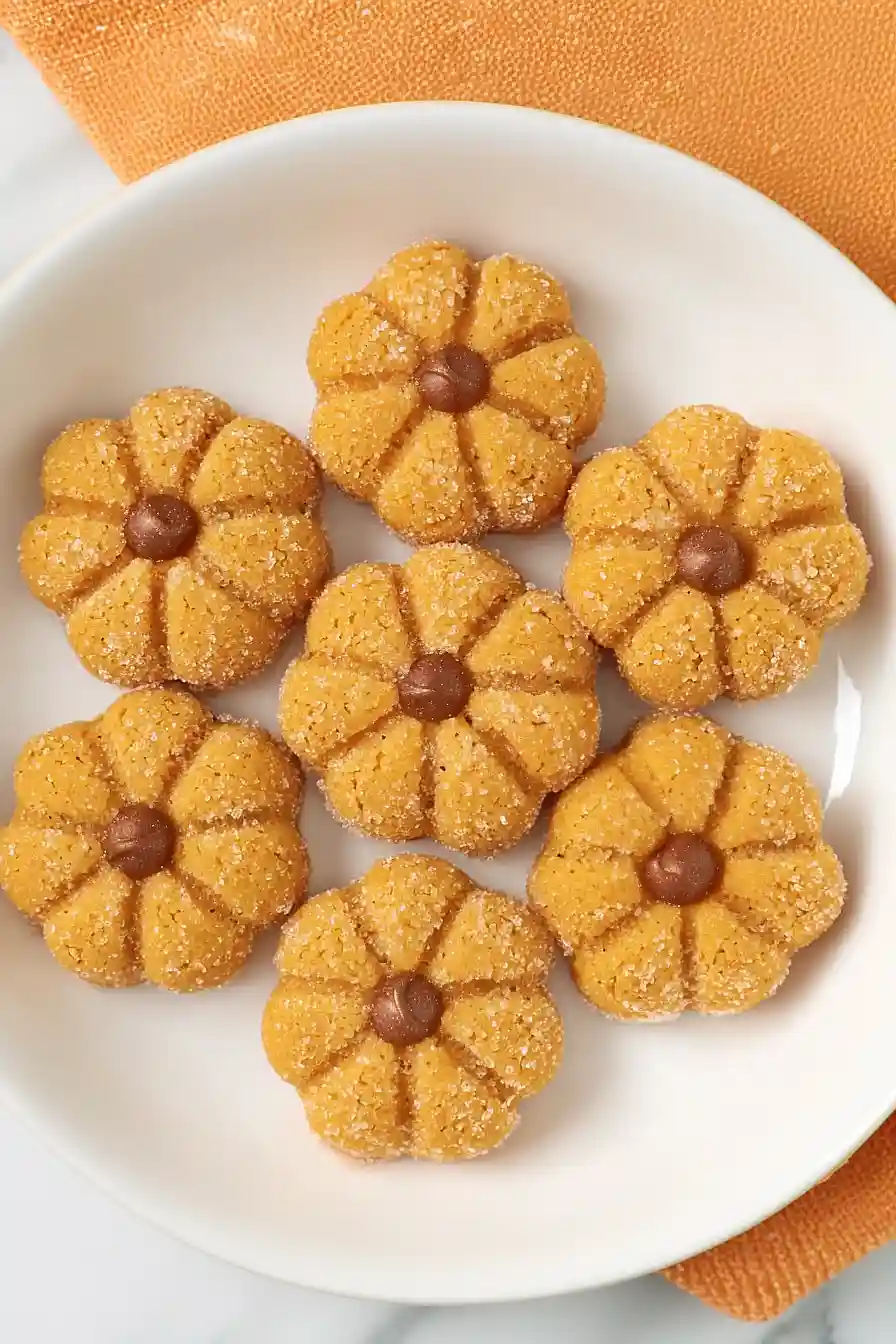
Using a toothpick, make lines all around each sugar-coated ball from bottom to top to mimic the ridges of a pumpkin.
Gently press your thumb into the top of each ball to create a slight indentation.
Add a semi-sweet chocolate chip to the top of each pumpkin, pressing down slightly so it stays in place.
Serve immediately, or store the decorated pumpkin fudge pumpkins in the refrigerator until ready to serve.
