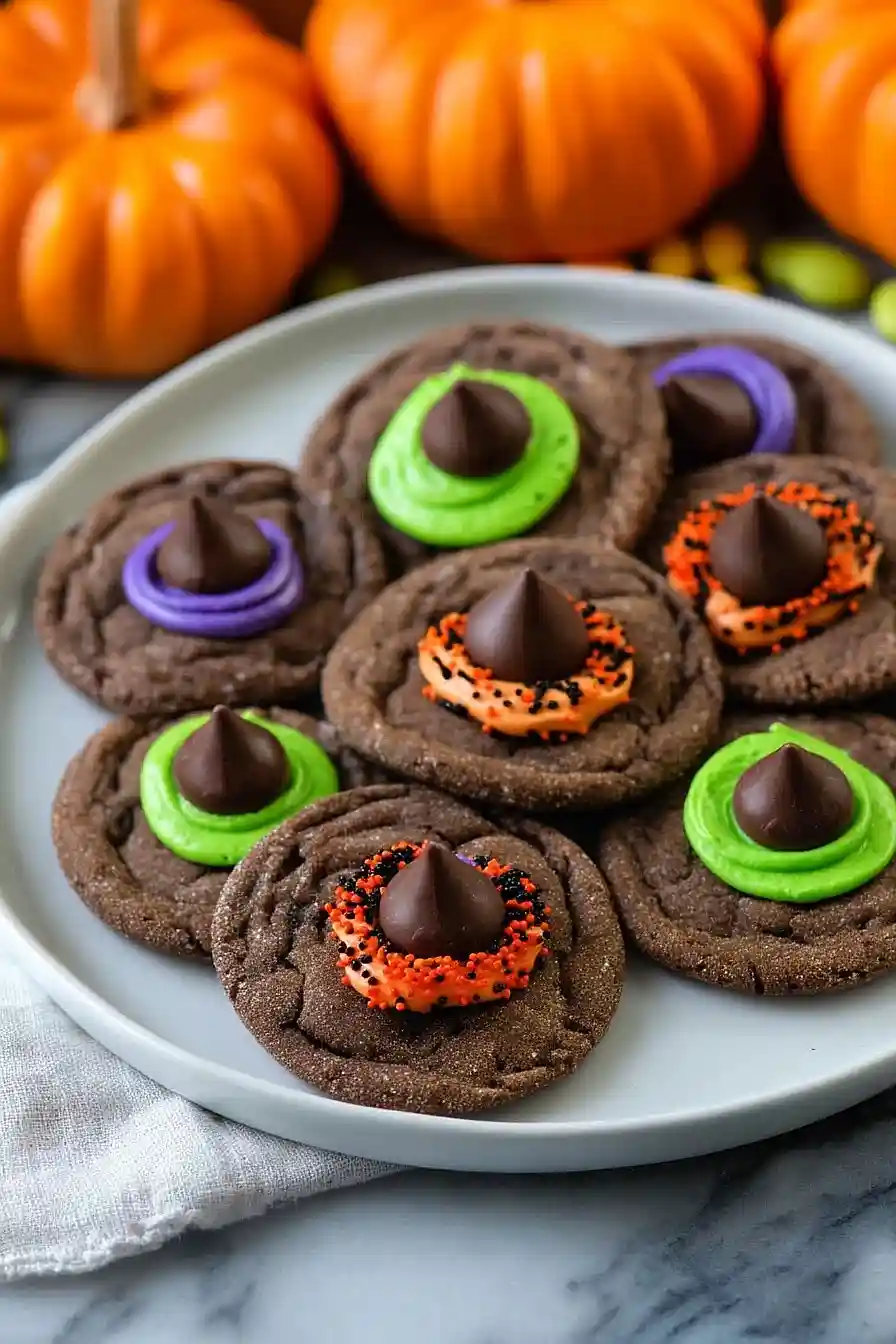
Here is my favorite witch hat cookie recipe, with simple sugar cookies shaped into pointed hats and dipped in chocolate, then decorated with colorful sprinkles and candy details.
These witch hat cookies are always a hit at our Halloween parties. My kids love helping me dip them in chocolate and add all the fun decorations. They disappear from the cookie jar faster than you can say “trick or treat!”
Why You’ll Love These Witch Hat Cookies
- Perfect Halloween treat – These spooky cookies are exactly what you need for Halloween parties, trick-or-treaters, or just getting into the festive spirit with the kids.
- Quick and easy – With just 30-40 minutes from start to finish, you can whip up a batch of these fun cookies without spending your whole day in the kitchen.
- Kid-friendly activity – The simple assembly with Hershey’s Kisses and sprinkles makes this a great baking project to do with little ones who love to help decorate.
- Soft chocolate cookies – The cocoa powder gives these cookies a rich chocolate flavor while keeping them tender and chewy, not dry or crumbly.
- Customizable decorating – You can use any color frosting and sprinkles you have on hand, making each batch unique and letting your creativity shine.
What Kind of Cocoa Powder Should I Use?
For these witch hat cookies, you’ll want to stick with natural unsweetened cocoa powder rather than Dutch-processed cocoa powder. Natural cocoa powder has a slightly acidic quality that works perfectly with the baking soda in this recipe to help the cookies rise and spread properly. Dutch-processed cocoa has been treated to neutralize its acidity, which can throw off the chemical reaction and affect your cookie texture. You can find natural cocoa powder at most grocery stores – brands like Hershey’s and Ghirardelli both make good options that will give your cookies that rich chocolate flavor without being too bitter.

Options for Substitutions
These spooky cookies are pretty forgiving when it comes to swaps, so here are some easy substitutions:
- Natural unsweetened cocoa powder: Regular unsweetened cocoa powder works just fine if that’s what you have. Dutch-processed cocoa will give you a slightly richer flavor, but either way your cookies will taste great.
- Brown sugar: You can use all granulated sugar if you’re out of brown sugar, though you’ll lose a bit of that chewy texture. Light or dark brown sugar both work equally well.
- Hershey’s Kisses: While Kisses are classic for the witch hat shape, you can use other cone-shaped chocolates like Bugles dipped in melted chocolate, or even make your own cones with melted chocolate and a piping bag.
- Gel food coloring: Liquid food coloring works too, just use less since it’s more watery. Start with a few drops and add more until you get your desired Halloween colors.
- Halloween sprinkles: Any festive sprinkles work here – orange and black nonpareils, mini chocolate chips, or even crushed Oreo cookies for a spooky effect.
- Vanilla extract: Feel free to swap vanilla for almond extract for a different flavor twist, but use half the amount since almond extract is stronger.
Watch Out for These Mistakes While Baking
The biggest mistake when making witch hat cookies is rolling the dough balls in sugar when they’re too warm, which causes the sugar coating to melt off during baking instead of creating that nice crackled surface – make sure your dough is properly chilled for at least 30 minutes before rolling.
Another common error is pressing the Hershey’s Kisses into the cookies while they’re still hot from the oven, which can cause the chocolate to melt completely and lose its shape – wait about 2-3 minutes for the cookies to cool slightly before gently pressing the kisses on top.
Don’t overbake these cookies either, as they’ll continue cooking on the hot pan even after you remove them from the oven, so take them out when the edges are just set but the centers still look slightly soft.
Finally, resist the urge to move the cookies too soon after adding the chocolate kisses, as they need time to set properly or you’ll end up with lopsided witch hats that slide right off.

What to Serve With Witch Hat Cookies?
These spooky cookies are perfect for Halloween parties and pair wonderfully with a big glass of cold milk for dunking. You can set them out alongside other Halloween treats like candy corn, chocolate eyeballs, or pumpkin-shaped candies to create a fun dessert spread. For a cozy autumn vibe, serve them with hot apple cider or warm spiced tea that complements the chocolate cookie base. They also make great additions to trick-or-treat goodie bags or as part of a Halloween movie night snack table with popcorn and other seasonal goodies.
Storage Instructions
Keep Fresh: These spooky witch hat cookies stay soft and chewy when stored in an airtight container at room temperature for up to one week. Just make sure they’re completely cooled before storing, and layer them with parchment paper if you’re stacking them to keep the frosting looking perfect.
Freeze: You can freeze the baked cookies (without frosting) in a freezer-safe container for up to 3 months. I like to freeze them in single layers with parchment paper between each cookie. When you’re ready to decorate, just thaw them at room temperature and add your frosting and Hershey’s Kisses.
Make Ahead: The cookie dough can be made up to 2 days ahead and stored in the refrigerator, or you can scoop the dough into balls and freeze them for up to 3 months. Bake frozen dough balls straight from the freezer, just add an extra minute or two to the baking time.
| Preparation Time | 15-20 minutes |
| Cooking Time | 8-11 minutes |
| Total Time | 30-40 minutes |
| Level of Difficulty | Medium |
Estimated Nutrition
Estimated nutrition for the whole recipe (without optional ingredients):
- Calories: 2900-3200
- Protein: 25-30 g
- Fat: 140-160 g
- Carbohydrates: 400-440 g
Ingredients
For the cookies:
- 1 tsp vanilla extract
- 1/2 cup unsalted butter (softened, I prefer Kerrygold)
- 1 1/2 cups all-purpose flour
- 1/2 tsp baking soda
- 1/2 cup white sugar
- 1/4 cup cocoa powder (unsweetened, for rich color)
- 1/2 cup brown sugar (packed well, for moisture)
- 1 large egg
- 1/2 tsp salt
- 1/3 cup sugar (for coating the cookies before baking)
For the frosting and assembly:
- 1 tsp vanilla extract (pure extract for best flavor)
- Halloween sprinkles
- Hershey’s Kisses
- 1/2 cup unsalted butter (room temp, for smooth frosting)
- Gel food coloring (assorted colors)
- 1 cup powdered sugar
Step 1: Preheat Oven and Prepare Dry Ingredients
- 1 1/2 cups all-purpose flour
- 1/4 cup unsweetened cocoa powder
- 1/2 tsp baking soda
- 1/2 tsp salt
Preheat the oven to 350ºF.
In a mixing bowl, stir together the all-purpose flour, unsweetened cocoa powder, baking soda, and salt until well mixed.
Set aside.
Step 2: Cream Butter and Sugars
- 1/2 cup unsalted butter, softened
- 1/2 cup white sugar
- 1/2 cup packed brown sugar
In a separate large mixing bowl, cream the softened unsalted butter, white sugar, and packed brown sugar together with a mixer set on low speed.
Mix until the butter is light and fluffy, making sure all sugar is incorporated.
Step 3: Combine Wet and Dry Ingredients to Form Dough
- 1 large egg
- 1 tsp vanilla extract
- dry ingredient mixture from Step 1
Add the egg and vanilla extract to the creamed butter and sugar, mixing again on low until just combined.
Gradually add in the dry ingredient mixture from Step 1, mixing on low or by hand until a smooth dough forms.
Avoid over-mixing.
Step 4: Shape, Roll, and Bake Cookies
- cookie dough from Step 3
- 1/3 cup sugar (for coating)
Use a small cookie scoop or tablespoon to portion out tablespoon-sized balls of dough.
Roll each dough ball between your hands to form a uniform sphere, then roll them in granulated sugar to coat.
Arrange the dough balls 2-3 inches apart on a silicone-lined baking sheet.
Bake one sheet at a time for 8-11 minutes, then let the cookies cool on the baking sheet for 10 minutes before transferring to a wire cooling rack.
Cool completely before decorating.
I like to let them cool a bit longer to ensure the frosting doesn’t melt when added.
Step 5: Make Colored Frosting
- 1/2 cup unsalted butter, room temperature
- 1 cup confectioners’ sugar
- 1 tsp vanilla extract
- gel food coloring, assorted
In a mixing bowl, combine the room temperature unsalted butter, confectioners’ sugar, and vanilla extract.
Beat with an electric mixer on medium speed until the frosting is light and fluffy.
Divide the frosting into separate bowls and add gel food coloring to each bowl as desired, stirring until the color is evenly distributed.
For a more vivid effect, use gel food coloring rather than liquid—it gives bold color without making the frosting runny.
Step 6: Decorate and Assemble Cookies
- colored frosting from Step 5
- cooled cookies from Step 4
- Hershey’s Kisses chocolates
- Halloween-themed sprinkles
Transfer the colored frosting into a piping bag (or a sandwich bag with the corner snipped off).
Pipe a dollop of frosting onto the center of each cooled cookie (from Step 4).
Press a Hershey’s Kiss chocolate into the center of each frosted cookie so the frosting slightly spreads around the base.
Sprinkle Halloween-themed sprinkles on top if desired.
Repeat until all cookies are decorated and assembled.
