Let’s talk about one of my favorite ways to feed a crowd – the nachos table! You know those times when you’ve got friends coming over to watch the game, or the kids have their teammates stopping by? This is my go-to solution. I started doing this a few years ago when I realized how much everyone loves to customize their own plates.
The best part about setting up a nachos table is how simple it makes hosting. I lay everything out buffet-style, and people can build their perfect plate. No need to guess who wants extra jalapeños or who can’t stand olives. Plus, I can prep most of the toppings while I’m already in the kitchen making dinner the night before.
Whether you’re into classic toppings like cheese and ground beef, or you want to experiment with different salsas and beans, this setup works for everyone. Trust me, once you try serving nachos this way, you’ll never go back to pre-made plates again.
Why You’ll Love This Nacho Table
- Perfect party food – This massive spread of nachos is ideal for game days, movie nights, or any gathering where you want to wow your guests with a fun, interactive meal.
- Customizable toppings – Everyone can build their perfect bite with different combinations of meat, cheese, veggies, and toppings – making it great for picky eaters and food lovers alike.
- Quick preparation – From start to finish, you can have this impressive spread ready in just 30-40 minutes, perfect for last-minute entertaining.
- Simple ingredients – Most of these ingredients are pantry staples or easy-to-find items at any grocery store, making this recipe a reliable go-to for entertaining.
- No fancy equipment needed – All you need is a baking sheet and some basic kitchen tools to create this crowd-pleasing feast.
What Kind of Tortilla Chips Should I Use?
For nachos, you’ll want to pick sturdy, thick tortilla chips that can handle all those delicious toppings without breaking. Restaurant-style chips are ideal since they’re usually thicker than regular grocery store varieties and hold up better when loaded with ingredients. Look for chips that are lightly salted (you can always add more salt later) and avoid flavored varieties that might clash with your toppings. If you can find them, chips made from white corn tend to be slightly sturdier than yellow corn chips, though either will work fine for your nacho spread.
Options for Substitutions
One of the great things about nachos is how easy it is to swap ingredients based on what you have or prefer:
- Minced beef: You can easily swap the beef for ground turkey, chicken, or even plant-based alternatives like Beyond Meat. For a vegetarian version, try using crumbled tempeh or extra refried beans.
- Taco spices: No taco seasoning? Mix your own with chili powder, cumin, paprika, garlic powder, and oregano. Or use fajita seasoning as a quick substitute.
- Refried beans: Black beans or pinto beans work great here – just mash them slightly with a fork. You can also skip the beans entirely if they’re not your thing.
- Cheese blend: While the cheddar-Monterey Jack mix is classic, you can use any melting cheese you have. Pepper Jack adds nice heat, or try a Mexican cheese blend. Just avoid hard aged cheeses as they won’t melt as well.
- Toppings: Feel free to mix up the toppings based on what’s in your fridge. Swap tomatoes for salsa, use pickled onions instead of fresh, replace avocado with guacamole, or switch sour cream with Greek yogurt. No cilantro? Try fresh parsley or just skip it.
Watch Out for These Mistakes While Cooking
The biggest challenge when making nachos is preventing them from becoming soggy – to avoid this, always start with a base layer of the sturdiest tortilla chips you can find, and never add wet toppings like tomatoes or sour cream until after baking. Another common mistake is piling all the ingredients into one massive mountain, which leads to uneven cooking and cold spots – instead, try creating multiple thin layers of chips, meat, beans, and cheese to ensure every bite is perfectly melted and heated through. The timing of your cheese melting is crucial too – watch your nachos carefully under the broiler as they can go from perfectly melted to burnt in seconds, typically needing only 2-3 minutes to achieve that ideal gooey consistency. For the best results, serve your nachos immediately after they come out of the oven, and consider warming your serving platter beforehand to keep everything hot longer.
What to Serve With Nachos?
While nachos can definitely be a meal on their own, you can round out your spread with some tasty Mexican-inspired sides. A fresh bowl of guacamole and some zesty pico de gallo are natural choices that let people add extra toppings as they please. I like to serve a simple Mexican rice on the side to help soak up all those good flavors, and it’s perfect for anyone who wants to make a heartier meal. For drinks, you can’t go wrong with some ice-cold Mexican beer or homemade margaritas – they really hit the spot with spicy food. If you’re feeding a crowd, consider putting out a bowl of Mexican street corn salad too!
Storage Instructions
Keep Components Separate: For the best nacho experience, store your prepped ingredients separately. Keep cooked beef and beans in airtight containers in the fridge for up to 3 days. Store chopped veggies like tomatoes, onions, and cilantro in separate containers – they’ll stay fresh for 1-2 days.
Prep Ahead: Want to get a head start? Brown the beef and prep the beans up to 2 days before. Grate the cheese and store it in a zip-top bag. Just wait to chop the avocado and tomatoes until you’re ready to serve – they’re best fresh!
Leftovers: Already assembled nachos aren’t great for storing – they’ll get soggy. If you end up with leftovers, remove any cold toppings and store the cheesy chips separately from wet ingredients. When ready to eat, pop the chips in the oven at 350°F for a few minutes to crisp them up again.
| Preparation Time | 10-15 minutes |
| Cooking Time | 20-25 minutes |
| Total Time | 30-40 minutes |
| Level of Difficulty | Easy |
Estimated Nutrition
Estimated nutrition for the whole recipe (without optional ingredients):
- Calories: 2800-3200
- Protein: 120-140 g
- Fat: 150-170 g
- Carbohydrates: 250-280 g
Ingredients
For the nacho base:
- 1 can refried beans (I use Rosarita Traditional Refried Beans)
- 2 tbsp taco spices
- 1 lb minced beef
- 1/4 cup sliced pickled jalapenos
- 2 cups grated cheese blend
- 1/4 cup water
- 1 bag tortilla chips
For the toppings:
- 1 diced avocado
- 1/2 cup chopped red onion
- 3 diced roma tomatoes (about 1/2-inch dice)
- 1/4 cup chopped fresh cilantro (freshly chopped for best flavor)
- 1/3 cup sour cream
Step 1: Preheat the Oven
Start by preheating your oven to 400°F (200°C).
This will ensure that the oven is ready by the time you have assembled the nachos.
Step 2: Cook the Ground Beef
Place a skillet over medium heat and add the ground beef.
Cook for about 5 minutes, using a spatula to break up the meat as it cooks.
Once the beef is cooked, drain any excess fat from the skillet.
Add the taco seasoning to the skillet, and cook for another 5 minutes, allowing the beef to brown and become slightly crispy.
Step 3: Combine Beef with Refried Beans
Add the refried beans and a bit of water to the cooked ground beef in the skillet.
Stir until everything is well combined and the mixture is evenly heated through.
Step 4: Assemble the Nachos
On a rimmed sheet pan, spread out a layer of tortilla chips.
Top the chips with the ground beef and bean mixture.
Sprinkle cheese liberally over the top, and add any desired jalapeños for a spicy kick.
Step 5: Bake the Nachos
Place the sheet pan in the preheated oven and bake for about 10 to 15 minutes, or until the cheese is melted and the tortilla chips start to turn golden brown along the edges.
Step 6: Add Fresh Toppings and Serve
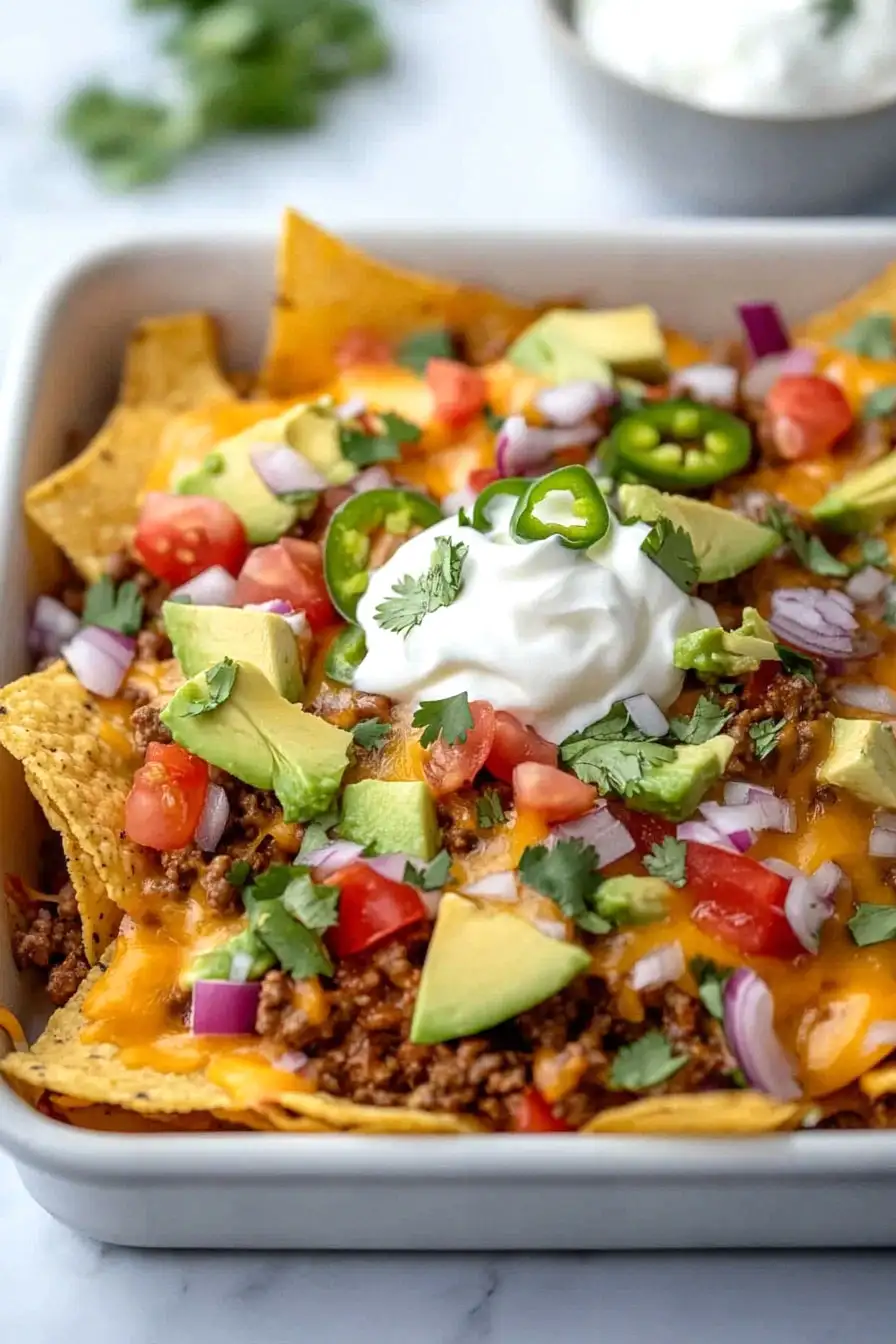
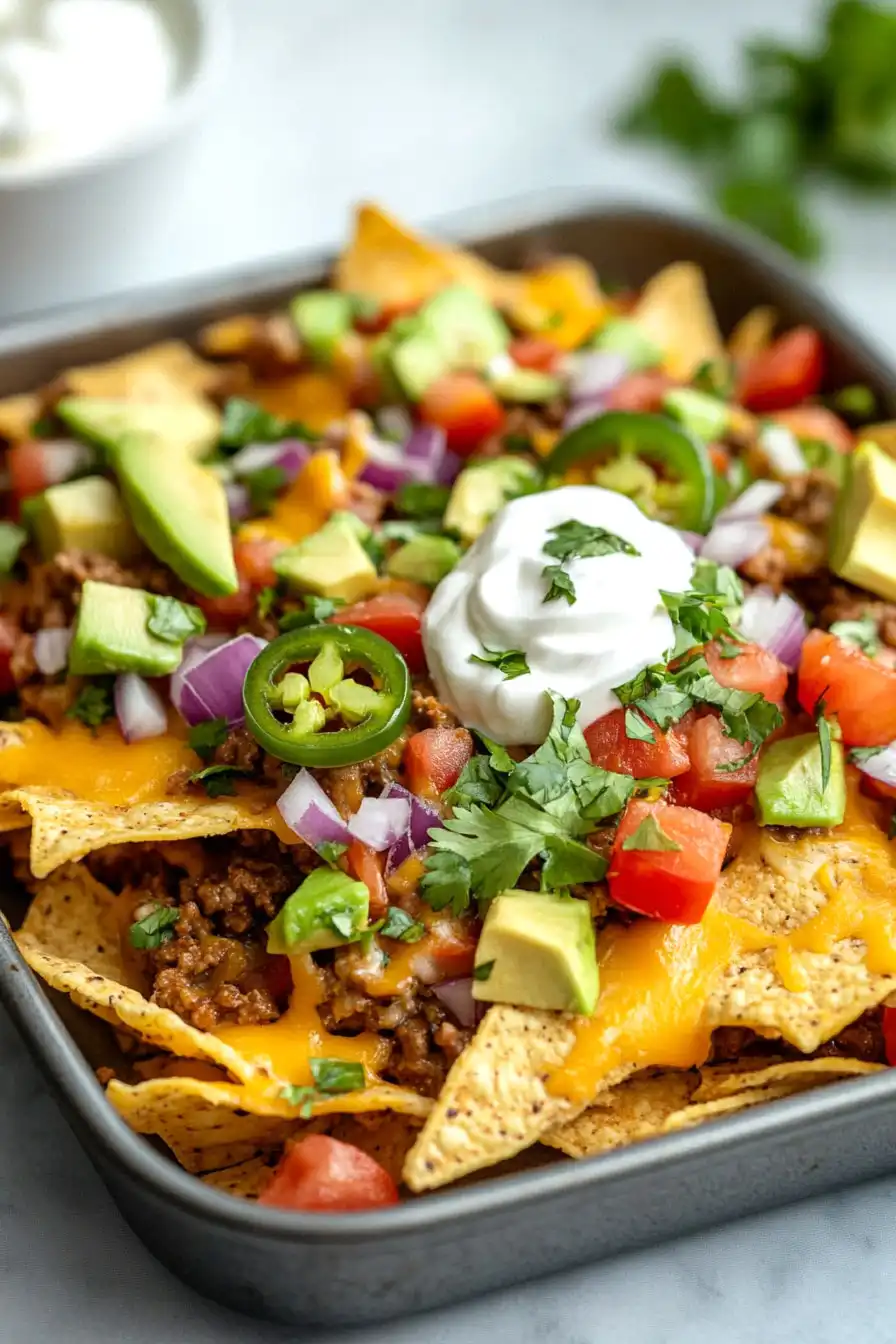
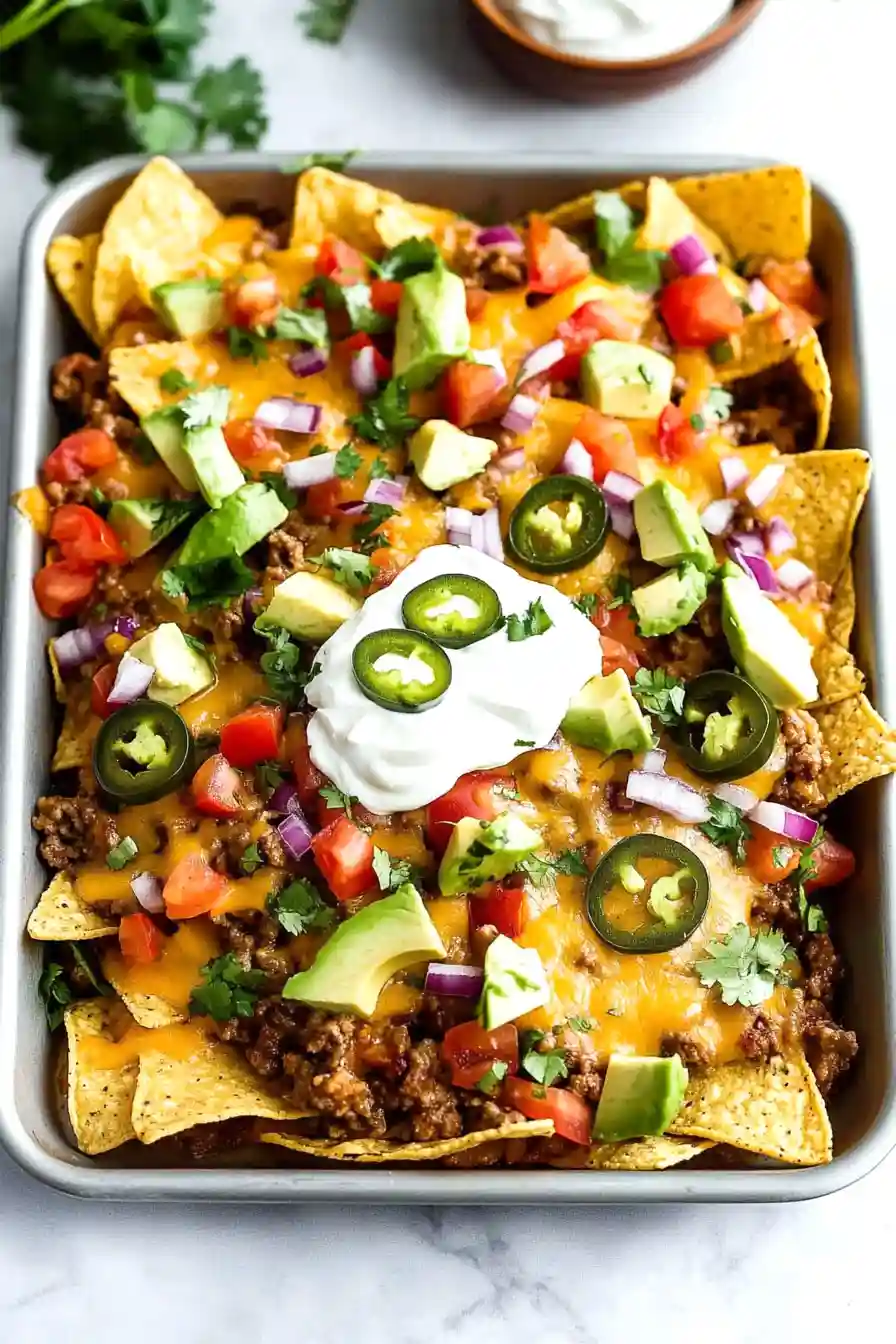
Remove the nachos from the oven and immediately top with diced tomatoes, onions, avocado, a dollop of sour cream, and chopped cilantro.
Serve while warm and enjoy your freshly made nachos!
