If you ask me, red velvet and strawberries are a match made in heaven.
This twist on classic red velvet cake brings together two favorite flavors in one homey dessert. Fresh strawberries and smooth cream cheese frosting complement the rich, cocoa-touched cake layers.
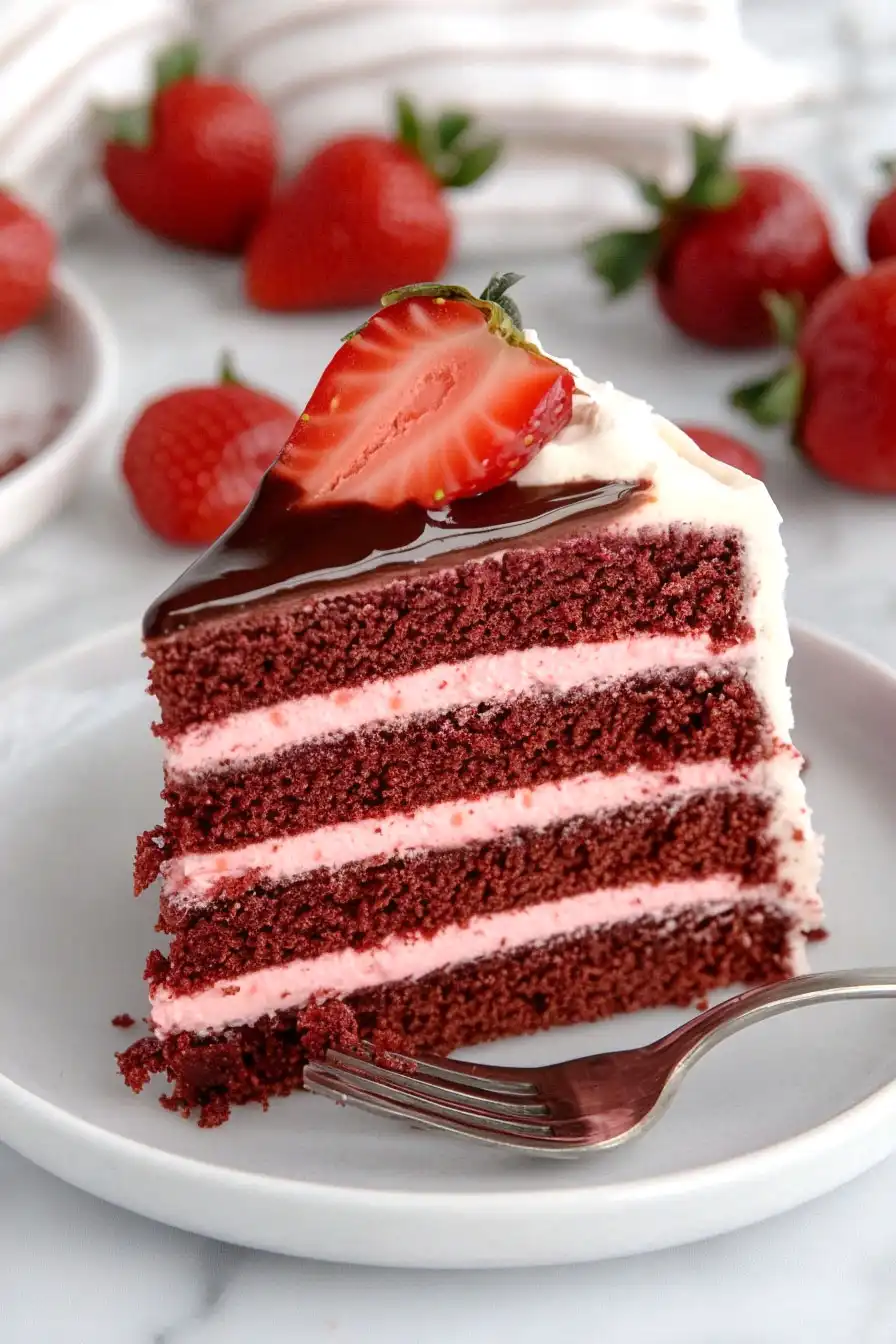
It’s topped with a simple strawberry sauce that soaks just slightly into the frosting, giving each bite the perfect balance of sweet and tangy. The bright berries scattered on top make it look like something special, even though it’s really simple to put together.
It’s a family-style dessert that feels just right for any occasion, from summer picnics to holiday gatherings.

Why You’ll Love This Red Velvet Strawberry Cake
- Allergy-friendly – This gluten-free cake can be easily made vegan with simple butter substitutions, making it perfect for serving guests with dietary restrictions.
- Rich flavor combination – The classic red velvet taste gets a fresh twist with sweet strawberries, while the chocolate and vanilla notes create a perfect balance of flavors.
- Make-ahead friendly – You can prepare different components of this cake in advance, making it ideal for special occasions or when you want to split up the baking process.
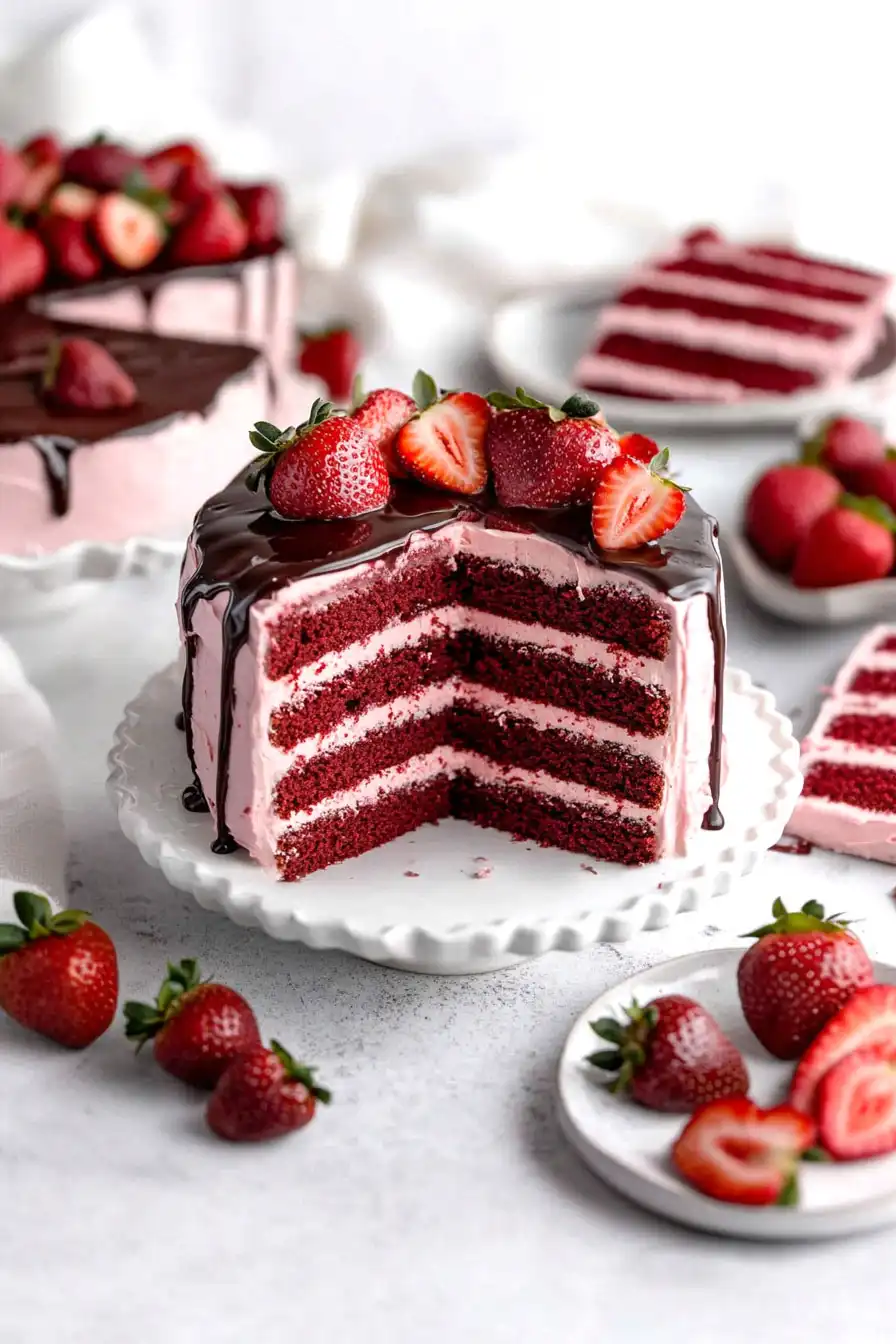
- Impressive presentation – The combination of red cake layers with strawberry filling makes this a show-stopping dessert that’s perfect for birthdays, holidays, or any celebration.
What Kind of Strawberries Should I Use?
Both fresh and frozen strawberries will work great in this red velvet cake, so don’t stress if fresh berries aren’t in season. If you’re using fresh strawberries, look for ones that are bright red throughout without any white or green patches – these will give you the best flavor. When using frozen berries, thaw them completely and drain off any excess liquid before adding them to your recipe to prevent your cake from becoming too wet. Just keep in mind that frozen strawberries tend to be a bit softer when thawed, but they’ll still taste amazing in this cake.
Options for Substitutions
This red velvet strawberry cake can be adapted with several substitutions to fit different dietary needs or what you have in your pantry:
- Gluten-free flour blend: If you don’t need the cake to be gluten-free, you can use regular all-purpose flour in the same amount. Just skip the xanthan gum since it’s only needed for gluten-free baking.
- Cornstarch mixture: This acts as an egg replacer. You can use 4 regular eggs instead, or other egg substitutes like mashed bananas (1 cup) or applesauce (1 cup) – though these will add their own flavors.
- Milk: Any plant-based milk works well here – almond, soy, or oat milk are good options. Just make sure it’s unsweetened.
- Red food dye: For a natural option, try 2 tablespoons of beet powder or puree. The color won’t be as bright, but it’s a good natural alternative. You can also skip it – the cake will taste the same.
- Strawberries: Fresh or frozen both work great. If using frozen, no need to thaw first. You could also swap with raspberries for a different berry twist.
- Chocolate chips: Any type works – dark, semi-sweet, or even white chocolate. For dairy-free needs, use dairy-free chocolate chips.
Watch Out for These Mistakes While Baking
The trickiest part of making red velvet cake is achieving the right texture – gluten-free flour can make your cake dense if you overmix the batter, so fold ingredients gently just until combined. When working with gluten-free flour, letting your batter rest for 15-20 minutes before baking helps the ingredients hydrate properly and results in a better crumb structure. Temperature control is crucial – make sure all your refrigerated ingredients (like butter and milk) are at room temperature before starting, as cold ingredients can cause the batter to curdle or bake unevenly. For the perfect strawberry filling, avoid overcooking the berries – they should be just soft enough to mash but still maintain some texture, and remember to let the filling cool completely before adding it to your cake to prevent the frosting from melting.
What to Serve With Red Velvet Strawberry Cake?
This rich cake pairs wonderfully with a scoop of vanilla ice cream or a dollop of freshly whipped cream to balance out its sweet, chocolatey flavors. For a nice hot beverage pairing, try serving it with a cup of coffee or hot chocolate – the warmth creates a lovely contrast with the cool strawberry filling. If you’re hosting a party, set up a drink station with cold milk and strawberry-infused water to give your guests some refreshing options. And don’t forget, some extra fresh strawberries on the side make for a perfect garnish and add a burst of natural sweetness to each bite.
Storage Instructions
Keep Fresh: Your red velvet strawberry cake will stay fresh and moist when stored in an airtight container in the fridge for up to 5 days. If you’ve cut into it, press some plastic wrap against the exposed cake sides to keep them from drying out. The strawberry filling helps keep everything nice and moist!
Freeze: Want to save some for later? You can freeze unfrosted cake layers wrapped tightly in plastic wrap and aluminum foil for up to 3 months. For a frosted cake, place it in the freezer unwrapped until the frosting hardens, then wrap it well. When you’re ready to enjoy, thaw it overnight in the fridge.
Make Ahead: This cake is great for planning ahead! You can bake the layers up to 2 days before assembly – just wrap them well and keep them in the fridge. The strawberry filling can also be made a day ahead and stored in the fridge. Just bring everything to room temperature before assembling your cake.
| Preparation Time | 30-45 minutes |
| Cooking Time | 45-60 minutes |
| Total Time | 75-105 minutes |
| Level of Difficulty | Medium |
Estimated Nutrition
Estimated nutrition for the whole recipe (without optional ingredients):
- Calories: 5000-5500
- Protein: 50-60 g
- Fat: 250-270 g
- Carbohydrates: 700-750 g
Ingredients
For the cake:
- 1 tbsp red food dye
- 1 tsp baking powder
- 1/2 cup unsalted butter (softened)
- 1/4 cup cocoa powder
- 1.5 cups sugar
- 1 tsp white vinegar
- 1 tbsp white vinegar
- 1/3 cup milk (at room temperature)
- 1 cup milk
- 1 tsp vanilla extract (I use Nielsen-Massey vanilla extract)
- 4 tbsp cornstarch
- 1 tsp baking soda
- 2.5 cups gluten-free flour blend
- 1 tsp salt
- 6 tbsp water
- 1 tsp red food dye
For the strawberry frosting:
- 2 tbsp water
- 8 cups powdered sugar
- 3.5 cups strawberries (freshly hulled and pureed)
- 2 tsp vanilla extract
- 1/4 cup water
- 1.5 cups sugar
- 1 cup unsalted butter (room temperature, I use Kerrygold)
- 2 small pinches salt
For the ganache:
- 6 tbsp unsalted butter
- 3/4 cup chocolate chips (I use Guittard semisweet chocolate chips)
Step 1: Prepare the Cake Pans and Dry Ingredients
Preheat your oven to 350 degrees Fahrenheit.
Grease and line two 8-inch cake pans with parchment paper, then set them aside.
In a large bowl, whisk together the gluten-free flour, cocoa powders, baking powder, baking soda, and salt, ensuring everything is well combined.
Step 2: Make Vegan Buttermilk and Cornstarch Mixture
In a large measuring cup, measure out 1 cup of milk of your choice and add 1 tablespoon of white vinegar.
Stir gently with a spoon and let it sit for 5-10 minutes to create your vegan buttermilk.
In a small bowl, mix together the cornstarch and water until it thins out—it will be thick and tacky at first.
Set this mixture aside.
Step 3: Cream Butter and Sugar
Using an electric mixer fitted with a paddle attachment, beat together the butter (or vegan baking stick) and granulated sugar in a large bowl until the mixture is light and fluffy, around 2-3 minutes.
Gradually add the cornstarch water mixture in two portions, beating until combined after each addition.
Stir your vegan buttermilk with a spoon; it should appear chunky.
Add the additional 1/3 cup of milk, 1 teaspoon of white vinegar, red food coloring, and vanilla to the measuring cup.
Whisk to combine.
Step 4: Mix Cake Batter
With the mixer on low speed, alternate adding the dry ingredients and the wet buttermilk mixture in three parts, starting and ending with the dry ingredients.
Mix all parts together until fully combined.
Use a spatula to ensure the mixture is completely mixed.
Divide the batter equally between the prepared cake pans and smooth the tops with a butter knife.
Step 5: Bake the Cakes
Bake the cakes on the center oven rack at 350 degrees Fahrenheit for approximately 45 minutes, or until they are slightly springy to the touch.
Let the cakes cool in their pans for a short while before transferring them to a cooling rack to cool completely.
Once cooled, slice each cake horizontally in half to create four layers.
If the tops are domed, carefully trim them to level the tops.
Step 6: Prepare Strawberry Frosting
While the cakes are baking, prepare the strawberry frosting.
In a small saucepan over medium heat, combine the quartered strawberries and granulated sugar.
Stir constantly for 5-8 minutes until the strawberries soften and the sugar dissolves.
Mash the strawberries with the back of your spoon as needed.
Strain this mixture through a mesh colander to obtain the liquid, discarding the seeds.
Step 7: Make Frosting and Assemble Cake
With an electric mixer or hand mixer, beat the room-temperature butter (or vegan baking stick) until creamy, about 2-3 minutes.
Add confectioners’ sugar, water, strained strawberry liquid (about 8 tablespoons), salt, and vanilla.
Beat until smooth.
Start assembling the cake by placing one cake layer onto a stand.
Spread 1/5 of the frosting on top, and continue layering cake and frosting until all layers are used.
For the top layer, place the cake bottom side up for a flat top, then frost with a thin layer of frosting, creating a semi-naked cake effect.
Chill in the fridge for 15-20 minutes.
Step 8: Prepare Ganache and Decorate
During the last 5 minutes of chilling, make the ganache by microwaving chocolate chips with butter (or vegan baking stick) in a heat-safe bowl in 10-15 second increments, stirring each time, until fully melted and smooth.
Remove the cake from the fridge and spoon most of the ganache on top, pushing it to the edges so it drips down the sides.
Work quickly to prevent premature setting.
Place the remaining frosting in a piping bag and create swirls around the top rim.
Optionally, add extra strawberries in the center of the cake for decoration, using 5 if desired.
