Growing up, lasagna night always meant hours in the kitchen with my mom, carefully layering noodles and simmering sauce from scratch. These days, between work and kids, I rarely have time for that kind of commitment. That’s when I discovered a little shortcut that changed my weeknight dinner game – using rotisserie chicken from the grocery store.
Instead of cooking meat from scratch, a ready-made rotisserie chicken saves me at least an hour of prep time. Plus, the meat is always tender and flavorful, which means I can focus on getting those layers of cheese and sauce just right. Now I can make a homestyle lasagna that tastes like it took all day, even on a busy Tuesday night.
Ingredient Substitutions
Ricotta cheese can be replaced with cottage cheese for a lower-fat option or with blended silken tofu for a dairy-free alternative. Both substitutes maintain a creamy texture and protein content. Use the same amount as called for in the recipe.
Cooked chicken can be substituted with cooked turkey for a similar flavor profile, or with crumbled firm tofu or tempeh for a vegetarian option. Season the tofu or tempeh with poultry seasoning to mimic the chicken flavor. Use the same quantity as the original recipe specifies.
Lasagna noodles can be swapped with zucchini slices or eggplant slices for a low-carb, gluten-free alternative. Slice the vegetables thinly and pre-cook them slightly to remove excess moisture. Layer them as you would the pasta noodles, adjusting the overall baking time if needed to ensure the vegetables are fully cooked.
| Preparation Time | 20-30 minutes |
| Cooking Time | 45 minutes |
| Total Time | 65-75 minutes |
| Level of Difficulty | Medium |
Estimated Nutrition
Estimated nutrition for the whole recipe (without optional ingredients):
- Calories: 2200-2500
- Protein: 150-170 g
- Fat: 110-130 g
- Carbohydrates: 180-210 g
Ingredients
For the ricotta mixture:
- 1 egg
- 1 cup ricotta cheese (full-fat for richness)
- 1/2 tsp kosher salt
- black pepper, to taste
- zest from 1 lemon (freshly zested for best aroma)
- 1/4 cup grated parmesan cheese
For the lasagna:
- 3 cups tomato sauce
- 1 lb shredded mozzarella cheese
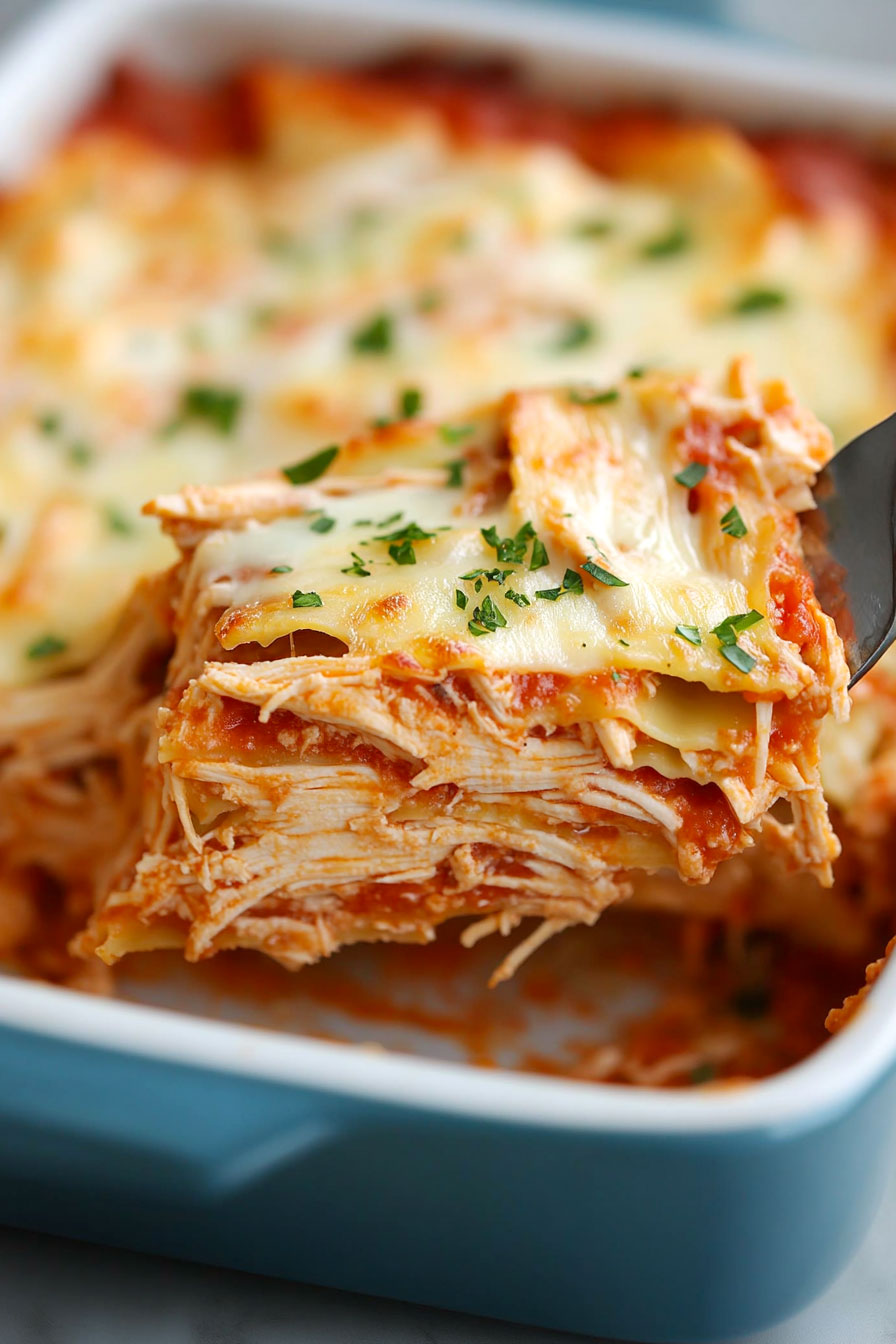
- 2 cups cooked chicken (shredded rotisserie chicken works great)
- 9 to 12 lasagna noodles (oven-ready preferred)
- olive oil (I use Bertolli 100% Pure Olive Oil)
Step 1: Preheat and Prepare Baking Dish
Preheat your oven to 375°F.
Lightly coat a 2-quart baking dish with olive oil to prevent sticking, and set it aside for later use.
Step 2: Cook and Prepare Lasagna Noodles
Cook the lasagna noodles until al dente according to the package instructions.
Once cooked, rinse them under cold water until cool.
Lay the cooked pasta flat on a clean surface or plate and set aside, keeping them ready for layering.
Step 3: Prepare Ricotta Mixture
In a medium bowl, combine ricotta cheese, one egg, Parmigiano-Reggiano cheese, lemon zest, salt, and pepper.
Mix the ingredients well until fully combined and set the mixture aside for layering.
Step 4: Begin Layering the Lasagna
Spread a light layer of tomato sauce on the bottom of the prepared baking dish.
Lay three to four lasagna noodles lengthwise over the sauce.
Layer a third of the remaining tomato sauce over the noodles, then half of the ricotta mixture on top.
Add half of the cooked chicken over the ricotta, then spread a third of the mozzarella cheese.
Step 5: Complete the Lasagna Layers
Repeat the layering pattern: start with another layer of lasagna noodles, followed by tomato sauce, the remaining half of the ricotta cheese mixture, the rest of the chicken, and a third of mozzarella cheese.
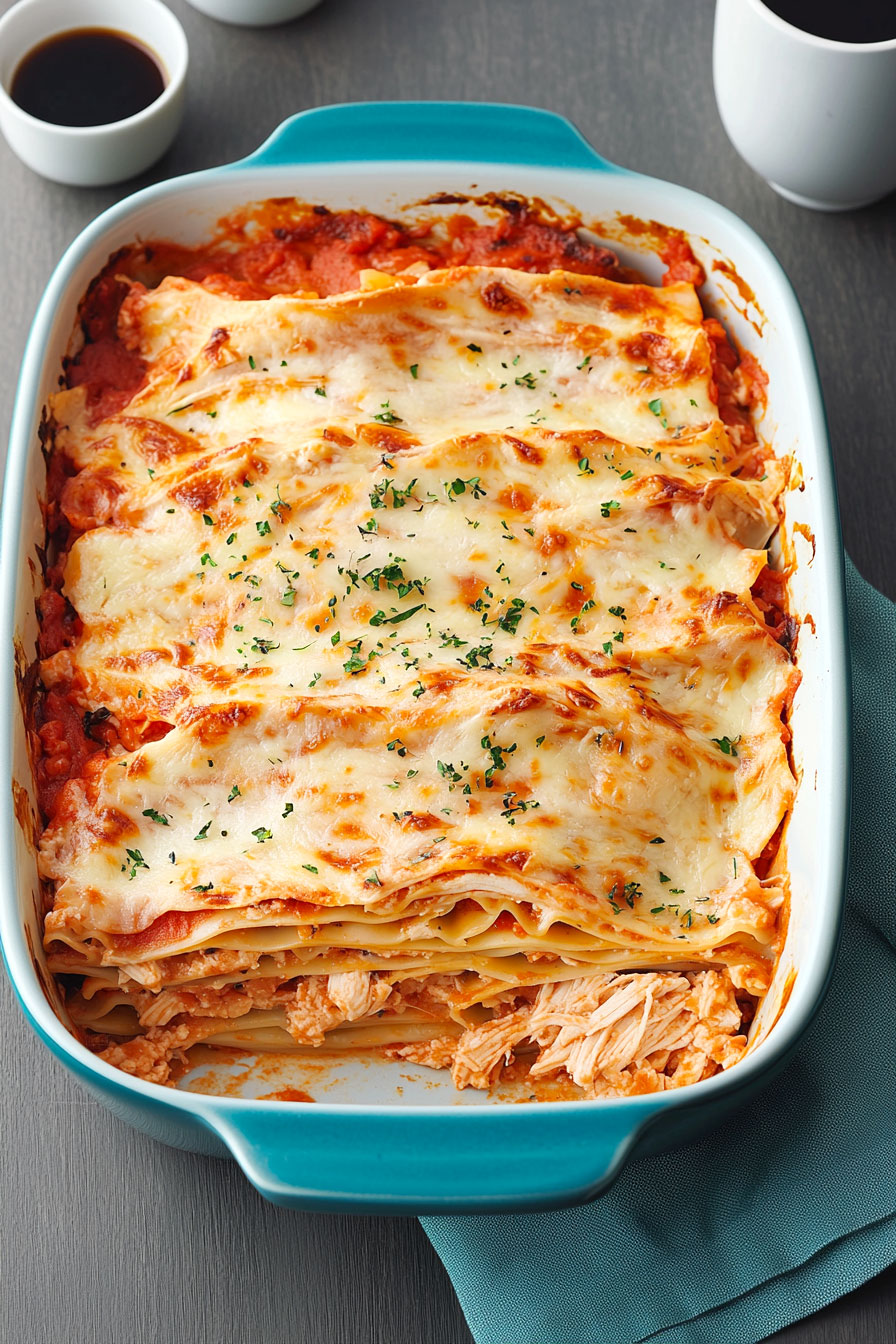
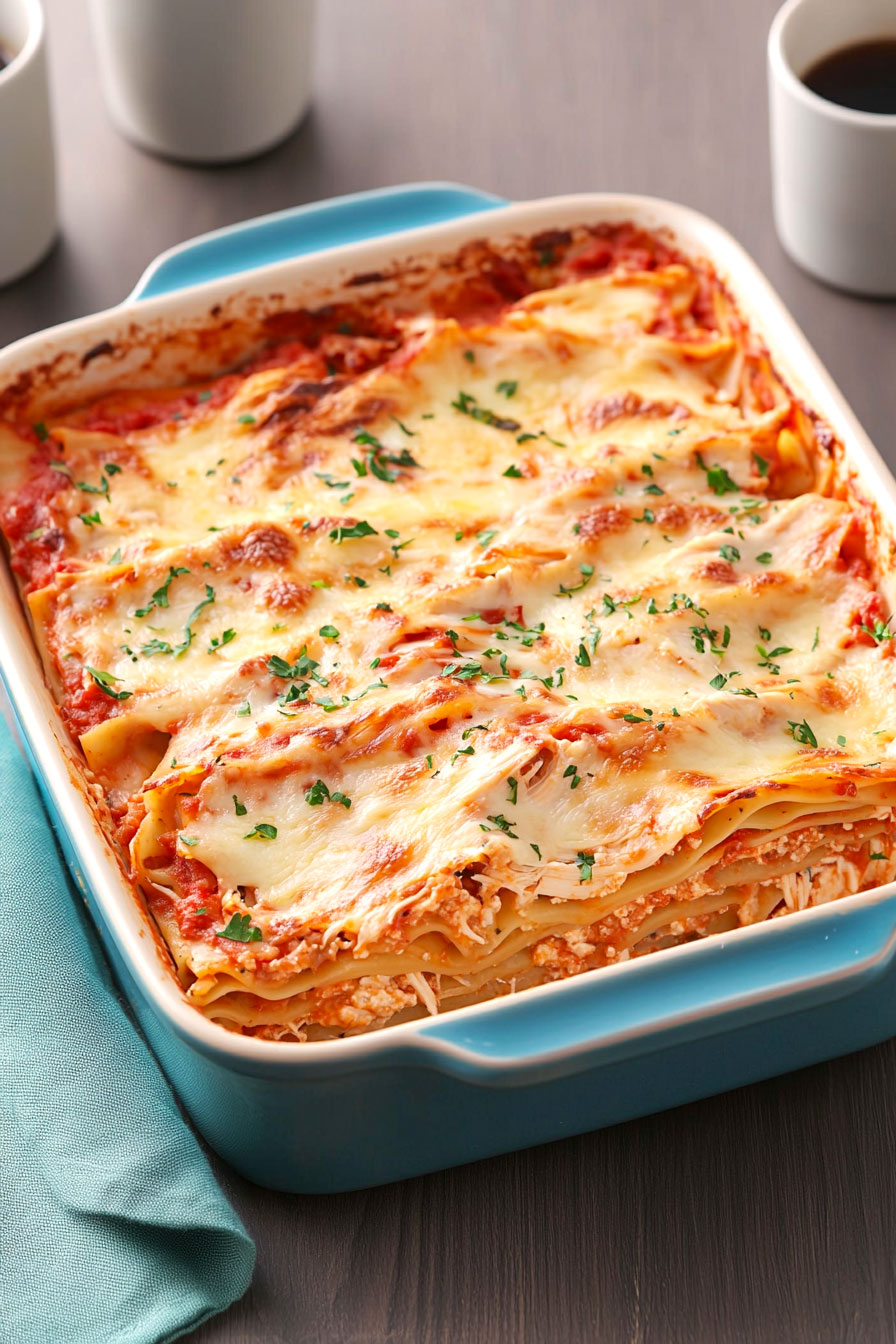
Finish with a final layer of lasagna noodles, topped with the remaining tomato sauce and mozzarella cheese.
Step 6: Bake and Cool the Lasagna
Bake the lasagna in the preheated oven for about 45 minutes, or until the top cheese is melted and golden brown.
Once baked, remove the lasagna from the oven and allow it to cool for about 10 to 15 minutes before serving to help it set slightly and make slicing easier.