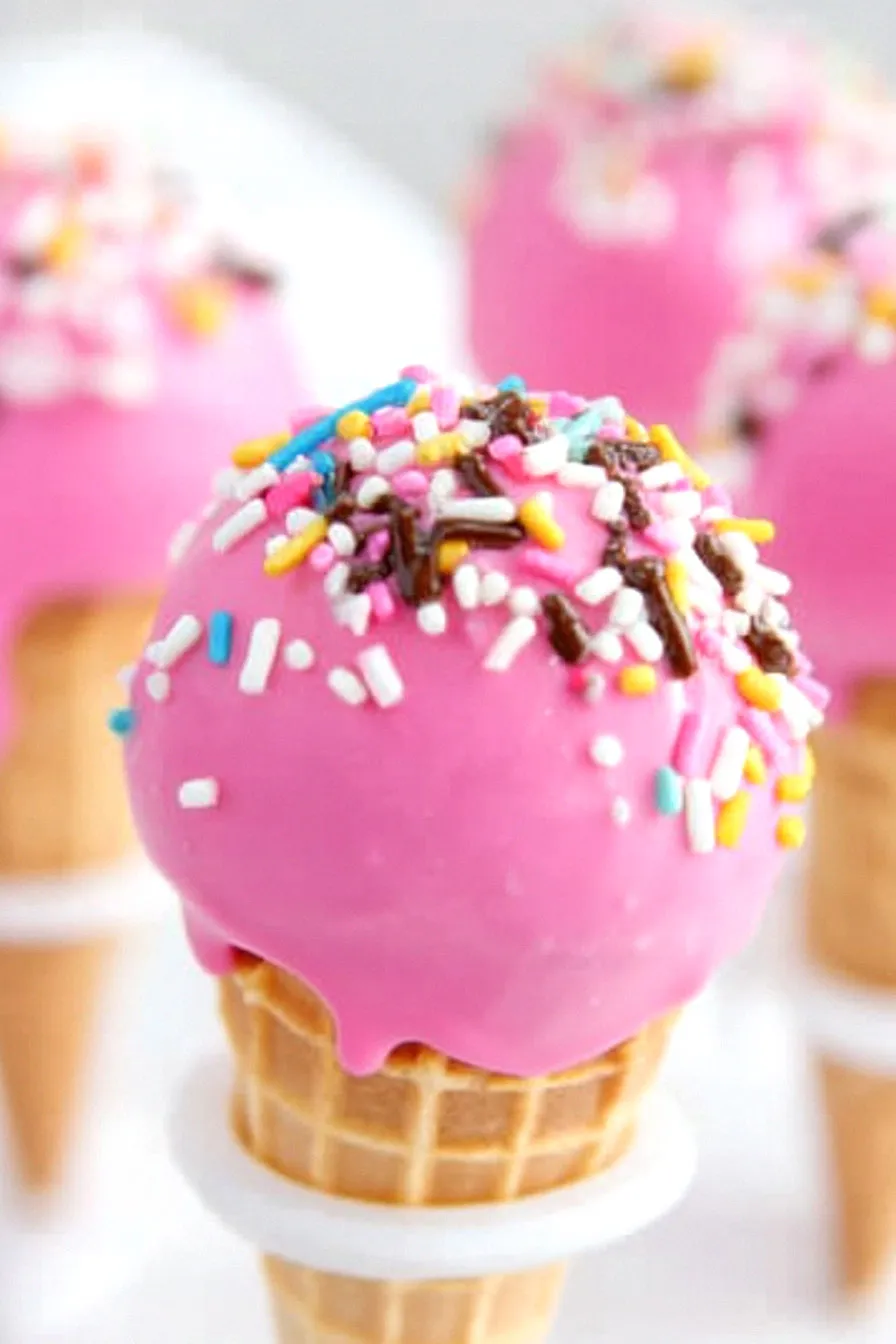
Looking for a fun treat that’ll make any party or gathering more special? Ice cream cone cake pops are the perfect solution when you want something that’s both cute and tasty. I know how tricky it can be to come up with desserts that work for both kids and adults, especially when you’re trying to avoid the usual cupcakes and cookies routine.
These ice cream cone cake pops are exactly what you need – they’re easy to make ahead of time, portable enough for any occasion, and guaranteed to bring smiles to everyone’s faces. Plus, you can switch up the decorations and flavors to match any theme or season you have in mind.
Why You’ll Love These Ice Cream Cone Cake Pops
- Fun party treat – These cute mini ice cream cone cake pops are perfect for birthday parties, summer gatherings, or any celebration where you want to bring smiles to people’s faces.
- No eggs or oil needed – Using soda instead of traditional cake ingredients makes this recipe super simple and budget-friendly – you only need a few basic ingredients.
- Make-ahead friendly – You can prepare these cake pops in advance and store them for your event, making party planning much easier.
- Customizable design – Switch up the sprinkles, candy melt colors, and cake flavors to match any party theme or holiday celebration you’re planning.
What Kind of Candy Melts Should I Use?
For cake pops, regular candy melts from brands like Wilton or Ghirardelli work great and come in lots of fun colors. The white or vanilla-flavored melts are a classic choice since they’re easy to tint with oil-based food coloring if you want to match your party theme or create different designs. You’ll want to avoid chocolate chips or regular chocolate bars as substitutes since they tend to be too thick and don’t set as reliably as candy melts. When working with candy melts, remember to heat them slowly in 30-second intervals in the microwave and stir well between each interval – this prevents them from seizing up or becoming too thick to work with.
Options for Substitutions
This fun recipe can be customized in several ways with these simple swaps:
- Funfetti cake mix: Any flavor cake mix works great here! Try chocolate, vanilla, strawberry, or even red velvet. Just keep the box size the same (15.25 oz).
- Lemon-lime soda: You can use any clear soda like Sprite, 7-Up, or even ginger ale. For chocolate cake, try using cola or root beer. Just make sure it’s not diet soda, as you need the sugar for the recipe to work properly.
- Vanilla frosting: Feel free to match your frosting to your cake flavor – chocolate, cream cheese, or strawberry all work well. Just don’t skip the frosting entirely as it helps bind the cake balls.
- Candy melts: White chocolate chips or colored chocolate melts are good alternatives. If using chocolate chips, add 1 extra teaspoon of shortening to help thin the coating.
- Shortening: Coconut oil works as a 1:1 replacement for shortening in this recipe.
- Ice cream cones: The small cake cone style is best for this recipe, but you can use wafer cones cut down to size. Just avoid sugar cones as they’re too thick and dark in color.
Watch Out for These Mistakes While Baking
The biggest challenge when making cake pops is getting the right consistency in your cake mixture – adding too much frosting can make them too sticky and impossible to shape, so start with just 2 tablespoons and add more only if needed. When melting your candy coating, avoid overheating it as this can make it thick and clumpy – instead, heat in 30-second intervals, stirring between each round until smooth, and add shortening if needed to thin it out. A common mistake is dipping the cake pops when they’re still warm, which can cause them to fall apart – make sure to chill your shaped cake balls in the freezer for 15 minutes before dipping them in the coating. For the best presentation, let each layer of coating dry completely before adding another, and keep your sprinkles nearby to add them quickly before the coating sets.
What to Serve With Ice Cream Cone Cake Pops?
These cute cake pops are perfect for parties and dessert tables, and they pair wonderfully with a few simple accompaniments. A glass of cold milk is the classic choice – it helps balance out the sweetness and makes for that perfect cake-and-milk combo kids love. If you’re serving these at a party, set up a hot chocolate station in winter or some flavored lemonades in summer to give guests drink options. For a full dessert spread, you can arrange these cake pops alongside bowls of actual ice cream, which lets guests mix and match their treats (plus, it plays into the whole ice cream cone theme!).
Storage Instructions
Keep Fresh: These cute cake pops will stay fresh at room temperature for up to 2 days when stored in an airtight container. For best results, place them standing upright (cone side down) and avoid stacking them to maintain their shape and prevent the coating from sticking together.
Refrigerate: Want them to last longer? Pop them in the fridge in an airtight container for up to a week. Just remember to let them sit at room temperature for about 15 minutes before serving – this helps the candy coating taste its best and keeps the cake inside nice and soft.
Make Ahead: You can prepare the cake ball mixture up to 2 days in advance and keep it in the fridge. When you’re ready to make the pops, just let the mixture come to room temperature for about 30 minutes so it’s easier to work with. The cones should be dipped and decorated right before serving for the best presentation.
| Preparation Time | 20-30 minutes |
| Cooking Time | 25-30 minutes |
| Total Time | 85-90 minutes |
| Level of Difficulty | Medium |
Estimated Nutrition
Estimated nutrition for the whole recipe (without optional ingredients):
- Calories: 3200-3600
- Protein: 20-25 g
- Fat: 120-130 g
- Carbohydrates: 500-540 g
Ingredients
For the cake:
- 1 box funfetti cake mix (I like Duncan Hines)
- 1.5 cups lemon-lime soda (gives a light, fluffy texture)
For the cake balls:
- 2-4 tbsp vanilla frosting (use a thick, shelf-stable frosting)
For the decoration:
- Sprinkles (for colorful decoration)
- 24 small ice cream cones (mini size for cake pops)
- 2 tsp shortening
- 3 cups candy melts (white or colored, as preferred)
Step 1: Prepare the Cake
Preheat your oven to 350°F (175°C) and grease a 9×13 inch pan to prevent sticking.
In a large bowl, combine the cake box mix with soda, mixing until well combined.
Pour the mixture into the prepared pan and bake for 25-30 minutes.
After baking, allow the cake to cool completely for at least one hour.
This cooling time is essential for the next steps.
Step 2: Form Cake Balls
Once the cake is fully cooled, crumble it using a fork until it reaches a fine consistency.
Gradually add a few teaspoons of frosting to the crumbled cake until the mixture binds smoothly.
Roll the cake crumbs by hand to form small cake balls.
Set these cake balls aside for later assembly.
Step 3: Prepare Candy Melts
In a microwave-safe bowl, mix candy melts with shortening.
Heat them in the microwave at 15-second increments, stirring in between until the candy melts reach a smooth, melted consistency.
Step 4: Assemble Cake Pops
Dip the open end of the cone into the melted candy mixture, ensuring all areas where the cake ball will attach are coated.
Position each cake ball onto the cone where the candy melt was applied.
Let it sit for about 5 minutes or until the candy melt is firm, securely attaching the cake ball to the cone.
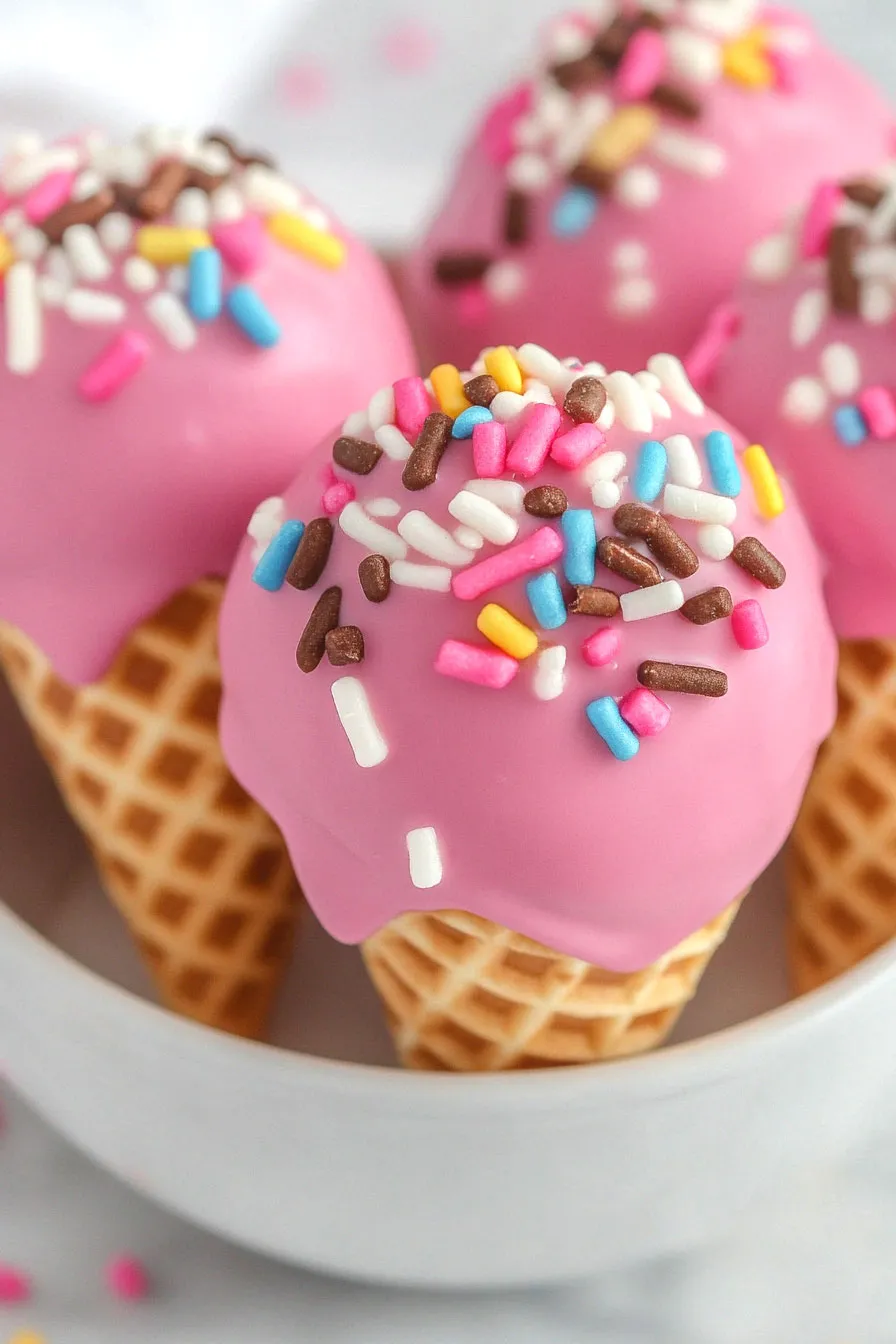
Step 5: Decorate Cake Pops
Once the cake ball is firmly attached, dip it again into the pink candy melts.
Gently tap the cone to remove excess chocolate and then generously add sprinkles over the entire cake pop.
Allow it to stand until the chocolate firms up and the decorations are set.
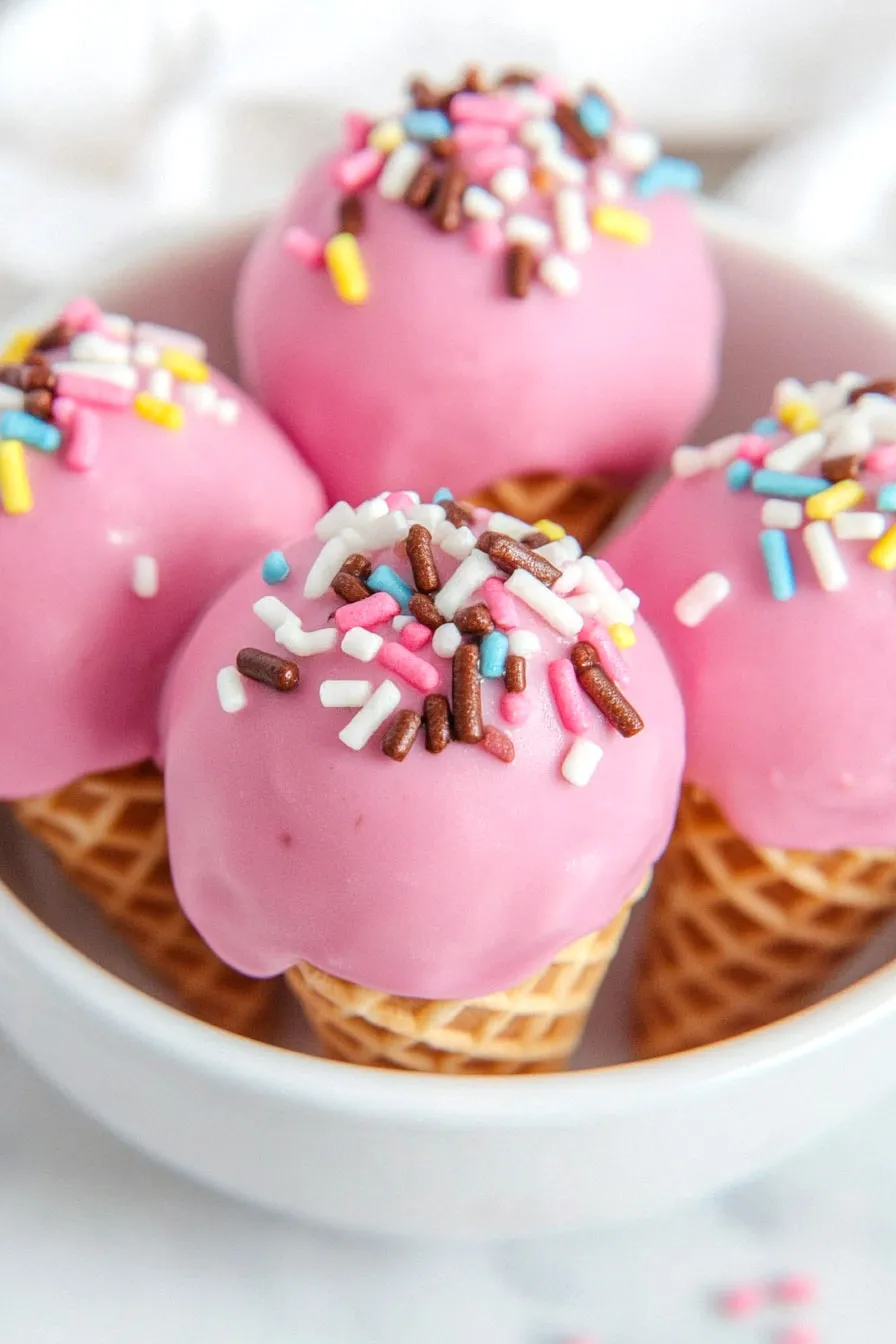
Step 6: Serve and Enjoy
Serve the completed cake pops immediately for a delightful treat.
Enjoy the fun and delicious combination of cake and candy cone!
Perfect for parties or a sweet snack.
