I’ve always had a soft spot for desserts that feel a bit nostalgic. You know, the ones that remind you of potlucks and family gatherings from years ago. This pineapple upside down dump cake brings back memories of my mom’s kitchen, but with a much easier approach. I like having recipes that don’t require a ton of measuring or fancy techniques.
What makes this recipe such a favorite in my house is how simple it is to throw together. When I need a last-minute dessert for unexpected company or a quick treat for a weekend dinner, this is my go-to choice. Just a few pantry staples, a can of pineapple, and you’re ready to go. Plus, the house smells amazing while it bakes – like a warm, sweet hug from your oven.
Don’t let the name fool you – even though it’s called a “dump cake,” the end result tastes like you spent way more time on it than you actually did. And honestly, sometimes those are the best kinds of recipes to have in your back pocket.
Why You’ll Love This Pineapple Upside Down Dump Cake
- 5-ingredient recipe – With just a handful of simple ingredients from your pantry and fridge, you can create this sweet, fruity dessert without any fancy shopping trips.
- No mixing bowls needed – True to its ‘dump cake’ name, you’ll just layer ingredients right in the baking dish – no complicated mixing or multiple bowls to wash.
- Quick prep time – You can have this in the oven in less than 10 minutes, making it perfect for last-minute dessert needs or unexpected guests.
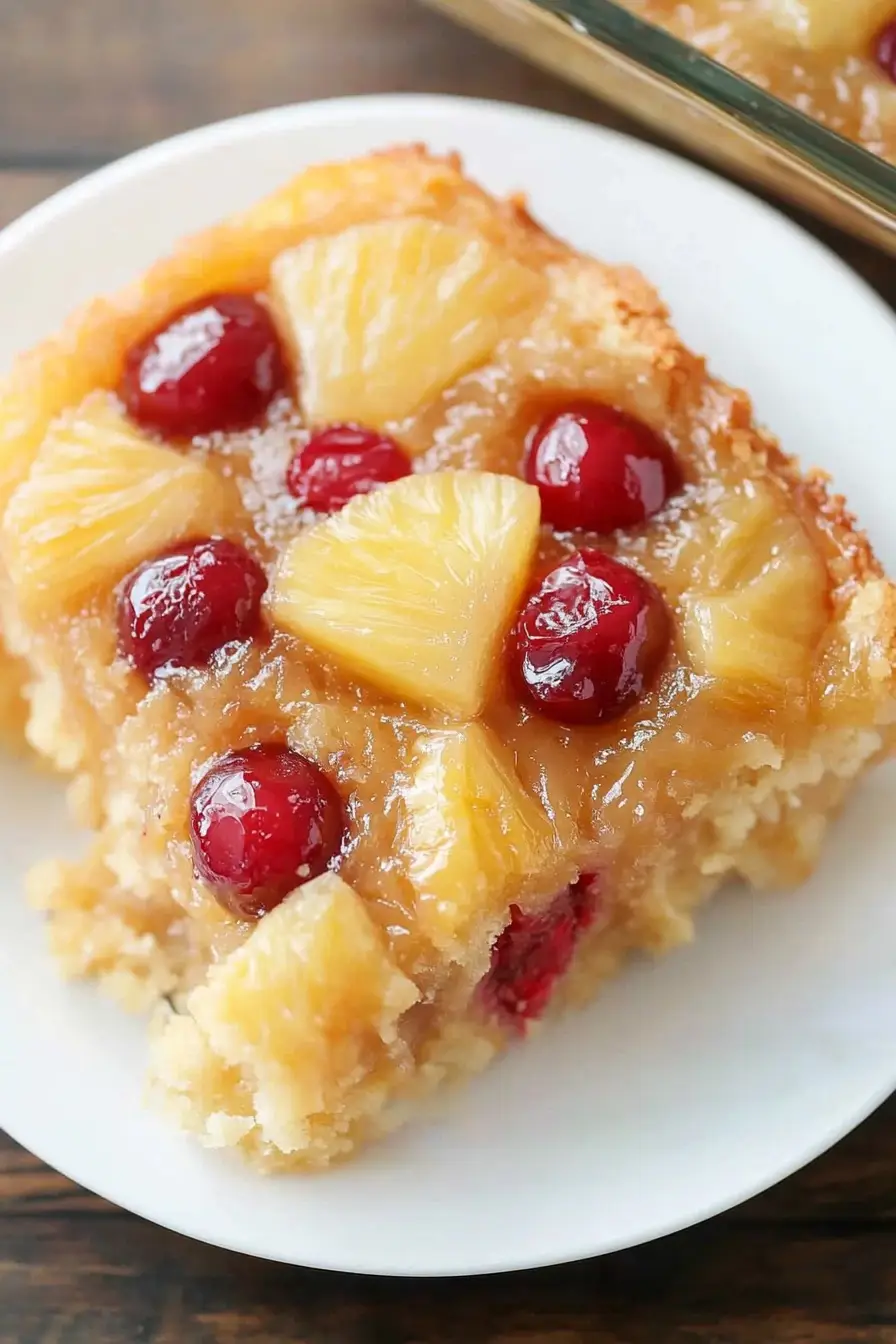
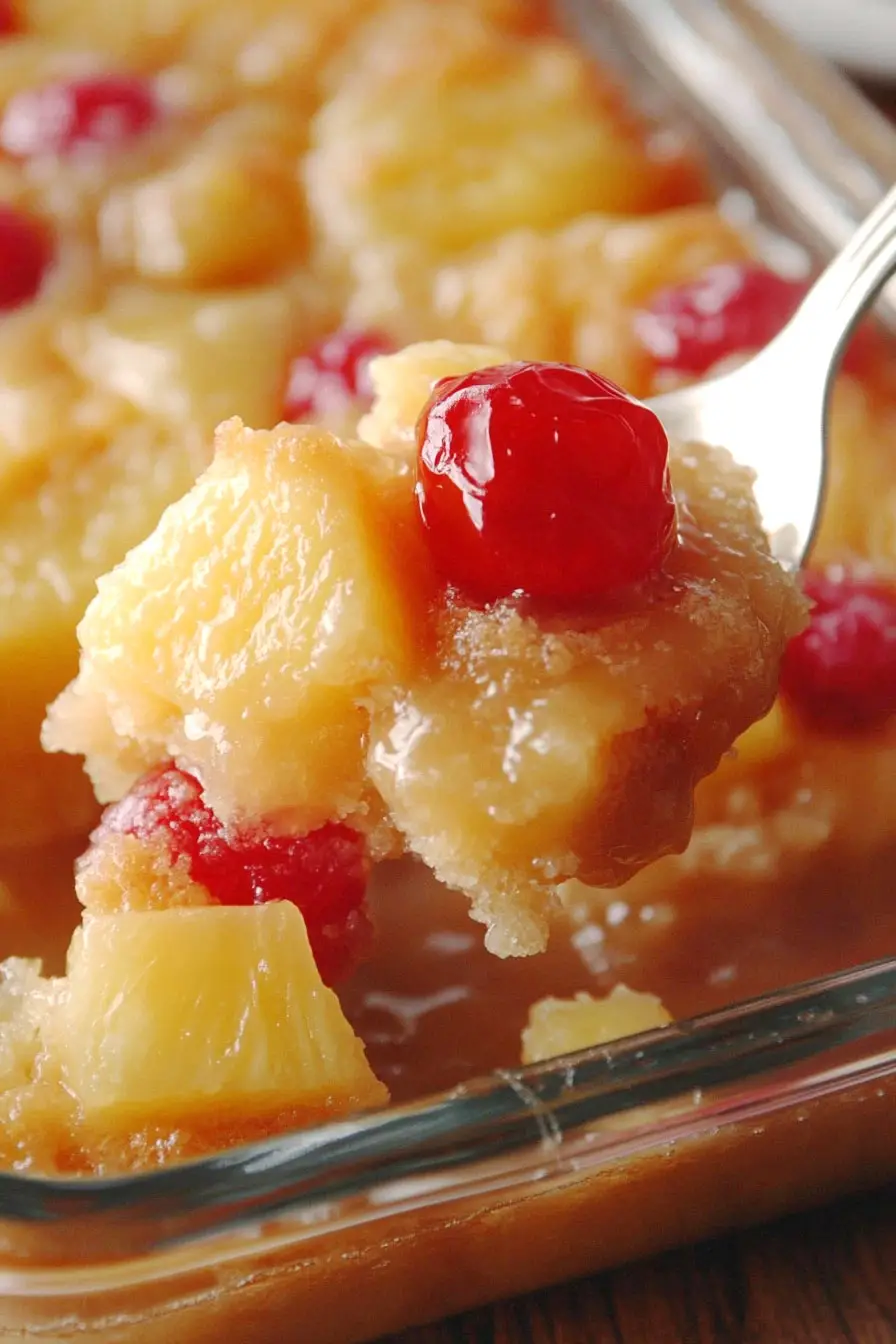
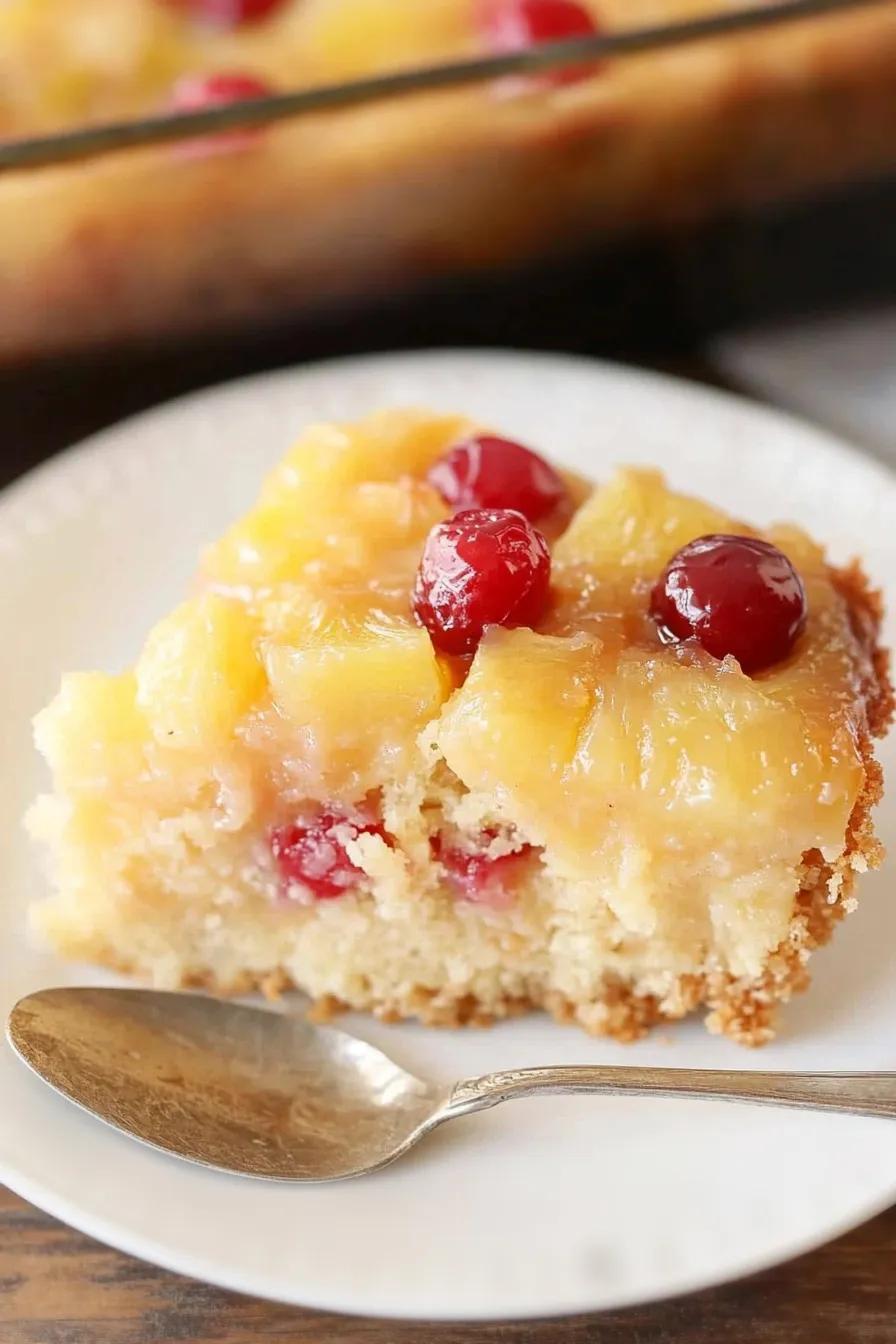
- Classic flavor combination – The sweet pineapple, cherries, and buttery cake mix create that beloved pineapple upside down cake taste without any of the traditional fuss.
What Kind of Pineapple Should I Use?
For this dump cake recipe, canned pineapple is actually your best bet – and don’t feel bad about using it! While fresh pineapple is great for eating, canned pineapple is more consistent in sweetness and moisture content, which is exactly what you want for baking. The recipe calls for diced pineapple, but crushed pineapple or pineapple chunks will work just as well – just make sure to drain them really well to avoid a soggy cake. If you do want to use fresh pineapple, you’ll need to cook it down first with some sugar to get that same tender, sweet texture that canned pineapple provides. Just remember that whichever type you choose, draining the pineapple thoroughly is key to getting the right texture in your cake.
Options for Substitutions
This easy dump cake can handle some simple swaps if you need them:
- Canned pineapple: Fresh pineapple works too – you’ll need about 4 cups diced. Just make sure to cook it briefly with 2 tablespoons of sugar first to release some juice. You can also use canned peaches or mandarin oranges if pineapple isn’t your thing.
- Maraschino cherries: These add that classic look, but you can skip them entirely or use fresh pitted cherries. Frozen dark cherries work well too – just thaw and drain them first.
- Yellow cake mix: While yellow cake mix gives that traditional flavor, white cake mix or vanilla cake mix work just as well. For a fun twist, try butter cake mix!
- Butter: Stick with real butter here – margarine doesn’t give the same rich result. If you need a dairy-free option, coconut oil can work, but the flavor will be slightly different.
- Brown sugar: Out of brown sugar? Mix 1/2 cup white sugar with 1 tablespoon molasses. Light or dark brown sugar both work fine in this recipe.
Watch Out for These Mistakes While Baking
The biggest mistake when making pineapple upside down dump cake is not draining the pineapple and cherries thoroughly – excess liquid can make your cake soggy and prevent it from setting properly, so take an extra minute to drain the fruit really well and even pat it dry with paper towels.
Another common error is placing the butter slices too far apart, which creates dry patches in your cake – make sure to distribute the butter pieces evenly and close together, about 1/2 inch apart, so they melt and spread uniformly across the cake mix.
Temperature control is crucial here – baking at too high a temperature can burn the fruit and sugar on the bottom before the cake is fully cooked, so stick to 350°F and watch for golden-brown edges and a set center.
For the best texture, resist the urge to stir or mix the layers – simply layer the ingredients as directed and let the magic happen in the oven, as mixing will prevent that lovely caramelized fruit layer from forming on top when you flip it.
What to Serve With Pineapple Upside Down Dump Cake?
This sweet and fruity cake is perfect on its own, but adding a few simple sides can make it even more special! A scoop of vanilla ice cream is my go-to choice – it melts slightly when it meets the warm cake, creating an amazing combination of hot and cold. For a lighter option, try serving it with some freshly whipped cream or a dollop of coconut whipped cream to play up the tropical pineapple flavors. If you’re serving this at a party, consider putting out some coffee or hot tea, which helps balance out the sweetness of the dessert.
Storage Instructions
Keep Fresh: Once your pineapple upside down dump cake has cooled, cover it with plastic wrap or pop it in an airtight container. It’ll stay good in the fridge for up to 5 days. The cake actually gets even more moist and flavorful after a day, as all those yummy pineapple juices settle in!
Freeze: Want to save some for later? This cake freezes really well! Just wrap individual portions or the whole cake tightly in plastic wrap, then aluminum foil, and it’ll keep in the freezer for up to 3 months. Remember to label it with the date so you know when you made it.
Warm Up: When you’re ready to enjoy your stored cake, you can eat it cold straight from the fridge, or warm it up a bit. Pop individual slices in the microwave for about 20-30 seconds. If you’re reheating from frozen, thaw it overnight in the fridge first. A scoop of vanilla ice cream on warm cake is always a good idea!
| Preparation Time | 10-15 minutes |
| Cooking Time | 25-30 minutes |
| Total Time | 35-45 minutes |
| Level of Difficulty | Easy |
Estimated Nutrition
Estimated nutrition for the whole recipe (without optional ingredients):
- Calories: 2600-2900
- Protein: 10-15 g
- Fat: 150-170 g
- Carbohydrates: 360-400 g
Ingredients
- 1 box yellow cake mix (I use Duncan Hines)
- 10 oz maraschino cherries (drained thoroughly)
- 1/2 cup brown sugar (packed well)
- 40 oz diced pineapple (well-drained for best results)
- 3/4 cup butter (cold, thinly sliced)
Step 1: Prepare the Baking Pan
Start by preheating your oven to 350ºF (175ºC) to ensure it’s ready by the time your ingredients are assembled.
Lightly spray a 9×13-inch baking pan with cooking spray to prevent sticking.
Step 2: Add Pineapple and Cherries
Pour the drained pineapple and cherries into the prepared pan, spreading them out evenly.
This will form the fruity base for your dessert.
Step 3: Add Brown Sugar and Dry Cake Mix
Sprinkle a layer of brown sugar evenly over the fruit in the pan.
Then, take your dry cake mix and evenly sprinkle it over the top of the brown sugar-covered fruit.
Ensure the cake mix completely covers the fruit to form the crust for your dessert.
Step 4: Top with Butter
Place pieces of butter evenly over the entire surface of the dry cake mix.
The butter will melt during baking and help form a delicious, golden-brown crust.
Step 5: Bake the Dessert
Transfer the pan to your preheated oven and bake for 25 to 30 minutes.
The dessert is done when the top is golden brown and has a slightly crisp texture.
Remove from the oven and allow it to cool slightly before serving.
