I used to think cake pops were something only fancy bakeries could pull off. Growing up, my mom would make red velvet cake for special occasions, but turning it into those cute little balls on sticks? That seemed way too complicated.
Turns out, I couldn’t have been more wrong. Making red velvet cake pops is actually pretty simple – it’s just cake crumbs mixed with frosting, dipped in chocolate. And the best part? You can use leftover cake or even box mix. No fancy baking skills required, just a willingness to get your hands a little messy.
Why You’ll Love These Cake Pops
- Perfect party treats – These bite-sized sweets are ideal for parties, bake sales, or holiday gatherings – everyone loves a portable dessert they can eat without a plate or fork!
- Simple ingredients – With just three main ingredients – cake mix, frosting, and candy melts – you can create these impressive treats without a complicated shopping list.
- Make-ahead friendly – You can prepare these cake pops several days in advance and store them in the fridge, making them perfect for busy hosts and party planners.
- Kid-friendly project – Rolling the cake balls and dipping them in candy coating is a fun activity that kids can help with – it’s like playing with edible Play-Doh!
What Kind of Red Velvet Cake Mix Should I Use?
Any brand of red velvet cake mix from your local grocery store will work well for these cake pops. Betty Crocker, Duncan Hines, and Pillsbury all make reliable red velvet mixes that deliver that classic cocoa-tinged flavor and signature red color. If you’re looking to save a few dollars, store brands can work just as well – just make sure to follow the package instructions carefully for the best results. While some bakers swear by certain brands, the most important thing is making sure you don’t overbake the cake, as you want it to stay moist enough to form into balls with the frosting later.
Options for Substitutions
Need to make some swaps for your cake pops? Here are some helpful alternatives:
- Red velvet cake mix: If you can’t find red velvet cake mix, use regular chocolate cake mix and add 2-3 tablespoons of red food coloring. You can also use any other cake flavor you like – vanilla, chocolate, or strawberry all work great!
- Cream cheese frosting: Don’t have cream cheese frosting? Regular vanilla buttercream works just as well. You can also use chocolate frosting if you want a richer taste. Just remember to start with less frosting than the recipe calls for and add more as needed – you want the cake balls to hold together but not be too wet.
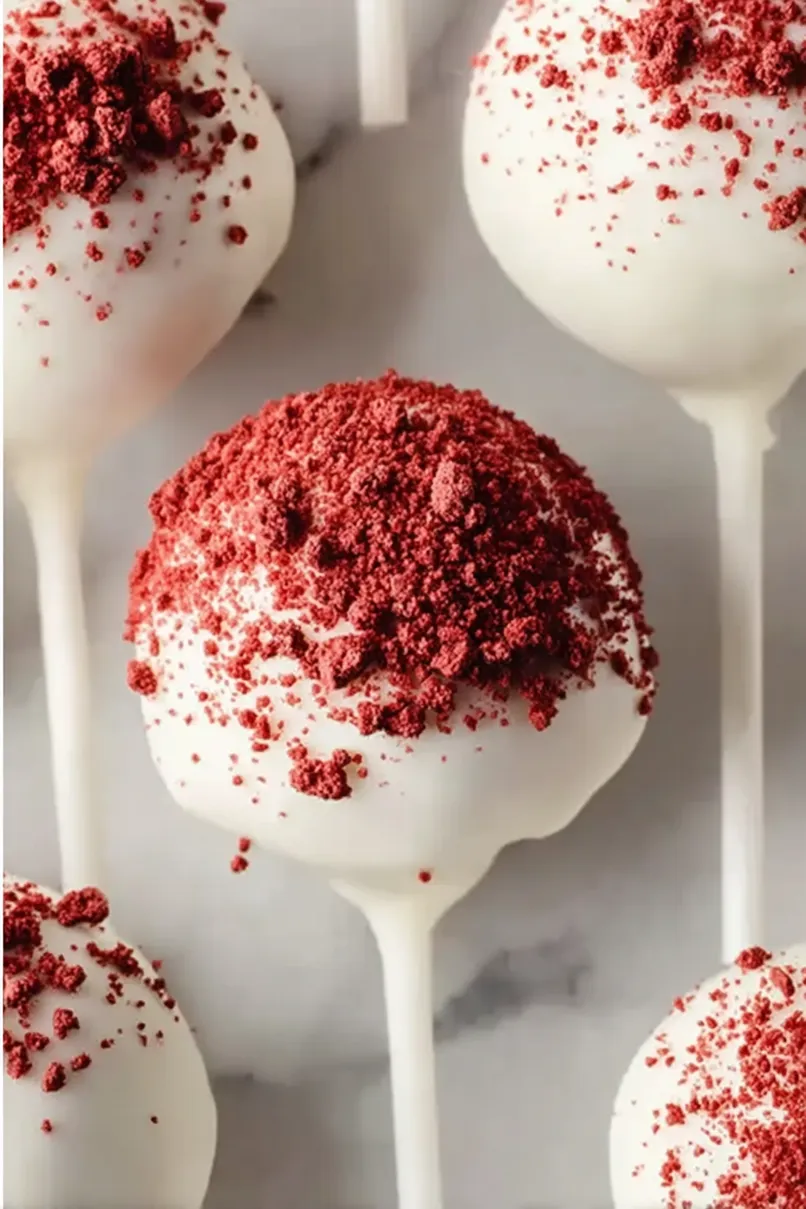
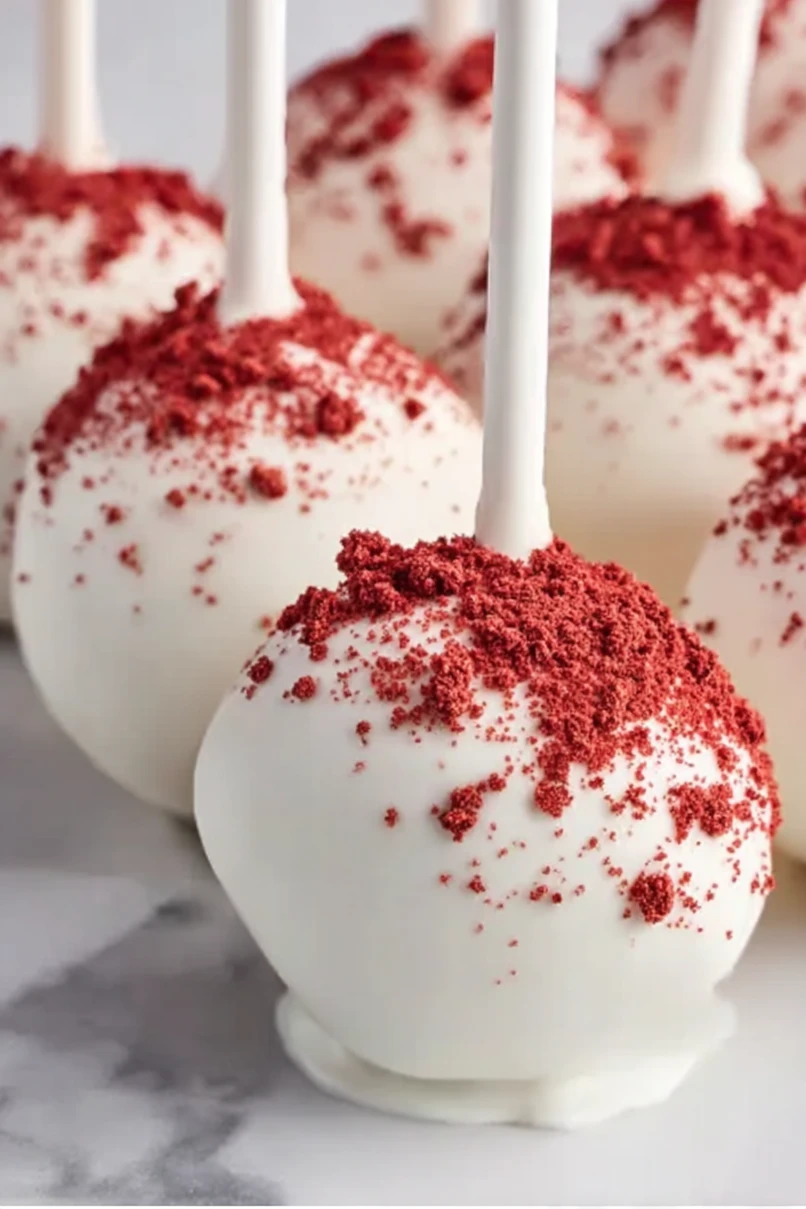
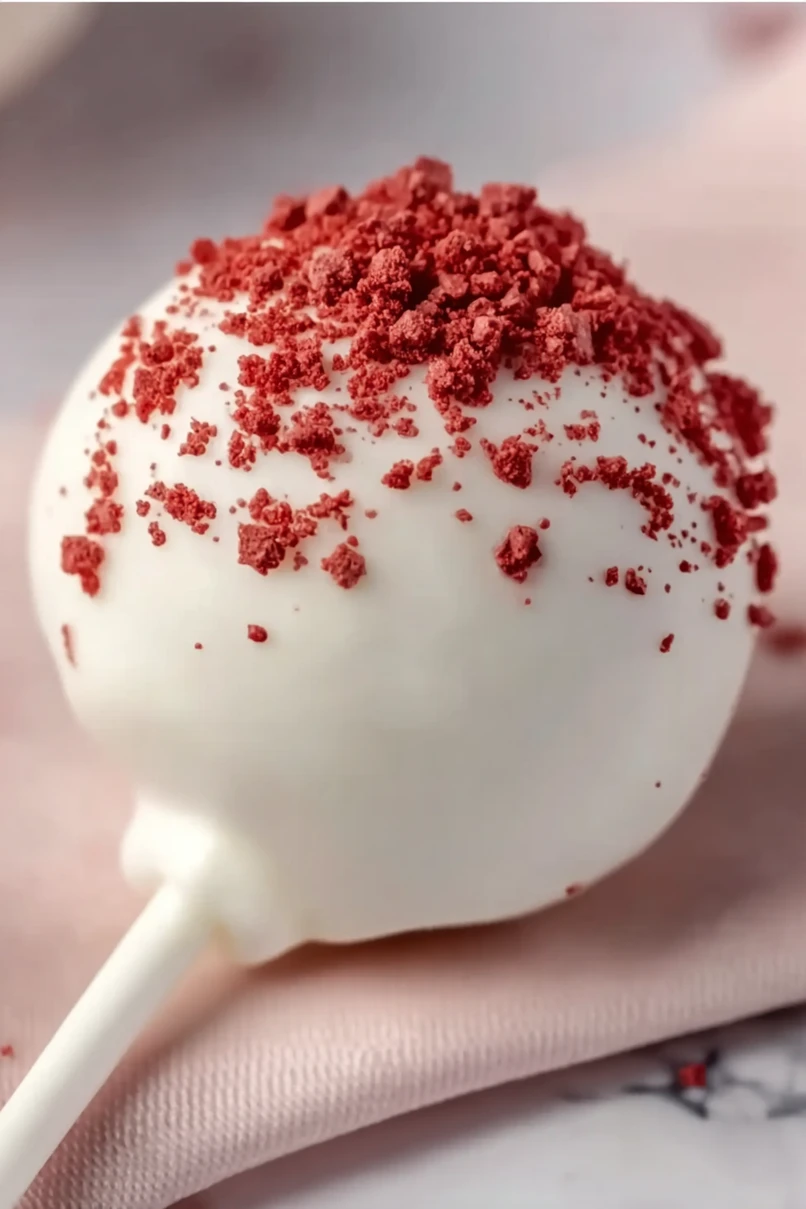
- White candy melts: These are the best option for coating, but you can substitute with white chocolate chips mixed with 1 teaspoon of coconut oil or shortening to thin it out. Colored candy melts work too if you want to get creative! Just avoid using regular white chocolate bars as they can be tricky to work with and may not set as well.
Watch Out for These Mistakes While Baking
The biggest challenge when making cake pops is getting the right consistency in your cake and frosting mixture – too much frosting will make them too soft to stay on the stick, while too little will cause them to crumble. Start with just a few tablespoons of frosting and gradually add more until the mixture holds together like play-dough when rolled. Another common mistake is rushing the chilling process – your cake balls must be completely cold (at least 2 hours in the fridge or 15 minutes in the freezer) before dipping, or they’ll fall apart in the warm candy coating. When it comes to melting your candy coating, avoid overheating it as this can make it thick and clumpy – instead, heat in 30-second intervals, stirring between each, and add a teaspoon of coconut oil if needed to thin it out. For the smoothest finish, tap off excess coating gently against the bowl’s side rather than shaking the pop, which can create air bubbles or cause the cake ball to fall off the stick.
What to Serve With Cake Pops?
These sweet little treats are perfect for serving alongside hot drinks at your next gathering! A good cup of coffee or hot chocolate makes the perfect match for cake pops, especially since their small size means guests can enjoy them without feeling too full. If you’re hosting a party, try setting up a drink station with coffee, tea, and hot chocolate so everyone can pick their favorite pairing. For the kids (or kids at heart), a cold glass of milk is always a winning combination with any cake-based treat.
Storage Instructions
Keep Fresh: Once your cake pops are completely set, place them in an airtight container and keep them in the fridge. They’ll stay fresh and tasty for up to a week. I like to stand them upright in a block of styrofoam to prevent them from sticking together, or lay them flat with wax paper between layers.
Freeze: Want to make these treats ahead? You can freeze your finished cake pops for up to 6 weeks! Just place them in a freezer-safe container with parchment paper between layers. The candy coating helps lock in moisture and keeps them tasting great.
Thaw: When you’re ready to enjoy your frozen cake pops, move them to the fridge overnight to thaw. Then let them sit at room temperature for about 20 minutes before serving. This gradual thawing helps prevent condensation from forming on the candy coating.
| Preparation Time | 30-45 minutes |
| Cooking Time | 30-35 minutes |
| Total Time | 90-120 minutes |
| Level of Difficulty | Medium |
Estimated Nutrition
Estimated nutrition for the whole recipe (without optional ingredients):
- Calories: 1800-2200
- Protein: 10-15 g
- Fat: 70-90 g
- Carbohydrates: 270-300 g
Ingredients
For the cake:
- 1 pkg red velvet cake mix (I use Duncan Hines)
For the assembly:
- 1/3 cup cream cheese frosting
For the coating:
- 12 oz white candy melts (for easy dipping)
Step 1: Prepare and Bake the Cake
Begin by preparing your cake according to the package directions.
In a large mixing bowl, beat together the cake mix, water, vegetable oil, and eggs until well combined.
Pour the batter into a greased 9×9-inch baking dish or two 8×8-inch round cake dishes.
Bake in a preheated oven at 350°F until a toothpick inserted into the center comes out clean.
Allow the cake to cool completely.
Step 2: Crumble and Mix with Frosting
Once the cake is completely cooled, crumble it with a fork in a large bowl or in the baking dish.
Set aside 1/2 cup of the crumbled cake to decorate the outside of the cake pops later.
Stir the remaining frosting into the crumbled cake until well combined.
Cover the mixture with plastic wrap and freeze until firmly chilled.
Step 3: Form Cake Balls
Using a cookie scoop and your hands, roll the cake and frosting mixture into evenly sized small balls, about the size of a ping pong ball.
Place the formed balls onto a large baking sheet.
To ensure uniformity and ease of shaping, freeze the balls again until they are hard.
Step 4: Insert Sticks and Prepare for Coating
Once the cake balls are firm, give them another gentle roll to smooth out the sides and place them onto a cookie sheet.
Melt the candy melts in the microwave or a double boiler until smooth.
Dip the tip of a lollipop stick into the melted chocolate, then insert it into one of the frozen cake balls.
Repeat with all the cake balls and return them to the freezer until the sticks are solidified.
Step 5: Coat Cake Pops and Decorate
Gently dip each cake pop into the melted chocolate, or use a spoon to drizzle the chocolate over the balls, allowing any excess to drip off.
Decorate each pop with the set-aside crumbled cake for added texture and visual appeal.
Step 6: Set and Serve
Place the coated cake pops upright in a styrofoam block or cardboard box to allow the chocolate to harden.
Once set, your easy bite-sized cake pops are ready to enjoy!
