Growing up, I never knew pineapple tarts could be an Easter tradition until my neighbor brought them to our annual spring gathering. My family always stuck to the usual chocolate eggs and jelly beans. But these little pastries, with their sweet pineapple filling and buttery crust, quickly became a must-have at our Easter celebrations.
The funny thing about pineapple tarts is that they’re actually pretty simple to make, even though they look fancy. Unlike those tricky Easter egg decorating projects that never quite turn out right, these tarts are pretty forgiving. As long as you follow a few basic steps, you’ll end up with something that tastes amazing – even if they’re not perfectly shaped.
Why You’ll Love These Pineapple Tarts
- Homemade pineapple filling – Fresh pineapples make all the difference in these tarts, creating a naturally sweet and tangy filling that store-bought versions just can’t match.
- Melt-in-your-mouth texture – The combination of butter, egg yolks, and cornstarch creates a delicate pastry that literally melts in your mouth with each bite.
- Perfect for holidays – These tarts make wonderful Easter treats or holiday gifts, and they’re always met with excitement when shared with friends and family.
- Make-ahead friendly – While they take some time to prepare, you can make these tarts in advance and store them in an airtight container for several days.
What Kind of Pineapple Should I Use?
For these traditional tarts, you’ll want to look for ripe pineapples that feel heavy for their size and give off a sweet aroma at the base. The most common varieties you’ll find at the grocery store are Smooth Cayenne or Gold pineapples, and either one works great for this recipe. When choosing your pineapple, look for one with golden-brown skin and green leaves that are fresh and crisp – avoid fruits with soft spots or excessive brown areas. A good tip is to gently pull one of the center leaves – if it comes out easily, the pineapple is ready to use. Before starting your recipe, let the pineapple ripen at room temperature for a day or two if it’s not quite ready, as this will develop more natural sweetness.

Options for Substitutions
While some ingredients are key for these classic tarts, here are some helpful substitutions you can try:
- Fresh pineapples: If fresh pineapples aren’t available, you can use canned pineapple chunks – just drain really well and cook them down longer to remove excess moisture. You’ll need about 4 (20 oz) cans.
- Superfine sugar: Regular granulated sugar works too – just pulse it in a food processor for a few seconds to make it finer. You can also use caster sugar as a direct replacement.
- Cornstarch: You can swap cornstarch with tapioca flour in the same amount. This ingredient helps with the texture, so try not to skip it.
- Powdered sugar: If you’re out of powdered sugar, blend regular sugar in a food processor until very fine, then measure out what you need.
- Butter: For the pastry, butter is really important for that melt-in-your-mouth texture. While margarine might work, it won’t give you the same rich results, so stick to butter if you can.
- Cinnamon stick: You can use 1/4 teaspoon ground cinnamon instead, or leave it out if you prefer – it adds a nice warmth but isn’t crucial to the recipe.
Watch Out for These Mistakes While Baking
The biggest challenge when making pineapple tarts is getting the filling consistency right – cooking the pineapple mixture too quickly on high heat can lead to burning, so maintain medium-low heat and stir frequently until it reaches a thick, jam-like texture that’s not too wet or too dry. When making the pastry, avoid overworking the dough as this develops gluten and results in tough, chewy tarts instead of the desired melt-in-your-mouth texture. Temperature control is crucial – make sure your butter is properly softened but not melted, and if the dough becomes too soft while you’re working with it, pop it in the fridge for 15-20 minutes to firm up. For the best results, test-bake one tart first to check your oven temperature, as these delicate pastries can quickly go from perfectly golden to overdone in just a minute or two.

What to Serve With Pineapple Tarts?
These sweet and buttery pineapple tarts are perfect for serving alongside your afternoon tea or coffee break! A hot cup of Earl Grey tea pairs wonderfully with these treats, as its slight citrus notes complement the tropical pineapple filling. If you’re hosting an Easter gathering or afternoon tea party, consider setting up a small dessert station with these tarts alongside some fresh fruit like strawberries or mandarin oranges for a nice balance. For those who love their sweets with a creamy element, a small scoop of vanilla ice cream or a dollop of whipped cream on the side turns these tarts into an extra special dessert.
Storage Instructions
Keep Fresh: These pineapple tarts stay fresh in an airtight container at room temperature for up to 1 week. Place them in single layers with parchment paper in between to prevent sticking. If you live in a humid climate, you might want to add a silica gel packet to the container to keep them crisp.
Refrigerate: For longer storage, pop your tarts in the fridge in an airtight container – they’ll stay good for up to 2 weeks. Just remember to bring them to room temperature before serving to enjoy their best texture and flavor.
Freeze: These little treats freeze surprisingly well! Pack them carefully in a freezer-safe container with parchment paper between layers, and they’ll keep for up to 3 months. When you’re ready to enjoy them, just thaw them overnight in the fridge, then let them come to room temperature before serving.
| Preparation Time | 30-60 minutes |
| Cooking Time | 120-180 minutes |
| Total Time | 150-240 minutes |
| Level of Difficulty | Medium |
Estimated Nutrition
Estimated nutrition for the whole recipe (without optional ingredients):
- Calories: 3200-3500
- Protein: 30-40 g
- Fat: 200-220 g
- Carbohydrates: 350-370 g
Ingredients
For the pineapple puree:
- 1 cinnamon stick (preferably Ceylon cinnamon for milder flavor)
- 1/2 cup superfine sugar
- 2 medium pineapples (peeled, cored, and cut into chunks)
For the dough:
- 2 egg yolks
- 2.5 cups all-purpose flour (I always use King Arthur all-purpose flour)
- 1 pinch salt
- 2 tbsp cornstarch
- 8 oz softened butter (unsalted, room temperature)
- 4 tbsp powdered sugar
Step 1: Prepare the Pineapple Purée
Start by skinning the pineapples and cutting them into small chunks.
Use a blender to purée the pineapple chunks into a smooth consistency.
Transfer the purée to a medium-sized saucepan, adding sugar and a cinnamon stick.
Simmer the mixture on low heat, stirring frequently to prevent sticking and burning.
Allow the mixture to reduce to about 20% of its original volume until it turns a dark gold color.
This process may take several hours.
Avoid letting the mixture boil.
Once the jam reaches your desired thickness, remove it from the heat, discard the cinnamon stick, and spoon the mixture into a bowl.
Cover with plastic wrap and refrigerate until ready to use.
Step 2: Prepare the Dough
In a large bowl, combine the flour, corn flour, salt, and sugar, mixing them well.
Cube the butter roughly and add it to the flour mixture.
Cut the butter into the flour or rub with your fingers until the mixture becomes crumbly, resembling coarse breadcrumbs.
Add the egg yolks, thoroughly combining and kneading the mixture until it no longer sticks to your hands.
Step 3: Shape the Pastry
Use a rolling pin to roll out the dough to your desired thickness, ideally around 1 cm.
Cut out shapes using a cookie cutter or knife and place them on a baking tray lined with non-stick baking paper.
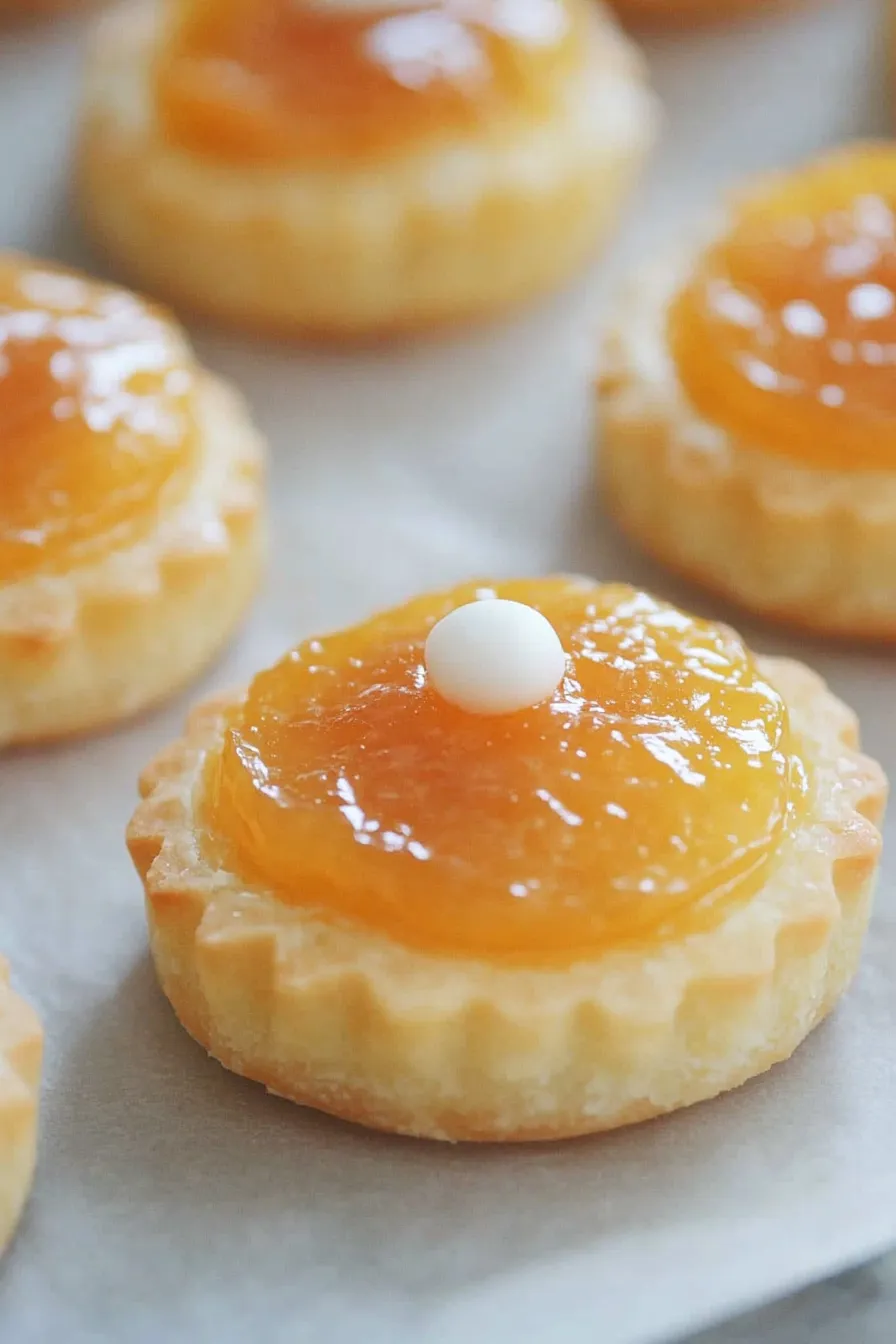
Step 4: Assemble the Pineapple Tarts
Take the chilled pineapple jam and roll it into small balls.
Place a jam ball on top of each pastry cut-out and flatten it slightly.
Decorate the tops with small pinches of pastry from any leftover dough scraps.
Step 5: Bake and Cool the Tarts
Preheat your oven to 180°C (356°F).
Bake the tarts for approximately 20 minutes, or until they turn golden brown.
Once baked, transfer the tarts to a wire rack to cool completely before serving.
They will be slightly crumbly when hot but will firm up once cooled.
