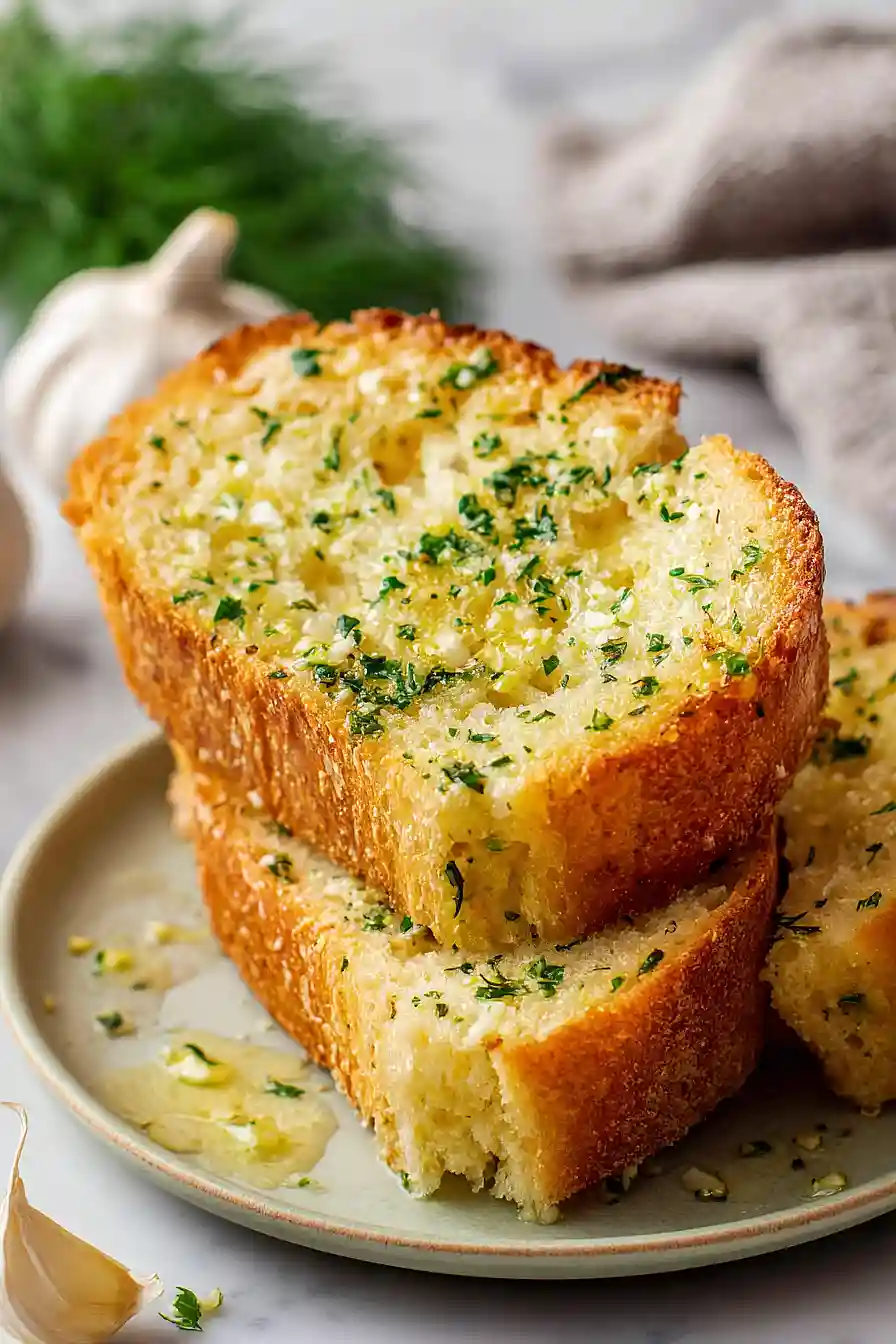
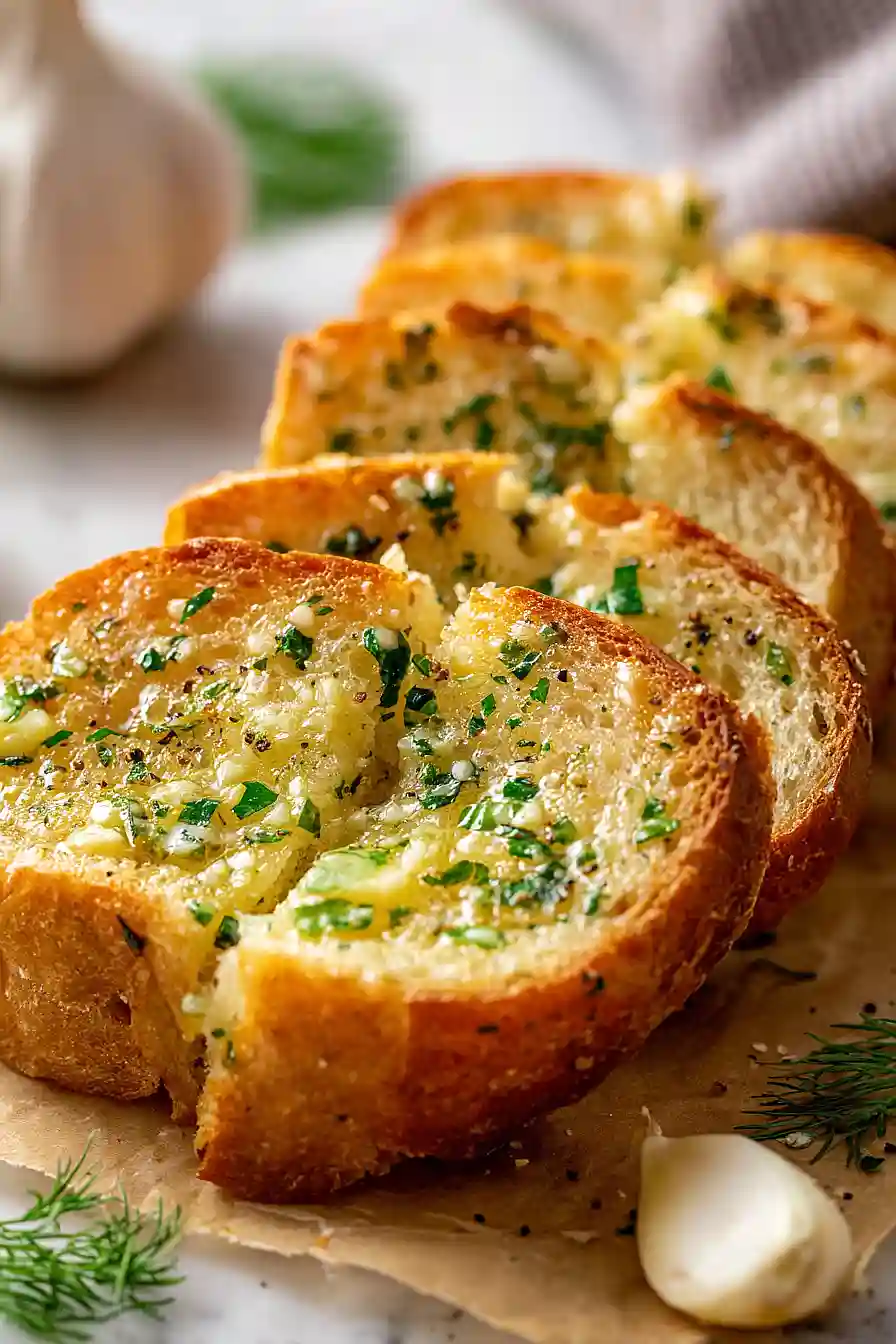
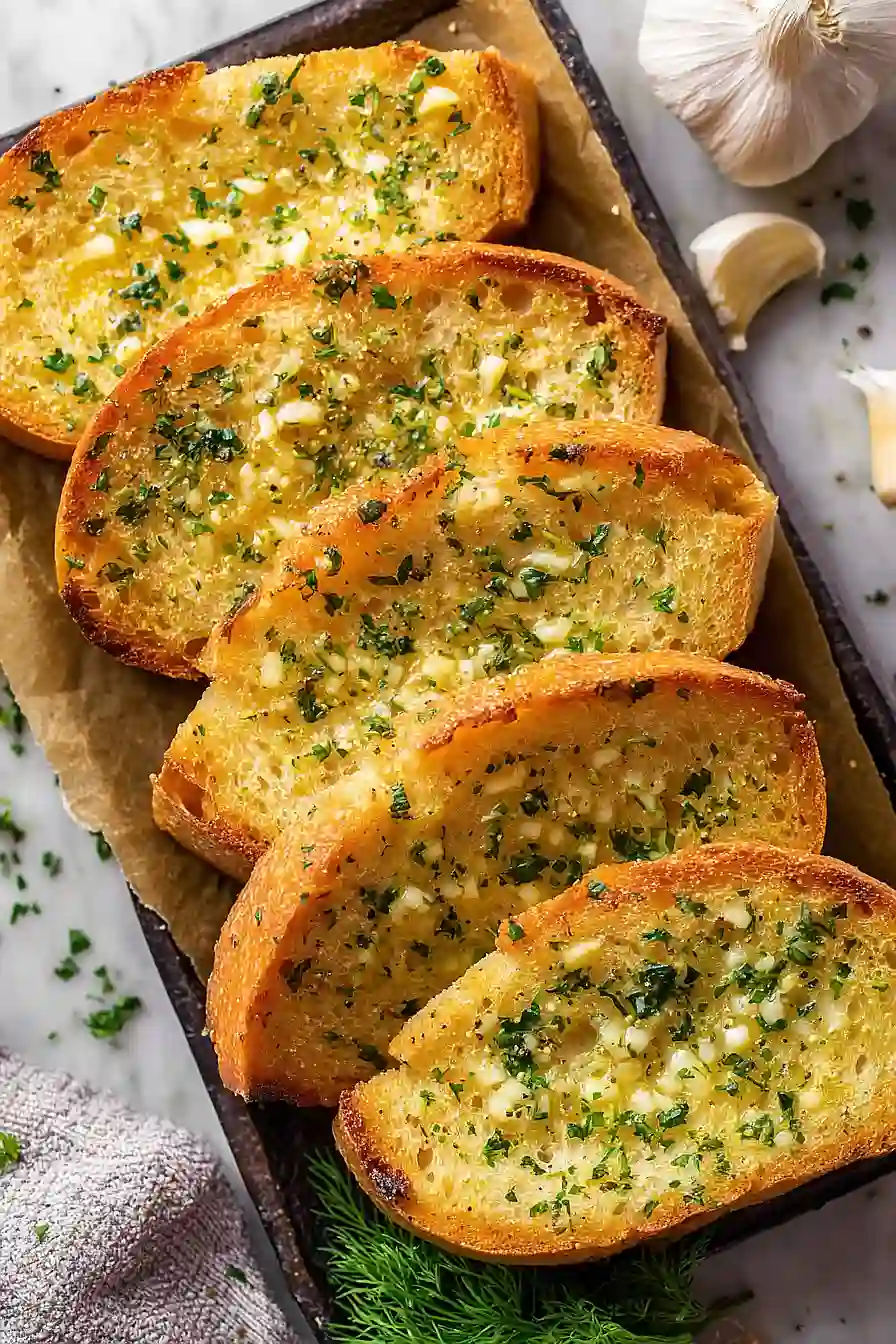
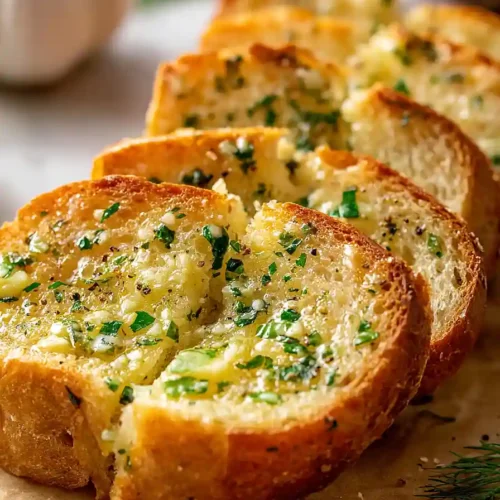
Here is my favorite garlic bread recipe, made completely from scratch with homemade bread dough, fresh garlic, butter, herbs, and just the right amount of seasoning.
This garlic bread is what I make whenever we’re having pasta night or when I need to bring something to a potluck. My family can easily finish a whole loaf in one sitting, so I’ve learned to always make extra. There’s something special about bread you make yourself, and the smell while it’s baking is pretty amazing too.
Why You’ll Love This Garlic Bread
- Homemade bread from scratch – There’s nothing quite like the smell and taste of fresh-baked bread, and making it yourself is easier than you might think.
- Simple, everyday ingredients – You probably already have most of these staples in your kitchen, so no special shopping trip needed.
- Better than store-bought – Once you try homemade garlic bread with real butter and fresh garlic, you won’t want to go back to the frozen stuff.
- Perfect for any meal – This garlic bread pairs beautifully with pasta, soups, salads, or just about any dinner you can think of.
What Kind of Butter Should I Use?
For garlic bread, the butter you choose really does matter since it’s one of the star flavors. You can use either salted or unsalted butter, but if you go with salted, you might want to cut back a bit on the additional salt in the recipe. Room temperature butter is key here because it needs to spread easily and mix well with the garlic and seasonings. If you have the time and energy, homemade butter will give you the freshest, creamiest taste, but a good quality store-bought butter works perfectly fine too. Just make sure to let it sit out for about 30 minutes before you start so it’s nice and soft.
Options for Substitutions
This homemade garlic bread recipe gives you some room to work with what you have:
- Instant yeast: If you only have active dry yeast, that works too. Just use the same amount but let it proof in the warm water with the sugar for about 5-10 minutes until it gets foamy before adding it to your flour.
- Butter: While butter gives the best flavor, you can use margarine or even olive oil if needed. If using olive oil, you might want to add a pinch more salt since butter has some saltiness to it.
- Fresh garlic: Fresh is definitely best here, but if you’re in a bind, you can use about 1 tablespoon of garlic powder or 2 tablespoons of jarred minced garlic. The flavor won’t be quite as punchy, but it’ll still taste good.
- Dill: Not a fan of dill? Try Italian seasoning, dried parsley, or oregano instead. You could also skip the herbs altogether and let the garlic shine on its own.
- All-purpose flour: Bread flour will give you a chewier texture if you prefer that, but all-purpose works perfectly fine for this recipe.
Watch Out for These Mistakes While Baking
The biggest mistake when making garlic bread from scratch is not letting your dough rise long enough – if it hasn’t truly doubled in size, your bread will turn out dense and heavy instead of light and fluffy.
Another common error is adding the garlic butter while the bread is still hot from the first bake, which causes the butter to soak in unevenly and can make the bread greasy, so let it cool completely before slicing and buttering.
When cutting slits in the top before baking, make sure they’re deep enough (about 1/4 inch) to allow steam to escape properly, and don’t skip the cornmeal on your baking pan – it prevents sticking and adds a nice texture to the bottom crust.
Finally, when slicing the cooled bread for buttering, leave about 1/2 inch at the bottom uncut so the loaf holds together, making it much easier to wrap in foil and serve without falling apart.
What to Serve With Garlic Bread?
Garlic bread is one of those side dishes that goes with just about anything, but it really shines alongside a big bowl of pasta with marinara or alfredo sauce. I love serving it with soups too – think tomato soup, minestrone, or any creamy vegetable soup where you can use the bread to soak up all the good stuff at the bottom of the bowl. It’s also perfect for mopping up the juices from Italian dishes like chicken parmesan or eggplant parmigiana. If you’re keeping things simple, garlic bread makes a great accompaniment to a fresh Caesar salad or antipasto platter for an easy weeknight dinner.
Storage Instructions
Store: Once your garlic bread has cooled completely, wrap it tightly in aluminum foil or place it in an airtight container. It’ll stay fresh at room temperature for about 2 days, or you can keep it in the fridge for up to 5 days if you want it to last a bit longer.
Freeze: Garlic bread freezes really well, which is great for meal prep! Wrap individual slices or the whole loaf in plastic wrap, then again in foil, and freeze for up to 3 months. You can also slice it before freezing so you can grab just what you need.
Warm Up: To bring your garlic bread back to life, wrap it in foil and warm it in a 350°F oven for about 10-15 minutes if refrigerated, or 20-25 minutes if frozen. For a crispier crust, unwrap the foil for the last few minutes of heating.
| Preparation Time | 90-120 minutes |
| Cooking Time | 30-40 minutes |
| Total Time | 120-160 minutes |
| Level of Difficulty | Medium |
| Servings | 8 slices |
Estimated Nutrition
Estimated nutrition for the whole recipe (without optional ingredients):
- Calories: 1750-2000
- Protein: 25-30 g
- Fat: 65-80 g
- Carbohydrates: 260-300 g
Ingredients
For the dough:
- 2 3/4 cups all-purpose flour (King Arthur brand preferred)
- 1 1/4 tsp salt
- 1 cup warm water (105°F – 115°F)
- 1/2 tbsp active dry yeast
- 1 tbsp sugar
- 1 tbsp olive oil
- 1/2 tsp garlic powder
For the garlic butter:
- 1/2 cup Kerrygold unsalted butter, softened
- 1/2 tsp dried dill
- 1 tbsp fresh parsley, finely chopped
- 6 garlic cloves, freshly minced
- 3/4 tsp sea salt
- 1/2 tsp freshly ground black pepper
Step 1: Activate the Yeast and Begin the Dough
- 1 cup warm water
- 1/2 tbsp active dry yeast
- 1 tbsp sugar
- 2 3/4 cups all-purpose flour
- 1 1/4 tsp salt
- 1 tbsp olive oil
In a small bowl or cup, combine the warm water (105°F–115°F), active dry yeast, and sugar.
Stir gently and let sit for 5 minutes until foamy—this blooming step ensures the yeast is alive and active.
While waiting, measure out the flour and salt in a separate large mixing bowl.
Once the yeast mixture is foamy, pour it into the flour and salt, then add the olive oil.
Mix everything together until a shaggy dough forms, then knead by hand or with a stand mixer for 8–10 minutes until the dough becomes smooth, elastic, and slightly tacky but not sticky.
Step 2: First Rise and Shape the Loaf
- dough from Step 1
- 1 tbsp olive oil
Lightly oil a clean bowl and place the kneaded dough inside, turning it to coat all sides.
Cover with a damp cloth and let rise in a warm, draft-free place (like an oven with the light on) for about 1–1.5 hours, until the dough has roughly doubled in size.
Punch down the risen dough gently to release excess gas, then shape it into a round or oval loaf.
Place the shaped dough on an oiled baking sheet or parchment paper.
Step 3: Score and Second Rise
- shaped dough from Step 2
- 1/2 cup Kerrygold unsalted butter, softened
- 6 garlic cloves, freshly minced
- 1 tbsp fresh parsley, finely chopped
- 1/2 tsp dried dill
- 3/4 tsp sea salt
- 1/2 tsp garlic powder
- 1/2 tsp freshly ground black pepper
Using a sharp knife, score the top of the loaf with 2–3 diagonal slits about 1/4-inch deep.
Cover loosely with a damp cloth and let rise again in a warm place for 30–45 minutes until the dough has puffed up and nearly doubled in volume.
While the bread rises, prepare the garlic butter mixture in a small bowl by combining the softened butter, minced garlic, fresh parsley, dried dill, sea salt, garlic powder, and black pepper.
I like to let the garlic butter sit for a few minutes so the flavors can meld together—it makes a huge difference in the final taste.
Step 4: Bake the Bread Base
- risen dough from Step 3
Preheat your oven to 375°F.
Once the dough has finished its second rise, place it in the oven and bake for 20–25 minutes until the crust is golden brown and the bread sounds hollow when tapped on the bottom.
Remove from the oven and let cool for about 5 minutes—this brief cooling makes it easier to slice without squishing the bread.
Step 5: Assemble and Toast the Garlic Bread
- baked bread from Step 4
- garlic butter mixture from Step 3
Increase the oven temperature to 400°F.
Slice the cooled bread horizontally or vertically, cutting about three-quarters of the way through (leaving the base intact so the loaf stays together as one piece).
Generously spread the garlic butter mixture from Step 3 onto the cut surfaces and along the sides.
Wrap the entire loaf in foil to keep it warm and moist, then place it back in the oven for 10–15 minutes until the butter is melted and the bread is heated through.
I find that wrapping in foil prevents the crust from over-browning while ensuring the inside gets nice and warm.
Step 6: Finish and Serve
- assembled garlic bread from Step 5
Remove the foil-wrapped garlic bread from the oven and carefully unwrap it.
Transfer to a serving plate or bread basket and serve immediately while the butter is still warm and aromatic.
The bread will stay warm for several minutes, making it perfect for serving with pasta, soup, or as a standalone appetizer.
Mouthwatering Garlic Bread From Scratch
Ingredients
For the dough
- 2 3/4 cups all-purpose flour (King Arthur brand preferred)
- 1 1/4 tsp salt
- 1 cup warm water (105°F - 115°F)
- 1/2 tbsp active dry yeast
- 1 tbsp sugar
- 1 tbsp olive oil
- 1/2 tsp garlic powder
For the garlic butter
- 1/2 cup Kerrygold unsalted butter, softened
- 1/2 tsp dried dill
- 1 tbsp fresh parsley, finely chopped
- 6 garlic cloves, freshly minced
- 3/4 tsp sea salt
- 1/2 tsp freshly ground black pepper
Instructions
- In a small bowl or cup, combine the warm water (105°F–115°F), active dry yeast, and sugar. Stir gently and let sit for 5 minutes until foamy—this blooming step ensures the yeast is alive and active. While waiting, measure out the flour and salt in a separate large mixing bowl. Once the yeast mixture is foamy, pour it into the flour and salt, then add the olive oil. Mix everything together until a shaggy dough forms, then knead by hand or with a stand mixer for 8–10 minutes until the dough becomes smooth, elastic, and slightly tacky but not sticky.
- Lightly oil a clean bowl and place the kneaded dough inside, turning it to coat all sides. Cover with a damp cloth and let rise in a warm, draft-free place (like an oven with the light on) for about 1–1.5 hours, until the dough has roughly doubled in size. Punch down the risen dough gently to release excess gas, then shape it into a round or oval loaf. Place the shaped dough on an oiled baking sheet or parchment paper.
- Using a sharp knife, score the top of the loaf with 2–3 diagonal slits about 1/4-inch deep. Cover loosely with a damp cloth and let rise again in a warm place for 30–45 minutes until the dough has puffed up and nearly doubled in volume. While the bread rises, prepare the garlic butter mixture in a small bowl by combining the softened butter, minced garlic, fresh parsley, dried dill, sea salt, garlic powder, and black pepper. I like to let the garlic butter sit for a few minutes so the flavors can meld together—it makes a huge difference in the final taste.
- Preheat your oven to 375°F. Once the dough has finished its second rise, place it in the oven and bake for 20–25 minutes until the crust is golden brown and the bread sounds hollow when tapped on the bottom. Remove from the oven and let cool for about 5 minutes—this brief cooling makes it easier to slice without squishing the bread.
- Increase the oven temperature to 400°F. Slice the cooled bread horizontally or vertically, cutting about three-quarters of the way through (leaving the base intact so the loaf stays together as one piece). Generously spread the garlic butter mixture from Step 3 onto the cut surfaces and along the sides. Wrap the entire loaf in foil to keep it warm and moist, then place it back in the oven for 10–15 minutes until the butter is melted and the bread is heated through. I find that wrapping in foil prevents the crust from over-browning while ensuring the inside gets nice and warm.
- Remove the foil-wrapped garlic bread from the oven and carefully unwrap it. Transfer to a serving plate or bread basket and serve immediately while the butter is still warm and aromatic. The bread will stay warm for several minutes, making it perfect for serving with pasta, soup, or as a standalone appetizer.
